
Background
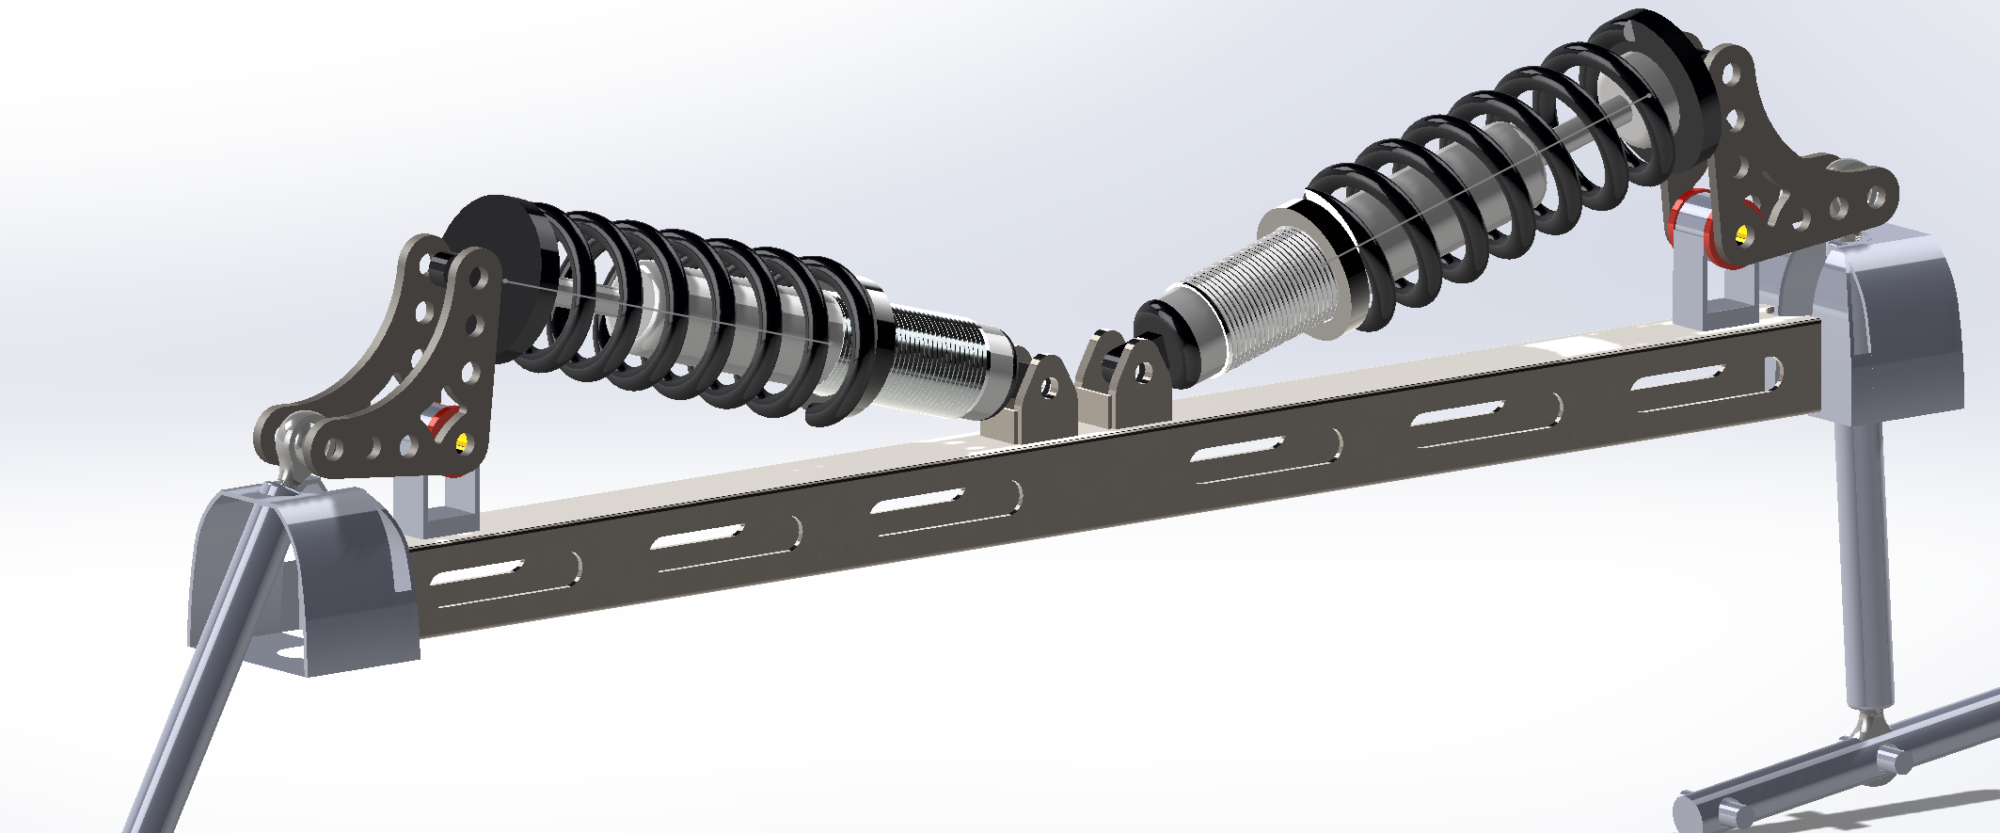
For my project, I’m going to make a cantilever suspension setup for a SN-95 Mustang with a maximalist and functional upcycled aesthetic. The suspension is meant to relocate the standard suspension for functional reasons as well and aesthetic reasons. I want the suspension to have an upcycled and understated aesthetic with its construction while having a maximalist aesthetic with its general design and placement.
My goal is to design and fabricate a suspension system that I can drive on the street and on the track safely. I’m not really sure if I’ll be able to do that with the time I have left in the semester but will definitely finish it after this semester is over for sure. If I can build it far enough that I can just push on the trunk of the car and see the suspension actuate I’ll be happy. I don’t currently have a timeline for completion. I’m just going to try and finish as much as I can during weekends when I can return home and work on it and see what where that gets me.
Current Progress
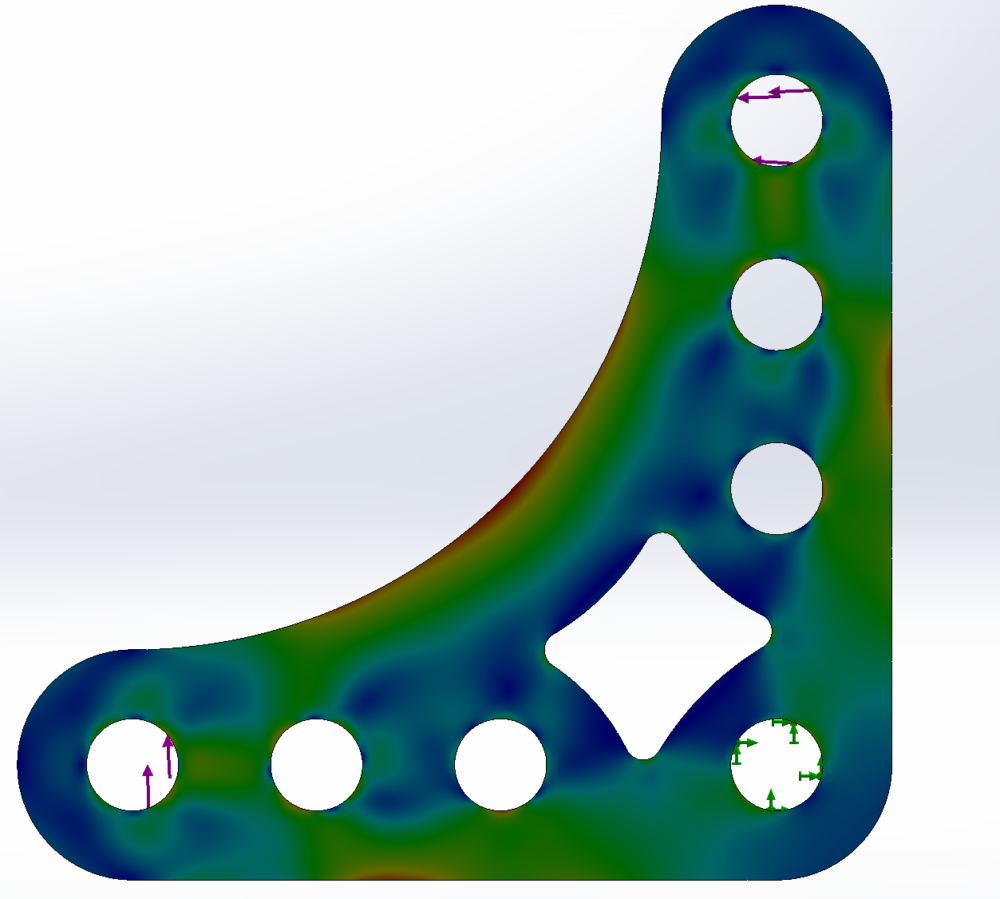
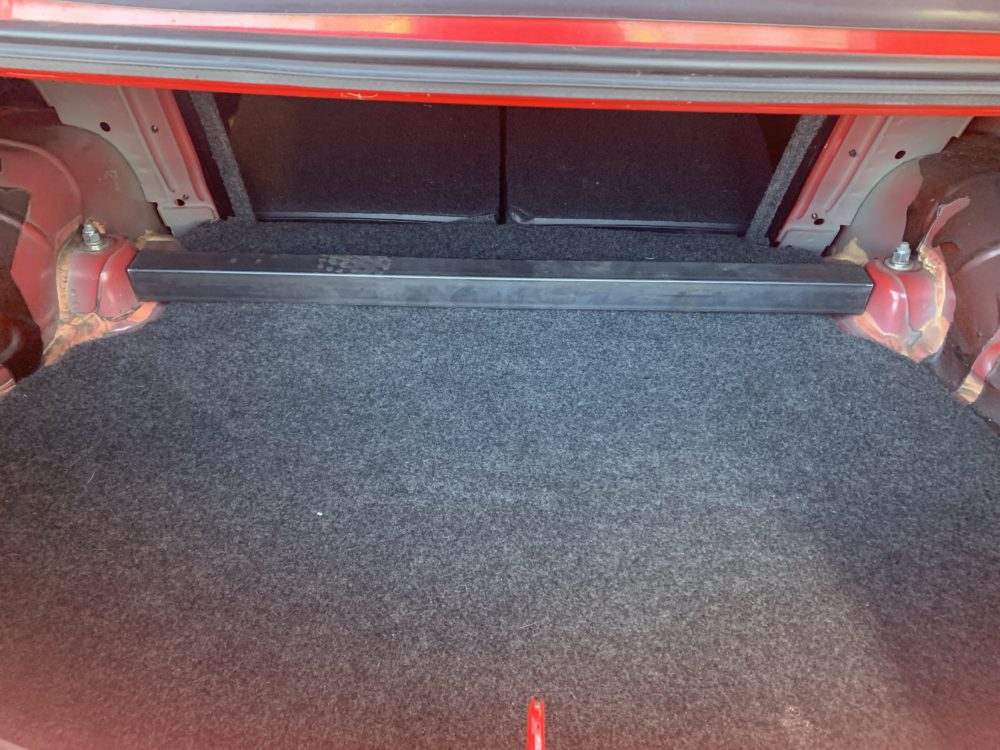
So far I designed the general design in CAD. I measured most of the needed dimensions and corner balanced the car to design the bellcranks. I then tried cutting material out of my current bell crank design using FEA and am happy with that. I began the process of having them laser cut from a company called SendCutSend. Finally I found and test fit a 2x2in steel square tube in my dad’s garage which will act as the crossbar.
Next step in Fabrication Process
To start the fabrication process, I will start by welding or bolting the crossbar that connects the two shock towers together to the car’s body. I’m not sure if I want to weld or bolt the crossbar to the body yet but the important thing is to weld the crossbar to a plate which will then be welded/bolted to the car’s body. This needs to be done because the thin sheet metal making up the car’s body is very weak and will deform and fail easily if the crossbar is directly connected to it. From there I plan on mocking up one side of the suspension and making sure the geometry is correct. Once I know where I want everything, I will weld/bolt the fixtures that the coilovers and bellcranks connect to. Then I’ll weld the bushing to the bellcrank fixture (the bushing will probably have to be modified to work with my project, we will see). I will then connect the bell cranks to the bushing/fixture and connect the coilover. Then I’ll move to the other side and repeat the same fabrication process. Once the suspension setup in the trunk of the car is completed, I’ll then move onto the pushrods that connect to the bellcranks and rear axle under the car. I need to weld on brackets onto the rear axle that can handle the loads it’ll experience from the suspension. I’ll then probably test fit the pushrods until they are the correct length, I haven’t thought that far ahead yet. At this point the suspension is hopefully completed and working correctly, but this probably won’t be the case honestly.
6 Comments. Leave new
In my opinion, your CAD model definitely looks super cool, so you’ve already covered the aesthetics portion of the project already. I would definitely weld the crossbar in for structural and stiffening reasons. Definitely looking forward to seeing the finished project.
Thank you! I think welding is the correct way to go too. I thought bolting would allow for quicker and easier removal if I ever wanted to move the suspension to a different Mustang but it doesn’t that things easier for this case.
Austin, I am really looking forward to see your project finished, I think is so cool. The FEM analysis you did shows a professional approach on the task. What material are the bellcranks made of? Are you going to need to manufacture almost all the parts or there are some parts that you can buy? Will you do it all by yourself?
Thank you! The bell cranks are made of 1/4″ HRPO mild steel. I’ll make some of the parts and buy others. For example, I’ll make any standoffs I need but will buy the bushings and components needs for the pushrods. I’m gonna do most of the work myself but I’m sure my dad will help out too as he’ll be at the shop when I’m there working.
I think it is so cool that you are not only modifying your car but actually fabricating some of the parts that you will ultimately need. I’ve seen so many videos of people modifying their cars by ripping them apart and buying prefabricated parts and installing them but this is a whole different level of modification. Props to you for that.
Thank you! I been working on cars since high school and the majority of the work has been general work and modifying things using prefabricated parts. I’ve done some very simple fabrication before but I’ve never done something to this level before. I’m excited to work on this project and will hopefully do more projects like this in the future.