

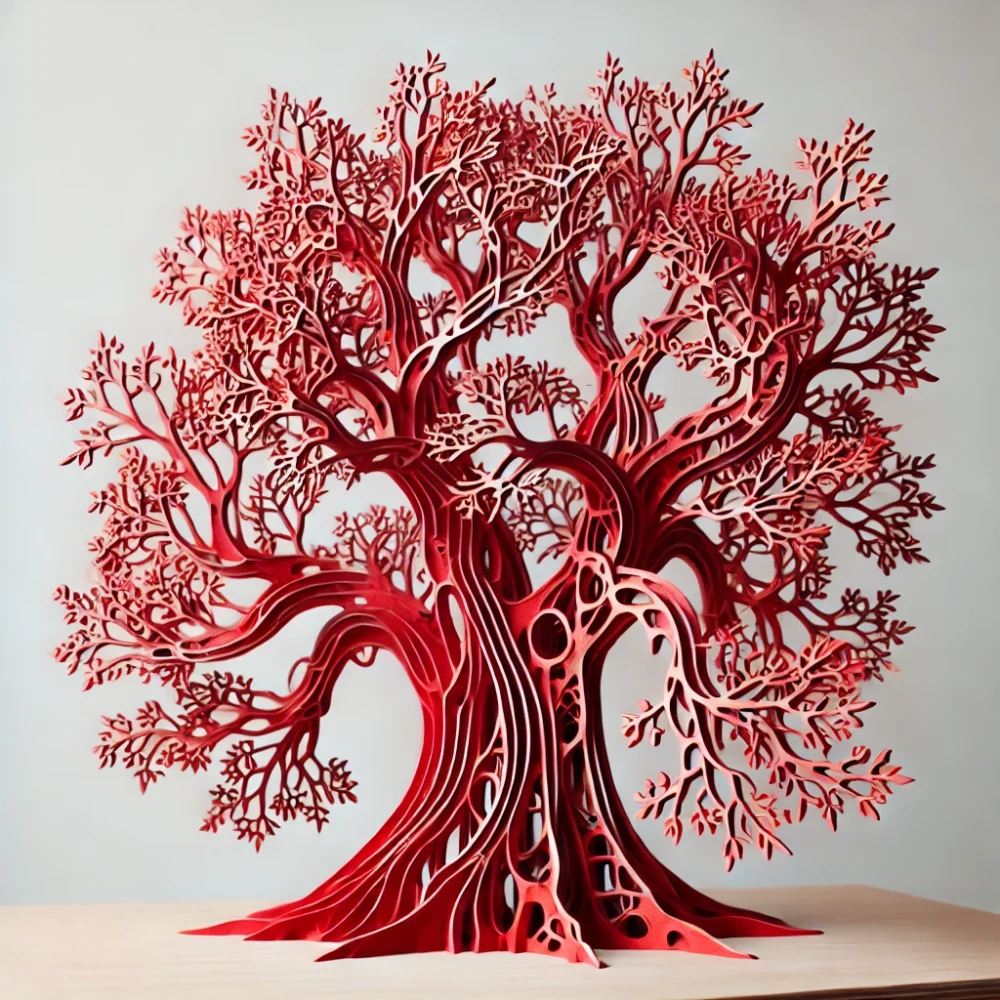
This week, I have made significant strides in developing my laser-cut tree sculpture, which follows the Unexpected Red Theory aesthetic. The primary focus has been refining the materials, design, and digital fabrication process.
Material Collection and Planning
One of the major steps I completed was sourcing scrap wood of various sizes and thicknesses. I want my tree to incorporate different layers and depths, so selecting pieces that vary in thickness while still being compatible for assembly is key. The combination of these varying dimensions will create a dynamic, textured effect in the final sculpture.
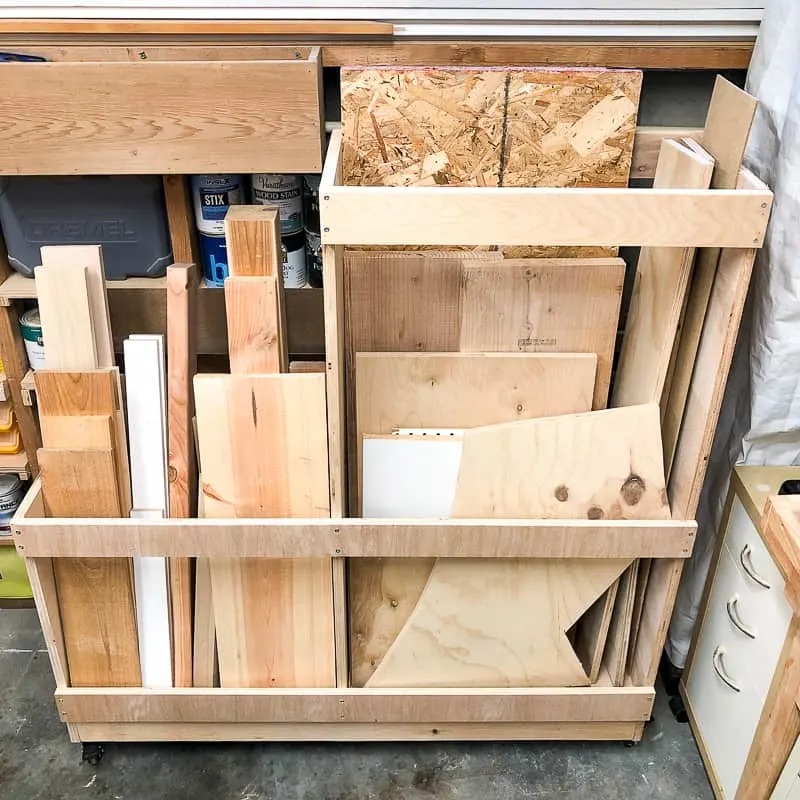
Additionally, I have been researching the best types of wood glue and joining methods to ensure stability in the final piece. Since I am working with upcycled materials, some pieces have slight warping or inconsistencies, so I need to account for these factors in my assembly process. I am also considering using wood filler or sanding techniques to create a smoother finish before painting the final tree in bold red.
Design Process and Software Workflow
To ensure precision and a cohesive structure, I have been using SolidWorks to develop a 3D rendering of the tree. This allows me to visualize the final structure and make necessary adjustments before moving to fabrication. By creating a fully detailed 3D model, I can check for any weak points or misalignments before committing to laser cutting.
Once the 3D model is finalized, I will export 2D drawings from SolidWorks to CorelDRAW to prepare them for laser cutting. This workflow ensures accuracy and efficiency in the design-to-fabrication pipeline. I am also experimenting with different engraving techniques to add additional depth and texture to the tree, which could enhance the contrast between layers and make the design even more striking.
Fabrication Schedule
Here is my planned timeline for the next steps of my project:
- Week 1 (Last Week): Material sourcing, 3D modeling in SolidWorks, finalizing design choices, and testing small-scale cuts.
- Week 2 (This Week): Convert 3D model into 2D cut files using CorelDRAW, run initial test cuts on scrap material to check fit and scale. Begin refining cutting settings to ensure precision.
- Week 3 (Early Next Week): Perform the full laser-cutting process, assemble the tree structure, and apply the bold red paint to achieve the Unexpected Red Theory aesthetic. Ensure that all pieces fit seamlessly before securing them in place.
- Week 4 (Before Deadline): Final adjustments, documenting the process, and preparing for the presentation. Make any last-minute refinements to enhance the overall visual impact.

Figure 4. Timeline
Next Steps
With materials secured and design underway, my next focus will be optimizing the layered effect in SolidWorks and ensuring the interlocking pieces fit seamlessly. I will also begin test cutting smaller samples to validate the design before committing to the full-size laser cut. Since different wood thicknesses react differently to laser cutting, I will need to adjust my settings accordingly and ensure a clean finish on all edges.
Another aspect I will experiment with is the paint application process. I want to ensure the bold red paint fully enhances the tree’s details without obscuring the fine laser-cut lines. I am considering using a spray-paint technique with multiple thin layers to preserve the texture while achieving an even, vibrant color. Additionally, I may test a glossy vs. matte finish to determine which best complements the aesthetic.
I’m excited to see how the different wood thicknesses contribute to the overall aesthetic and how the Unexpected Red Theory will bring the piece to life. By carefully selecting my materials, refining my design, and strategically using red paint, I hope to create a striking, thought-provoking sculpture that highlights the power of contrast in design. Looking forward to sharing more updates soon
2 Comments. Leave new
Hi Airyl, it seems like you’ve got a good plan set in place for the rest of this project! As someone who likes to play around with SolidWorks, I’m curious how you’re creating the complex geometry of the tree (given it’s probably a very smooth, contoured shape), and also how you’re able to break it up into laser engravable layers. Regarding painting, are you wanting an artificial, glossy/matte paint finish? Otherwise, you could try staining the wood, which would likely leave some of the natural features of the wood.
Hello Eric! Regarding solid works, I was hoping to find a grabCad file close to it, and if it doesn’t exist, I might try inserting a PMG, and hope that, that would work. Worst case, I might just plan it out with hand drawings and use corelDraw to break up the parts that can translate to the laser cutter. For paint, I am leaning towards a more Matte paint finish, I am worried about using stains because it might not get to the color that I want. Thanks for the suggestions!!