
I haven’t started physically building or shredding 3D prints yet, but I hope to get to that this coming weekend. As of now, I’ve gathered all the materials I should need: a picture frame, a clear acrylic sheet, and all my 3D print scraps. Soon, I’ll start sorting the prints by color to determine what images I can create with the colors available. This process will help me get a better idea of what designs I can realistically achieve based on the variety of colors I have. I got my frame from Art Parts, which was a great find because it saved me money and the effort of making one from scratch. The acrylic sheet came from the ITLL, and the 3D scraps were already in my possession from previous projects.
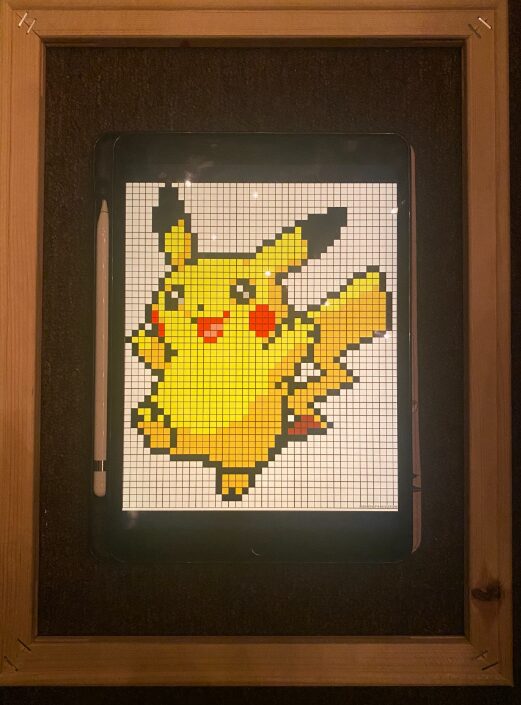
Another major task I accomplished this week was testing several free pixel art software programs. Since this project will be highly dependent on pixel mapping, I wanted to make sure I chose the right tool to plan my design. To keep a testing consistent, I used the same image in each program to see how they handled pixelation, resolution adjustments, and manual editing features. I copied an image of Jake the Dog from Adventure Time because it matched the level of complexity I aimed for, making it a great test case for this project.

Picture 1: Base Image Jake the Dog
First, I tried an open-source GitHub software called Pixel It, which is designed to take images and convert them into pixel art. The software worked well and did a good job of automatically pixelating images, but since I used an image that was already in pixel art form, some lines became blurry. This created an effect where it seemed like the image was being pixelized twice, which wasn’t ideal for my needs. Additionally, the resolution it generated was too small for me to recreate manually with 3D print scraps. Given the constraints of my project, I decided that Pixel It wouldn’t be the best choice.
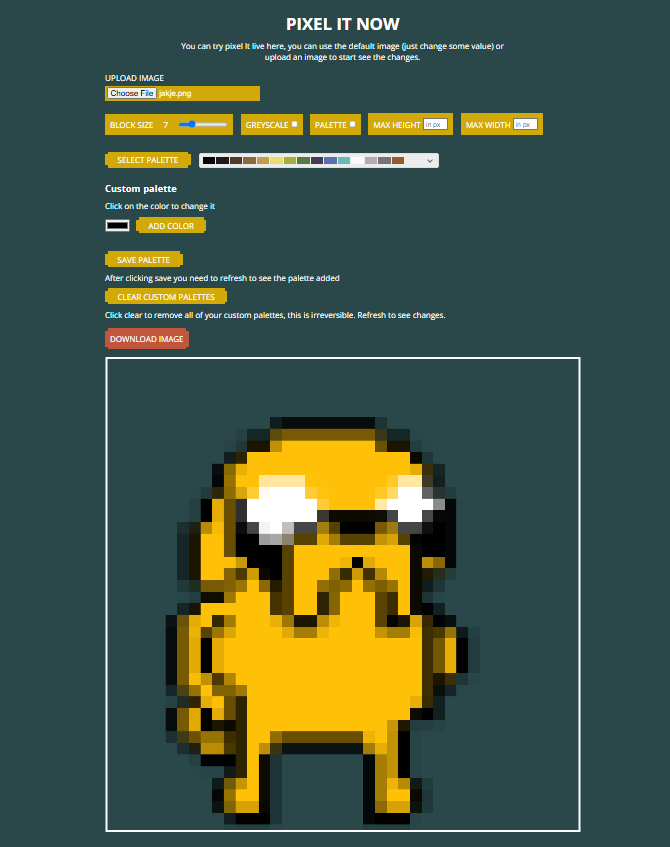
Picture 2: User Interface for Pixelit
Next, I tested Pixelartmaker, which required me to manually place each pixel instead of automatically generating them from an image. At first, I thought this might be beneficial since it would give me more control over the design. However, I quickly realized that I couldn’t find an option to adjust the pixel size. This meant that if I wanted to achieve the level of detail I needed, I would have to group many tiny squares together manually. Because of this, I didn’t spend much time on Pixelartmaker—I only made a quick stick figure to test its basic functionality before moving on.
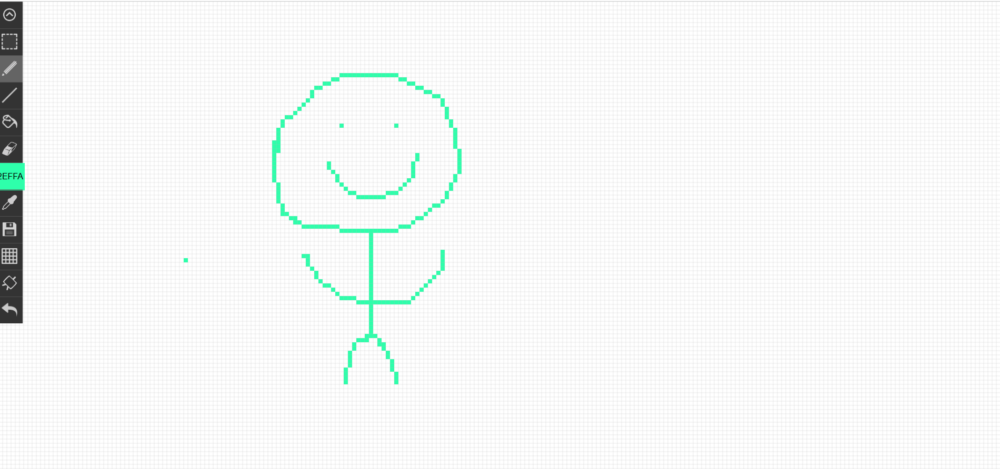
Picture 3: User Interface Pixelartmaker
Finally, I tried Piskel, which ended up being my favorite of the three. This software offered a variety of useful features that made pixel art creation much better for my needs. One of the most helpful tools was the vertical mirror function, which allowed me to create symmetrical designs. Another key feature was the ability to adjust the pixel size, making it much easier to achieve my target resolution without grouping a bunch of boxes. Additionally, Piskel allowed me to work in layers, which prevented interference between different colors. It also had an option to resize the frame, giving me the ability to match it to my frame.
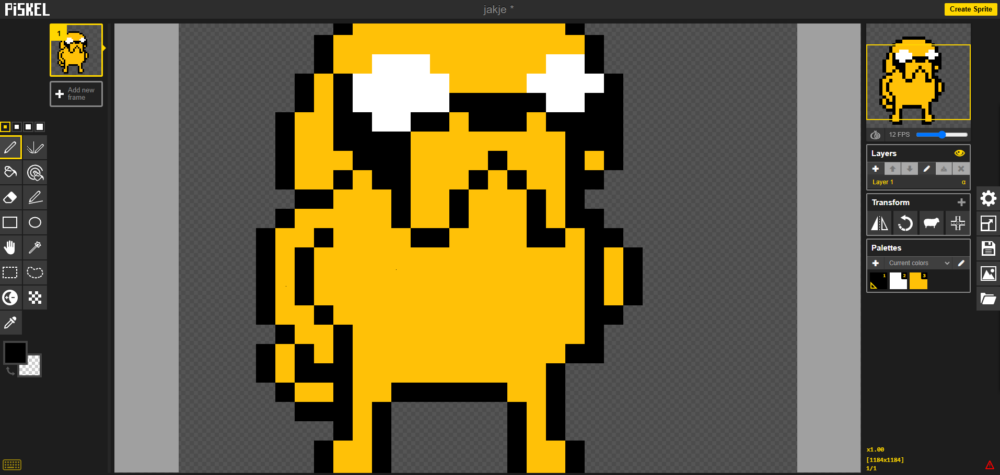
Picture 4: User Interface Piskel
Moving forward, I will likely use Piskel to create a mapped image of my frame and guide my design. However, I may also experiment with graph paper as a another method, manually labeling colors by number, similar to a color-by-number page. This approach would allow me to create the design without relying entirely on digital tools.
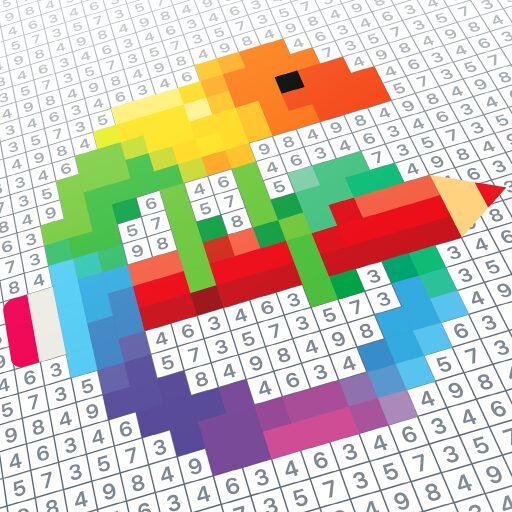 Picture 5: Color by Number
Most of my progress this week has been focused on laying the foundation for making real physical progress over the weekend. The next big decision I need to make is whether to buy a new blender specifically for this project or to use my current one. Since I’ll need to shred and break down the 3D print scraps into smaller pieces, I have to consider whether my existing blender can handle the task or if it would be worth buying a dedicated one just for this.
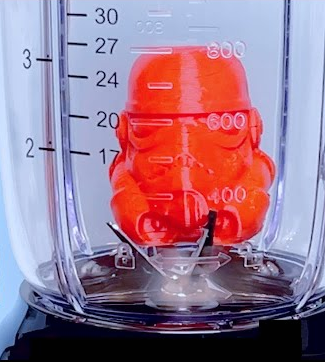
Picture 6: 3D Print Inside of a Blender
Picture 1: https://www.pixilart.com/art/jake-the-dog-18b83561e3b5037
Picture 2: https://giventofly.github.io/pixelit/
Picture 3: https://pixelartmaker.com/
Picture 4: https://www.piskelapp.com/p/create/sprite
Picture 5: https://play.google.com/store/apps/details?id=com.europosit.pixelcoloring&pli=1
Picture 6: https://www.youtube.com/watch?v=rYjZvSz2O_M
4 Comments. Leave new
This seems like an exciting project! I like how complex, yet feasible it is. I am interested to see what the final product will look like. In this post, I would have liked to hear more specifics on what your schedule looks like for the rest of the project and what tasks you are going to be working on.
Thank you! I’m glad you find the project both exciting and feasible. I’m really looking forward to seeing how it all comes together. Also that’s a great point about the schedule! Right now, I’m focusing on refining the design layout and gathering different colors.
I really like this project, its honestly quite similar to mine! I think its really cool that you’re repurposing 3D prints for this project, I see so much plastic waste generated by this process and I really enjoy seeing creative ways that people use this waste for good. I am a little curious how you’re planning on getting these 3D print scraps to be as precise as the pixel art you are creating. Overall really impressed, and excited to see how it turns out!
That’s awesome! I’d love to hear more about your project too! The amount of plastic waste from 3D printing is definitely something that pushed me toward this idea, and I’m excited to find ways to make it both sustainable and visually interesting. I am unsure how precise these scraps are and I’m hoping I can outweigh that effect my sheer volume of shredded scraps.