
For my final project, I am focusing loosely on the reminiscence theme. Since a lot of my childhood is surrounded by stained glass, I wanted to do something with stained glass and/or have the stained glass look.
I am making a glass terrarium. I want to use mixed materials like glass, and wood to make sure the terrarium is leak proof and has some stability especially at the bottom. I think it’d be a nice look as well to have glass and a darker wood to compliment each other.
My design functionalities are:
- Creating the over structure:
- Using a wood base and wood sides to create a general stable structure for the terrarium.
- Have glass panes on the sides of the box to cover all the sides except the front facing one.
- Making of the stained glass look:
- After assembling the glass to the structure, I used stained glass paint to make a cool design to the terrarium.
- Moving part
- I want to add a door to the open section with hinges so it can open/close
Progress
Starting off with my plans, I made a 3D model of how I wanted my structure to look like:
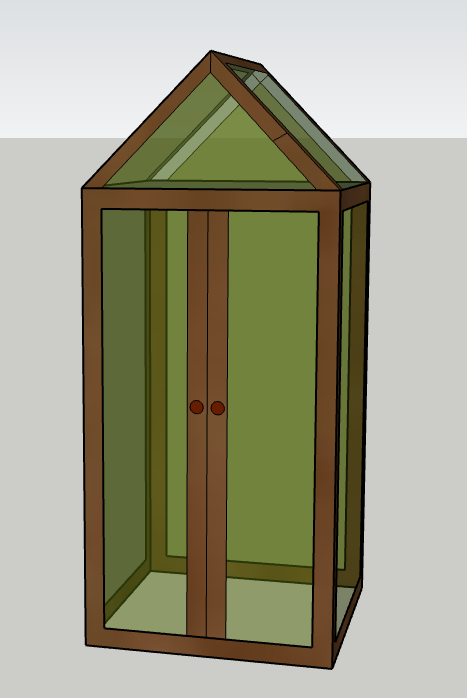
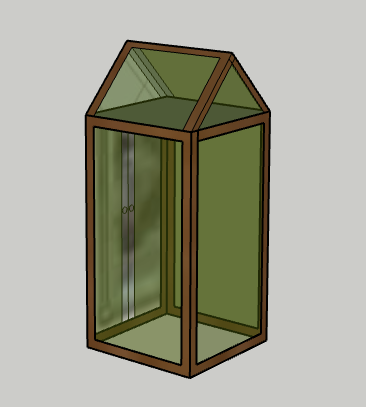
Figure 1: 3D Models
Figure 2: 3D Models pt. 2
In Figures 1 and 2, I planned out how I want my terrarium structure to look. I did a more simple design to add decals to the other sections of the project.
Metrics:
Frame: 4.5in x 6in
Roof: 4.5in x 2in
Door: TBD
Here are the materials I bought (Figure 3):
- Wood sticks
- Glass paint
- Glass
- Glue
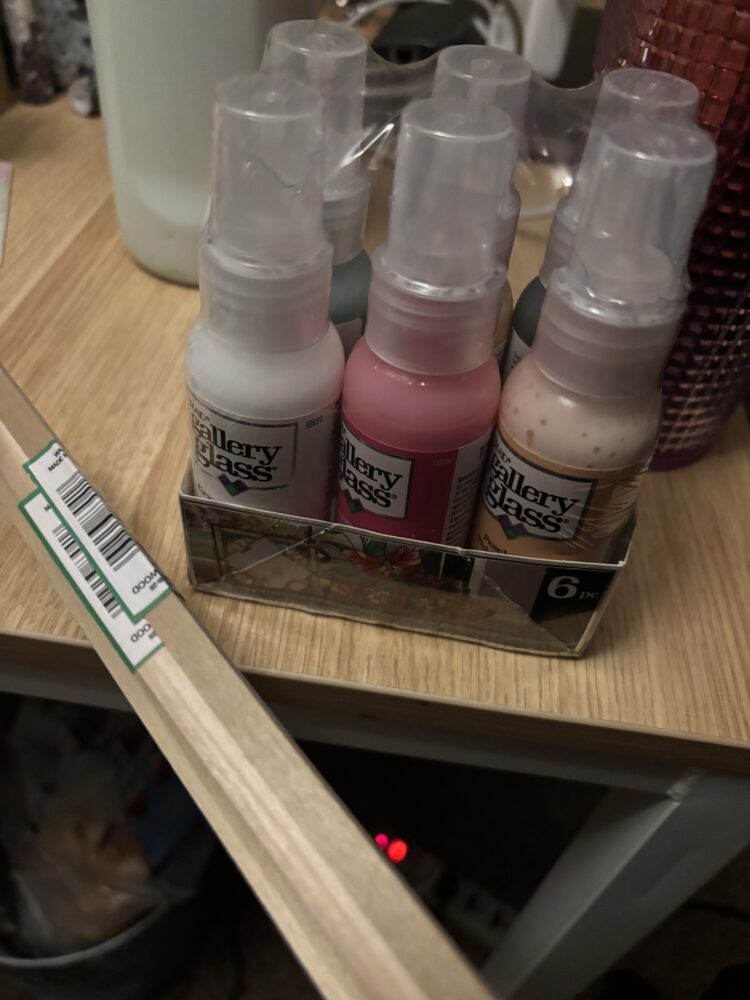
Figure 3: Materials
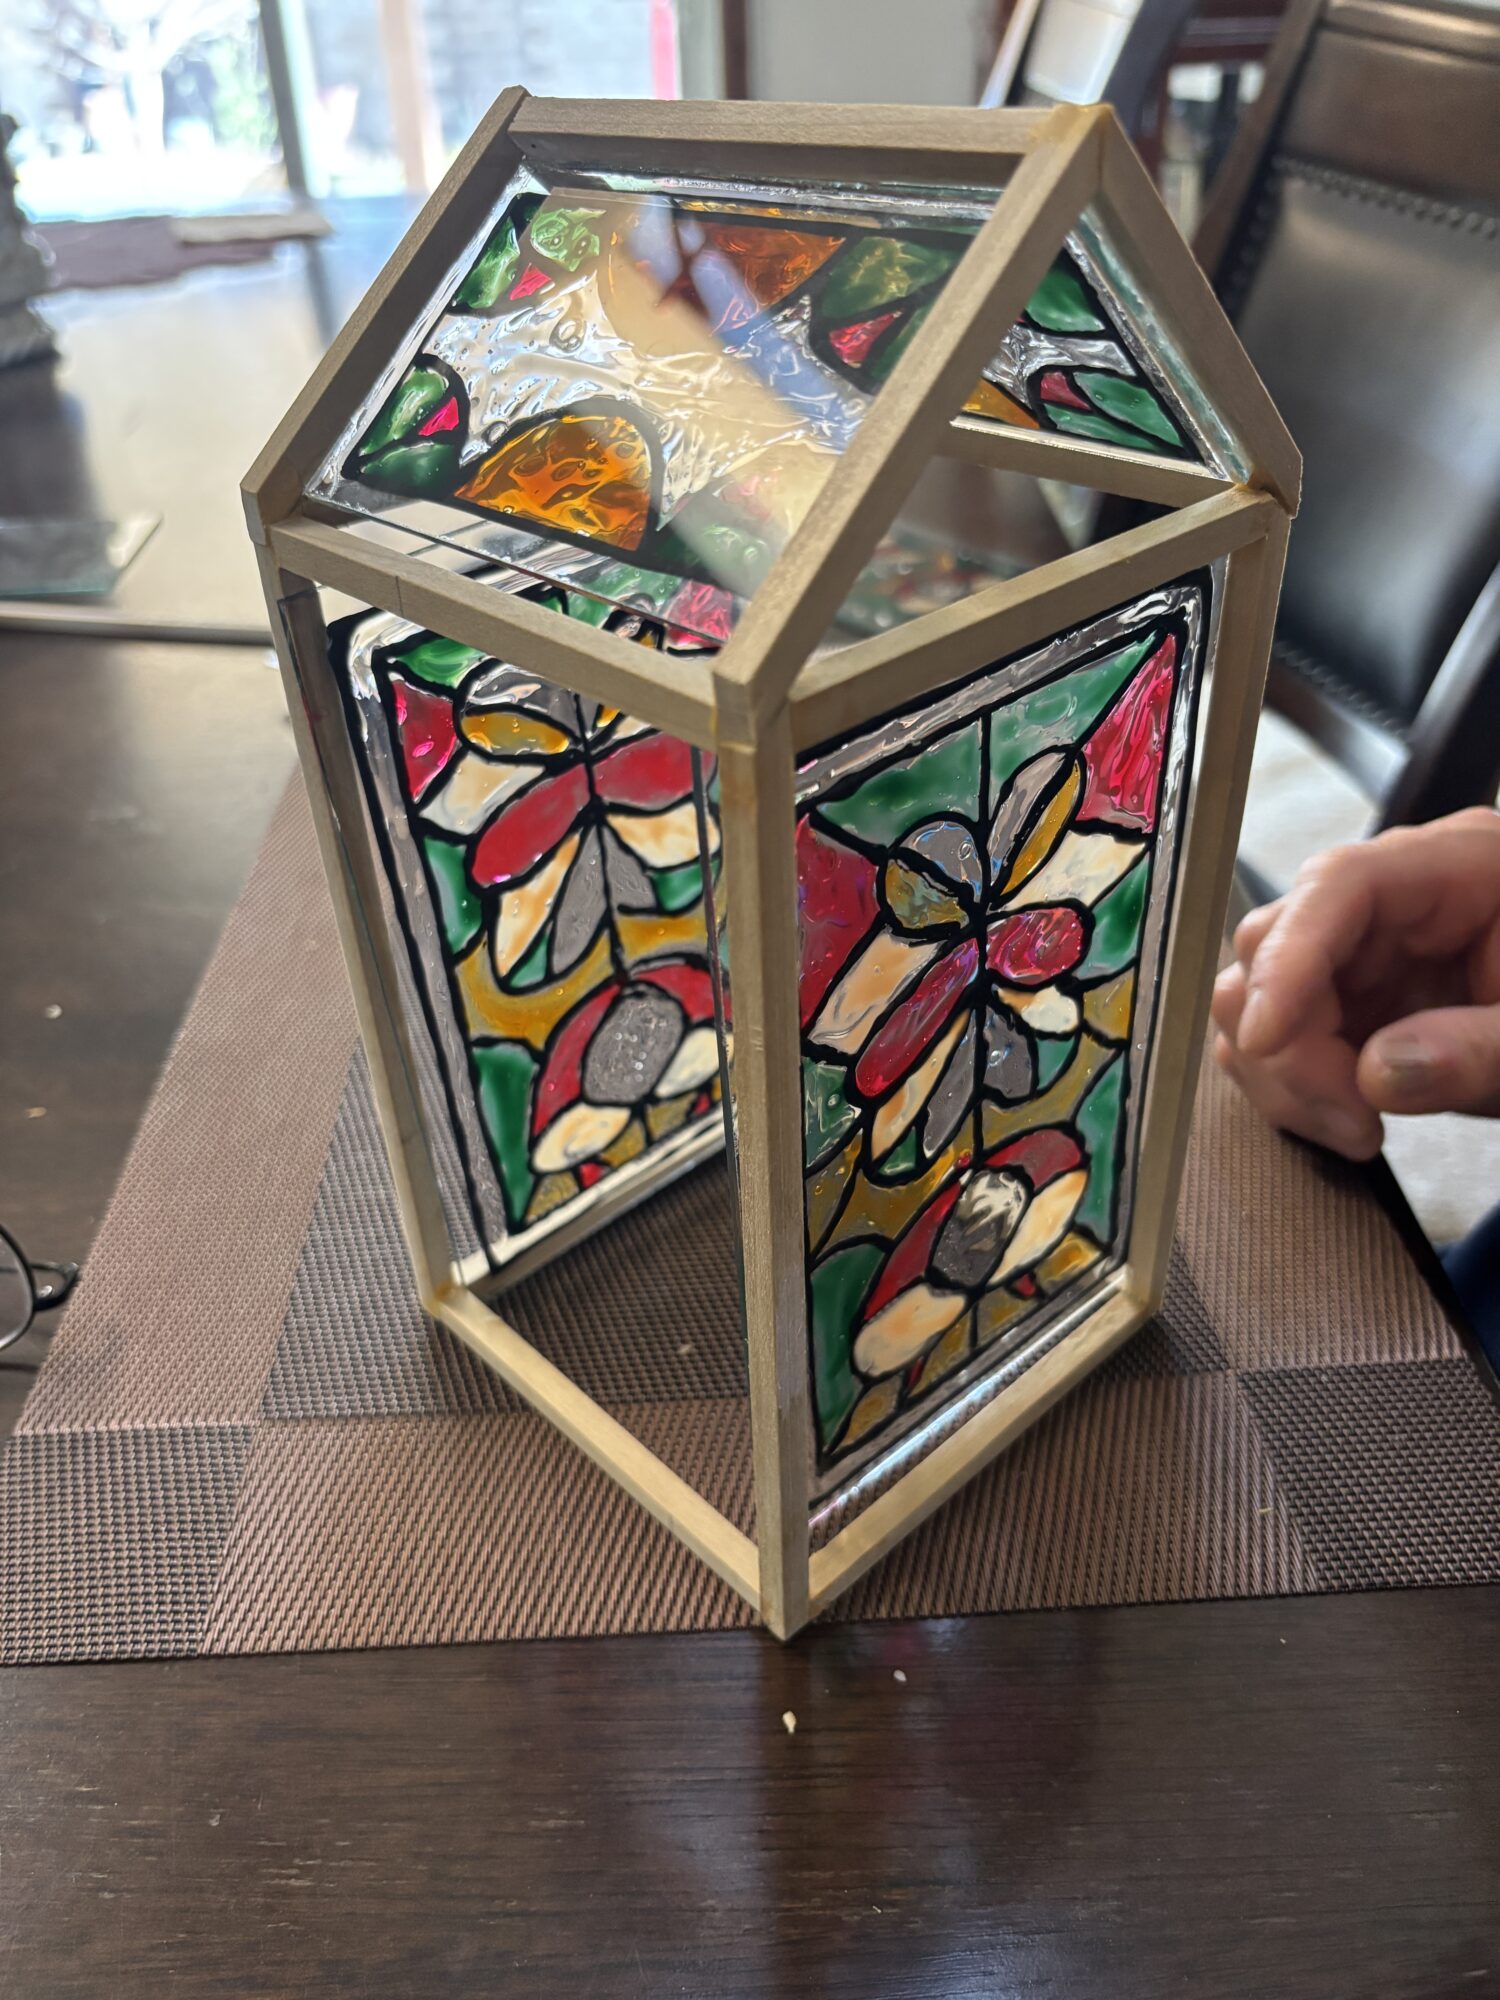
After measuring and understanding the frame and sizing of my project, I went to the wood shop to cut up the wood pieces into the right sizes. I then went to McGuckin’s and cut up the glass to the sizing of the structure. At first, I planned to find glass pieces to build my frame around it, but I decided it would be easier to plan out my design for more flexibility. I used glass paint to paint designs on the glass. I freehanded the pattern, Figure 4 shows how it looks wet.

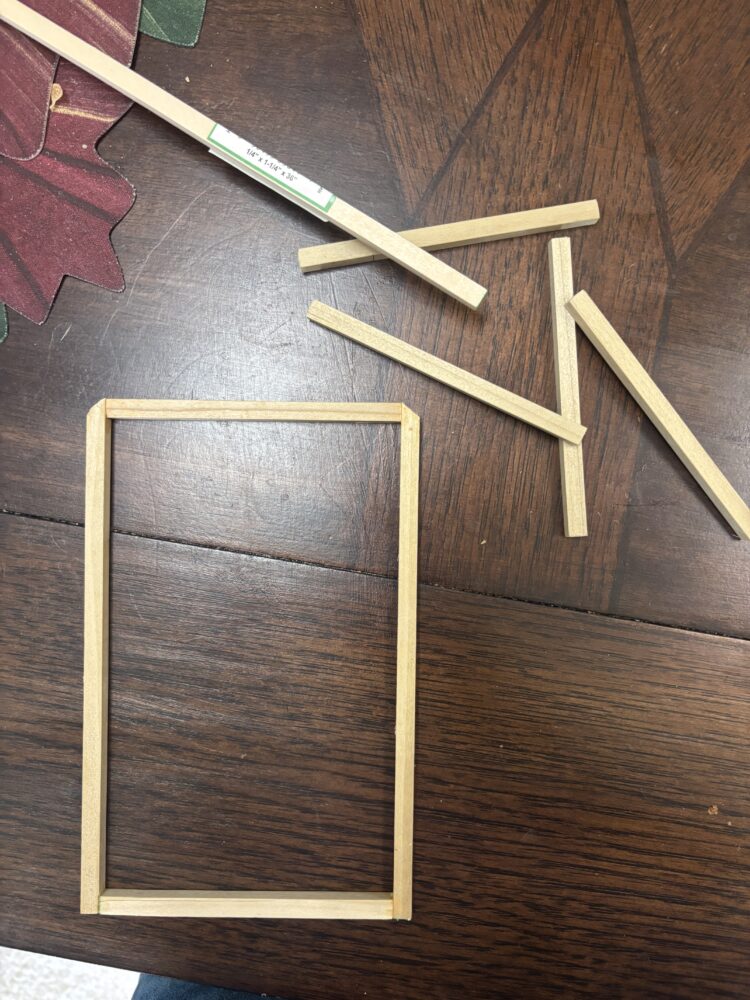
Figure 4: Glass Paint Figure 5: Wood Progress
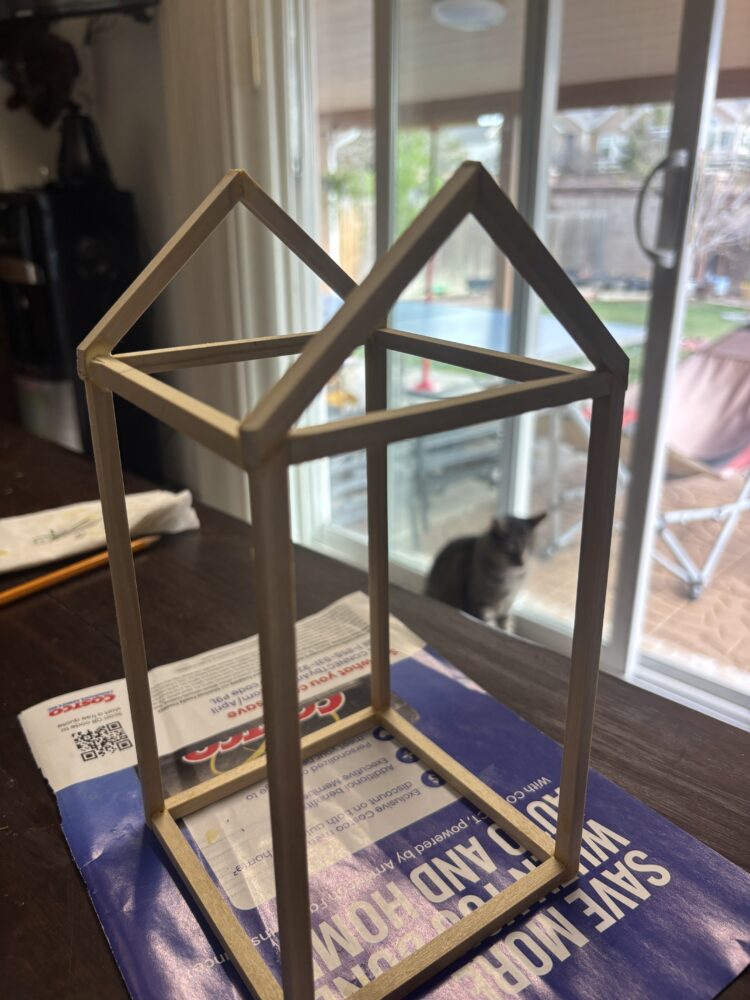
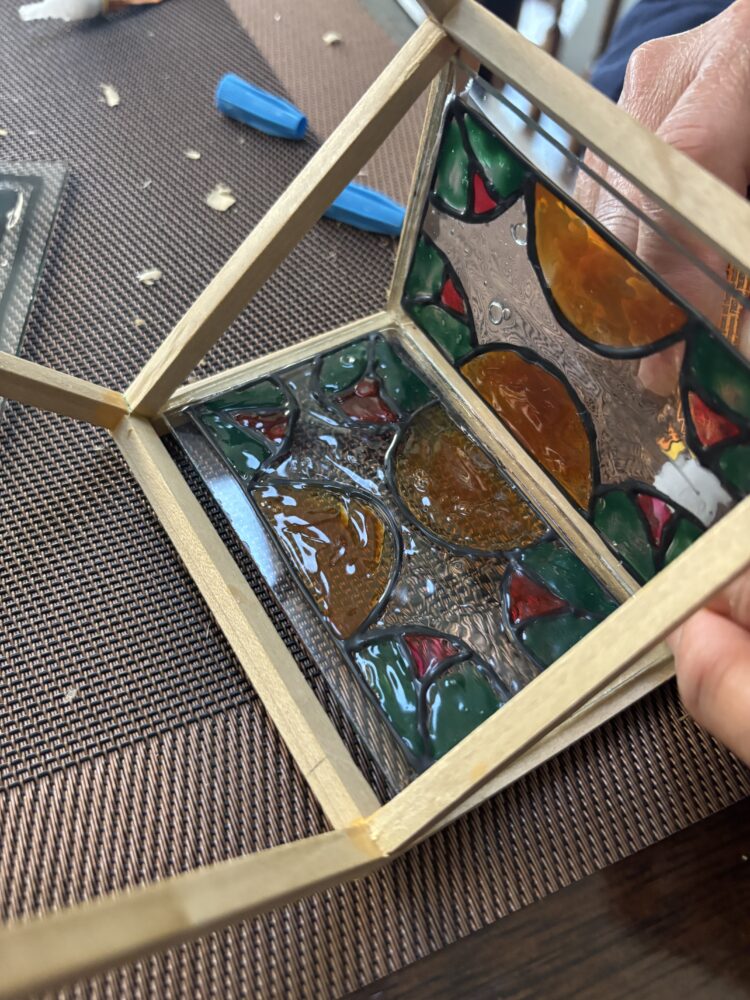
Figure 6: Assembling Figure 7: Assembling pt.2
After attaching the wood pieces with wood glue, the structure was looking pretty solid. I then fit the glass pieces into the frames, some parts of it like Figure 7 had a few gaps because of how the wood fit together. I am not very satisfied with it, but it is a terrarium so there is room for space because air should be able to enter the model.
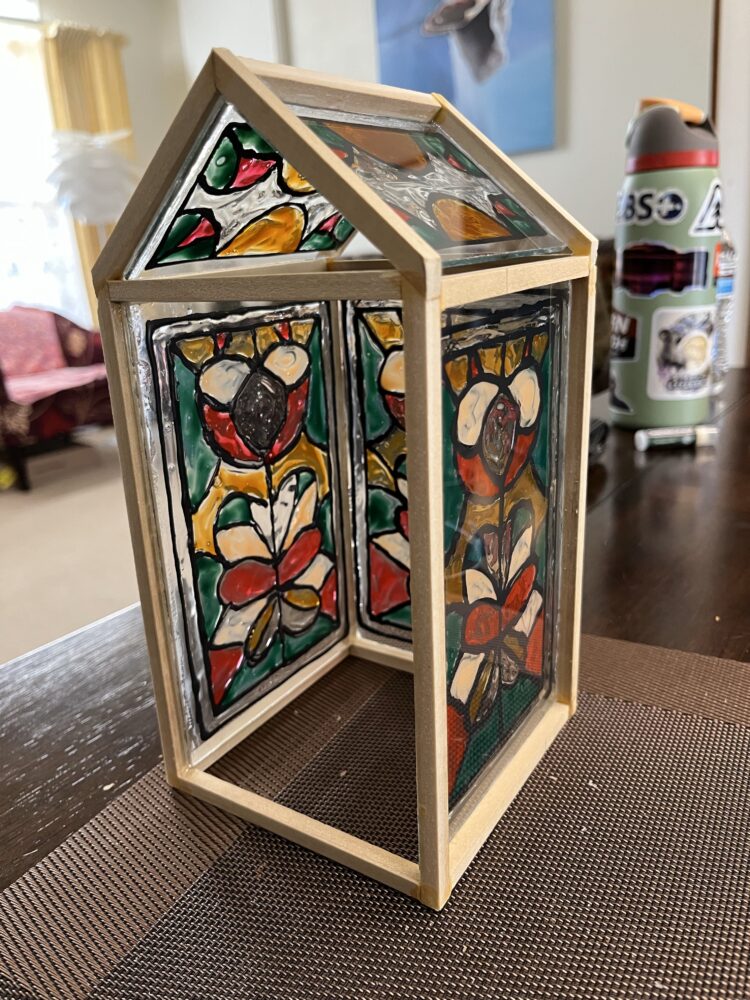
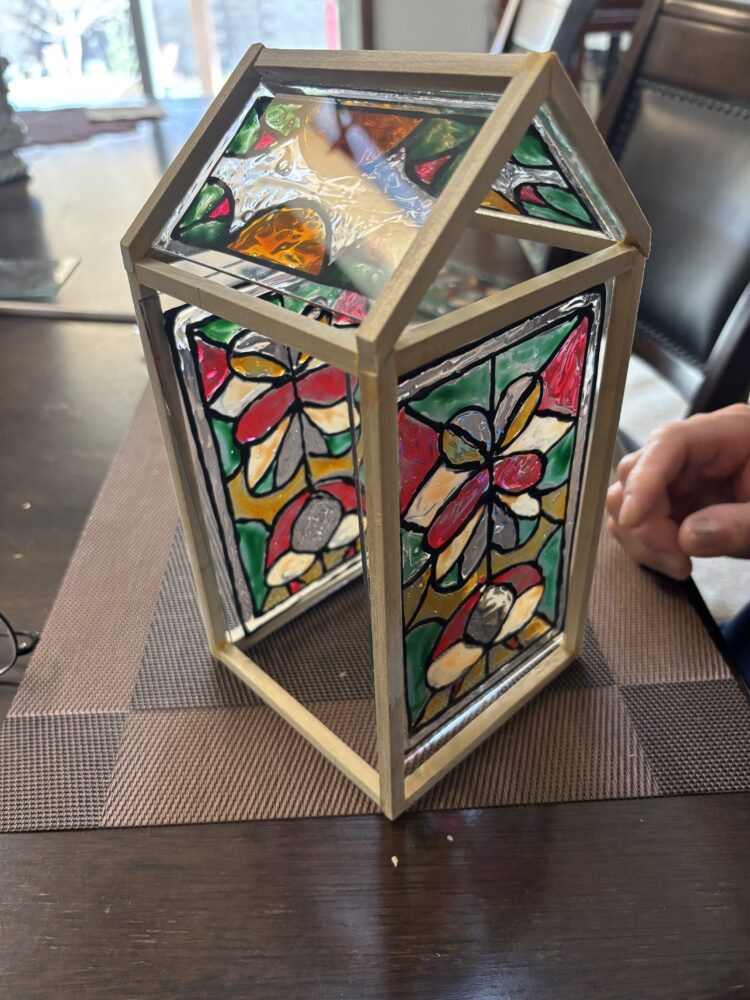
Figure 8: Structure Figure 9: Structure pt. 2
Here is the structure in progress in Figures 8 and 9. I like that I left out the hollows in the top roof section so there is air for the plant to live inside.
Future Plans
In this next week, I plan to get a bottom wood plank to attach to the bottom of the frame. I also plan to make wooden doors. I decided to make it out of wood instead of glass to switch up the textures a bit. There is a possibility that I want to stain/paint the wood. I can’t wait to see everything come together.
2 Comments. Leave new
Hi Jessica! This looks beautiful—I love the personal connection through stained glass. The mix of wood and glass gives it such a warm, elegant feel. Can’t wait to see how the door and final structure turn out!
Really love how you’re blending childhood memories with hands-on craftsmanship as it gives the project such a personal and meaningful touch. The mix of glass and darker wood sounds like it’ll make for a super elegant contrast, and the stained glass paint adds a nice nostalgic vibe.
Have you thought about sealing the wood with something waterproof once it’s all assembled? Could help with durability, especially if you end up using it for live plants.