
For the main project for this class, I decided to make an RC car to aid me in learning how to drive radio control vehicles. However, I couldn’t just stop at making a simple car. I wanted to make something unique.
RC cars mostly come in either a base car aesthetic or a race car aesthetic. While I am a fan of both, these aesthetics wouldn’t really be the unique I was looking for. Changing the color of a base car to something more exotic was my main idea, but I did not think it was enough. However, exploring a few different aesthetics really gave me a great idea into exploring how I could make those aesthetics into my image.
The aesthetic I chose to follow is a light version of cyberpunk. I wanted to follow the style similar to Tron, with the clean lines, bright lights, and contrast. I was inspired to follow this aesthetic after seeing a youtuber’s custom build of a Lamborghini Murcielago in a cyberpunk aesthetic. I really liked how they approached it, with the edge lit lights across the design. I instantly knew that I wanted to do something similar with lighting. The sharp geometries are perfect for a cyberpunk aesthetic. The base color did seem a little lacking, but the general concept was there.
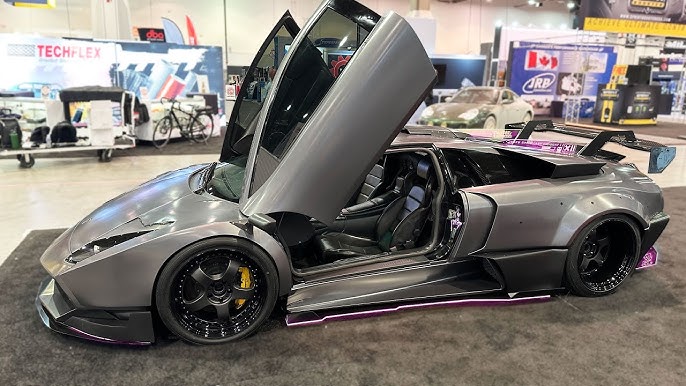
Cyberpunk Lamborghini Murcielago by B is for Build
The second inspiration I got was mostly for the color scheme. In Spiderman Across the Spider-verse, Miles Morales travels through inter-dimensional portals. These portals specifically caught my eye. I really liked the dark background colors, with the rings in magenta, orange, and red. Spiderman himself also contrasted the portals. The contrast was perfect for this project.

Spiderman Across the Spider-verse Movie Poster from IMBD
After having a general idea of what I wanted to build, I had to figure out how. I initially wanted to build my own custom chassis and modify a 2015 Chevrolet Camaro. The Camaro is my current car, and I had just recently got it when I was starting this project. However, designing a custom chassis would take much longer and could be classified as it’s own project in the scope of this class. It did not seem feasible, and thus I started looking for existing chassis’. One idea for this chassis to still have some customizing to it was to find a fully 3D printable chassis. This is where my decision comes in. I encountered a fully 3D printable chassis designed by DukeDoks. The chassis was perfect, with it being simple to fabricate and add in any electronics I could buy. The chassis itself allowed for different wheel widths, and any car body could be attached to it. Even the wheels and tires could be 3D printed in a material like TPU. The size of it was also something I liked, because I wanted this project to be larger scale.
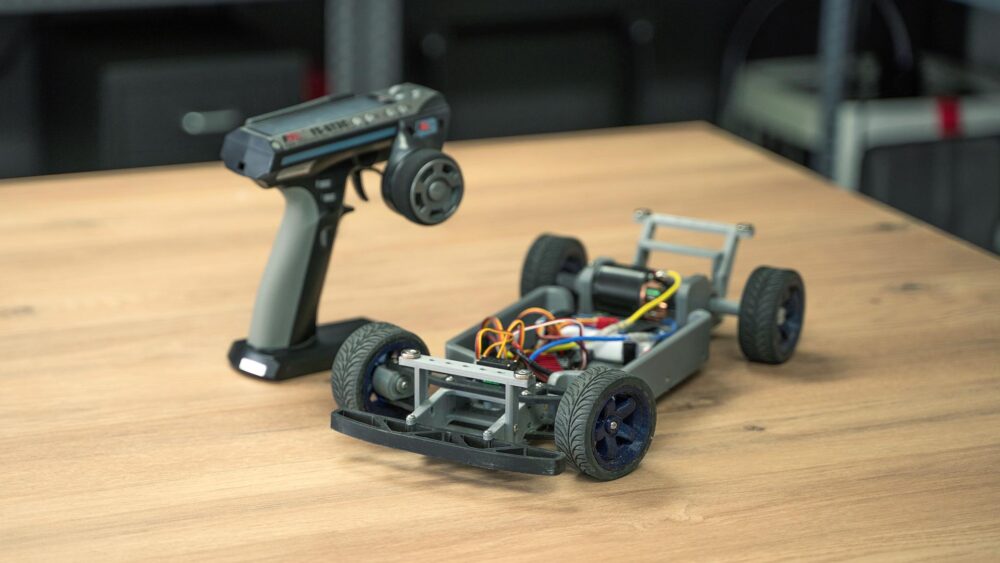
DKS-Basic Chassis by DukeDoks
Next, I had to decide what car to put on the chassis. One of the great things about this chassis is that there were existing car models that were already fitted to this chassis. This was important because I was running low on time to figure out exact details for this project. Thus, I had to put the idea of putting a Camaro body on it aside and use an existing car model as my base for the cyberpunk aesthetic. I had considered using a Ford Mustang since it is similar to the Camaro. However, I had found the perfect car model to use, a car that I looked to get at some point.
The car model I had decided to use was the AMG GT Coupe. This car is perfect for this project. It is a car model that is not known to be modified at all. I personally like the Black Series version of this car with it’s race car styling. The car is mostly displayed in a luxurious tone and aesthetic, but I really wanted to change this presentation in a way that both highlights luxury and cyberpunk. The body was also readily available to 3D print, which was my original idea behind making body modifications to add the cyberpunk aesthetic.
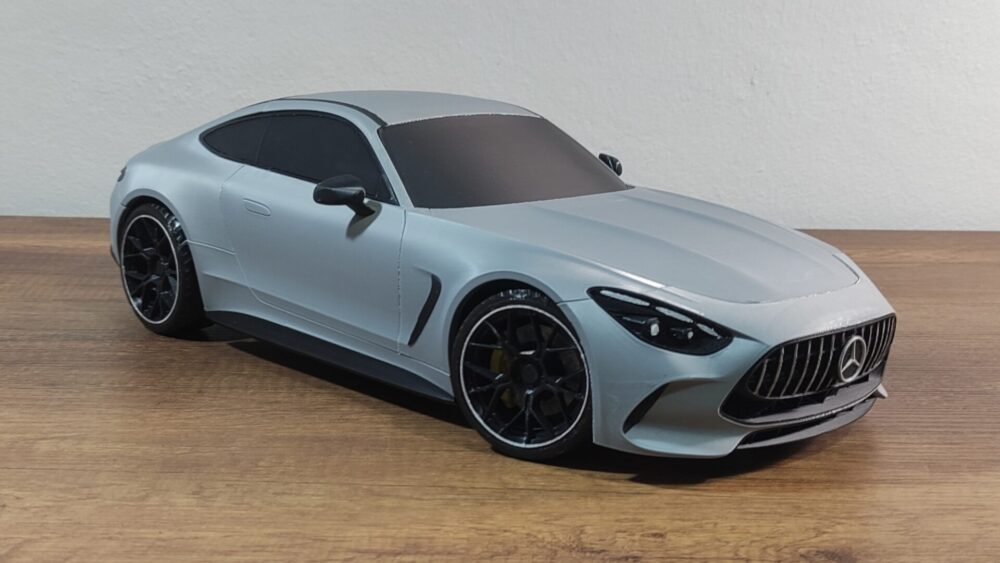
AMG GT Coupe 1/10 scale by Cormango
Having the foundation as to what I wanted to make, I had all the tools necessary to bring my vision to life. The following describe the main requirements that I wanted to achieve with this project.
- Light Cyberpunk. The cyberpunk aesthetic can vary, and is mostly associated with neon lights and complex systems. While the aesthetic is interesting, the full cyberpunk aesthetic is not what I envisioned for this project. Instead, I wanted to borrow some aspects of cyberpunk, such as the lights, contrast, and some geometric forms. Not all the features of cyberpunk, but a select few, thus the light naming.
- Actual Lights. Apart from the lighting I wanted to incorporate from the cyberpunk aesthetic, I also wanted to add traditional lights like a normal car. Headlights, taillights, and the accent lighting for the aesthetic should all be easily controllable, allowing for the aesthetic to be adjustable in color. To do this, I used Adafruit’s Neo pixel RGB LED. These LEDs allow for the control using a single signal wire, and specific patterns can also be programmed.
- Striking Contrast. With the cyberpunk lighting, I wanted to achieve an aesthetically appealing color contrast that fits the cyberpunk theme. My main inspiration for such a contrast is Spiderman Across the Spiderverse’s portals, which features a dark background color accented with magenta’s and oranges. For the dark background color, I chose to use Polymaker Panchroma Silk PLA in Dark Blue for the main components and Polymaker Polyterra PLA Black for the body accents. For the accent lighting, that would be integrated in with the lights.
- Dynamic yet Elegant. The AMG GT car model I chose is known to be elegant and luxurious. I wanted to reimagine the car in a different tone, while still maintaining the sense of elegance. To accomplish this, I am using the existing body lines of the car model and modifying them to be more in line with cyberpunk.
- Driving. The main goal outside of the aesthetic is driving this car. I am terrible at flying RC airplanes, so having something to learn controlling a radio control vehicle with less degrees of freedom should help. However, this is a low priority goal due to the aesthetic focus of the project. The electronics I chose to use for this are Hobbywing’s Quicrun 10BL120 G2 ESC and 3652SL G2 3250KV Motor, along with a battery and controller I already own from RC airplanes. Additionally, I got a heavy duty 25kg servo for the steering function.
With these specifications in mind, I then started sketching on top of Cormango’s image to create an initial visual of the project. The color accents are shown, and some body modifications were drawn for ideas.
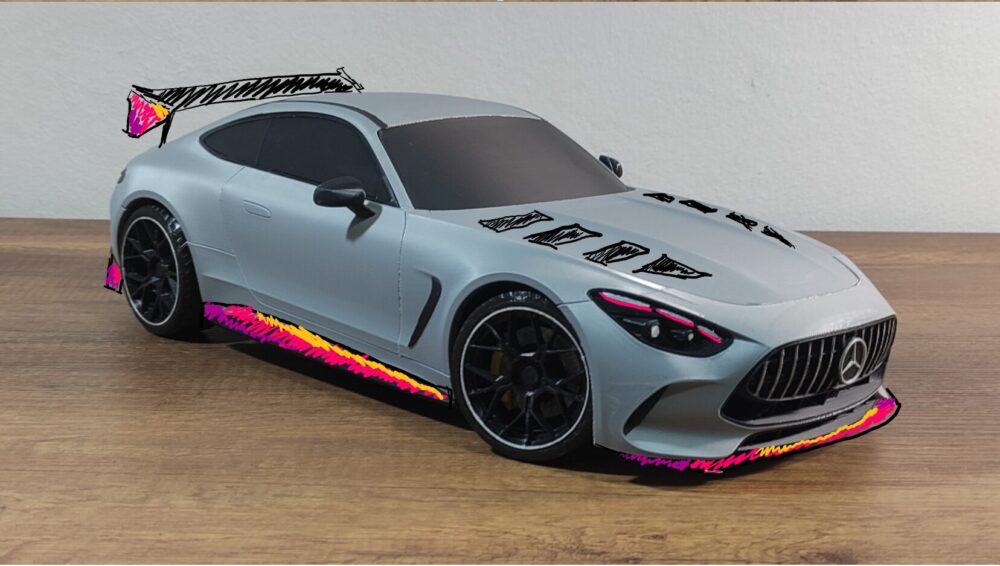
AMG GT Sketch of Vision for project
Next, using the body from Cormango, I wanted to use CAD to model the body kit. However, after attempting to use SolidWorks, I realized it would not be feasible since it kept crashing with a single part. I was at a loss, but started planning on printing the body first and then measuring that to get the body kit designed in SolidWorks. This would have drawn out the design process more. I then remembered a program a friend of mine used to create 3D artwork models. Blender fit the exact use case I was looking for. I did have to learn some basics of Blender first.
After importing the main body of the car, I was ready for the body kit design. I started with the side lighting components, trying to match some of the more aggressive styling in race cars and the light visual of the Lamborghini inspiration. I created a channel for the LEDs to sit in, and I fell in love with how it had started to look. I then formed style design elements to the fender and quarter panel, really adding the geometric shapes shown in cyberpunk aesthetics. I also added a front splitter with LED glow, and a rear wing for added aggressiveness of the car style. I rendered the car and I knew it was ready to be 3D printed.
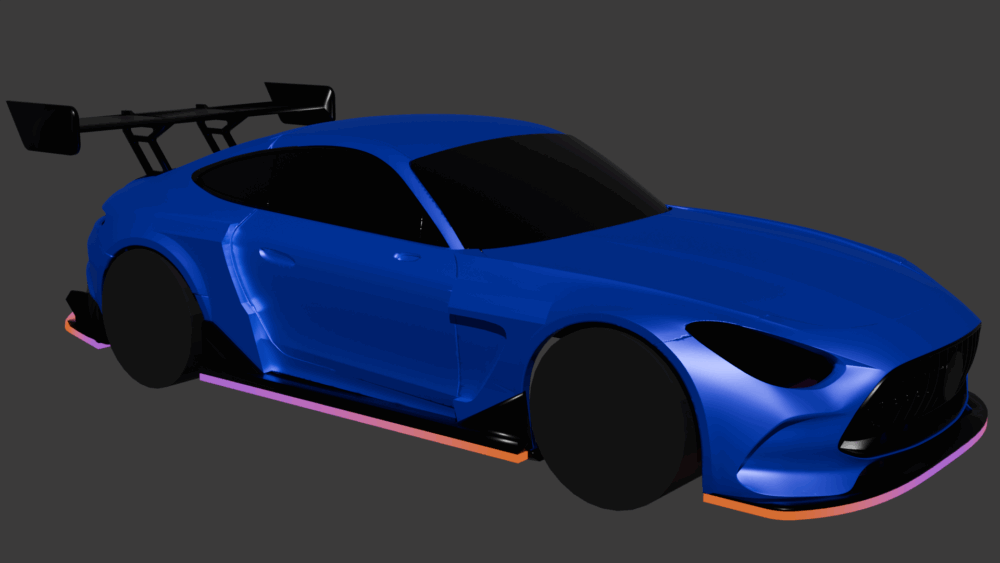
Render of body modifications to AMG car in Blender
There were still a few things I still had to design for before I started making the car. First, I realized that the LEDs would need their own power source and controlling them individually required a controller. For this, I bought a 5000 mAh power bank and DFRobot’s Arduino Beetle. The Arduino Beetle is a arduino microcontroller the size of a quarter, perfect to fit inside the chassis. Additionally, the power bank gave the more dangerous LiPo battery I have from the RC airplane less load.
Overall, this design perfectly embodied the aesthetic I wanted. The light cyberpunk aesthetic shown in the sharp edges in the body kit, along with the dynamic lighting fit it perfectly. The body kit also gives the car a hint of elegance, hinting at its original form. The dark blue metallic color of the body contrasts the colors of the lighting in the color scheme I was inspired from.
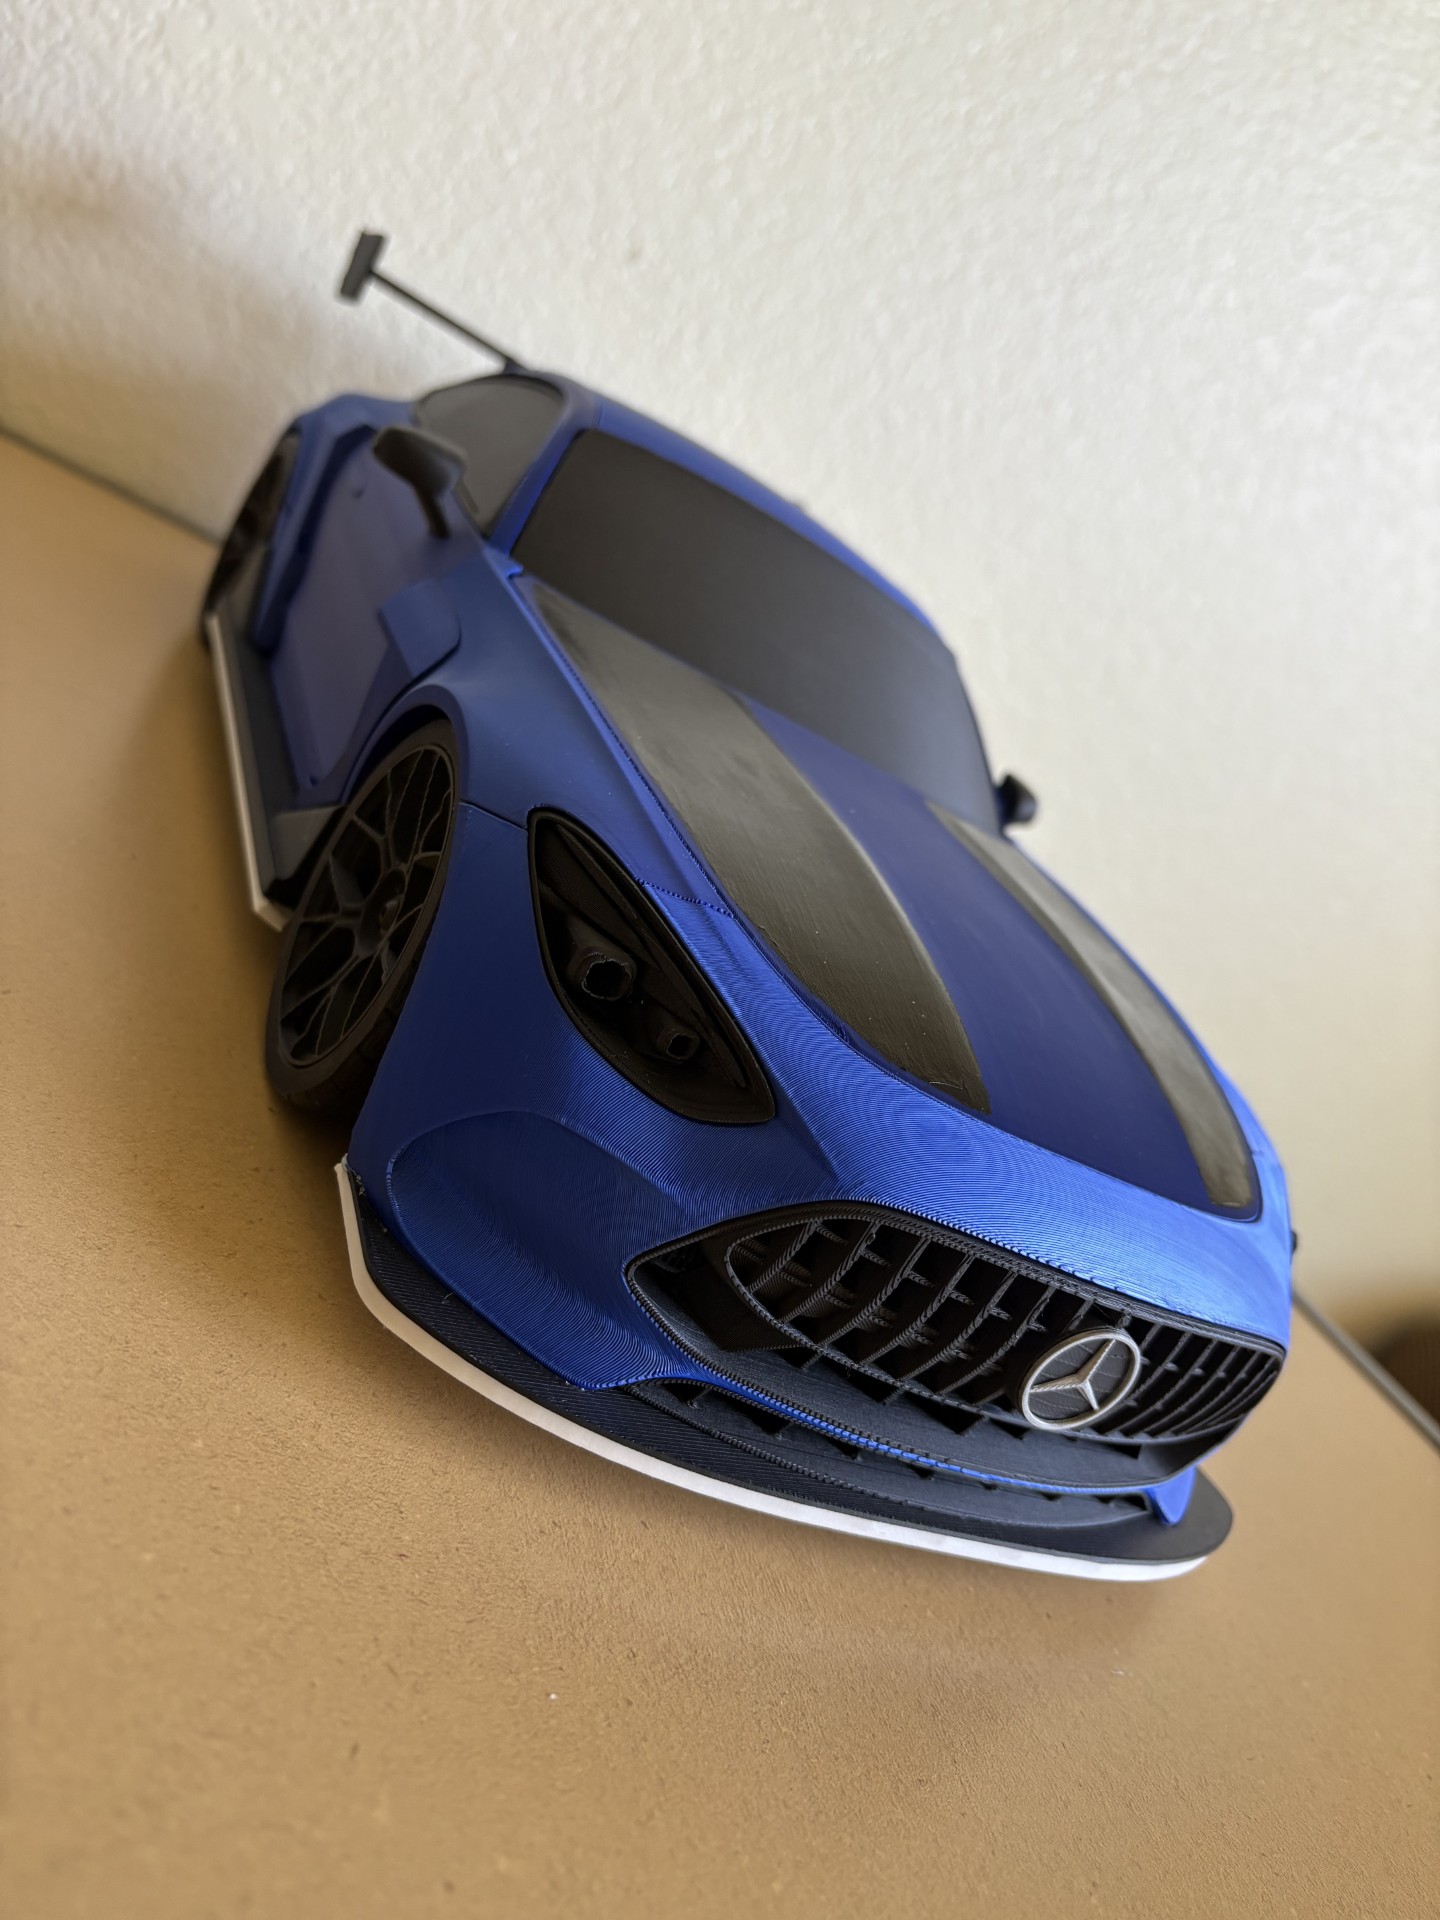
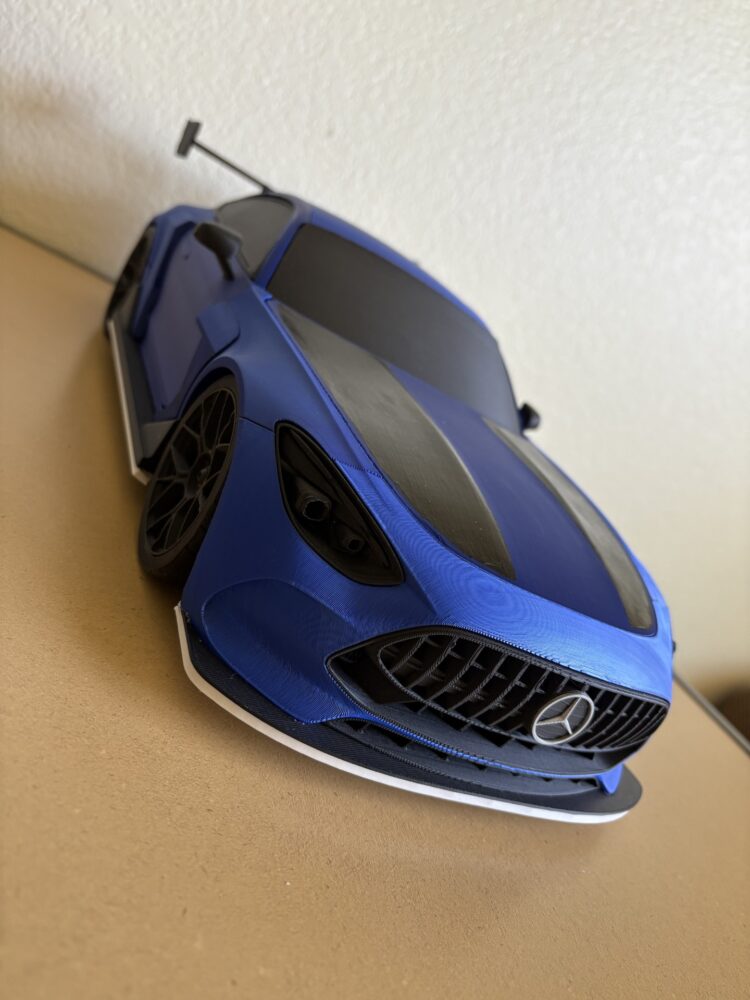 Front view of finished RC car, in daylight.
References:
- Cyberpunk Lamboghini Murcielago, B is for Build,https://www.youtube.com/watch?v=SosVXUy-i68
- Movie Poster, Spiderman Across the Spiderverse (2023), IMDB,https://www.imdb.com/title/tt9362722/
- DKS-Basic Chassis, DukeDoks, https://dukedoks.com/portfolio/guia-chasis-rc/
- AMG GT 63 Coupe 1/10, Cormango, makerworld,https://makerworld.com/en/models/877085-amg-gt-63-coupe-1-10-scale-rc-car-display-model?from=search#profileId-845122
4 Comments. Leave new
Bryan, this is an incredible result! I am a fan of RC cars myself, and I really appreciate your accomplishment of not only producing a very customized body but adding lighting with control as well. It is really cool that this custom aesthetic pulls from multiple inspirations, and the result is a striking look in a clean package – totally up my alley.
I really relate to your SolidWorks struggles, and I am glad you took the leap (which I have not yet) to Blender to realize your aesthetic. What were you able to accomplish with the lighting programming? Do you think this will be something you continue to experiment with? I would love to hear more about that process to try and learn myself.
Great work!
-Cole
Glad to hear my project came out great. Regarding the lighting, I originally had just a solid light going at all times for the edge lit components. However, the microcontroller has a much better capability of creating something amazing. Thus, I started messing around with a sequenced lighting, and I think it came out great. I definitely want to keep experimenting with it, especially with how simple it is to run a program that does all the magic for the lighting. I’ll be detailing a bit more on how I created the lighting itself in the next post.
You do a great job thoughtfully blending your cyberpunk inspiration with the original elegance of the AMG GT to create a really cohesive and unique vision. I thought this project turned out really cool and loved how you used blender.
Thank you. Blender was a bit of a learning curve and I still have a lot to learn from it. But, I did like using it in this artistic way.