
Introduction
Throughout this project, I intended to create an item of furniture that would not only work successfully in my bedroom but also aesthetically benefit the room as well as itself. I intended for it to be versatile to adapt with me as I advance beyond my existing living arrangement. I have a dream to live in New York City one day and would love for this piece to come along with me.
Inspirations and Adaptations
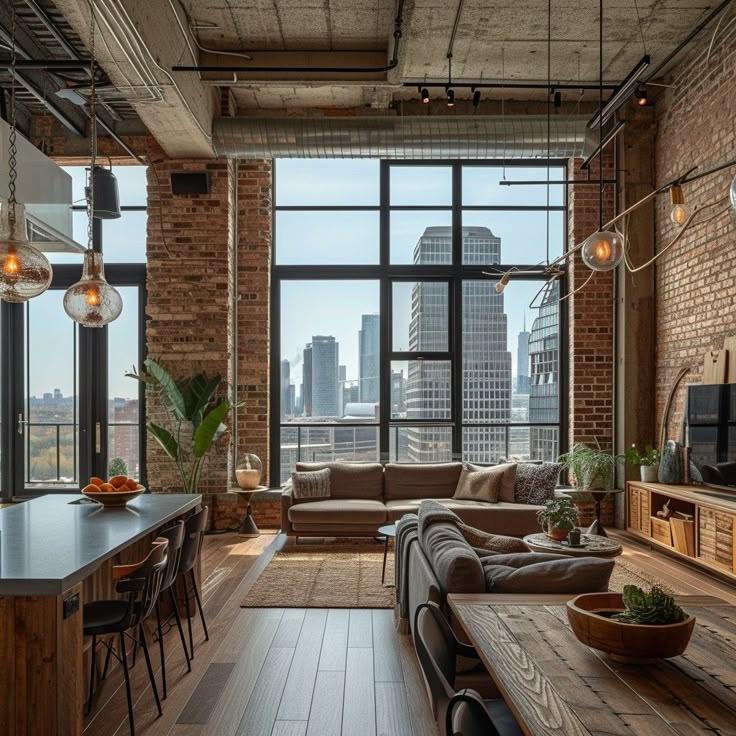
Before embarking on this project, I drew inspiration from multiple sources that reflected the eclectic mix of styles that I was aiming for. The mixing of urban and vintage was what I envisioned for the rack, mainly focusing on that New York loft style. One of my main sources that I depended on was Pinterest. Because it is so visual, Pinterest allowed me to see different furniture pieces, design ideas, and color palettes. My research was based on the keywords “urban furniture,” “vintage bedroom,” and “men’s industrial room decor.” These keywords introduced me to a wealth of ideas, from industrial shelving units to vintage clothing racks, that inspired me to think about materials, scale, and general mood I wanted. I came across a few designs that I utilized and applied to my project. One that I was stimulated by was a minimalist industrial rack made from black metal piping, akin to what I had envisioned but with a slightly more refined and glossy sheen. While this was similar to what I envisioned, it was a little too sterile and clinical for the feel of my overall bedroom. Because of this I changed my original plans.
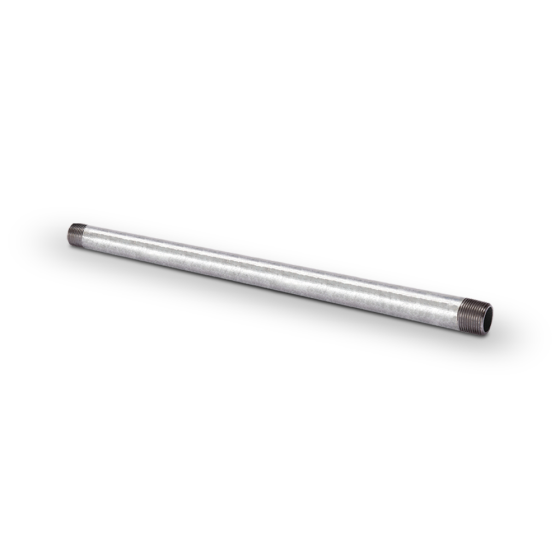
I required something a little more rugged and lived-in, I thought a raw metal pipe would fit this aesthetic closer.
These city loft-style interiors, which have a tendency to use reclaimed wood and metal in an effort to achieve a raw, unfinished but polished look. There was one element particularly that drew my eye and that was a coat stand built using plumbing pipe and an antique wood pallet. That inspired the concept of using steel pipe but adding padding to the overall design with wood so that it maintained the old-fashioned appearance. The wooden shelf piece with all the holes and slanted surfaces was inspired by old display furniture that I found on Pinterest. I also researched the bohemian and minimalist styles, which, as I wrote about in my last post, weren’t exactly where I was going in general. But I enjoyed the way the boho-style copper pipes and brass fittings made me think about incorporating a touch of metallic heat to my style. It was something I experimented with for a bit but ultimately dropped.
Project Vision, Specifications, and Aesthetic
My expectation of this project was to create a usable and functional piece of furniture that would be simple to integrate into my existing bedroom aesthetic, which is an amalgamation of city-industrial and vintage styles. The rack should be not only pleasing to the eye but also usable, and versatile enough to be re-purposed in the event that I would relocate it to a new room in the future. My measurements were dictated by my need for a clothes rack to carry multiple items, from clothing to knick-knacks, and serve as additional shelving space for display. My measurements were based on an empty area of my room, which was about 5 feet wide and 2 feet deep, allowing for a freestanding style coat rack as opposed to anchoring it to the wall or floor. I wanted to make the best use of space without overstuffing the room. Functionally, the design would be to serve two functions primarily: a hanging area for clothing and an area for storing clothes and shoes. More specifically with a platform or basket at the bottom to hold shoes, and a set of shelves that could store sweaters or other folded clothes. One of the main challenges with this project was making sure that the rack was strong and sturdy enough to support the clothes hanging/being stored on it. This prompted me to choose steel pipes, which are renowned for their sturdiness and industrial look, as the major material. I chose to make the design freestanding, so there would be the ability to move it around. The caster wheels, as an important part of my design, would also allow the rack to be rearranged when needed. This is the dynamic part of my project, which I think would work very well on hard-wood flooring, but doesn’t work so well on my current carpet flooring, unfortunately. I’m hoping the New York City loft that I live in will have hardwood floors to allow the rack to be truly dynamic. Aesthetically, I wanted to maintain a raw, unfinished look that would complement my existing furniture, and I wanted the piece to show-off my clothes and let them take center stage. I’d like to store some of my favorite clothes on the rack as a way to “show off” my closet.
Initial Sketches and Final Design Plans
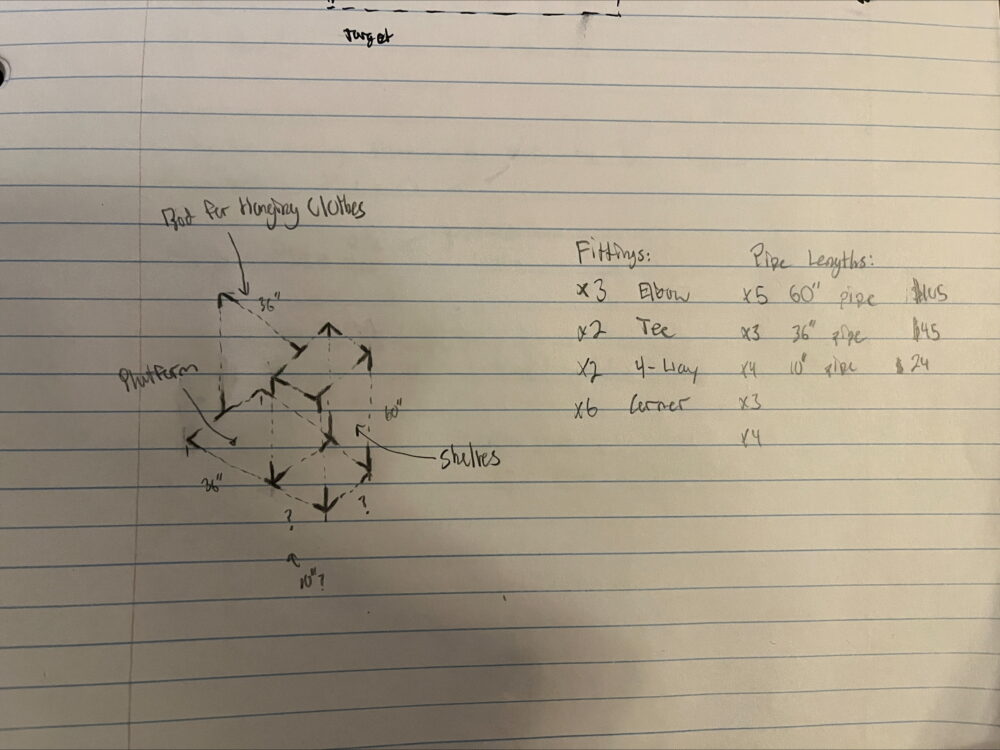
I first began by creating some rough renderings of the design, playing around with different placements for the clothes rod, the shelves, and the wheels. These initial drawings were very basic, focusing mainly on proportions and the general structure of the piece, rather than the finer details. I knew that sketching out my ideas would help me visualize the project in a more tangible way and give me a better understanding of how all the components would fit together in the final piece. By getting the ideas on paper, I was able to adjust the sizes and placement of each element as needed, ensuring everything would come together in a functional and cohesive way. Alongside the sketches, I also made a list of all the parts I would need to complete the project. This was a crucial step, as it allowed me to break down the cost of the materials and get a clearer idea of the budget. Understanding the cost upfront helped me plan accordingly and avoid any unexpected expenses along the way. It also gave me a practical sense of what was achievable within my budget constraints. Once the design started to come together on paper, I planned to transition into creating a more precise model using CAD software. I felt that a digital version of the design would give me a better sense of the exact dimensions and proportions, as well as allow me to visualize the project in a more detailed way before committing to the actual build. This would also help me to identify any potential design issues or improvements that I might have missed in the initial sketches. However, when it came time to source materials, I ran into a bit of a hurdle. I struggled to find a set of parts on McMaster-Carr that fit my budget and the needs of the project. The parts I had in mind, particularly the fittings and lengths of pipe, were either too expensive or unavailable in the quantities I needed. Faced with this challenge, I decided to head to Home Depot to explore what they had in stock. I thought this would be a good way to see if I could find similar materials at a more reasonable price, and potentially adjust my design based on what was available.
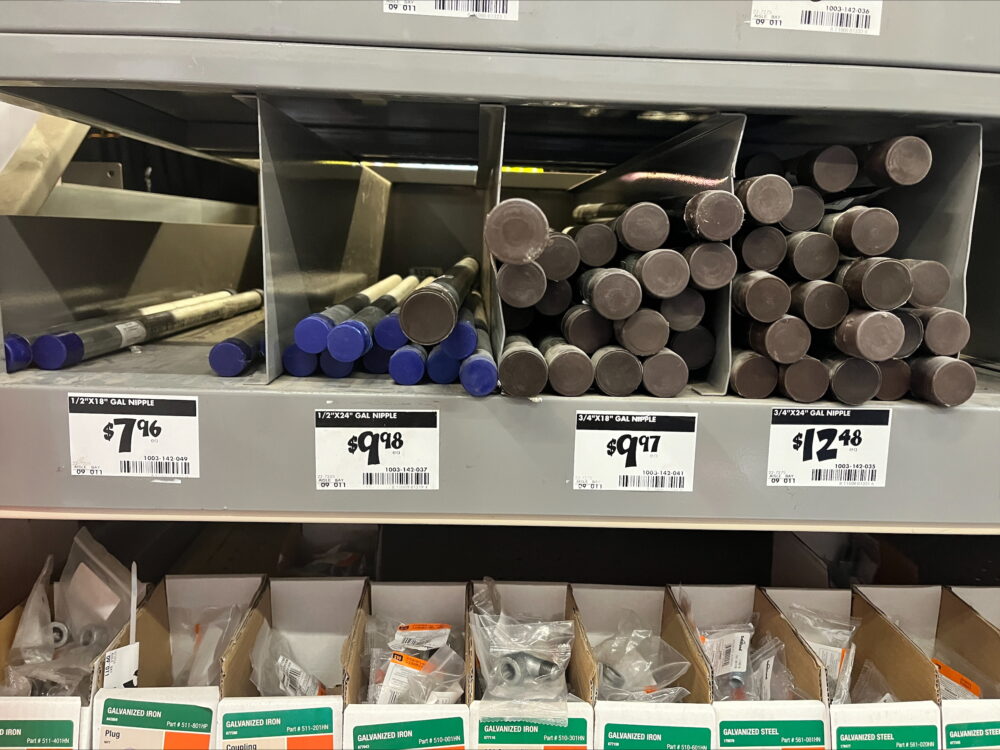
Upon visiting Home Depot, I quickly realized that they didn’t carry all of the pipe fixtures I had initially planned to use, especially the four-way fixture that I was hoping to incorporate. This setback forced me to rethink my design entirely. I had originally planned to incorporate shelves into the rack, but without the necessary four-way fixture, I had to simplify the design. Instead of shelves, I decided to focus on creating a simpler, more streamlined structure with a crossbar for hanging clothes. This change significantly altered the look and functionality of the piece, but it also made the project much more affordable. By removing the shelves and focusing solely on the clothes hanging feature, I was able to reduce the overall cost of the rack, bringing it closer to my target budget of around $150, which was a big win.

While this change in the design was somewhat disappointing in terms of my original vision, I realized that it wasn’t a complete setback. The simplified version would still function well for the purposes of the project, and it offered a more cost-effective solution. Additionally, I saw this as an opportunity to revisit the design once the semester was over and incorporate the more complex features I had initially envisioned, such as the shelves and additional fixtures, by purchasing them online. This would give me the chance to refine the design and adapt it to my evolving needs and the availability of materials. This process of adjusting my design based on material constraints was a valuable learning experience. It taught me the importance of flexibility in the design process and the need to be adaptable when faced with unexpected challenges, and I think it will be a very valuable experience for me.
Conclusion
Within this project, I learned that the design process is one of flow and iteration. Inspiration came from numerous places, some that I rejected in the beginning and others that I rewrote until something felt particularly my own. By means of strategic planning, testing, and researching different possibilities within design, I was able to move toward a completed product of furniture that accurately reflected the aesthetic and functional demands of my bedroom. The challenges I faced in making changes to my designs and working on the aesthetic only made me appreciate more the relationship between form and function, and I am excited to see how this work will progress. The completed clothing rack is not just a functional item of furniture, but a reflection of my own style and the creative process that I have used in this work.
Works Cited
-
Pinterest. “Urban Industrial Bedroom Design Inspiration.” Accessed April 23, 2025. https://www.pinterest.com
-
“Bohemian Style Living Room Ideas.” Accessed April 23, 2025. https://www.pinterest.com
- Home Depot. (n.d.). VPC 1/2 in. x 18 in. Galvanized Steel Schedule 40 Cut Pipe. Home Depot. https://www.homedepot.com/p/VPC-1-2-in-x-18-in-Galvanized-Steel-Schedule-40-Cut-Pipe-22-720518/304751917
- Sigler’s. (n.d.). 113GS-D18 1/2″ Galvanized 18″ Nipple. Sigler’s. Retrieved from https://www.siglers.com/113gs-d18-12-galvanized-18-nipple-113gs-d18.html
- Pinterest. (n.d.). [Image of pin 563018698311686]. Pinterest. https://www.pinterest.com/pin/563018698311686/
1 Comment. Leave new
Hey! This is such a great post and really encapsulates the aesthetic you are following for this project. I like how you described the design process and how, when limitations arose, you adapted and quickly changed the design. Great job!