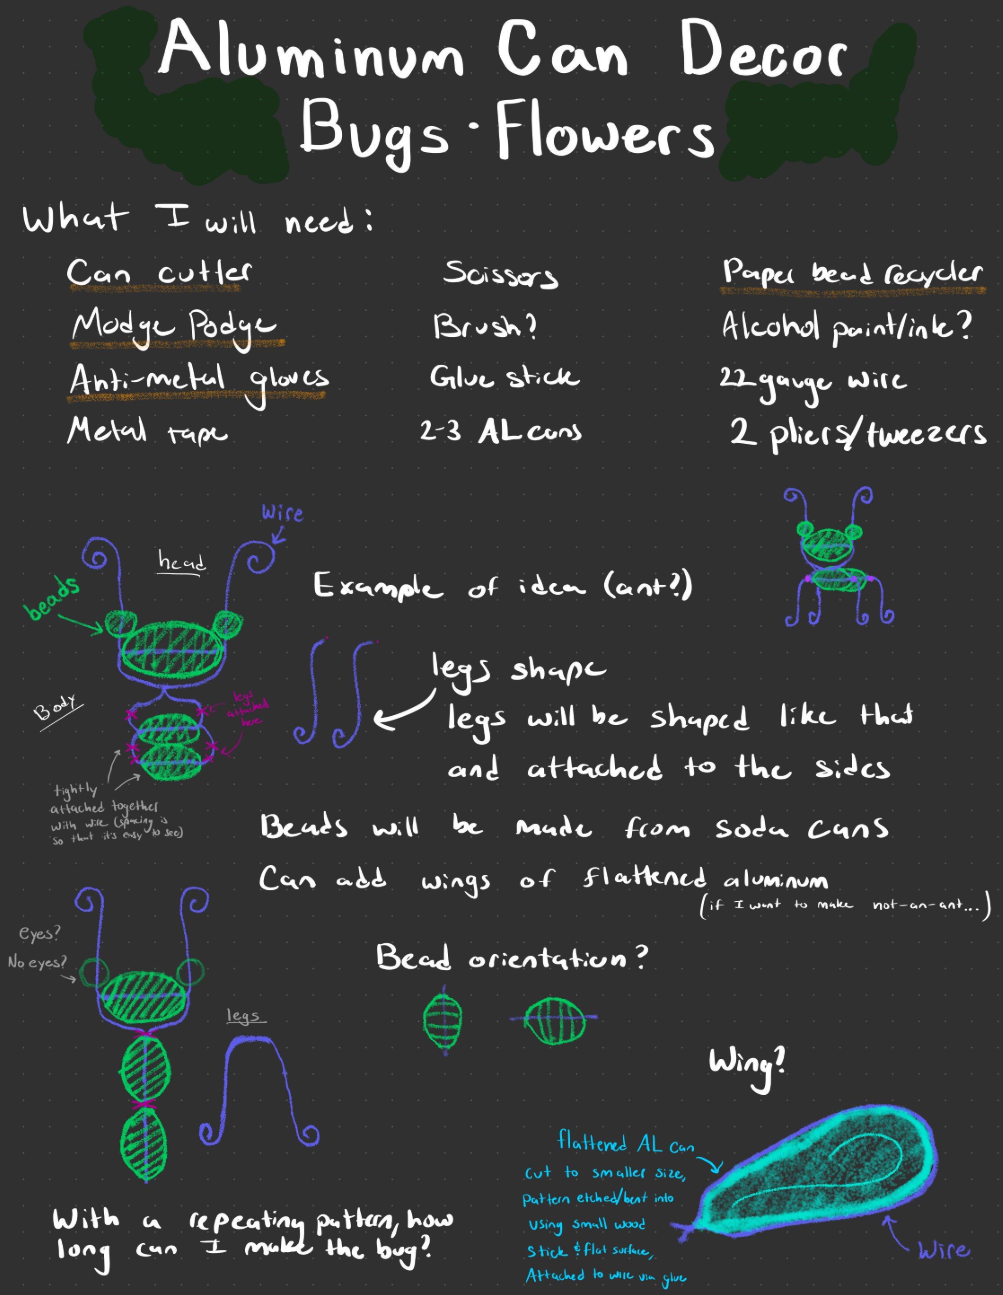
This is my initial design based off of upcycling aluminum cans and wires.
I wanted to base it off of Solarpunk!
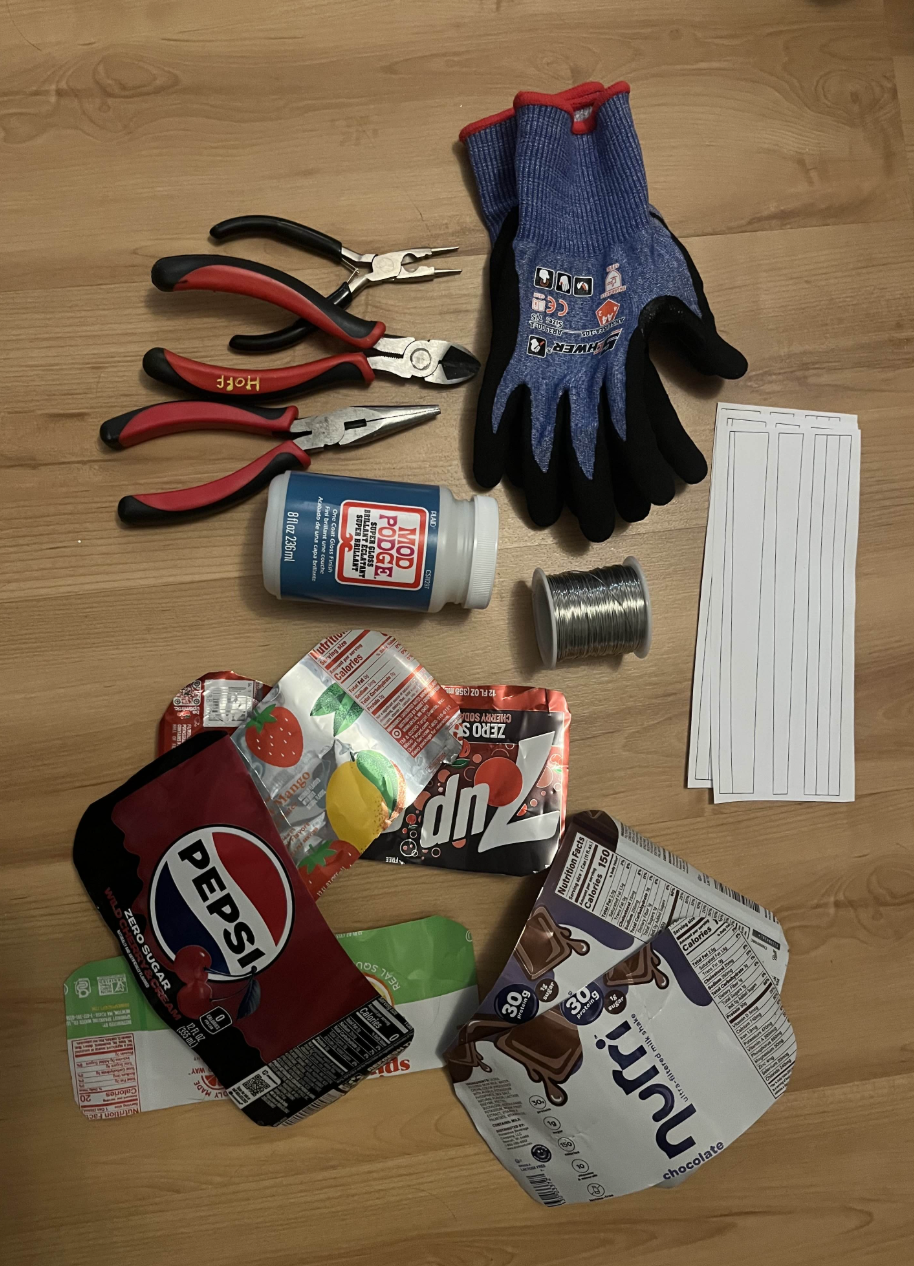
I used tape, gloves, scissors, boxcutters, three aluminum cans, a bead roller, bead templates, 22 gauge wire, and multiple miscellaneous tools. I did all of my work over a cardboard box to catch the aluminum scraps!
Below is a picture of tools, materials, and templates. The Modge Podge was left unused due to curing issues. I ended up screwing up so much wire that I bought my own. I ran out of my recycled wire from past projects and felt guilty for wasting so much wire (from the supply in the ITLL) during my attempts. I used 22 gauge jewelry wire. The flattened aluminum sheets are also seen. The material I used for the bug-like eyes was cut from drywall anchors I had left over in my toolbox (they’ve never been used until now); they are hidden under some shadow in this picture.
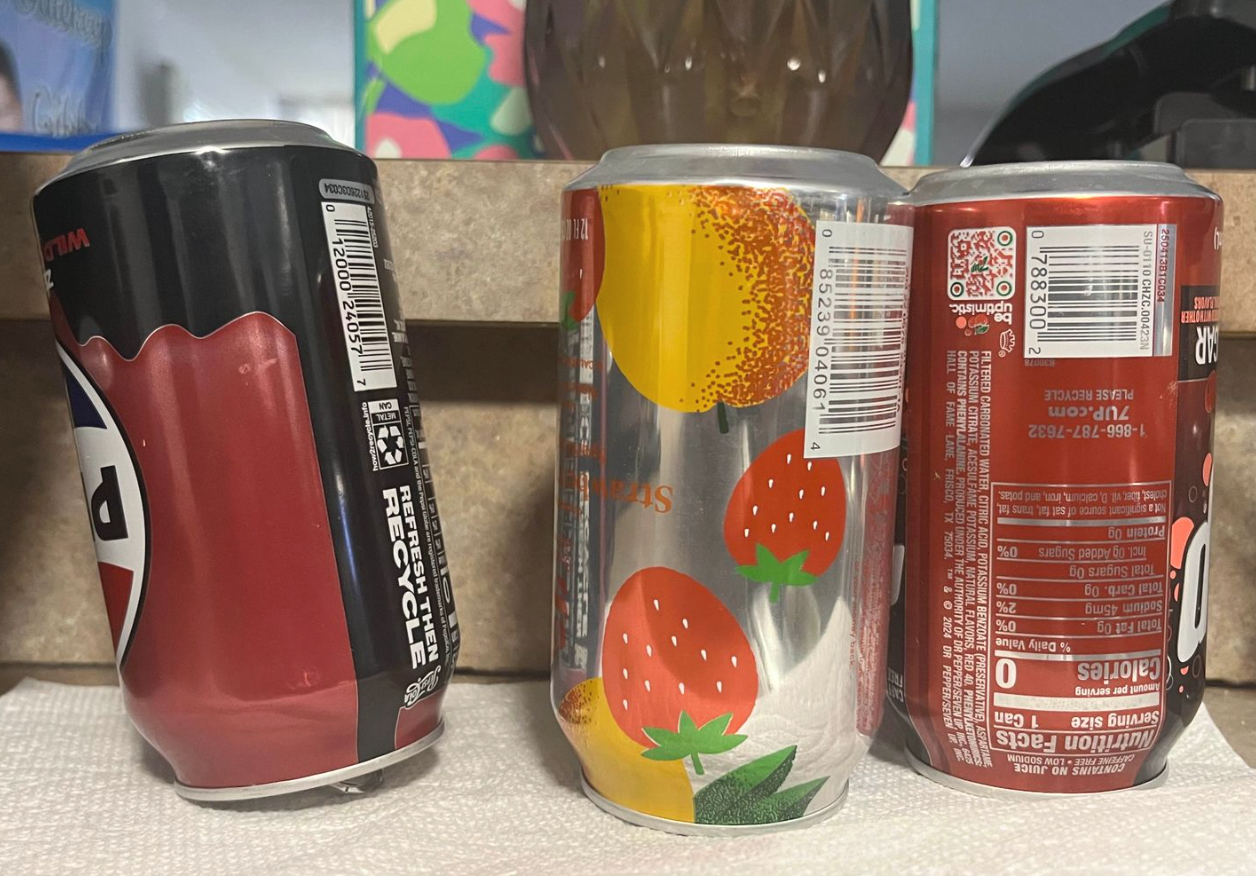
- Prepare the aluminum from the cans. I suggest scissors, a knife, gloves, and tape for cleaning up metal shards. Once the aluminum sheet has been cut, flatten it by crushing it under weight for a day and then using a table corner to flatten it (run it over the edge against the curve).
- Cut out the bead templates (any should work for this as long as it’s a paper bead template for rolling) and glue it onto the aluminum. Make sure it’s on the not-colorful side, so you can see the colors when you roll the beads. DON’T LET THE GLUE DRY! Cut it all immediately and separate scrap from template. It’s easier to remove the paper while it’s fresh glue. (Truthfully, the three identical bead patterns are okay to roll with the paper if you want it to be bigger. The head bead should not be any thicker.)
- Head bead: prepare by attaching the three sloping strips using tape on the colorful side. Line them up so it’s consistent and cut off any access. Add a small strip of tape to the very end of the small side (this will allow you to lock it in place once once rolled). Take your beading tool and roll tightly (but not too tightly). Try to keep the slope consistent. The colorful aluminum should be on the outside. Once rolled, use the tape on the end to lock it in place. (I added a few more small strips to ensure it wouldn’t uncoil.) Body beads: Cut them out and roll them. You don’t need to attach them, as these are small and not-sloping beads. Roll them tightly but not too tightly. Add tape on the end to keep it from uncoiling.
- Lightly coat the sides of the beads in modge podge or another clear sealant to soften the edges. DO NOT let it block the center thru-hole of the bead. It might take days to cure.
- Cut the wires using the jewelry pliers or other wire cutters. You’ll need three 3in wires and two 8in wires.
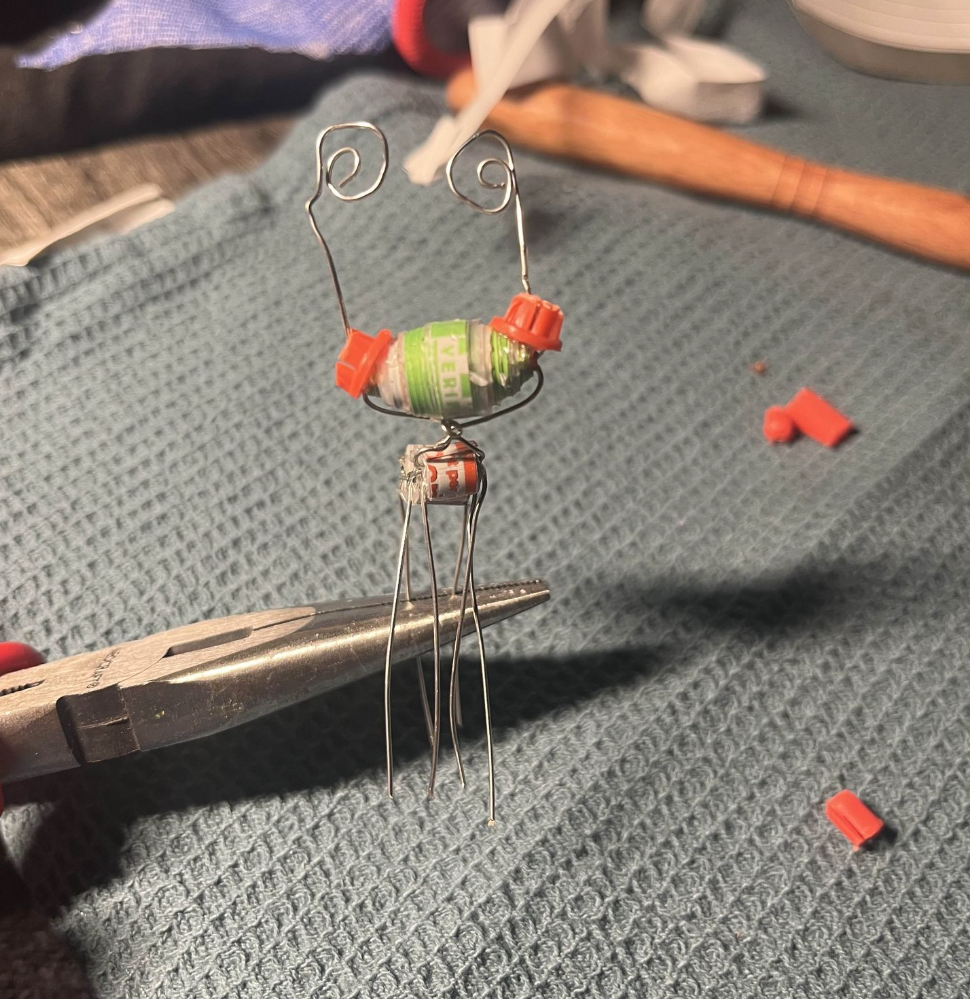
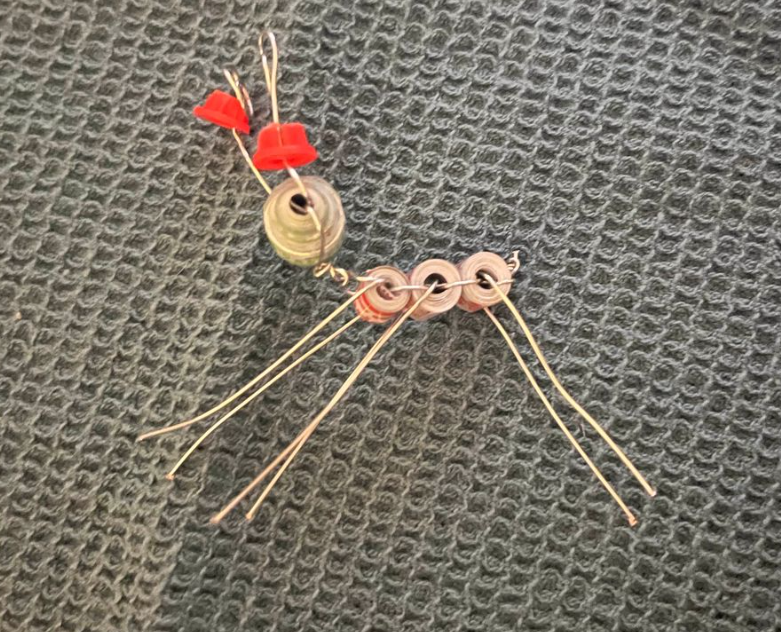
- Take the two 8in wires and add a curl at one end. Make sure the curls are equal in size. These will make the head.
- Assemble the head: Add the eyes, one for each wire. Then thread the not-curled end of the wires through the head bead in opposite directions. Bend the ‘antenna’ part at 90 degrees to lock in place (it should have 1 inch of lift from the head to the curl; as long as the two sides are equal, it doesn’t really matter). Pinch the not-curl-ends so that they point backwards, and cross them behind the bead. Twist them together so that they twist in the exact center of the head of the bead. Twist this a few times (I did 3-4 times) to make a neck and lock the bead in place.
- Assemble the first body segment: Take the two wires. Just like the head bead, cross the ends in opposite directions through the body-segment bead. For this first bead, it might be helpful to bend the wire in a ‘[‘ shape after the neck to make a more snug place to slot the bead. It’s really small so it’s hard to do. Tighten the wires around/through the bead. You don’t need to twist it once it comes through the middle.
- Assembling the other body segments: Take the two wires. Just like the head bead, cross the ends in opposite directions through the next body-segment bead. Pinch the wires so they’re square-ish to accommodate the bead. Repeat this for as many beads for the body as you want. Once you’ve placed the last bead, twist the remaining wire behind the last bead. Try to twist it so that it doesn’t poke out or risk cutting you. NOTE: Lengthen the wire if you’re adding more beads, and cut more 3in wires.
- Assembling the legs: Thread a 3in wire through each body bead. Position them so they’re even and all equivalent length, then pinch the wires into a downward position. These are your legs. They don’t need to be bent perfectly to stand yet; they just need to be even. (Or they don’t need to be even if you like it having uneven legs.)
- Gluing: Once the legs are satisfactory, grab your superglue. Use a toothpick to precisely apply globs/dallops to important locations. This includes but is not limited to the eyes (to glue them onto the wire or bead or not at all), into the thru-hole of each bead to lock it in place with the wires, and into the body beads to lock the legs in place. Let it all dry completely. NOTE: If you did not use sealant to cover the sharp parts of the beads — or you worry about the beads unraveling — dab a bit of glue onto the sides of the body beads or onto the sharp corners of wires/beads.
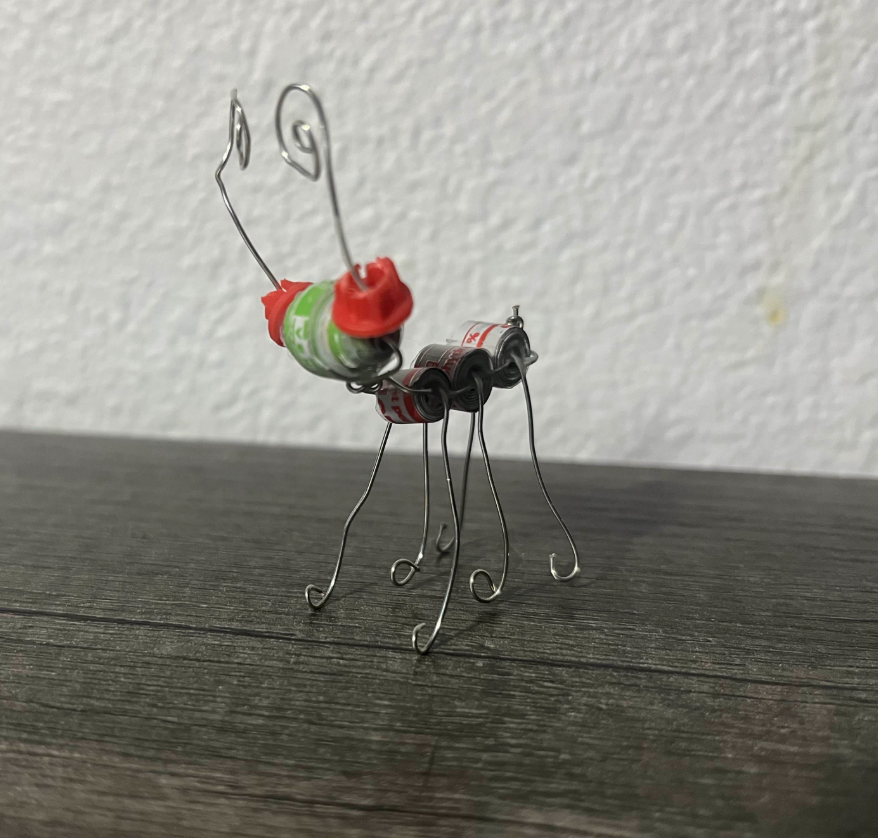
- Finishing the assembly: Once the glue is dry, use your pliers to curl the feet of the thing. You can use this to make them all equal if they weren’t equal lengths before. Bend the legs so that it can stand by itself.
Before I show the final product, I wanted to cover what I messed up.
Initially, I was going to have the beads coated in modge podge to protect from the sharp corners and thin edges I may have missed. However, the website for the product said it would cure in 4 days, but it has been over a week and it has not cured. I tried a different solution to protect from the metal, but all of the beads stuck together after the wind knocked the tray over during drying.
I did not properly allocate my wire and used more than I needed to.
Another issue: the template I used for the beads wouldn’t stay on the metal, so I used a gluestick and let them dry. When it came time to remove them, the paper would not come off. (I didn’t know a normal gluestick stuck to aluminum so well!) It made the beads thicker than intended when I rolled them, but I think it added character by making it look a little chunky and off-kilter.
My biggest mistake of all was assuming I could use bells (that I’ve collected from old/broken cat toys) as eyes or feet or added to the neck… The cats got ahold of one of these (lured to it by the bell noise, I assume) and it disappeared into the cat toy dimension.