

I think I am off to a good start on my project. Since my design review presentation I have followed the schedule as much as I could. Even thought I am not as far as I want to be, but I feel that I am getting promising results with all of my tests and prototypes.
Last two weeks I have been:
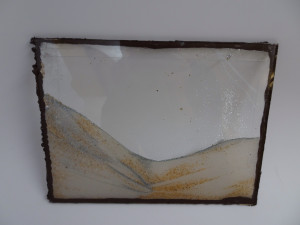
- Experimenting with an existing Sand Picture that I borrowed.
- Some of the liquid of the one I borrowed evaporated over time and I am trying to fix it.
- Came to a conclusion of adding 50% Alcohol and 50% Salt and Water.
- I think this will keep the fluid less turbid and avoid mold forming over time.
- Collecting different materials:
- 12 different samples of sand
- Sand, Alumina, Aluminum oxide, Glitter, small spheres
- Ranging from 0.5microns to 2mm
- Glass and Acrylic
- Sealant: hot glue and silicone
- Frame: aluminum sheet and wood
- Stand 3D printing
- 12 different samples of sand
- Low resolution tests
- I put the hot glue and silicone in water for 3 days. I saw that Silicone performed better so I used it.
- Using a spoon I put the different samples of sand/particles I have in a jar. I did this to test the following:
- How fast the particles drop?
- Do the particles have an adhesive force and stick together?
- Do they make the water turbid?
- Do the particles trap air bubbles in them?
- Does their color change in the water, or do they change the color of water?
- Is this a good cleaning process for the sand before I put them in the sand picture?
- How will different grains mix?
- Building a first prototype
- This was the biggest challenge but I wanted to get ahead and build one. I had this idea that If I fail earlier in the project I would be able to apply some modifications to what I am doing.
- I also trained my hand before I did any of the operations.
- This step actually helped me because I started learning about the tool that I need to build one of these.
- So the Tools are:
- 1mm x 3mm x 30cm spacers
- Scissors and a box cutter
- Wood: a pad and two square bars
- Tripod and a camera (since I am trying different ways to document what I am doing)
- A Ruler
- 3 empty one liter bottles for mixing the liquid
- Syringes
- Wipes
- Spoons and a cup (for sand)
- Sand paper (to sand down the sharp edges of glass
- Safety: gloves and googles
- Double sided tape
- The procedure I followed for building the first prototype:
- Sand down the edges of the glass
- Clean the Glass after sanding
- Put the first glass sheet on the wood and stick it down with double sided tape
- Put the spacers on the first glass sheet and tape them in place
- Put the other sheet on the paces and have the wooden bars on top of the sheet where the spacers are located
- Start applying silicone from the edges only on three sides of the frame
- Let the silicone dry for at least a day
- Cleave the extra layer of silicone with the box cutter. This will allow the Silicone to dry faster
- After drying and cleaning fill the frame with water and leave it for 1 hour on paper to determine if it leaks. If it does add silicone to the parts where it leaks and leave it to dry
- Add the sand and the solution to the frame with a syringe
- Hold the frame vertically to seal the last (4th) side of the frame and let it dry for a day
- Add more fluid with a syringe if needed
- Next Steps:
- After building my first prototype I learned a lot from it. It still does fully function as I want it to but here what its missing:
- I can’t really control the flow of the sand, the sand I have is too heavy and course.
- It is missing a frame. I will add wood, 3D printed ABS or metal sheet. I am leaning more towards wood.
- Add a support to the frame
- After building my first prototype I learned a lot from it. It still does fully function as I want it to but here what its missing:
I still have a lot ahead of me but I will keep pushing until I am completely satisfied with my results.
Note: I am having difficulties uploading images and videos to this post and I think its because of the load on the website before our post deadline. I will post my images and videos once the website allows me. Thanks for your patience 🙂
4 Comments. Leave new
Wow, it looks like you are making a lot of really good progress on your project. making a first prototype is a really big first step. I think a wood frame would definitely be better looking than plastic. Have you thought about adding a lever that can turn a beam in the tank to control the flow of the fluid even more? Makes the project more dynamic also. Good work so far.
Looking great! Tricky project trying to reverse engineer/design all this. Have you considered using the methods you’ve learned and the materials you have to make a new different kind of design that further deviates from the inspiration which may require less guessing? Maybe allowing the user more inputs or changing shape to more like a snow globe?
Whichever way you go I think a wood frame will compliment your current brown/gold color scheme very well.
Thanks. Right now wood is my front runner for a frame, do you recommend any other materials? I am still experimenting with giving the user more control but it is not as easy as I thought it would be.
Wow it really seems like you have a solid foundation and game plan going! Your first prototype looks amazing despite the finishing. I know that when you play with the layer of air, that can really help slow down or speed up the flow of the sand. I think a thicker layer of air will really slow the flow down. I have heard of injecting the air into the frame with a syringe (which might be difficult to get a hold of) or maybe a ball air pump could work, they have a very small diameter opening that might work!