
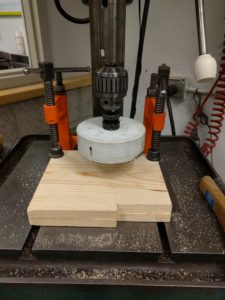
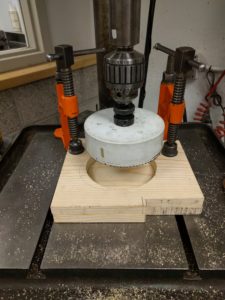
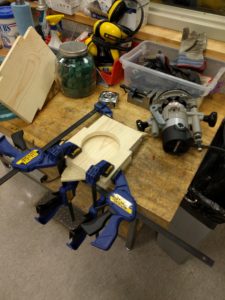
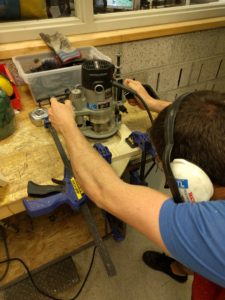
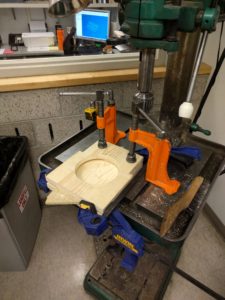
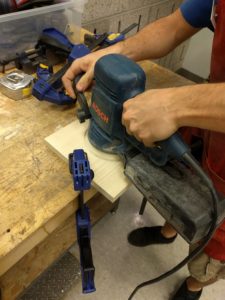
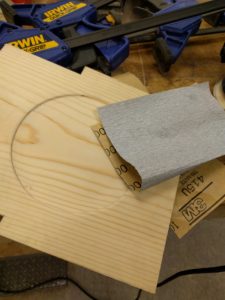
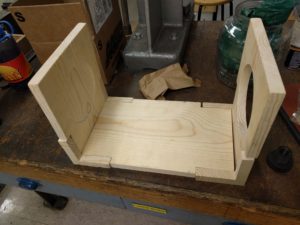
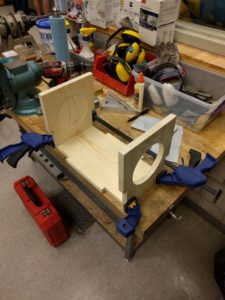
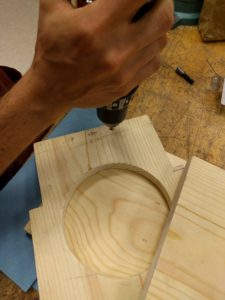
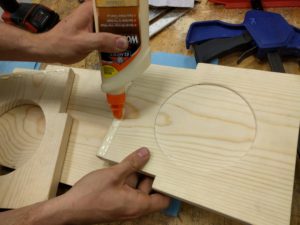
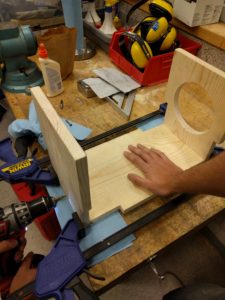
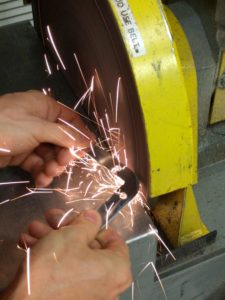
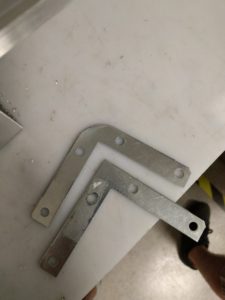
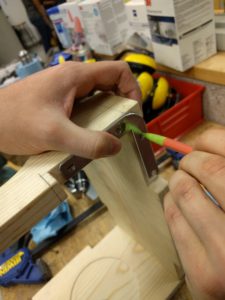
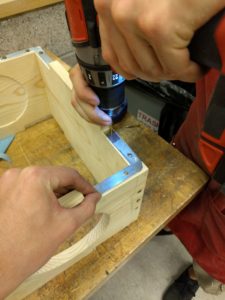
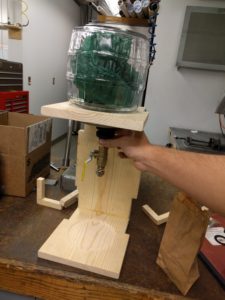
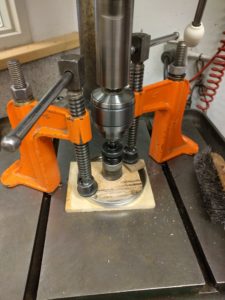
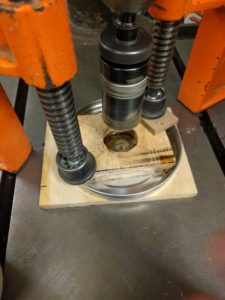
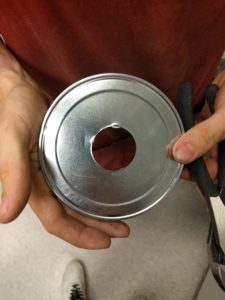
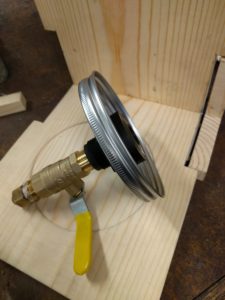
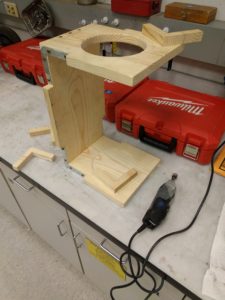
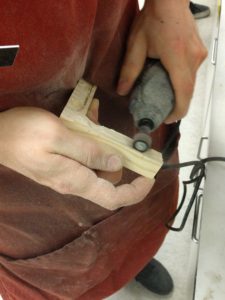
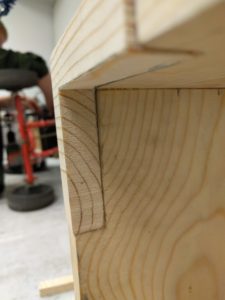
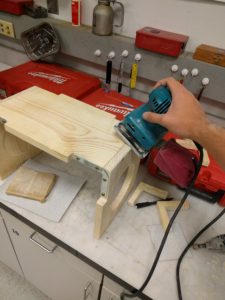
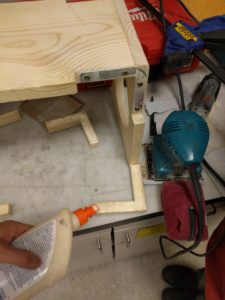
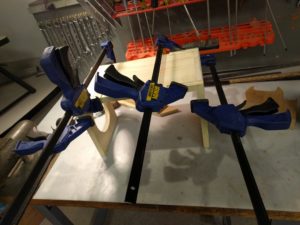
The build is mostly done! It was quite the process. The previous process can be seen in my other blog here. From the last point where the wood was cut to size, I started by using a hole saw to cut the hole for the jar and valve (pictures below). Once the hole was cut it was used as a template to cut a small circular recess to help locate the collection jar. The clamps were posing a problem for router access so one half was cut on the table, and the other half was secured to a drill press so that the other half could be routed. The surfaces came out a little uneven and so I took an electric sander and smoothed out the surfaces. Then I took sandpaper and hand sanded the corners and edge so that everything was smooth. I dry fit everything again to make sure it all fits. The frame was secured with clamps and holes were pre-drilled so that the wood would have less chance of splitting once it got screwed. once the holes were drilled the top and bottom pieces were countersunk so that the screws will be flush with the surface. The pieces were then glued and screwed together and held with clamps while the pieces dried. Next the angle brackets were ground down so that there could be more room for rounding the corners of the wood. The holes were then marked out on the frame where the brackets are going to be, and had holes pre-drilled. Then the brackets were screwed into place. The jar and valve were placed on top to ensure correct sizing. A hole saw was used to make a hole in the lid for the valves. The problem was that the metal was thin and there were concerns about the saw tearing the metal. Wood was used to hold the top and bottom of the lid so that there would be more support. The valve was screwed into the hole. The fit was perfect. The last few steps involved dremeling out channels for the corner covers so that they hide the brackets. Once they all fit, then they were glued and clamped. Once the glue is dry, the project is done! I have wood stain and will staining the frame over the next few days. I also have clear protective coat for more protection to the finish.
(apologies for the poor formatting of the pictures. Nothing I do seems to get them to be in a clear order, but for the most part just go left -> right, and top -> bottom for the most chronological order).
8 Comments. Leave new
The attention to detail, and the overall quality of your woodworking are excellent. The project turned out nicely, and the stains give the project a cool craftsman type. I bet your friend is going to be extremely happy about receiving his coffee brewer, since caffeine is a religion.
I can always appreciate a woodworking job well done. Sweet project!
Good job! I like the attention to detail you put into your brewer, especially with the precise fabrication and classy wood staining. I hope it produces some great coffee for you.
I love the craftsmanship you put into this. Great work!
The places where you grinded to fit look incredibly flush. Was there a lot of trial and error?
Great looking frame. I like how the stain came out. It may be different if it is filled, but I noticed that the top jug tended to want to fall out of the hole, even with the valve there to stop it. This could be for future improvements, but if you could find a jug that could be filled from top and the valve could attach from the bottom, you could permanently secure the jug to the frame so that it would seem a bit more stable. Regardless, I think it came out fantastic, and I’m sure your friend is going to love it.
Looks nice! I think it would look nice to apply some sort of finish to the wood. Maybe even a nice veneer.
Good job on the build Ben. This turned out to be a successful project. I like that you found out a way to drill through the stainless steel cover. I like that you dremeled out the channels, this is a simple solution and it looks like it serves the purpose. Did you show it to your friend yet? What was the responses that you got in the Expo? Are you only using glue to attach the wood together? I know that you don’t want to hammer in nails on the side for the aesthetics but how good is the glue? Good job, you really managed to get an excellent looking coffee brewer in no time! I hope your friend enjoys his coffee.