
Introduction
I really like how the class starts off with an upcycle project reminding us of the fact that we can implement things that we have lying around into useful, function products. I decided to make a key hanger for this project since I needed one at home. I looked up key hangers online for different ways and realized that I can make it out of anything as long as the keys can hang, obviously. I was looking around my tool box and garage and found a block of wood that could potentially be used, and a bunch of old keys. So the idea came up of bending those keys to attach them on the wooden block and use them to hang the keys that I currently use.
Inspiration
The aesthetic that came into my mind when I gathered the keys and brought the wooden block is some kind of a raw looking wooden aesthetic, think about wooden kitchens, houses or maybe phone cases. Something maybe like the following figure, it shows a cabin from the inside having a wooden aesthetic.

I addition, I also wanted to have the influence of keys that would have some kind of an exposed/rustic aesthetic. Like a building that is not painted from the inside like exposed concrete and such (from lecture).
Vision
The way I imagined this project outcome to be as an attractive appealing look that would make someone admire how simple, yet how creative it is. In addition, I really liked the idea of having it be made out of keys.
Design Process
The following flowchart demonstrates the process I followed when I made my product. This is actually a different one from the graphic loop I posted earlier. This one is more specific to my project and it is basically the one I followed. The difference between them is that the design loop I posted in another blog demonstrated my idea of a very generalized design process that includes having a team and whether the product was to be manufactured of if it was a software. Click here to go the the blog of the old design loop process.

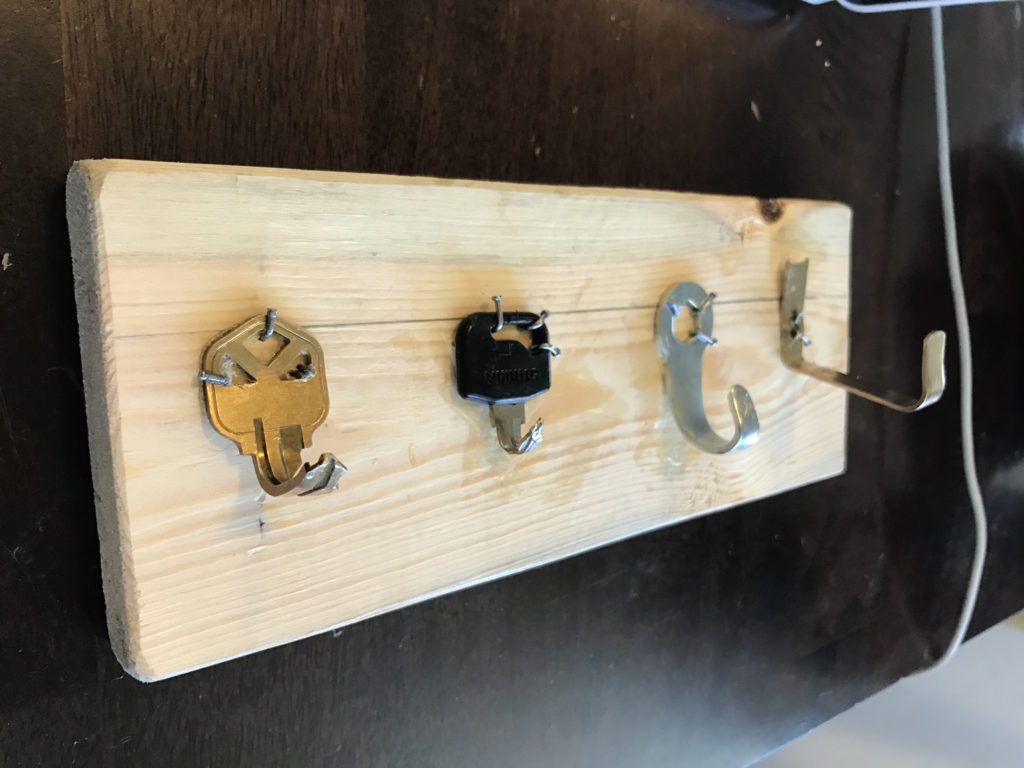
Implementation started off by acquiring block of wood that is 8″ x 4″ x 0.5″ and a bunch of old keys.
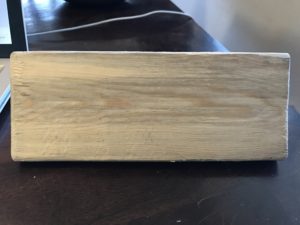
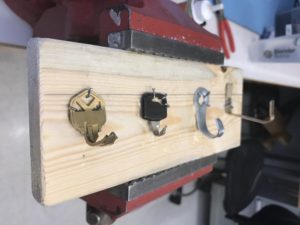
After getting the wood and the keys, I started off by sanding the sharp edges off the wood and made the block ready for keys to be attached to it. Next, I bent the keys using a vice and a hammer so I would hold the keys in the vice and hammer them. The problem I faced was that a lot of the keys I had started breaking due to the brittleness of those keys. I initially wanted to have different types of keys to make it have a random look. As you can see in figure 4 below, the two hangers at the right end aren’t door keys, and that is because all the door keys I tried to bend broke.
I then used nails to tighten the keys on the wooden block. At first, I didn’t think it would give them such an exposed look but the nails in my opinion reduced the aesthetic look of the wood and the keys. Which in result gave the final product some kind of a sketchy look and although it would hold the keys, it doesn’t look very attractive.
Functional & Artistic Goals
For functionality, the product works as intended and would hold the keys that are hanged on it. On the other hand, I don’t believe I met my artistic goals of the aesthetic looks I was looking for. The exposed nails and different types of keys gave it a different type of look. The options I am considering in order to improve are:
- Use different time of wood, maybe something wethered looking wood.
- Use four similar keys instead of different ones
- Find an alternative way to attach keys to the wooden block.
Next Plan
My next plan is to refine the artifact according to the critiques recieved and the list of improvements I have in the Goals section above. It is always rational to iterate the process of making a product towards improving it. This blog post will be updated with the refined work once it is acquired.
Click here to watch the video presentation. Note that the video is 4 minutes long since I started recording half way through the presentation, but I repeated the first slides for a quick intro.
Citation:
- Figure 1, http://www.logcabininteriors.com/aesthetic-small-cabin-staircase-attached-by-light-oak-stair-handrails-alongside-rattan-sofa-frame-including-striped-chenille-cushion-covers-around-wooden-wall-panels/
8 Comments. Leave new
This is really cool! I like the fast that you are using keys to hang keys. It’s ironic art. I agree with what Professor Hertzberg said about heating the metal more, if you try recreating this project. Great Job!
This is a cool idea. Use keys to hold keys! It’s a very simple idea to that can be very useful. It would have been cool if you had a bunch of old keys and made the whole thing out of them. you could have welded them all together for the frame and then welded the main keys to hold the real keys! Overall great idea.
Hi Faisal,
The “meta” aspect of this design is amusing, and I like that you tried hard not to buy anything new. Sometimes not buying anything takes more effort and time in terms of sourcing materials that you need, maybe your team can help you with this in the future if you need it. Also, I’m glad in the end that you would use a different fastener next time. It is a delicate balance between pure recycling and getting the final product that you want. I liked your creativity!
I like the idea of creating something out of necessity rather than going to buy an item to accomplish the same task. I like the aesthetic of this product how the wood looks natural. I also like the idea of using keys to hang keys. Great work.
This is definitely a clever idea, its almost humorous to hang keys onto keys. But I agree with your points that some more extravagant wood would be nice and using solely keys would be nice as well. But I do understand how difficult it must’ve been to bend the keys without a torch. I look forward to seeing the next iteration, this is a wonderful idea.
Very functional and very genius idea for making a key hangar. I really like how you used physical keys as the hooks and also utilized different types of keys instead of just standard house keys. This idea would look great on a piece of drift wood or some type of wood that you took right out of nature, maybe something weathered. I also like how functional your project is! Good job.
It was great to see that your project applied to a problem that you had. It was very simple in material, but also very creative. The premise of reusing old keys as hangars for your current keys is very entertaining. It was also neat to hear how different keys required different approaches to be able to bend it.
I love that you made something that spoke to a need that you had ! Nothing like annoying roommates to spark a creative idea ! Its also great that you didn’t really buy anything new and you took the recycling part of this seriously.