
Hello,
This is the description and follow-up for how I made my standing desk prototype, and some discussion of the what the actual project will be like.
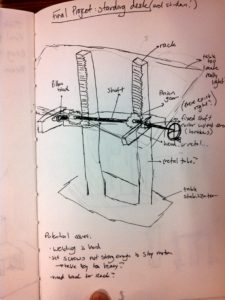
Original Inspirations:

Ideation/initial design
Starting with these initial ideas floating around in my head, I started to draw my design. for various reasons, the designs ran into road blocks, as I will explain here.
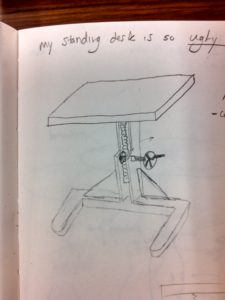
This design was too expensive, and probably too heavy for what it needs to do, and what I want it to look like. It’s also difficult to get all those gears to line up right.
A little simpler, with only one rack and pinion, but still ugly-ish, not fragile enough.

It’s too complex in these previous drawings. The purpose of this idea was to explore increasing delicacy and simplification of mechanisms and cost
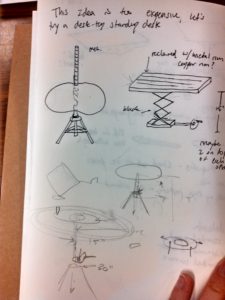
Making the desk as a desk-top desk would make it smaller, and therefore cheaper. But the biggest problem with this is that there is really limited space below the table top to put mechanisms.
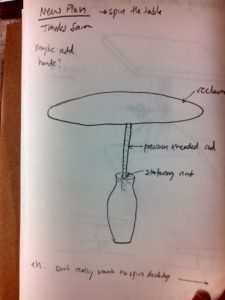
That’s true, that the threaded rod is more elegant, and it is more versatile. In this design, the desk top spins to make the table go up and down. Not ideal if you’ve got a cup of flaming coffee on it.
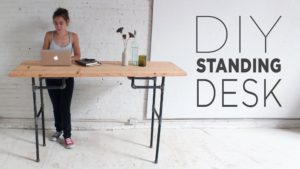
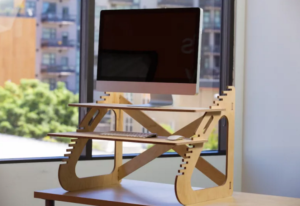
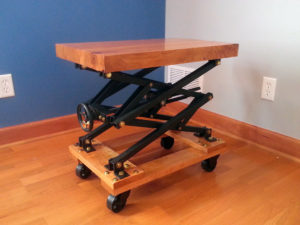
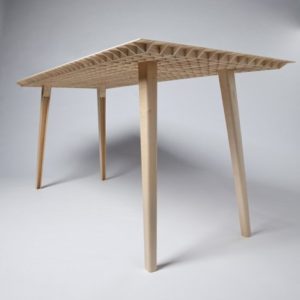
More focused internet inspirations
This section is about focusing more on individual pieces from my chosen design:

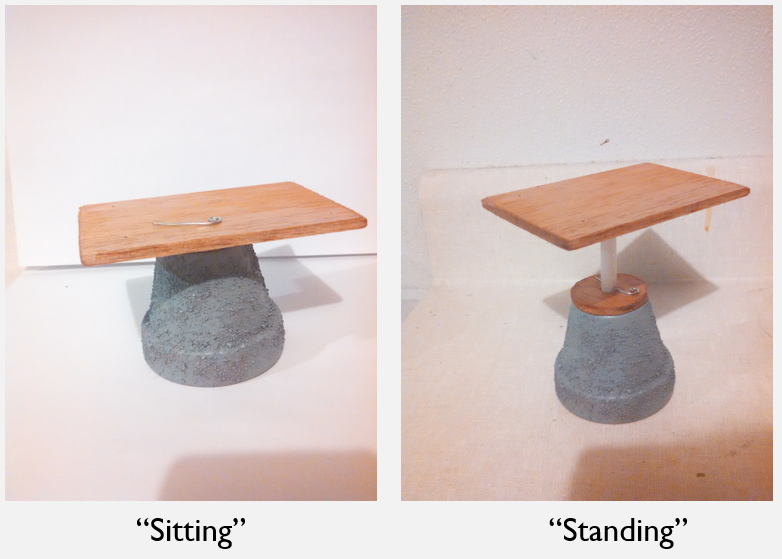
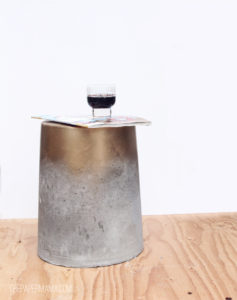
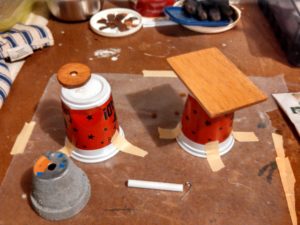
This is the final chosen idea from the ideation steps. A heavy, yet hollow base has a plastic, thick rod through it and a bushing. The table top is attached to the rod. The desk simply slides up and down, and a brake in the form of holes through the rod ,with a peg in it (This will make more sense with the prototype, later)
One idea I had for the base, to make it heavy, yet simple was to make it from concrete, like so:
The prototype itself:

As you can see, when the desk is in the “siting” position, the middle stem is mostly all the way inside the base. Then the user would pull the desk up, and insert the peg to keep it there. Multiple holes in the stem allow for different heights.
How It’s made:
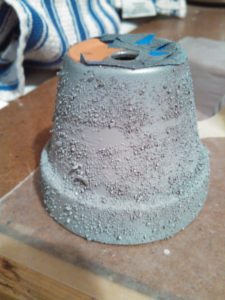
- The base.
Cover the flowerpot in podge-modge glue, then use some sand from the backyard to sprinkle on the glue. Let it dry, and then put some grey spay paint on it, and let that dry.
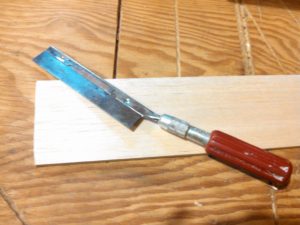
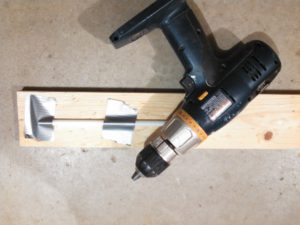
2. Cutting the wood pieces
I used balsa wood for the table top, and the piece that connects the base and the stem. I used a fine-toothed saw, a drill bit, and a sandpaper to make it work. I used the drill hit to cut a too-small hole for the stem, by hand, then sandpaper on a pencil to make it just large enough to accommodate the stem. Lastly, I cut out the circle from the wood, after having traced the flowerpot bottom circle onto it.

3. Making the stem
Then I used a piece of polystyrene tubing (the kind used for model building, from McGuckins) and drilled holes in it for the brake peg, and cut it a decent length.

4. Let it dry, and put it all together with superglue
Artistic and functional goals
Functional
- The prototype gets the point across
- Base still not heavy enough
- Stem does not slide very smoothly
Artistic
- I like the cement look of the base
- The holes in the stem aren’t straight, might need machining on the real thing
- The ratios are not entirely accurate
What’s Next
- Time to upscale!
- Need to think more carefully about large-scale aesthetics
- Need to think more about fasteners not present in prototype
Thank you for taking the time to look at my prototype!
Presentation video
references
- http://www.google.com/aclk?sa=l&ai=DChcSEwingoLTiLfSAhUOgL0KHY1KC-4YABATGgJ0aA&sig=AOD64_3VUEZIgSIO0OSU4VHL-uUbZOow4Q&ctype=5&q=&ved=0ahUKEwiBqvvSiLfSAhUJxmMKHfSsCoAQwjwIHQ&adurl=
- https://www.google.com/aclk?sa=l&ai=DChcSEwingoLTiLfSAhUOgL0KHY1KC-4YABATGgJ0aA&sig=AOD64_3VUEZIgSIO0OSU4VHL-uUbZOow4Q&ctype=5&q=&ved=0ahUKEwiBqvvSiLfSAhUJxmMKHfSsCoAQwjwIHQ&adurl=
- https://www.google.com/url?sa=i&rct=j&q=&esrc=s&source=images&cd=&cad=rja&uact=8&ved=0ahUKEwi_x87LibfSAhVSyGMKHcA8AcYQjRwIBw&url=http%3A%2F%2Flifehacker.com%2Fthe-complete-guide-to-choosing-or-building-the-perfec-1682274258&psig=AFQjCNFoj278rc1mwnYYQX37_kSCmtdp8A&ust=1488518382573047
- https://www.google.com/url?sa=i&rct=j&q=&esrc=s&source=images&cd=&cad=rja&uact=8&ved=0ahUKEwjM_YXSirfSAhUE_mMKHcpUALUQjRwIBw&url=https%3A%2F%2Fwww.pinterest.com%2Fjeanguy041%2Fscissor-lift-table%2F&psig=AFQjCNGAb8Ncb5JMxTL6ZucC2_E8VPb3sQ&ust=1488518761601516
- https://www.google.com/url?sa=i&rct=j&q=&esrc=s&source=images&cd=&cad=rja&uact=8&ved=0ahUKEwjA5L-kjbfSAhVO22MKHT2UABgQjRwIBw&url=http%3A%2F%2Fwww.diys.com%2Fconcrete-coffee-tables%2F&psig=AFQjCNGQCm4uJLKWRrvoz46Ui2AEcnvvqQ&ust=1488519445377258
- https://www.dezeen.com/2014/01/17/wooden-table-by-ruben-beckers-weighs-just-4-5-kilograms/
10 Comments. Leave new
Great job! I really like that you made something that you can use in your everyday life, I wish that I had done that. As someone who has done construction work, I was able to immediately recognize how you are going to make the base.
You planned out your project really well. It looks like you have worked through the things that you want and don’t want to be a part of your design. Your prototype looks well-made so I can only imagine what the actual final product will look like.
Your reasoning in your design process really shows in your final design. I think the pin system is good, however it does limit the amount of weight. Have you thought about adding a spring? This would help the user when lifting and also alleviate stress on the pin if the table has significant weight. As for the base, perhaps consider using concrete to encase a lighter object so you can achieve not only the dimensions you want, but also the weight. This is a great project, I look forward to seeing the finished product.
Really awesome to see your idea develop from when you first mentioned it in our team discussion. I really like the aesthetic that you’ve decided to pursue and I think combining the different textures of the concrete and the wood makes it interesting but also modern and industrial which can sometimes be contradictory. Anyways, great presentation and I’m excited to see the end product!
This is a really cool project! Sit/stand desks are really nice to have but you are right, they are really expensive. It will be really cool to see your more economical version. The prototype is really well done. It is easy to see that you put a lot of thought in it.
Very detailed prototype! I think an adjustable desk is a fantastic idea especially combined with the aesthetic you are giving it. I would be careful with how large your concrete base is. A full bucket of concrete can be heavier than expected and may be a huge headache to move around. Maybe consider using a large stump or log that has been squared off.
I like that you went through the process of sketching many possible designs and explained why you finally landed on the design you are going to pursue. I have always wanted to find a cheap and stylistic standing desk of my own and I think this is a great solution to the problem. I am excited to see the final product.
I think the industrial chic aesthetic can fit really nicely with this design. With the proper wood and metal the aesthetic can be presented really well. Good work
Really well thought out presentation ! Great job! I think the project is a great one and you seem to really have a handle on the mechanics of it all .
Amazing work, really shows how detailed and thoughtful the idea is. I like how you got your inspiration and reasoning. The design process and the steps for making the prototype are thoroughly presented. Looking forward to seeing the final product. Good job!