
Background
I built a totem themed with the character “Rick”, from the TV series Rick and Morty, for my final project.
A totem is an artifact that many people brings to music festivals. A totem is generally an art piece that is fastened to the top of a long pole, that is carried around at festivals. Primarily, totems are used to help groups of people stay together among the many thousands of other festival-goers as they move between stages.
Here are a few examples:


I enjoy the psychedelic theme, and feel that it fits well within the aesthetic scheme seen at many EDM music festivals. I also enjoy watching a TV show known as “Rick and Morty”, whose aesthetic could be described as futuristic and wacky. I chose to combine these two aesthetics for my project by creating a totem using a plushie Rick that is decorated in sound-reactive LED strips.
For reference, below is an image of a scene from “Rick and Morty”:

Before solidifying my artistic choices, I considered other potential aesthetic themes: steampunk, minimalist, and one that uses super-normal stimuli. While my final aesthetic is well within the psychedelic category, I was able to incorporate some basic elements that use super-normal stimuli, such as the large sunglasses on Rick’s head, and the large head, legs’, and arms’ proportions relative to the body.
My goal was to make the entire Rick plushie from head to toe a little under 3 ft. I also wanted to use two 16-LED neopixel rings, that would be mounted in sunglasses attached to Rick, and around 150 other LEDs, taken from an addressable LED strip.
Project Constraints
Before making any hard design choices, I considered a number of constraints that would inform my decisions related to technical, aesthetic, and functional considerations.
Technical Design Constraints
Some of the relevant totem guidelines that the festival outlines are:
- Maximum height can be 10 feet
- Totems must be made from a lightweight material (e.g., foam, PVC / no solid metal)
- PVC, light wood or aluminum poles must be no thicker than 1 inch in diameter.
Aesthetic Design Constraints
- The totem is attempting to fit within the psychedelic theme, and within the style and aesthetic created by the show Rick and Morty. (IMDB & Images reference)
- The totem overall needs to be decorated with vibrant colors, in order to fit within the defined aesthetics.
- From a materials standpoint, I would like to design the Rick plush figure to be squishy, and without any potentially dangerous protruding elements. Along similar lines, I am planning to contain as many electronic components as possible within Rick, and to waterproof any elements that are exposed to the exterior.
Functional Design Constraints
- The project requires powering a total of 182 LEDs, including a microcontroller and microphone driver (to allow the LEDs to be sound-responsive), and needs to be operated for approximately 12 hours at a time. This constraint mainly relates relates to power management for the light output (intensity) for the LEDs and technical complexity that can be used to animate the LEDs.
- The totem has a “dancing” functionality that is manually operated by manipulating poles attached to the figure’s hands, feet, and head. Accordingly, the plush figure needs to be built so that the arms, legs, and head can move freely without interference. Additionally, the wiring and components need to be set up to accommodate the same.
- The size of the overall totem (including the weight of all electronic components) needs to be around 5 lbs or less, and the weight needs to be appropriately balanced so that the totem is not overly top-heavy.
- All of the electronic components need to be able to be controlled by an Arduino microcontroller.
- I was aiming to constrain the project to cost at or under $150
Project Progression
I began by searching online for Rick plushies. While I found various “Rick and Morty” characters, including a Rick head plushie, on a website, Etsy, I could not find an artifact for my totem that I considered suitable. Therefore, I chose to create my own.
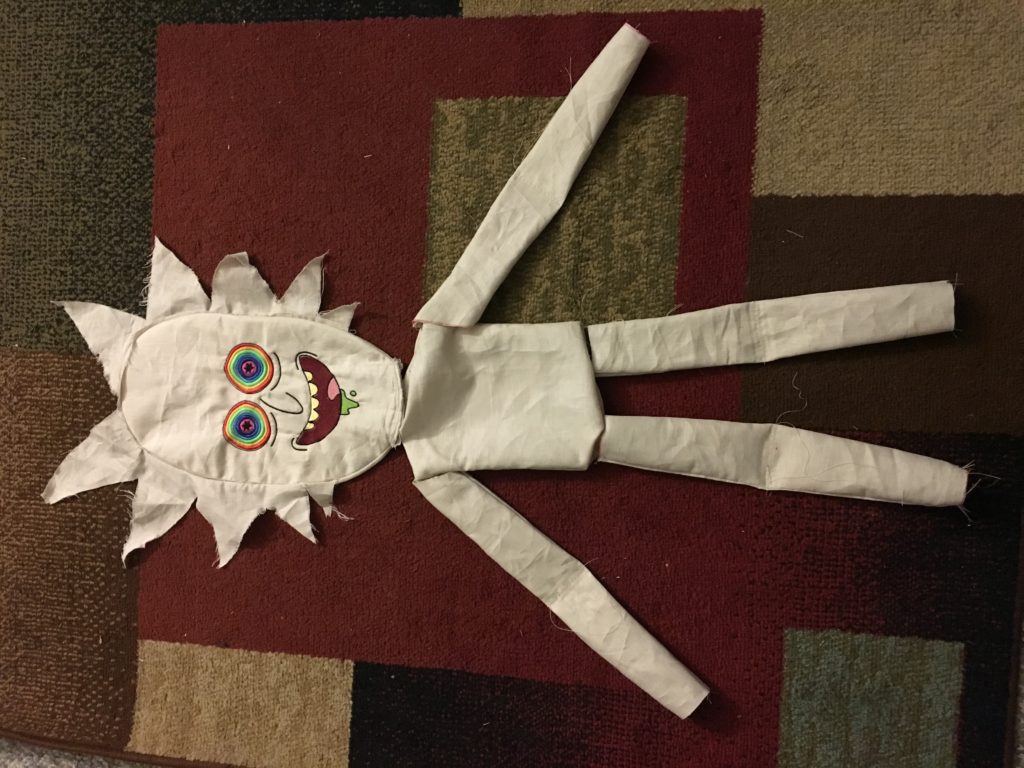
First I created the head for the plushie. My aunt owns a few commercial embroidery machines, and generously allowed me to use one to embroider the facial features and outline for the head. I started with an image of Rick’s head that I cut out of an image found online in Photoshop. The image I chose had Rick looking slightly off center from the camera, so I had to modify the facial features in the image to appear to be looking straight ahead. I also stripped out the colors, and other extraneous elements. Finally, I vectorized the image so that it could imported into the sewing machine layout software.
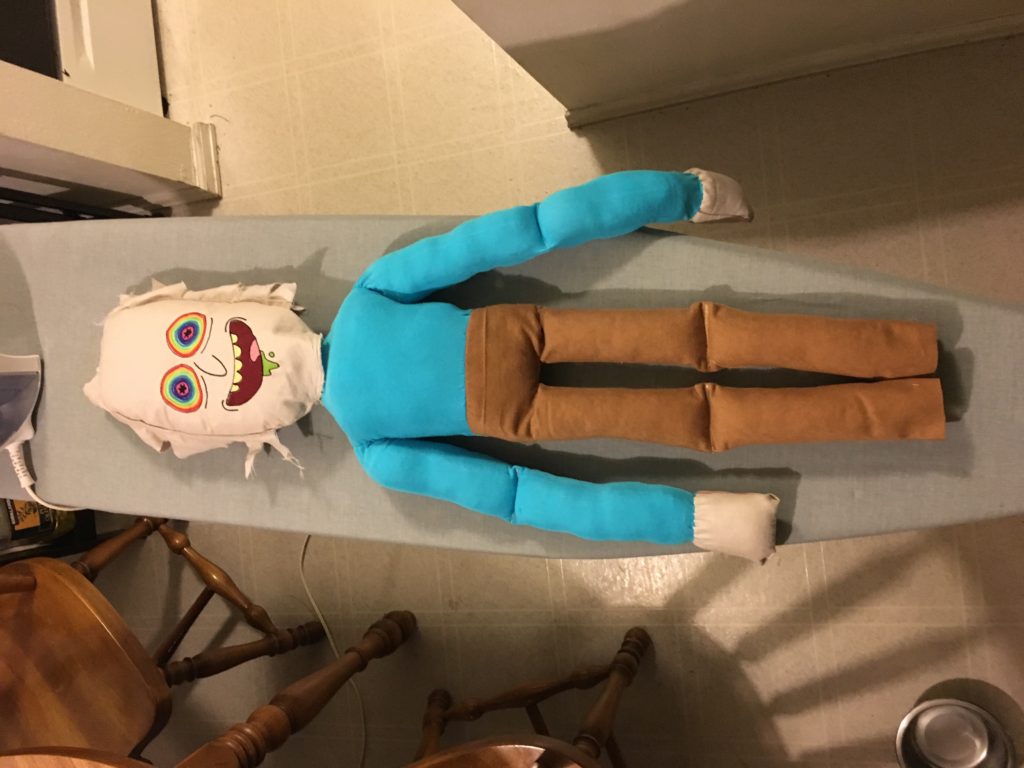
Then, I created a prototype of the plushie body, using the same fabric material I used for the head, to experiment with the dimensions for the torso, legs, and arms. I was satisfied with the dimensions, however, I decided not to use this fabric, instead opting to create a new figure with already-colored fabric to simulate Rick’s clothing. I attached infant-sized shoes to the legs for the feet, and made fabric pockets for the hands. Altogether, this process took approximately 40 – 50 hours to complete.
Below is an image of the initial prototype:
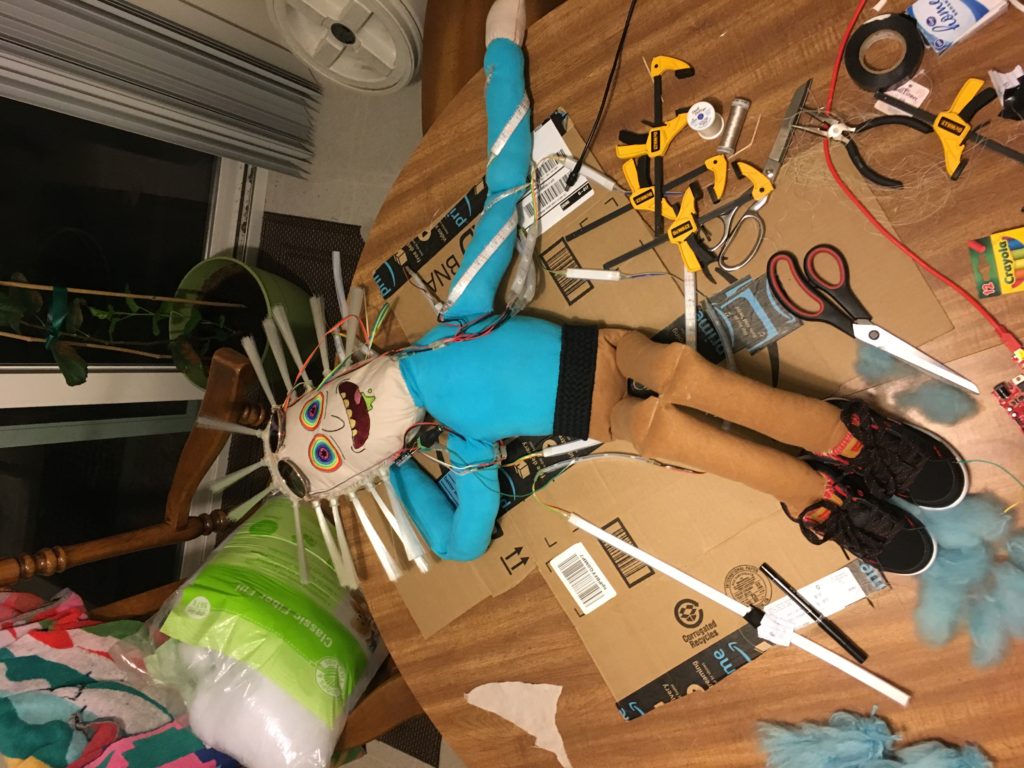
Below is an image of the plushie used in the final design:
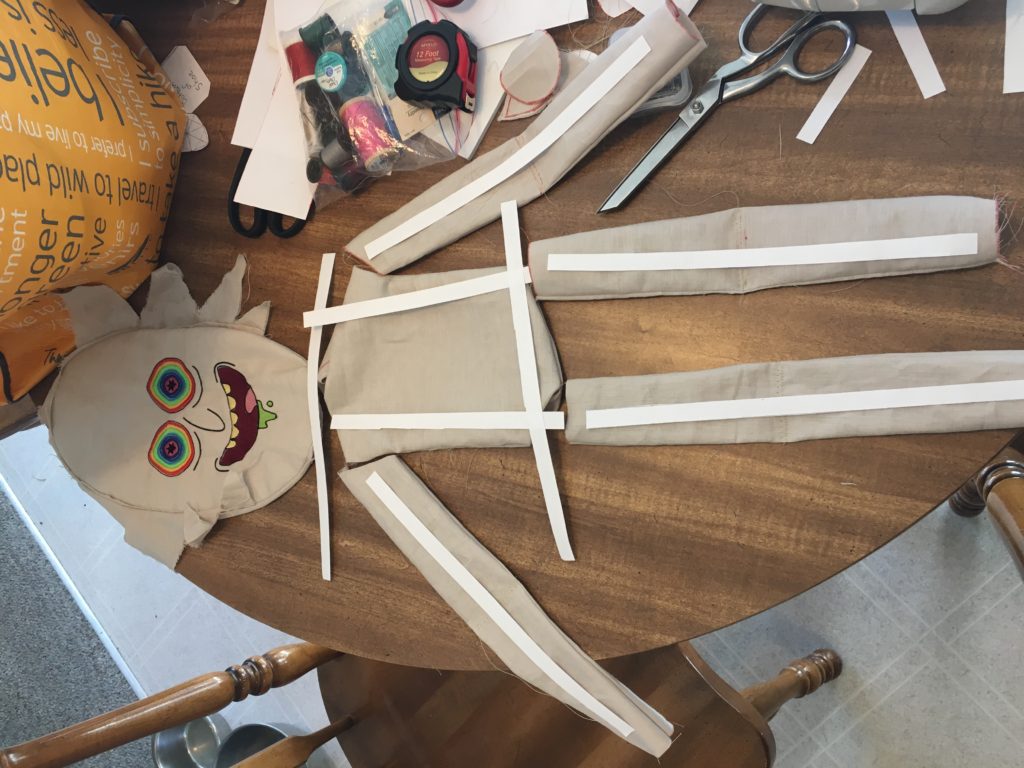
Concurrently, alongside creating the final plushie, I also did some prototyping for the layout of the LED strips over the plushie figure. Initially, I opted to make the LED strips run down the torso, arms, and legs for simplicity. After further reflection, I decided to attach the LEDs in a spiral pattern around the arms and legs, and to use a diamond-like shape on the chest and back.
Below is an image of the initial prototype, with the LED strips running down the appendages. The final LED pattern can be seen in images below.
While I was creating the plushie, I also worked on creating the layout for the LEDs. LED strips come on reels, and the one I purchased was a strip of 150. After deciding where to place the LEDs across the body, I had to cut the strip into sections of LEDs, and attach them back together with varying lengths of wires that matched the layout. This portion of the project took longer than I would have expected, as it was necessary to make the wires and splitters, attach and heat shrink each connection, and test the LEDs after each connection. I would estimate that this process took around 50 – 60 hours.
Below is a video of a test of the LED strands before they were attached to the figure:
My initial plan to attach the LED strips to the body was to use hot glue to partially adhere the strips to the fabric body, and then to reinforce the strips against the body with sew loops. After trying to glue a small section to the body, I discovered that the glue would not stick to the silicone rubber sheath around the LED strip, and that when it dried it was somewhat rigid. Instead I decided to sew each strip to the body in place. During this process I also attached the LED rings to the glasses using hot glue, and was able to use Liquid Nails glue to adhere the LED strips around the figure’s sneakers.
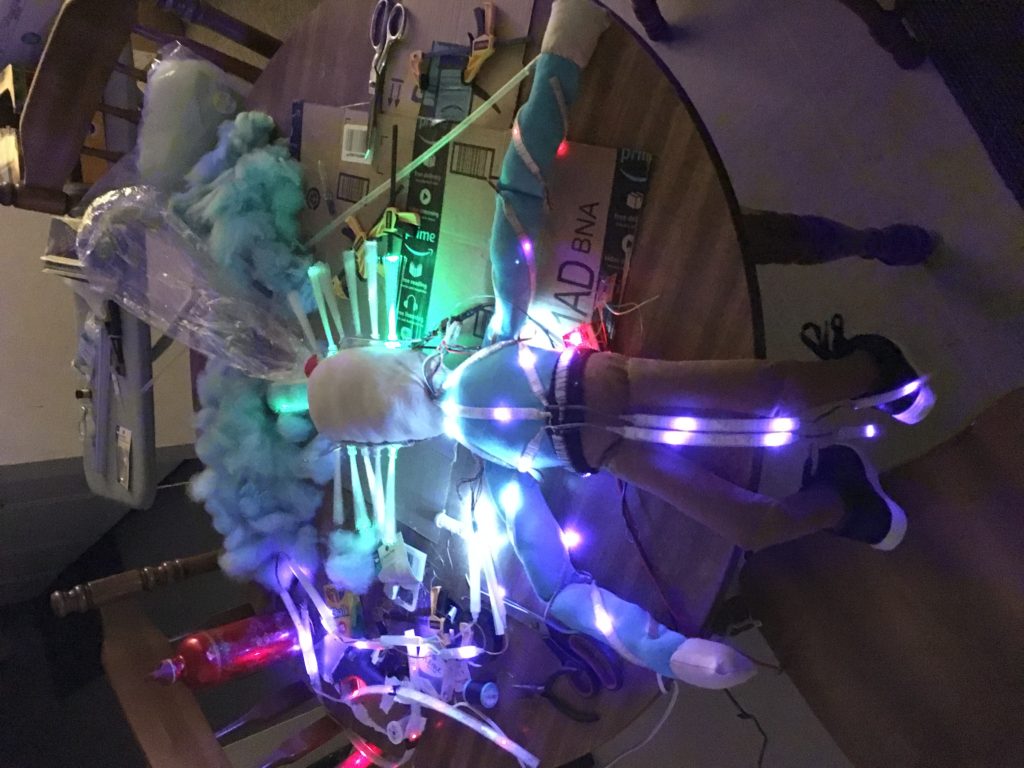
I wanted to create a cool effect for the hair, and came up with the idea to mount fiber optic cables onto the LEDs on a strip so that the light would illuminate through the hair. Light must be shined directly into one end of a fiber optic cable to get it to fully illuminate. I created a harness for each of the fiber optic cable bundles by heat shrinking the end of a bundle, and glueing it into a piece of plastic tube that was glued to the LED strip.
All of this work took on the order of 60 hours.
Below is a video showing the partially completed hair strip:
Below are two images showing the LED strips being adhered to the figure:
Project Costs / Time Estimate
The project ended up costing about what I had originally anticipated, coming out to be $150. Some of the materials I already owned, found for free, and/or I only used a portion of the material that was bought. For the sake of a more accurate estimate the below breakdown reflects the cost of the materials used. I have also included a breakdown of the time I spend on the project.
Soft Goods
- Fabric: $35
- Thread: $3
- Yarn: $2
- Shoes: $16
- Stuffing: $5
Electronics
- Microcontroller: $15
- LED Strips: $28
- Neopixel Rings: $25
- Wires: $5
- Heat Shrink: $5
Other Materials
- Fiber Optic Cables: $9
- Glasses: $2
Time Estimate
- Make Plushie Figure: 40 – 50 hours
- Create the Electronics: 50 – 60 hours
- Attach Everything to Body: 60 hours
- Programming Microcontroller: 8 hours
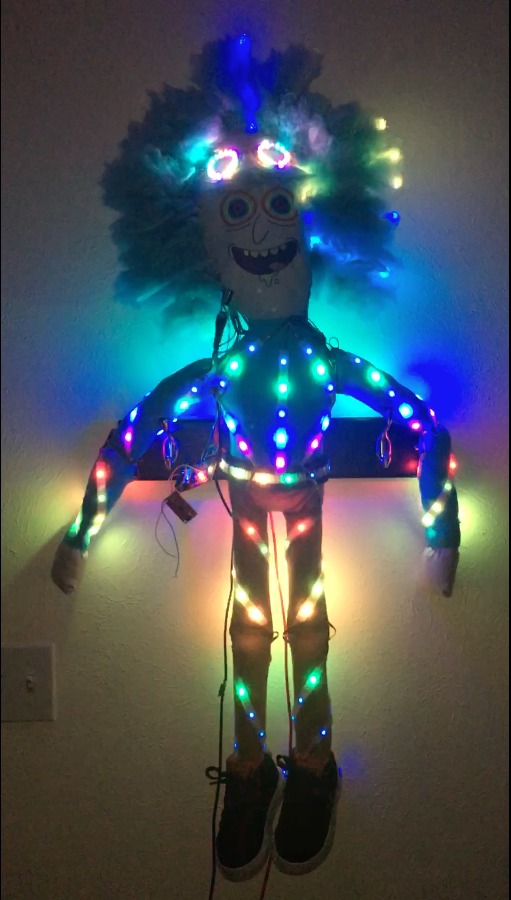
Finished Project
And finally, here is a short video of the final Rick totem animating.
3 Comments. Leave new
Good job Scott, your project turned out astondingly well! I really like how you spent time making everything go well together without many flaws. The integretion of led lights to sync wirh the music is great as well. My favorite project so far!
Really impressed with the turnout! Looks like you put a lot of time into the electronics of the whole thing. It’s really cool how there’s code embedded into Rick so he plays his own light show based on whatever song is playing. Awesome that you were able to do a project as technically advanced as this while incorporating something you enjoy at the same time. Good job!
Wow Scott, this turned out so cool. I can’t believe that it can light up and basically play a whole light show. 145$ is a lot of money, but it is good that you plan on using this when you go to the music festivals and such! I am shocked at the amount of time it took you to take apart the LED’s and then re-put them all back together the way you wanted them. This sounds like a very tedious process so props to you for being able to get through it. Why did it take you so long to attach everything to the body? Is it just a vigorous process? I really like the way this turned out, and after the amount of time you spent on it (over 100+ hours!) it is great that it turned out the way you like it.
Good job!