
Background
The Zoetrope is one of the oldest platforms for animation. It’s origins are a little unclear, however, it was popularized in the 1900s as an artifact. Growing up, animation and cartoons were a big part of my life. I owe my ability to draw to years of watching anime and trying to replicate that. Hence I have an emotional attachment to this project and am excited to personally draw the frames for the animation.
The Zoetrope is a historically significant device as well! It gave rise to more sophisticated tools which turned up in penny arcades all over the world. The predecessor of the Zoetrope was the phénakisticope, which was the first mass produced animation device which was a large circular disk with frames. The Zoetrope was a significant improvement, because it allowed more pictures with and enabled multiple people to view it at once. The signature picture of a running horse that is used in Zoetropes is equally significant. Eadweard Muybridge a photographer studied the locomotion of animals, and used a device called the zoopraxiscope to display the frames of his photographs in a more dynamic way. One could argue that this device was one of the precursor to movie projectors. The zoetrope comprises of a cylinder with slits cut vertically in the sides. The inner surfaces has animation frames which can be viewed partially through the slit. When the cylinder rotates, our brains stitches the images together see it as a moving image.
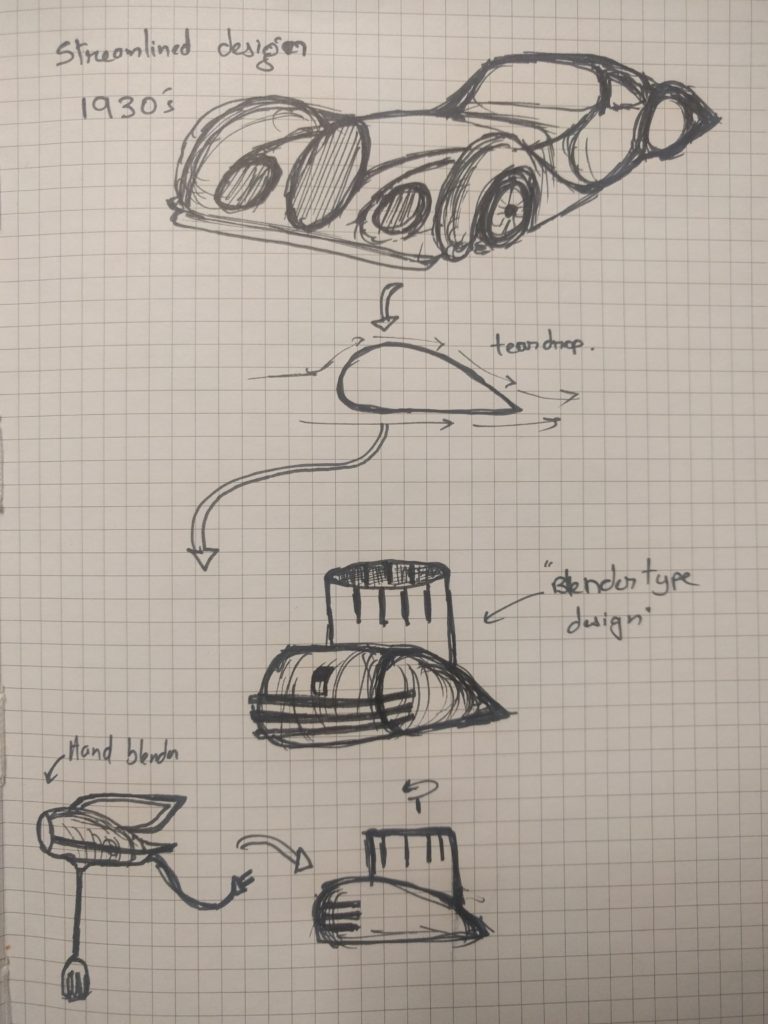
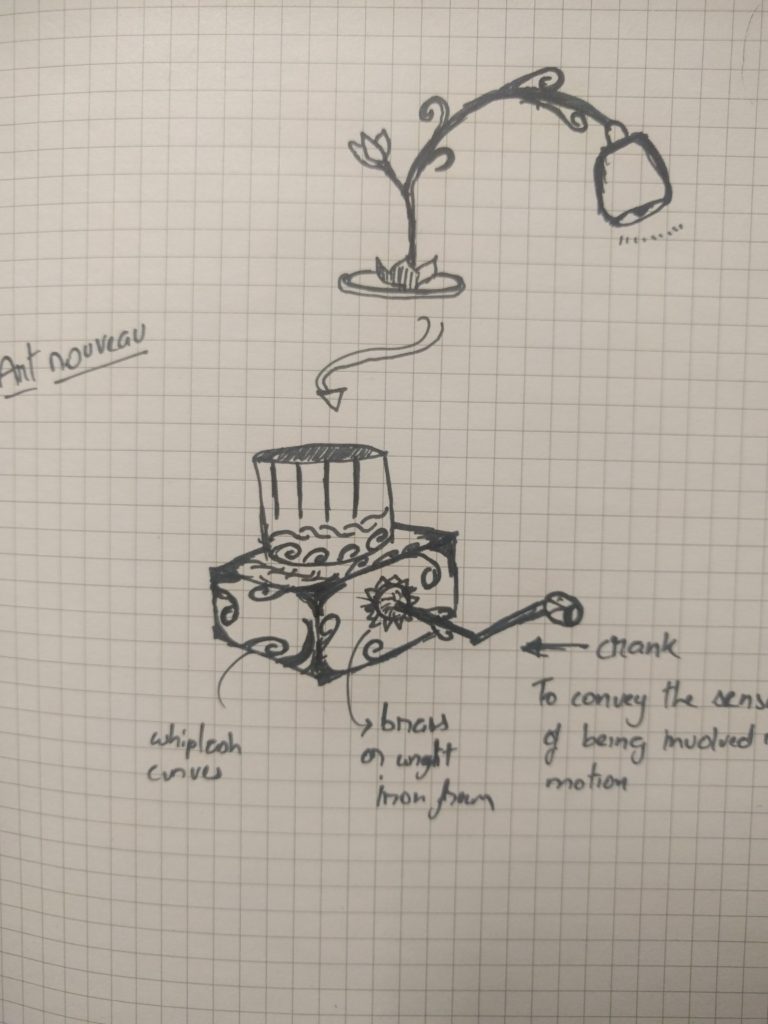
The three different aesthetics that I explored t are Art Deco, Art Nouveau and the Streamlined design of the 1930s. The way I re-imagined my design into these very prominent aesthetics, is by sketching a very popular product from that movement and trying to blend that design and making it my own.
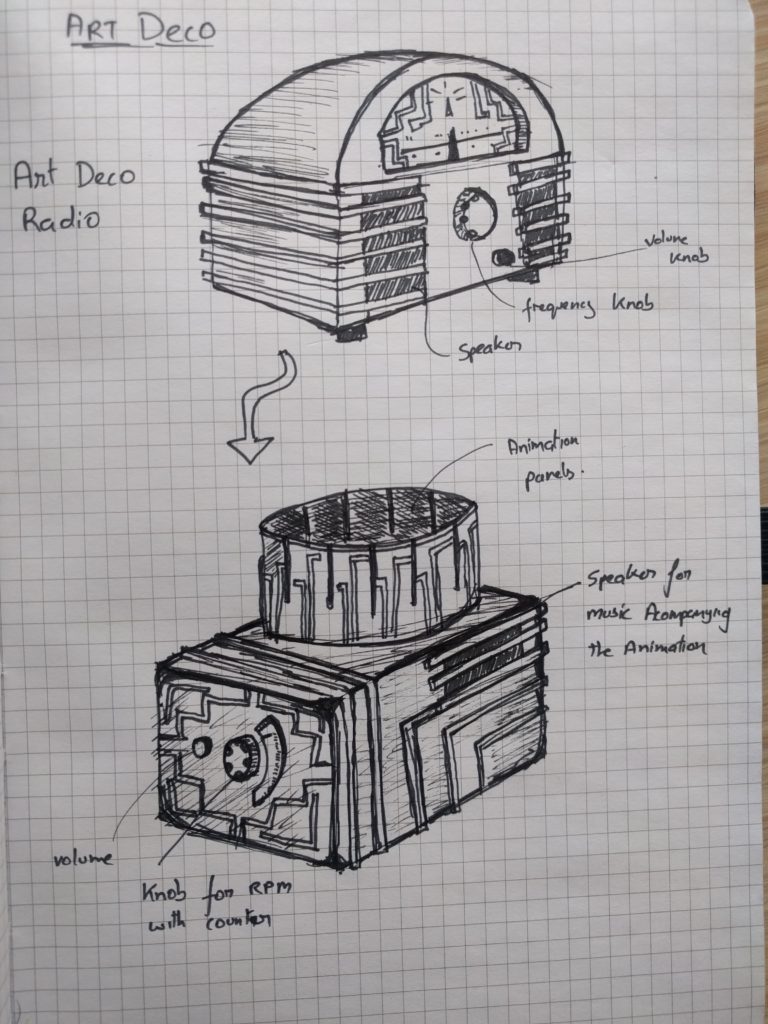
I am a gamer and one of my favorite game is the BioShock series what captivated my interest was the 3D environment and the ‘feel’ of it. It was only in this class that I realized that there was a name to what I liked and it was called Art Deco. This was enough for me to decide that this was the final aesthetic I am going with.
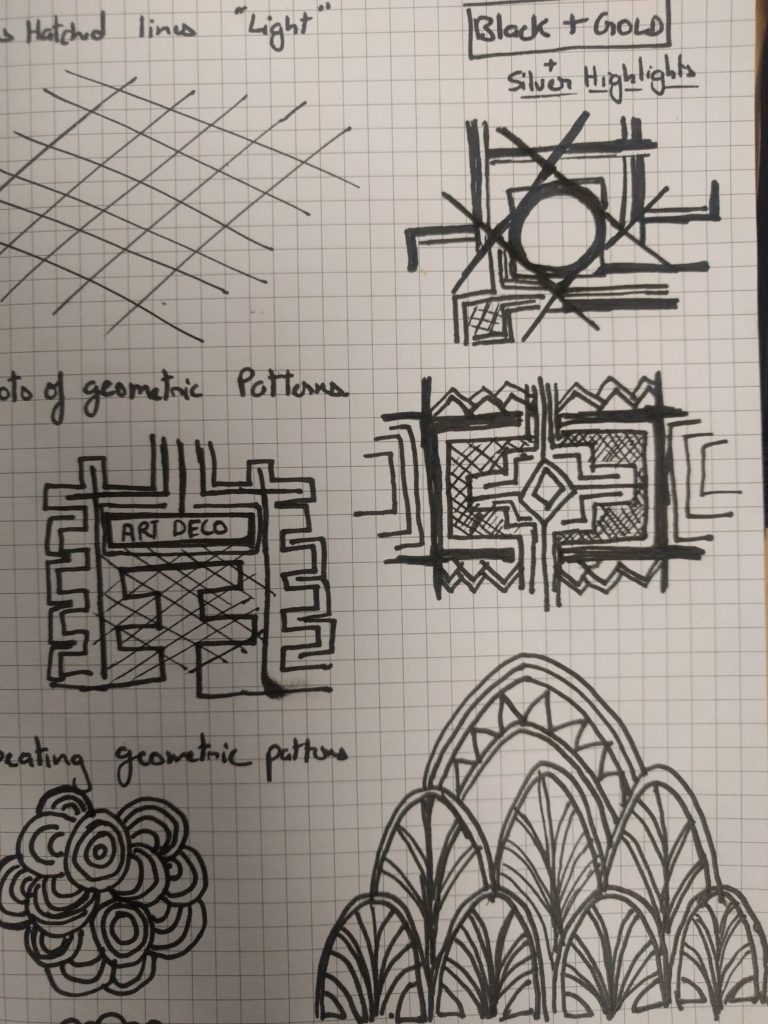
Some further research into the Art Deco movement gave me some insight into how it came about. The Art Deco movement originated from the need to deviate from the elitist Art Nouveau moment which was only accessible to the wealthy. The Art Deco movement comprised of a lot of straight lines and geometric patterns that were repetitive. The major theme is contrast and geometry. It is fascinating that Art Deco is so only because it was easily machinable and a good aesthetic that could be mass produced and perceived to have no deep or intricate meaning as opposed to Art Nouveau.
Project Constraints
-Technical Constraints
The only technical constraints I came across was designing the Zoetrope was to decide on the method of interaction. I could have gone with either a motor or a crank, but I decided to let it go because it took away from what the zoetrope essentially was. I found it that making it intractable with hands had a nice personal touch to it.
However this meant that the interaction had to be smooth and the bearing must spin without resistance. The design had to be robust and had to be able to take a fall.
The slits had to be the perfect width, too narrow and the images would never stitch together and too wide and it would appear blurry. This meant making many prototypes.
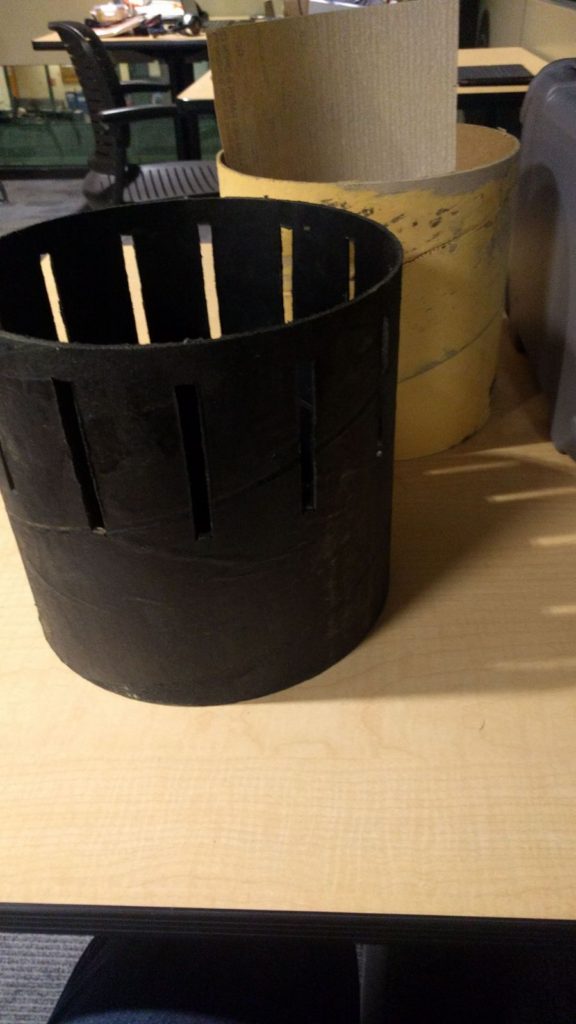
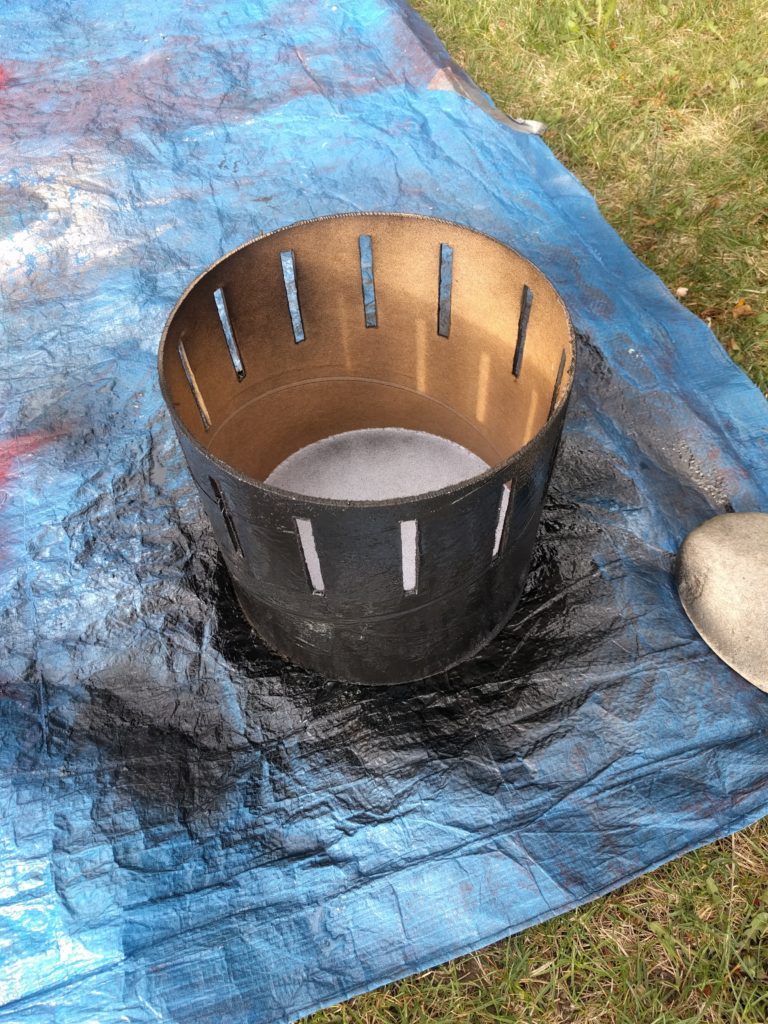
Additionally, as I am not very talented at woodworking, I had to find a single cylindrical piece that can be worked on and painted, which I later decided to use a form tube made out of dense cardboard.
-Aesthetic Constraints
As I knew the zoetrope also had to function as a piece of pottery,I had to paint over it. This proved to be particularly challenging as I am not very good at painting, it took me numerous trials to get a passable result, but now I can definitely appreciate the paint work by my colleagues.
Project Progression
Once I had a decent idea of what I am going to make I started sketching some models and different aesthetics. The assignment where I had to cast the project into different aesthetics really helped because thats where I decided to go with the art deco aesthetic.
Below are some other images where I used the streamlined aesthetic and the art nouveau style.
I started out with a high density cardboard form tube as I wanted a single piece of a cylinder. The cylinder being 48 inches long, I cut it down to 2 pieces of 9 inches each and 3 pieces of 8 inches. I wanted to experiment with different sizes and different slit widths. After some surveying in my residence hall, I decided to go with the 8 inch piece with 9 slits.
Once I decided how it was going to look. I painted it with spraypaint and primer. Sanding it down repeatedly and reapplying the paint got me the texture that I wanted.
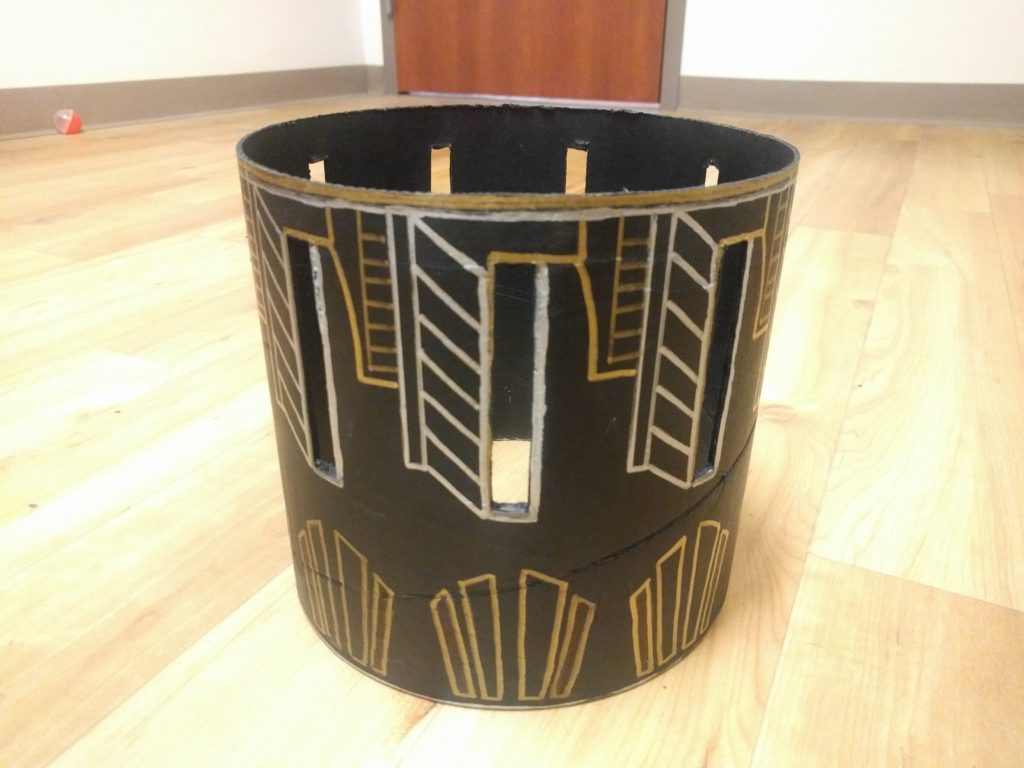
Once I spray painted the cylinder, I had to decide how to decorate my cylinder in an art deco style. I dew inspiration from art deco buildings. I decided to decorate around the slits as windows are decorated and also went with repetitive patterns.
When I had a design, I went ahead and painted on with an oil paint sharpie. It was a difficult process but I was satisfied enough to proceed to the next process which was to build a base which spins.
During the iterative process I decided to take out the box bottom and the crank and motor because I felt it took away from what the zoetrope actually is. It is actually to embed a crank and a motor on the base but I went with a skateboard bearing. I put together the model with wood glue.
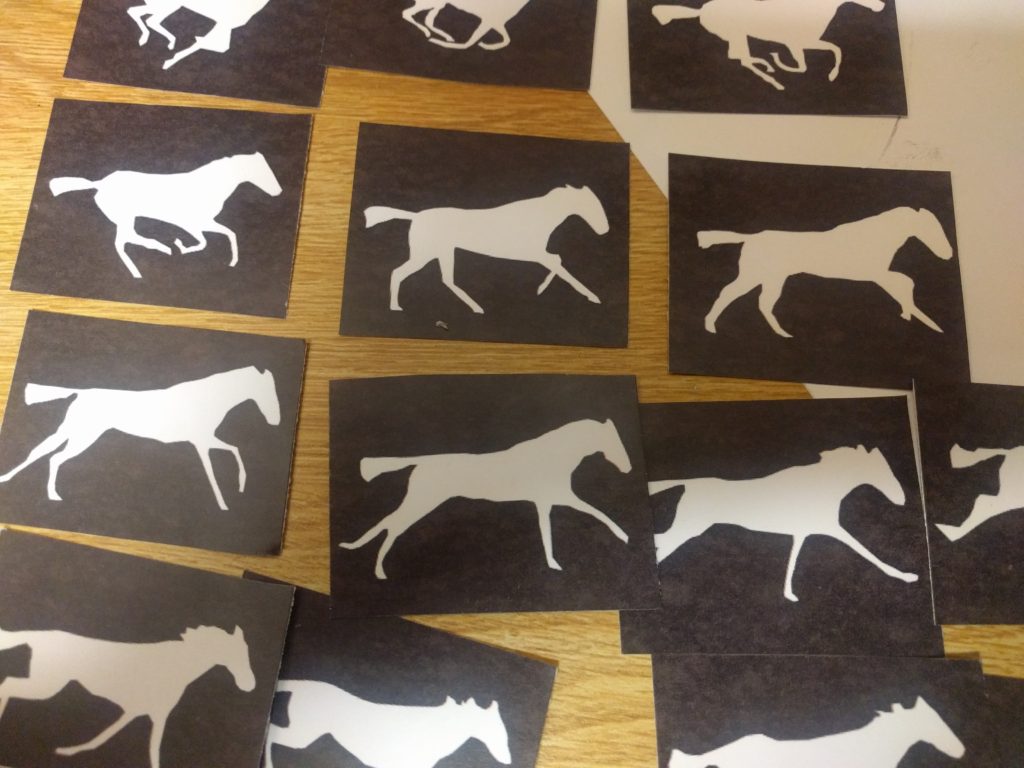
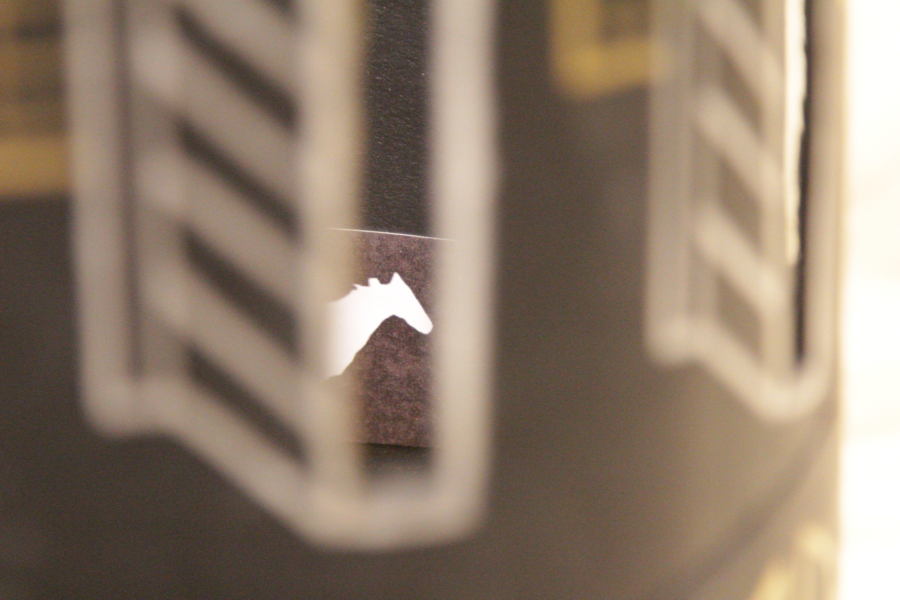
The last step was to put in the animation strips. I chose the iconic prancing horse for my subject and proceeded to print out strips and arranging them in a sequence
Project Costs
-Cardboard Tube ($9.99)
(needed a full cylinder as rolling isn’t an option)
– Fiber Board ($10)
– Paint ($10)
– Bearings ($15)
– Miscellaneous ($5)
– Total Cost : $49.99
– Elbow grease (Priceless)
Finished Project and Comments
I am pretty happy with my end result. I do feel the paintwork could have been a little better but it takes more practice, and I was presses for time. I would like to thank my teammates for their contribution and of course, Prof Hertzberg for taking wonderful pictures.
2 Comments. Leave new
I was so excited to see how you’re Zoetrope turns out and to be honest, it really surpassed my expectations. The art deco aesthetic you decided to go with during your final stretch really paid off. The animation also seemed quite seamless. Overall, congratulations on a job well done!!!
Zoetropes are super cool, I think everyone should make one at some point in their life 🙂 Glad you got to make one with unique aesthetic goals instead of just a tube with slits. Do you feel the aesthetic meshes with the concept of the artwork, or does it clash (like one of Hertzberg’s “steampunk toothbrush” aesthetic games)?