
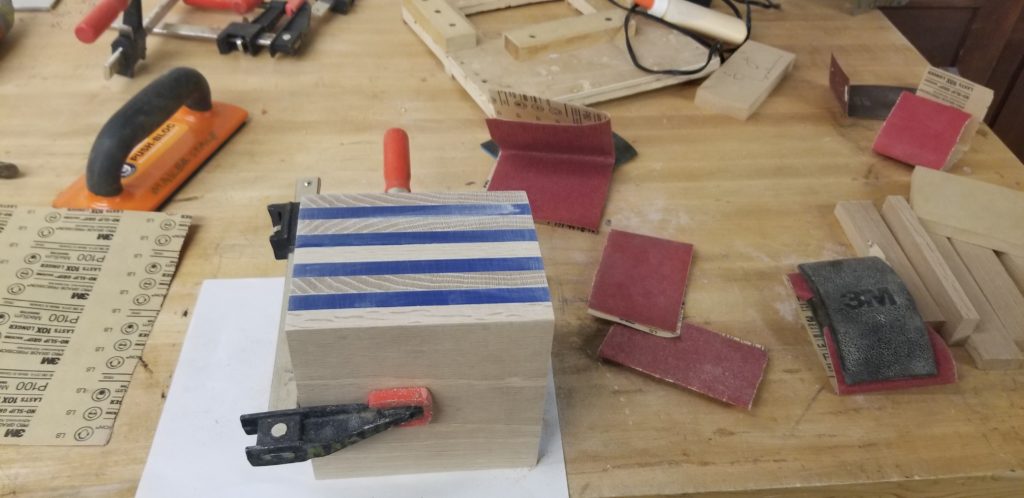
This week I spent most of my time working on fabricating the wood/PMMA base of my lamp. This is the part of my project that requires the most hands on work. I cut out 4, 1/2″ pieces of PMMA to 6×6″ and then cut out 5 pieces of oak to the same dimensions. I then used a hole saw to cut a 4″ hole out of the center of 4 of the pieces of oak. I then clamped them all together and tried to even out all of the pieces on the belt sander. This got my wood/PMMA cube closer to square, but the speed of the sander burnt some of my PMMA pieces. To fix this I tried hand sanding away the burnt parts but it was a very slow, tedious process. I ended up using a cabinet scraper to remove the damaged areas and get uniform flat surfaces on each side of the square. I carefully made sure that the cube was squared in all axes before clamping and starting this flattening process.
I’ve also been figuring out the details of my electronics and trying to decide what capabilities I want the lamp to have (dimable, RGB vs just white, physical controls, etc). This is my next step in fabrication; building my circuit and electronics. Then I need to update my CAD file for the lamp shade to make sure that the electronics fit and then I can print out my lamp shade and put all of the parts together.
This coming week I will stain my wood and glue the block together. I will also finalize my circuit, print out my head and start assembling the lamp. I am hoping all of this goes smoothly and I can finish this week. The aspect I’m struggling with right now is the circuit and figuring what functionality I think is necessary and how to build in that functionality without over complicating the lamp and keeping it a sleek and clean look.
5 Comments. Leave new
Your materials look awesome put together! I hope you plan on staining the wood to give it a little color. and contrast to the light that may come through the resin.
Cheers
This looks great! If possible, you should include some sort of small lighting in the base, I think it would look good with the layers.
This looks beautiful! Perhaps it’s just me, but I almost see a marbled pattern in the blue PMMA. Is your plan to light the plastic from behind? That would look supreme.
It looks great! Have you thought about using Arduino in your circuit? Looking forward to seeing your project! Good Luck.
It sounds like this is coming along nicely, it’ll be cool to see the final product. As the deadline approaches, do you think you will be able to include everything you were hoping too, and if something has to be sacrificed, what is it that you plan on cutting from the project?