
Link to the presentation:
Click HERE to Take you to the Presentation
Overall description and photos, then details of what you have made: CAD drawings, fabrication description, costs vs budget, etc.
All photos below were taken by me.
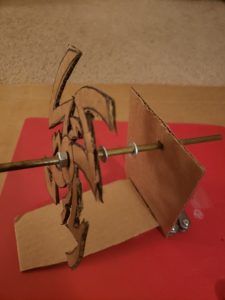
This project started with my inspiration from David C. Roy who creates kinetic sculptures for a living. He sells some of his pieces for around $3k. I liked the idea of something looking so simple, but was ultimately more complex than what people saw. Below is a rough assembly of my prototype. There is only one disk shown, but that was strictly due to resources.
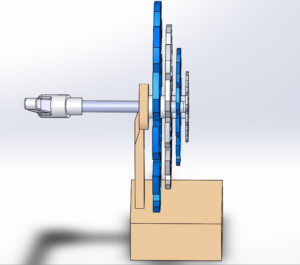
After my original prototype, I decided to build a model in SolidWorks. Below is the model that I created with the 4 disks, 4 spacers, handle, wooden dowels, and wooden base. I built my model to scale in order to create a Bill of Materials and vendors that carried everything for the parts that I would need to make my design.
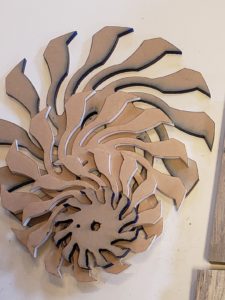
The first thing I did before I laser cut my disks was added a fillet to the inside of the disks. I found that there was a high stress concentration near the center, and didn’t want to risk the material breaking off. Once I did this, I began laser cutting. Below is a picture of all of my disks before I removed the protective coating.
Next, I ordered a 6061 aluminum shaft off McMaster and threaded both ends. One end was for the hex head cap screw that was inserted into the front end in order to drive the smallest disk. The other was for the handle that I screwed into the back. Next thing I did was think about my frame. I had a couple iterations and created both to try them out.
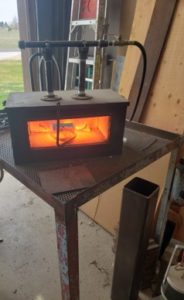
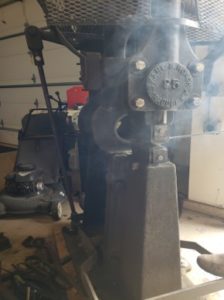
The first iteration was a steel base. This base required a forge, power hammer, anvil, oxy acetylene torch, bending fork, and a drill press.
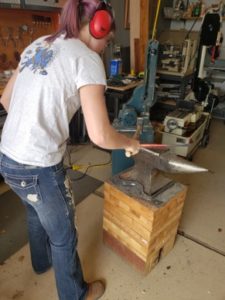

The final steel base is shown below. Overall, the steel base cost me $0 but took around 3 hours.

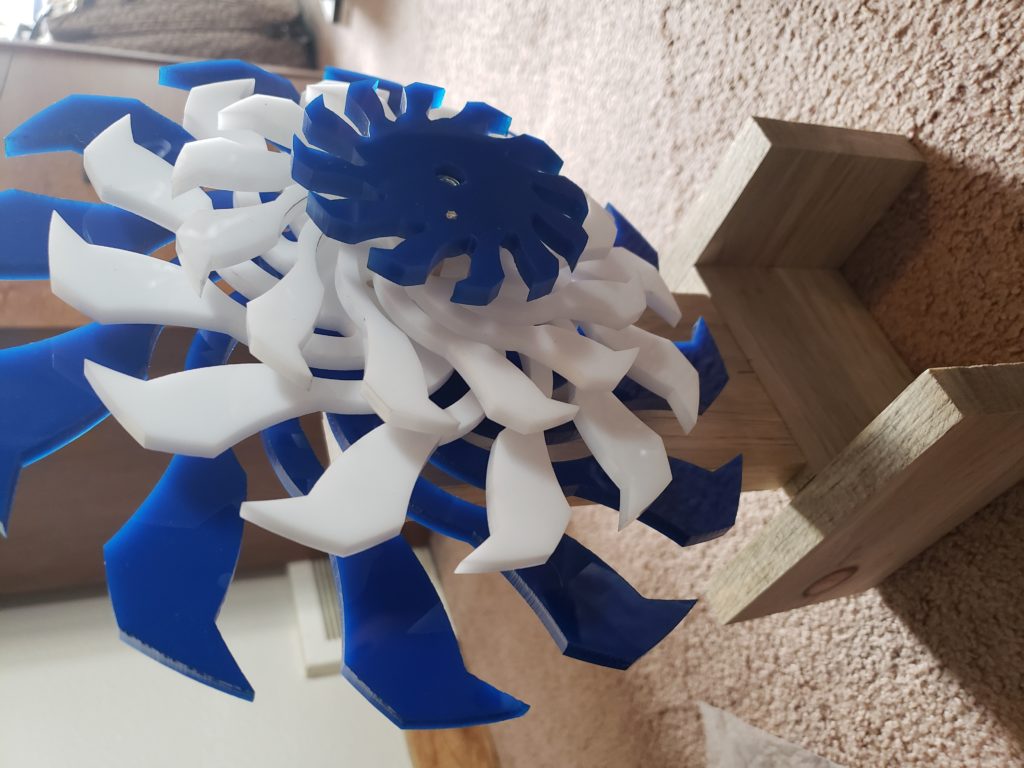
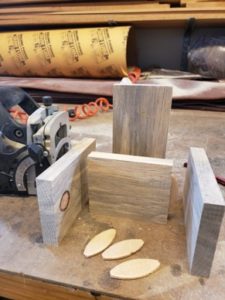
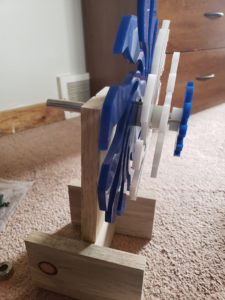
After making this base, I moved on to a wood base since my CAD model/ initial idea was a wooden base. I used a biscuit jointer, chop saw, planar, and wood glue. This design wa also $0 and took me 1 hour instead of the 3 that the blacksmithing took.
The final design is shown below. In the picture, the dowel pins are slightly visible. The purpose of these dowels is to drive the disks 90 deg from the next disk. The driven disk is the small one in the front that is attached to the shaft with the hex screw. Once the first disk starts to spin, the dowel that is press fit into it, slides along a groove in the second disk until it hits 90 degrees. Once it hits 90 degrees, it catches and spins the second one. This process continues until all the disks are spinning 90 degrees from the one in front.
Acrylic $24
Wood $0
Metal $0
Spacers $2
Set Screw Collar $2
Shaft $6
Handle $0
1/8” dowel $1
Hex bolts $1
__________________________
Overall $36
My budget was roughly $50, so this stayed well below my limit.
12 Comments. Leave new
Your fabrication skills are on point! This was cool to see in person and it was cool to hear about how you adapted as you went.
[…] Final Project (P1) – Kinetic Motion […]
I can tell that you put a LOT of time and effort into this project. Its easy to get caught up in the design of things but always remember that they have to fit together in the end. so remember TOLERANCING!!! I really like the color scheme you chose. And the metal work in the forge is just awesome! Ive always wanted to work as a blacksmith. Great job and I wish you the best of luck in the future. Dont be a stranger!
Great job! What a captivating project you created! I’d like one for my desk at home. Looks like a lot of time and effort were put into this from start to finish. Impressive CAD model, which I’m sure wasn’t easy to make. Great job!
I love your project and how it turned out. I would have wished if you would have added a demo video to the presentation so that we get an idea of what are you talking about or an idea of how it’ll look like. I would like to push you to think about extending the beach aesthetic to the wood base by adding engravings of waves, beach doodles, or more geometric shapes that go along with the rotating blades. Awesome work!
Pretty solid presentation! I like the way you recorded your prototyping process. The color combo is amusing reminding me of Greek. Great job!
You did great! I honestly wouldn’t change anything. Your fabrication skills are great and I wish you an amazing future. Good Luck!
I like the combination of the blue and the white color when seeing it from the front, the wavy patterns are very aesthetically pleasing. The metal cubing idea is very cool but I think the assembly looks a little top heavy with the blades. The wood base looks great though! I am thinking it would be really cool if you try using thinner copper blades and the metal base you had.
I definitely like the new base, I agree it fits the aesthetic much better. It was interesting to see how the project changed with your different prototypes, it really looks good!
It’s interesting you have two different aesthetics with the acrylic and wood, but I can see how it reminds you of the beach based on the blue color. I like the metal base too, but it definitely seems like it could be problematic, so it was probably a good idea to go with the more stable base. Good work!
Clare, I like the way your sculpture came out. The driftwood base looks really nice and does give it a more welcoming, organic aesthetic. I thought the other base you made was also cool though. The metalworking and forging looked like a lot of work, but a cool processing technique. I think your sculpture came out similar to the David C. Roy inspiration you talked about.
Good overall presentation. It was interesting to hear why you chose what you did due to your own limitations in skill set, ie non electrical work. It would have been cool to see in person and see how the curve and image change as you rotate the piece. The forging process was interesting to hear about as well