

For my upcycling project, I decided that I wanted to create a floor lantern. However, as I worked on it, I had to make a couple of changes here and there; and this is normal, I believe. Sometimes, things don’t work out as you work on something, and you have to change it up a bit or improvise. Nonetheless, I still have a lantern.
Inspirations
katagami stencil and seigaiha waves


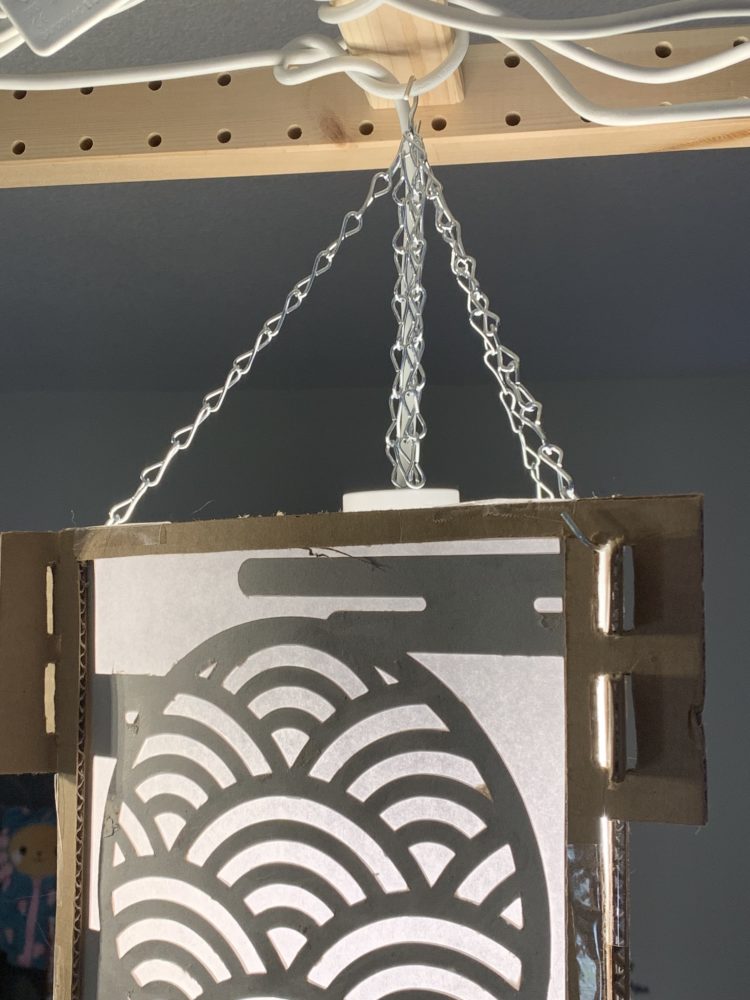
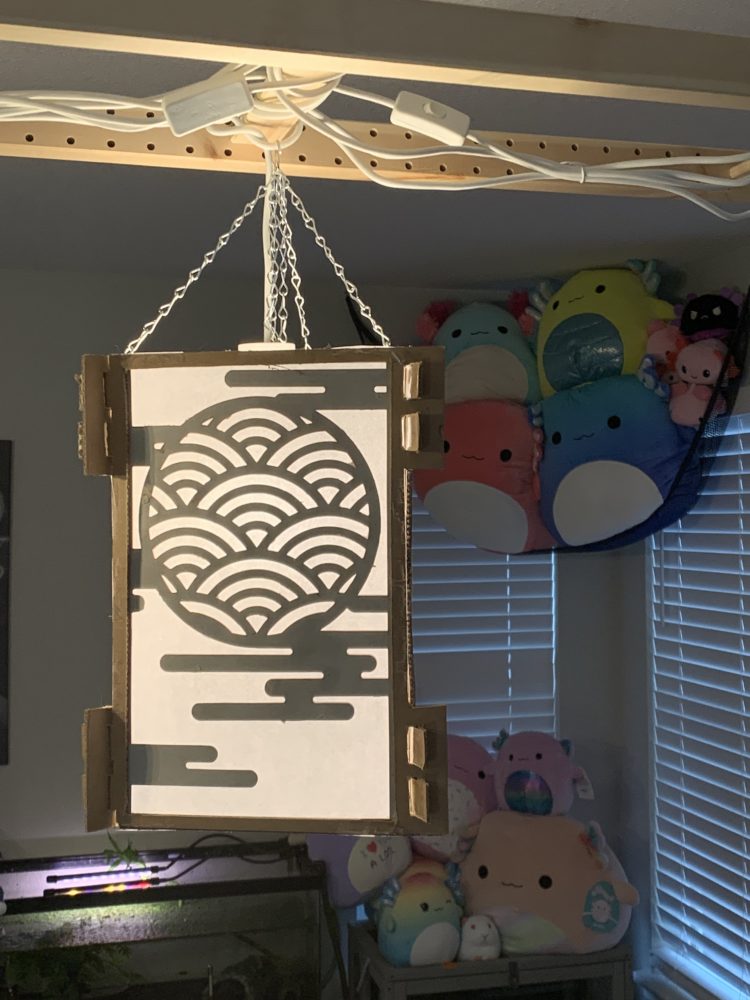
I wanted to employ a Japanese aesthetic (I talk more about it here). The aesthetic I wanted to achieve is Ma, which is a Japanese term used to describe “the partiality in Japanese design for empty spaces, vagueness, abstraction, asymmetrical balance, and irregularity.”[1] Specifically, I like the empty space, vagueness, and abstraction aspects of this aesthetic, so I took inspiration from traditional katagami stencils, and these stencils often feature a repeating pattern, and these patterns carry meaning. I decided to go with seigaiha, or waves. Japan is an island nation, so it’s appropriate that the sea or ocean is a traditional motif. It invokes the quietness and calm of the sea, and more generally, peace.[2] I put the seigaiha pattern inside of a circle, and then added some clouds to fill in the whitespace. There is plenty of empty space, which is necessary for a lantern cover (otherwise, light can’t pass through), and the vagueness and abstraction is present in the fact that there are basically only 3 different elements (waves, circle, and clouds), and that the design I came up with doesn’t directly represent a real-world object; i.e. there is no circular object containing waves that just floats in the clouds (that I know of).
Process
I ran into a lot of problems when fabricating the lantern, and that led to me making a lantern cover instead of a floor lantern (only a slight deviation anyways). Mainly, I was planning on using an Arduino and Neopixel LEDs in order to create a flickering candle effect, and attach that to the bottom of the lantern to create the floor lantern, but I realized that I didn’t have anymore spare LEDs and I didn’t want to buy more, so I stuck with a hanging lantern cover.
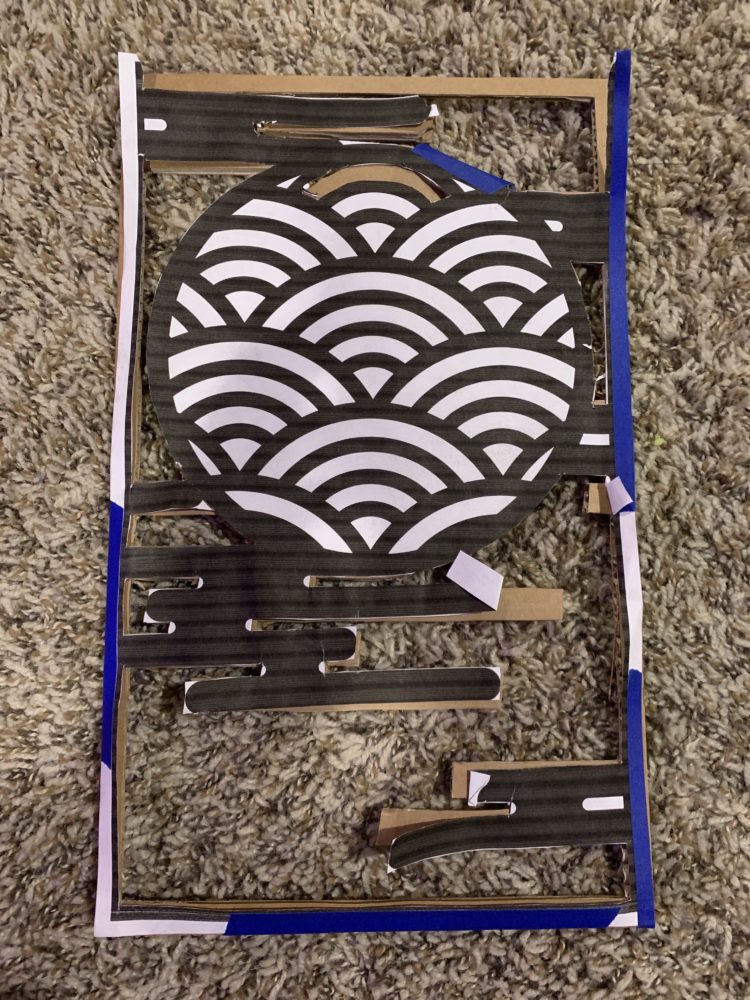
The first problem I ran into was cutting the lantern faces. Originally, I wanted to do it by hand, but I highly underestimated how hard it was going to be. I started by hand, cutting along a stencil that I printed out, and using several different cutting tools, including different sized box cutters and art knives, but it just wasn’t looking good. Additionally, it took me a couple of hours to cut this and it just felt like I would waste more time doing this way, especially when I need to cut more of these.
front and back of my attempt at hand-cutting the lantern face
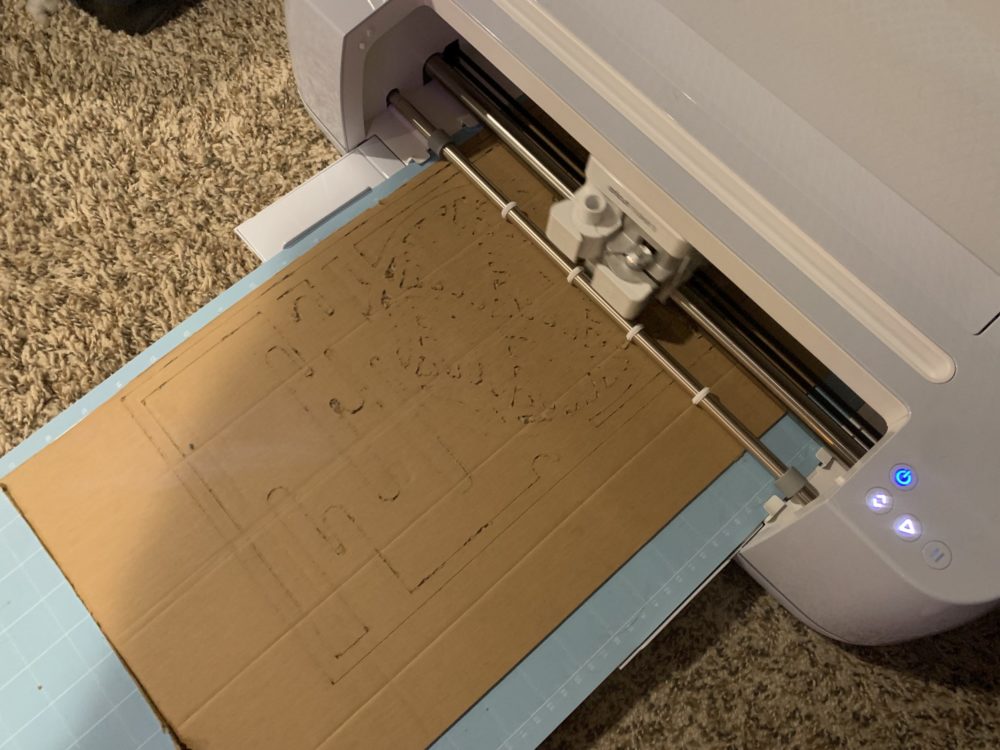
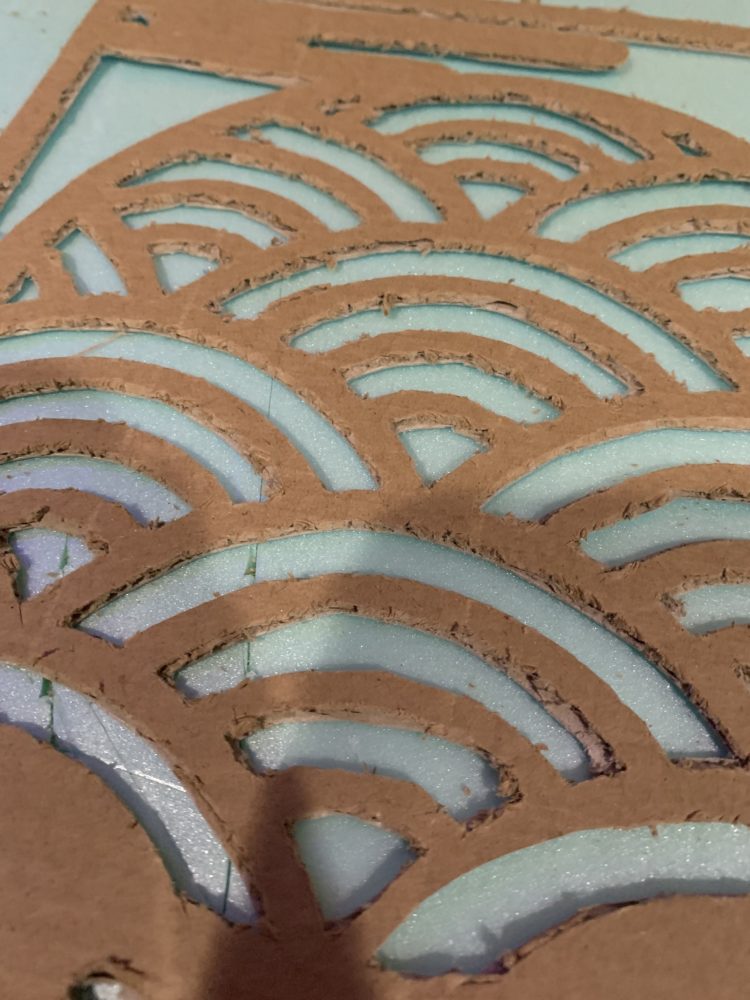
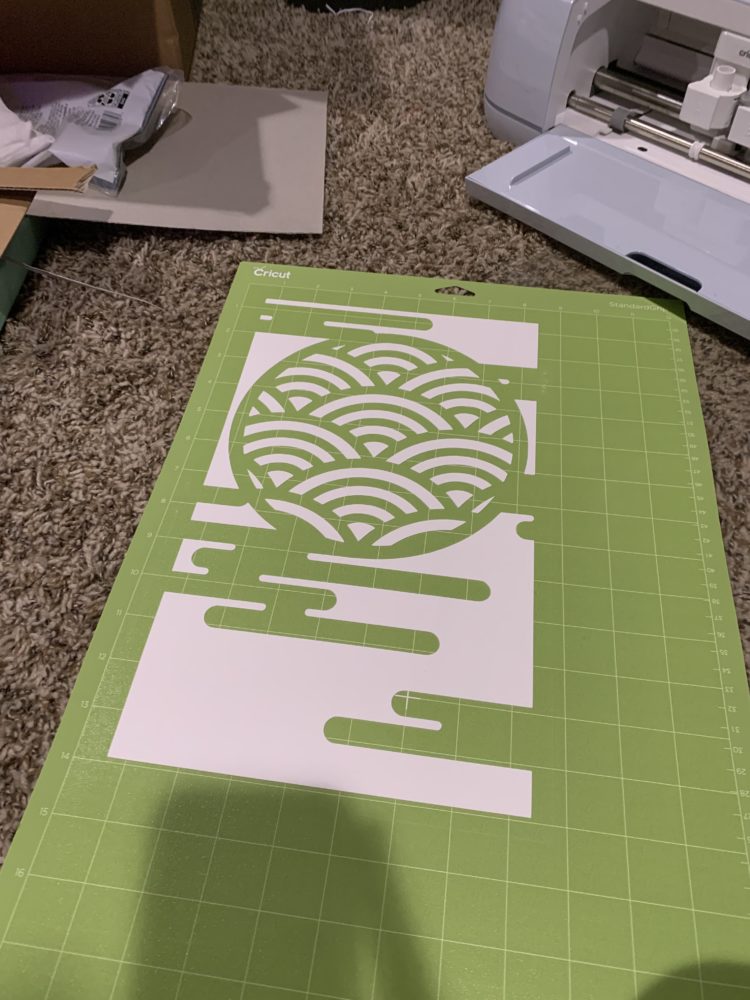
So, I transitioned to using my Cricut Maker 3. I still wanted to use corrugated cardboard since it would give me the best stability, but most of what I had on hand was too thick for the machine. Eventually, I did find something that was thin enough, but the Cricut wasn’t cutting it very well; the edges ended up being very rough, and some of the paper ripped when it was cut. I might need a different attachment to better handle the corrugated cardboard.
Cricut Maker 3 cutting corrugated cardboard and the results

The next best alternative was to use layers of thick paper, like cardstock or flat cardboard. I have so much cardboard in my garage that I was able to find gift boxes, and it was made of flat cardboard. It wasn’t enough to make layers, however, so I found some old poster paper and decided to layer that on top of the flat cardboard. The Cricut was able to cut through both materials easily and cleanly…mostly. One of the pieces of flat cardboard I had got caught in the machine and ruined the cut. I was so frustrated that I immediately threw it out and forgot to take a picture. I didn’t have any more flat cardboard, so I decided that the lantern cover would be triangular instead of rectangular (as they usually are). After cutting, I used classic Elmer’s white glue and brushed it on one side of the flat cardboard, and layered the poster paper on top (in retrospect, I think I should’ve used stick glue; it would’ve been less messy, but I’m not too sure how well everything would stick together). I repeated this process one more time for a total of two layers of poster paper on flat cardboard. Lastly, I glued a piece of legal size copy paper on the poster paper to create the lantern effect when lit. (I don’t have a lot of WIP pics, I’m very bad at documenting things like this)
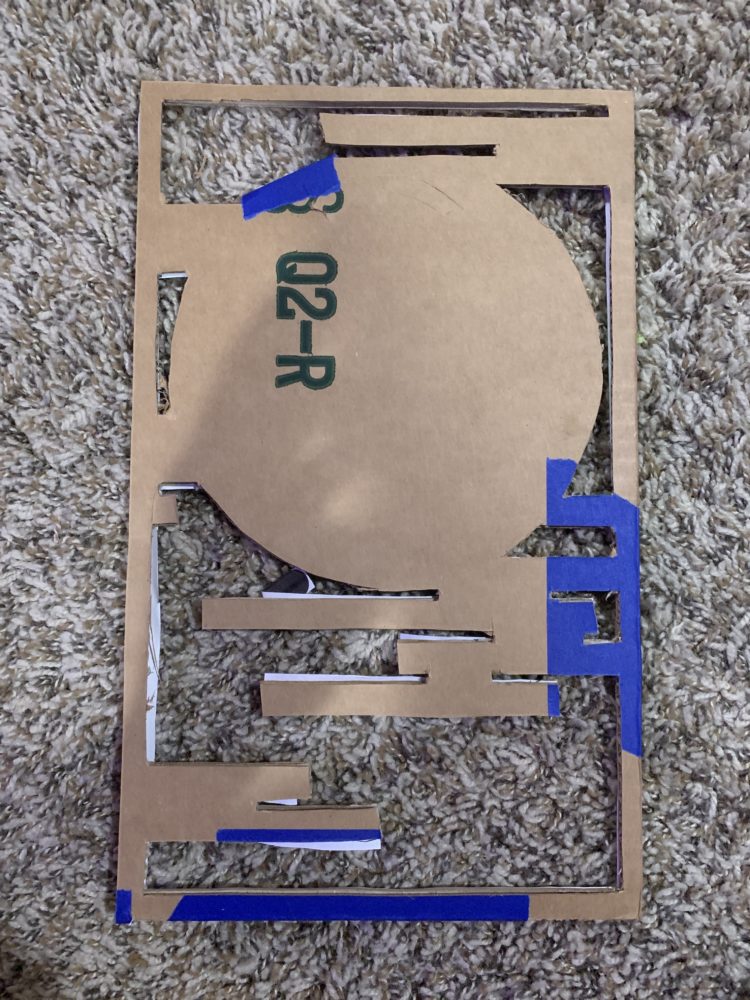
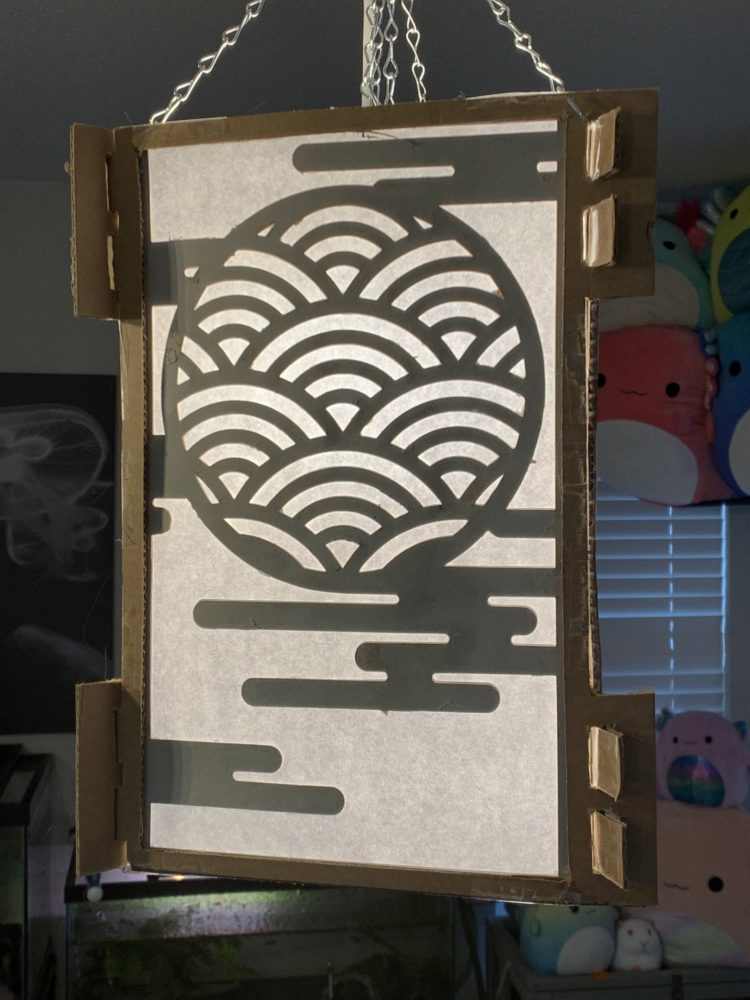
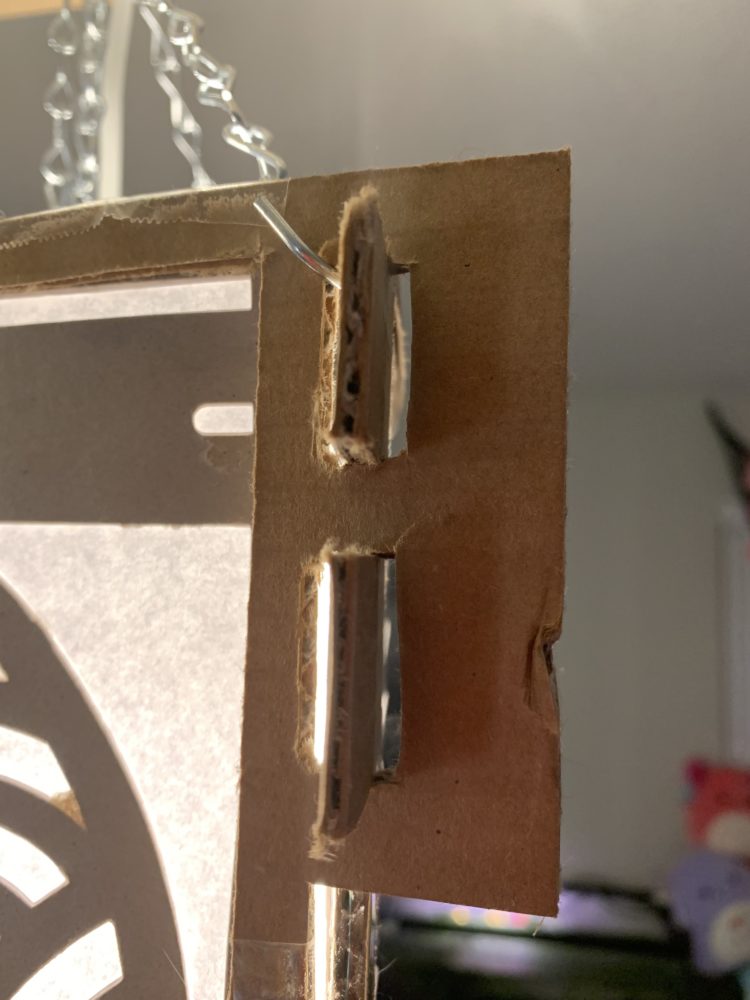
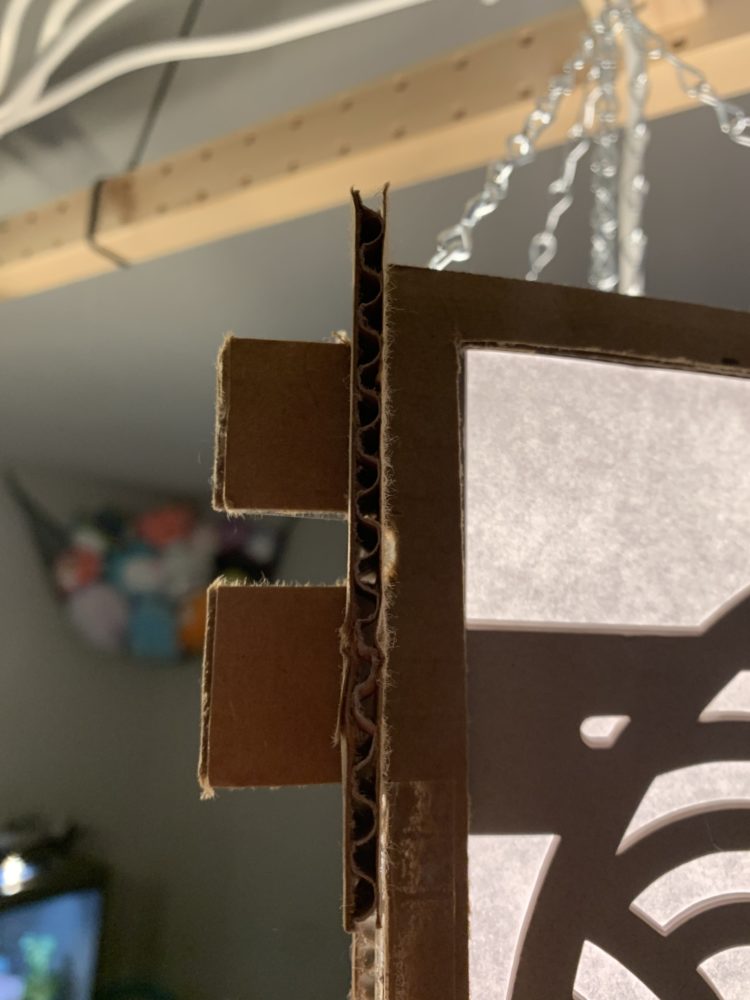
As the glue was drying, I made the frame for the lantern cover. I had to attach the frame to the edges of the lantern faces, so it needed a rectangular window shape, but I also needed to attach the different pieces of the frame to each other as well, and so I decided to use joinery inspired by this person.[3] I ended up with three identical pieces that interlock with each other without the use of any adhesives. Once the glue dried, I taped the faces to the frames (I didn’t feel like waiting for glue to dry), and assembled the lantern cover.
Cricut Cutting
Finished Frame
Joinery
Lastly, I used some chain I had from some IKEA furniture I bought (not sure, actually, to be honest) to hang it from where I hang some lights inside the house.
Hanging with Chains
Final Product
Final Thoughts
Functionally, it didn’t deviate much from what I originally intended to make. It’s not a floor lantern, but I still made it look like one. While it was supposed to have four sides, three sides worked just as well. Artistically, it’s not as “clean” as I’d like it; I’ve seen people on YouTube make really well-done and clean-cut cardboard structures, but I think I just lack the skill and/or experience to get such cleanliness. I still think it looks good, just not the best I could’ve done. Despite this, I think I still achieved the aesthetic I was going for. In simple terms, I wanted it to look Japanese, and I think using mostly Japanese motifs definitely helped achieve that goal. Specifically, the lantern design has a sense of vagueness and abstractness characterized by the white space, use of basic shapes, and non-resemblance to everyday objects.
My girlfriend had asked me to make more, so perhaps I can buy better materials and make more lanterns with different designs. The first iteration definitely needs refinement, and if I can find materials that are strong and can be cut with my Cricut machine, I think I can make something that lives up to my standards mentioned before.
Presentation Video Link
Link to Google Drive Location containing Presentation Video
Photo Credits
1. Katagami Stencil https://www.meg-andrews.com/photos/big/8743_b1.jpg
2. Seigaiha https://www.britexfabrics.com/media/catalog/product/cache/8981cd2ae5bac859d614a6e612091163/i/m/img_3382.jpg
All other photos are by me
References
[1] Graham, Patricia. Japanese Design : Art, Aesthetics & Culture, Tuttle Publishing, 2014. ProQuest Ebook Central, http://ebookcentral.proquest.com/lib/ucb/detail.action?docID=1767965.
Created from ucb on 2023-02-02 04:44:20.
[2] Couture, P. by P. & Polina Couture. (2021, October 7). The meaning of traditional Japanese patterns. Polina Couture. Retrieved February 22, 2023, from https://polinacouture.com/en/the-meaning-of-patterns-on-japanese-fabrics/
[3] Joinery models. do. (2012, April 16). Retrieved February 22, 2023, from https://studiomakedo.wordpress.com/2012/04/11/joinery-models-2-2/
4 Comments. Leave new
Josh, this is wonderful. From the report itself to the final product of your project. Your aesthetic is clear without even reading this blog post. The combination of patterns are obviously Japanese influenced designs and the idea of a lantern itself speaks Japanese culture. In terms of the process and actual technique used to make the lantern, if you were to do this again would you use a different material or another technique?
I think I do want to do this again, but I’ll probably use corrugated cardboard from Cricut; it’s supposed to be strong and able to fit in the machine. I’ll probably find a different way to glue all the pieces together as well; brushing the elmer’s glue for each layer made the cardboard and paper too wet, and distorted the structure a little bit
Love the outline you made for the lantern, and the documentation you made for this project!!! I think you reached the aesthetics you want to present, really nice work!
Would you like to apply LEDs on your next lantern works in the future?
I would like to add LEDs, since I can add different colors and patterns; they might get a little expensive though