

After a month’s time, which included ideation, sketching, collection, and fabrication, my upcycling final product is complete. My design is a double-decker plant potter that conforms to the 35mm photo collage aesthetic.
Inspiration
My journey began with the exploration of a specific aesthetic. For this I chose, what I deemed, the “BRTHR aesthetic”. BRTHR is a duo of filmmakers, Kyle Wightman, and Alex Lee. BRTHR has gained acclaim both in pop culture and niche internet groups from their combination of vaporwave, cyberpunk, retro film grading, and golden age Hollywood to create an aesthetic that is completely unique. They describe their work as a mashup between pop culture, energetic style, cinematic moments, and arresting 3d visuals.
A key element of the BRTHR aesthetic is the use of retro film overlays. All their works utilize 35mm, super 8, and vhs film. This sub element of the BRTHR aesthetic is what led me to look solely into 35mm film collages.
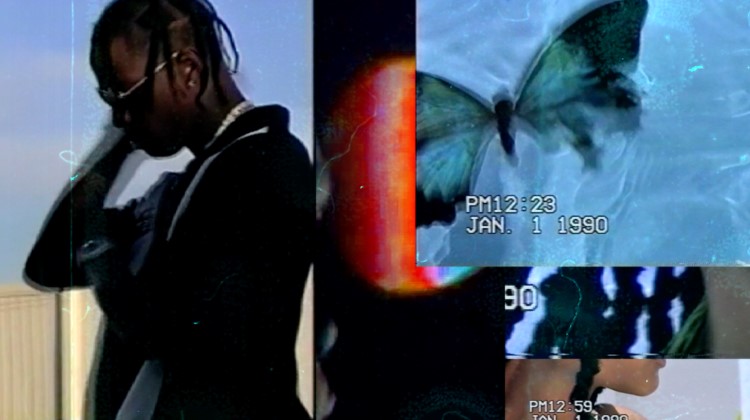
Travis Scott – Butterfly Effect – Still Shot Image courtesy of http://brthr.net/photo
The 35mm collage aesthetic falls under the general umbrella of “collage”, but has unique elements. Mainly, that the collage is entirely made out of 35mm film photographs. 35mm collages tend to focus on displaying the images or moments from a photograph. Sometimes other forms of mixed media such as writing are incorporated. I feel that this aesthetic is a way to highlight many stand alone images in a visually unique way. The 35mm collage is also characterized by a very DIY feel. Elements such as tape, glue, and writing that replicates film strips gives these collages an element of lo-fi.
![]()
Dexter Navy for Stussy x Converse – Dazed Magazine https://www.dazeddigital.com/artsandculture/gallery/23079/2/dexter-navy-for-stussy-x-converse
Material Collection
I consider myself to be a photographic designer in my free time. For this reason, I knew the basis of my upcycling material would be leftover 35mm photographs. The total material list is as follows:
Upcycled Materials
- Roughly 75 35mm Photographs
- 2 Discarded Scented Candle Holders
Purchased Materials
- 3 Bottles of Super Glue
- Pack of 8 #2 Pencils
- Exacto Knife
Other
- Scotch Tape
- Sharpie in the Colors of Gold, Bronze, and Silver
The candle holders served as the structure to house the indoor plants. The 35mm photographs got cut up and applied to the candle holders to create the desired aesthetic. Along with the photographs designs were also drawn with sharpie to help create a haphazard and DIY feel.
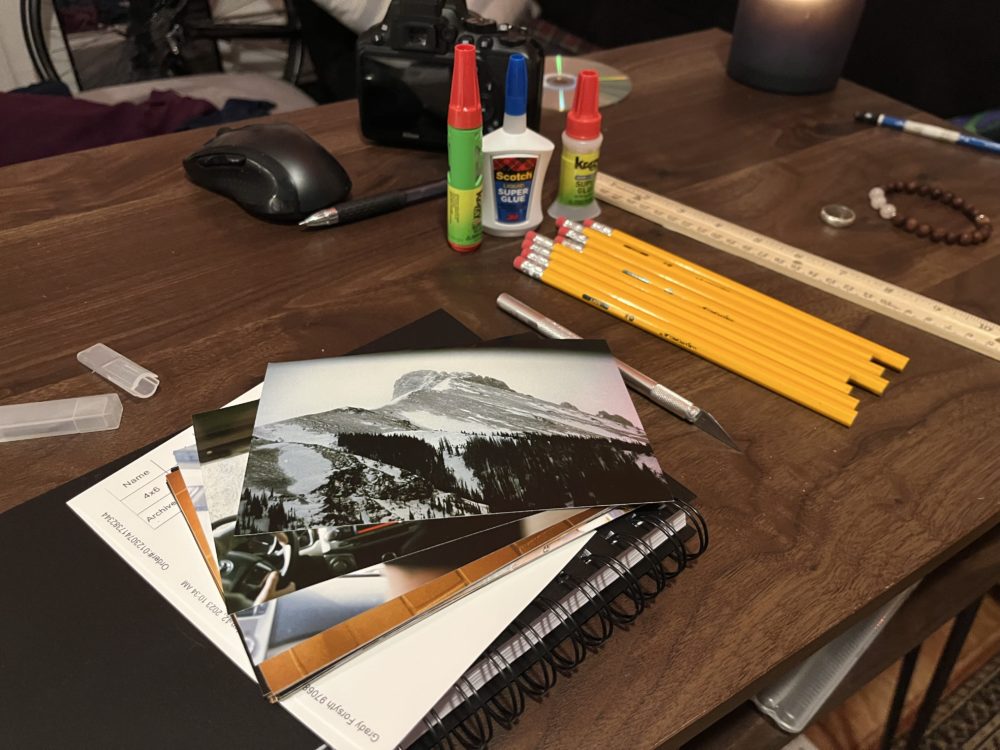
35mm Photographs and other assorted materials for use
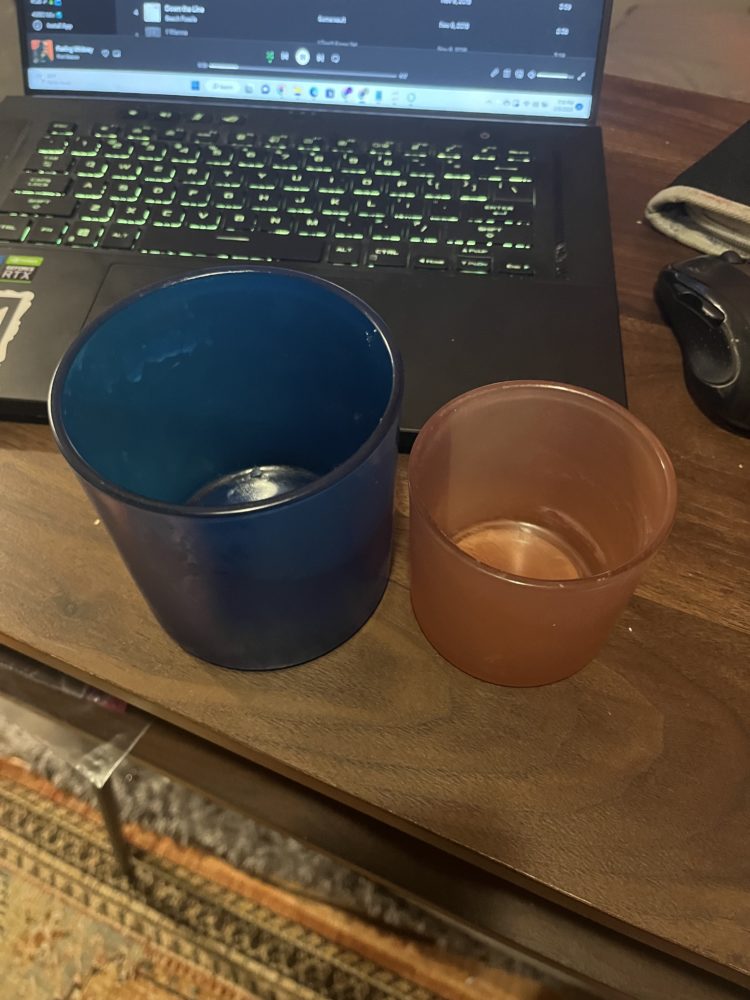
Cleaned candle holders for construction
Fabrication Process
Before construction began I knew I needed to do some sketching work to finalize the design.
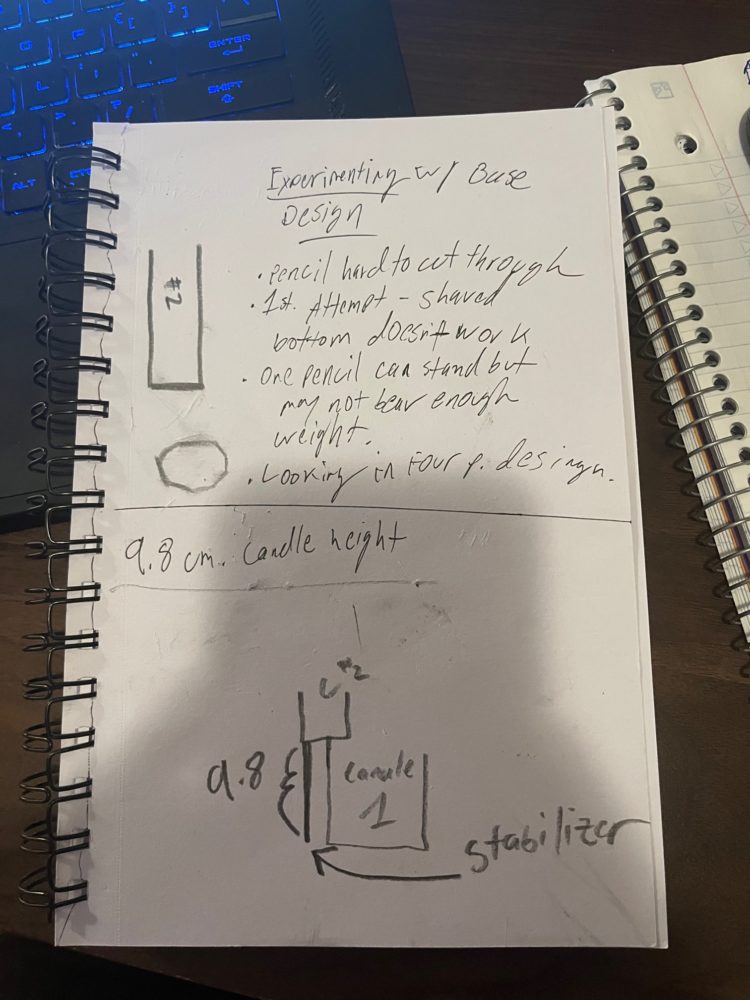
Early design sketching
I designed the structure to be composed of two candle holders. The base holder is made of the larger of two. The smaller one is supported by a beam that is 9.8 cm in length. The beam is created from a wooden pencil. It was cut using an exacto knife. This part of construction was tedious and took about four attempts. I would not recommend trying to cut wood with an exacto knife.
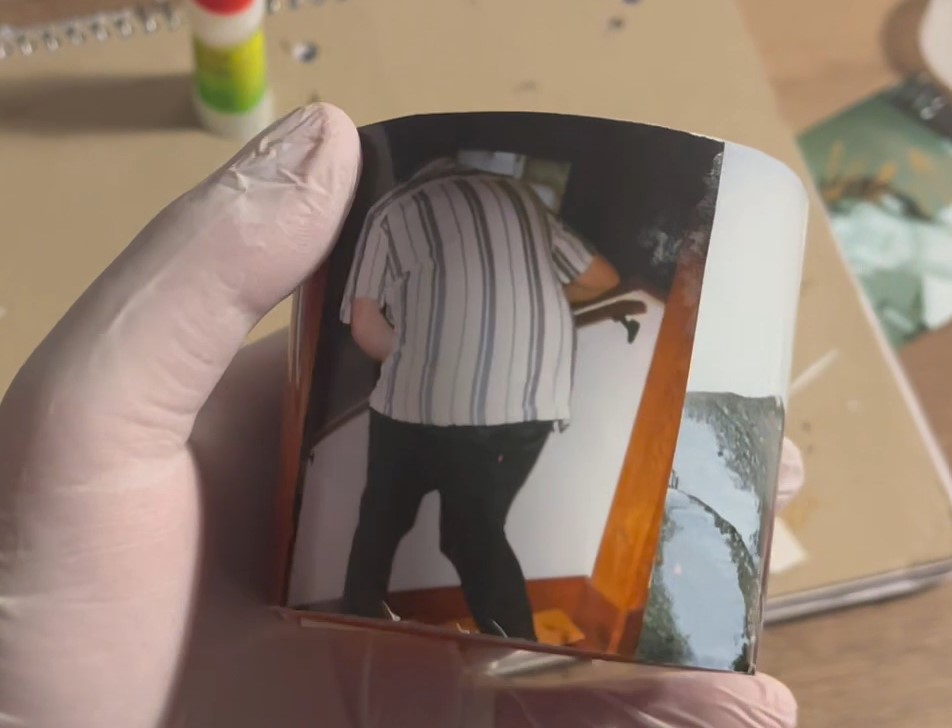
Once my pots and support beam were set up, it was time to begin the artistic portion. I went through an image curation process where I determined the photographs that I wanted to use as backgrounds and those that I was going to cut up and exhibit.

Image curation process for large candle
Once images were identified, I began applying the backgrounds. On the larger candle I chose to use images that only featured light leaks. This made the background appear mostly as a sea of lighted colors. This is what I wanted because it would allow me to highlight the other images which were being overlaid. The background images on the smaller candle are scenes in and of themselves. I applied the background images to the candle by identifying the size they needed to be. I then applied them with glue and rolled them onto the candle. Any excess image was shaved off with scissors.
Following the background curation and application, I began my collage work. I used gold sharpie on the background to include random writings and designs. I then applied my selected photographs using glue and tape. While each photograph is unique, they were all shot on one weekend. The end design tells the story of a weekend in the mountains with my friends.

Portion of Design on Large Candle
Portion of Design on Smaller Candle
The final steps in my fabrication process was putting the structure together. In order to do this I attached my pencil support beam to the edge of the smaller candle. I should note at this time that I painted the support beam gold to comply with the color palette being used in the design. To let the glue solidify, I let the structure sit overnight, with the weight of the candle securing the beam. My initial plan was to secure the smaller candle to the larger one using liquid cement. However, after numerous attempts I came to the conclusion that the candle holder material was not compatible with the binding solution. At first I was frustrated by this. I then realized though that this wasn’t a bad thing. It made the artifact more dynamic because users would have the ability to change the look of the second layer. Additionally, it would make it easier to plant in the large pot.

Final Artifact
Due to transportation hindrances I wasn’t able to get any plants yet for my final product. While this is not ideal, I plan to fill the artifact whenever I find a way to get to a gardening store. In leu of actual plants, I’ve created an extremely crude mockup of what my design would look like with plants.
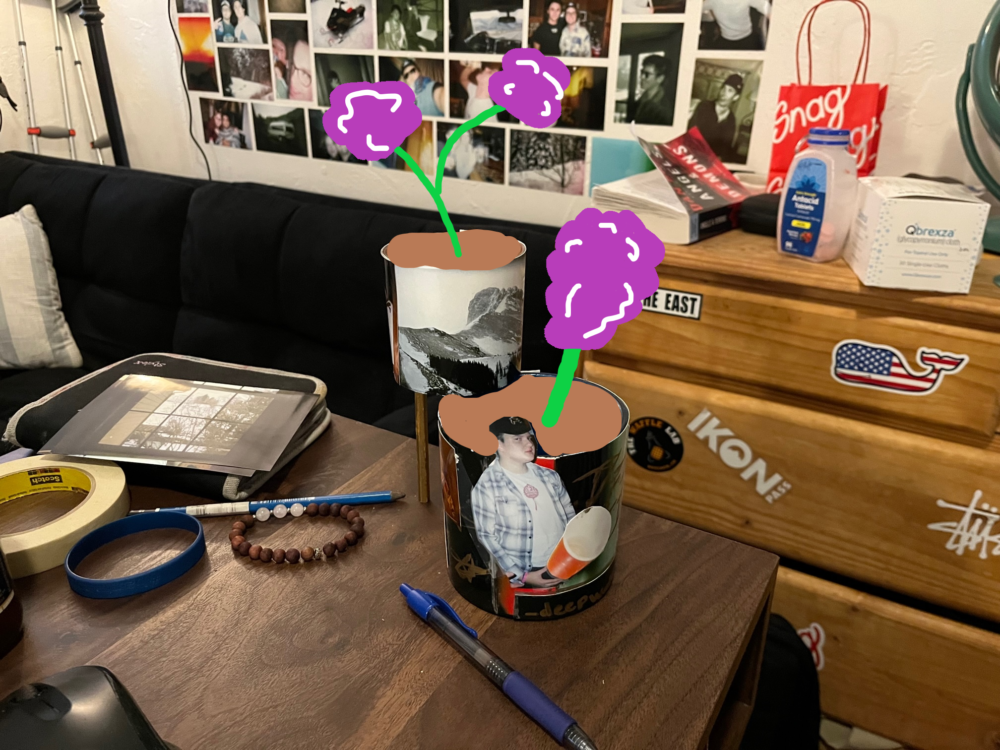
Mockup of Plants
Final Thoughts
At the end of the day I’m very excited with how my artifact turned out. I’m excited to continue to explore aesthetics and master my craft in the next project. Check out the 45 second video edit below to see more of the construction process!
1 Comment. Leave new
Hi Grady, super in-depth and interesting blog post! I really liked the aesthetic you chose and I like how your lower pot has the 3D effect of the head sticking up above the rim. I think that really adds a lot to the overall aesthetic. Looking at your final product, even though you weren’t able to get plants I was thinking it would make a create pencil holder and was even wondering if you thought about putting candles pack in the holders?