
Skateboarding has been around since the 60s and has changed quite a bit since its introduction. Over the years, advances in manufacturing, materials, and general deck knowledge have caused the skateboard deck to evolve significantly. For my final project, I made my own skateboard deck using a homemade press and mold. The mold provides the contours into which the deck will be pressed, while the press provides the force which tightly adheres the wooden veneers together with glue. This method of manufacturing, while on a much smaller scale, is identical to how most decks are manufactured in today’s commercial woodshops.
Timeline:
- Research (3 hours)
- Purchasing supplies (3 hours)
- Creating mold (8-10 hours)
- Creating press (2 hours)
- Pressing blank deck (1 hour)
- Designing and cutting deck shape (3 hours)
- Painting and finishing (1 hour)
Research
The background research required for this project was critical. There are multiple methods to create a skateboard deck at home. I read up on multiple different types of presses and molds to determine the best option for my skill set and available time. I settled on a wooden mold as opposed to a foam mold to ensure it would withstand multiple uses. I also looked into concrete molds but I have limited experience with concrete and am much more confident n my ability to work with wood. As for the press, I decided a spar press would provide more force than a vacuum bag and would be cheaper as the vacuum bag would require a very large compressor. I also learned about homemade hydraulic presses utilizing car jacks but decided that manufacturing a steel frame for this press would significantly increase the time I needed to spend on creating a press. If anyone is interested in learning more about homemade skateboard projects I would recommend visiting DIY Skate.
Purchasing Supplies
This project required several trips to Home Depot and some deep searching on the internet for maple veneer that could be used in skateboard manufacturing.
The materials I used in the project are listed below:
- Two 12′ 2×8″s
- Two 8′ 2×4″s
- One peice of 3/4″ thick 12×36″ plywood
- 9′ of 1/2″ threaded rod
- Sixteen 1/2″ ID washers
- Sixteen 1/2″ nuts
- Twenty-two 1.5″ phillips head screws
- Two bottles of Tightbond III wood glue
- One 4″ wide 1/4″ nap roller
- One quart of fiberglass epoxy
- One 1/4″ thick sheet of 42×16″ cork
- Seven plys of 9.5×35″ hardwood maple veneer
- One can of black satin spray paint
- One can of clear lacquer
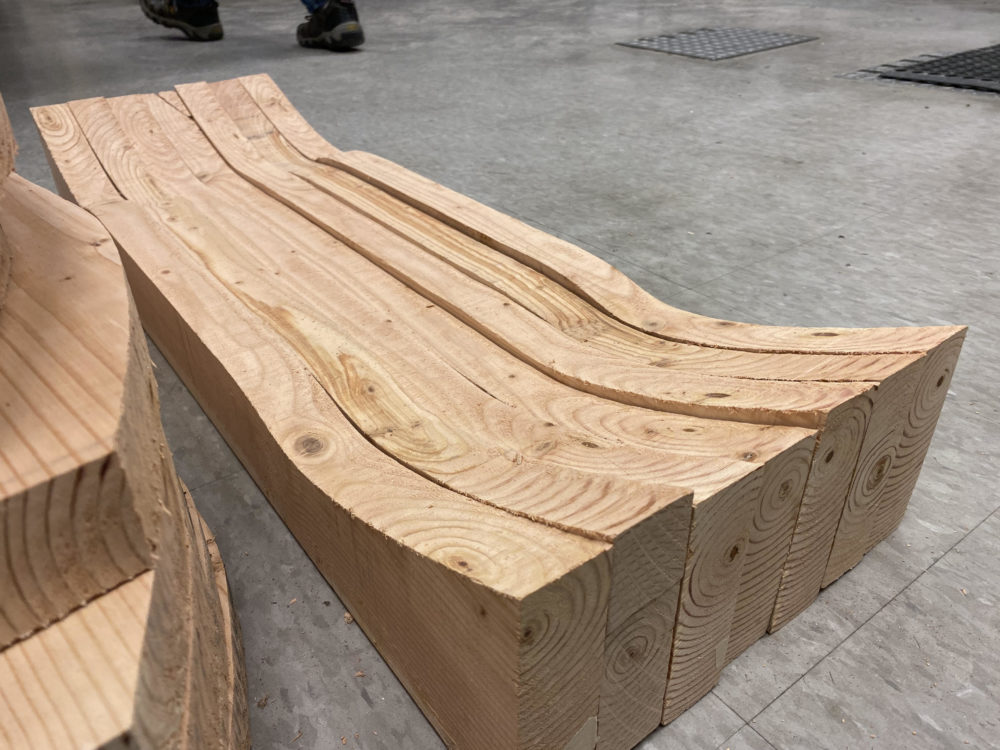
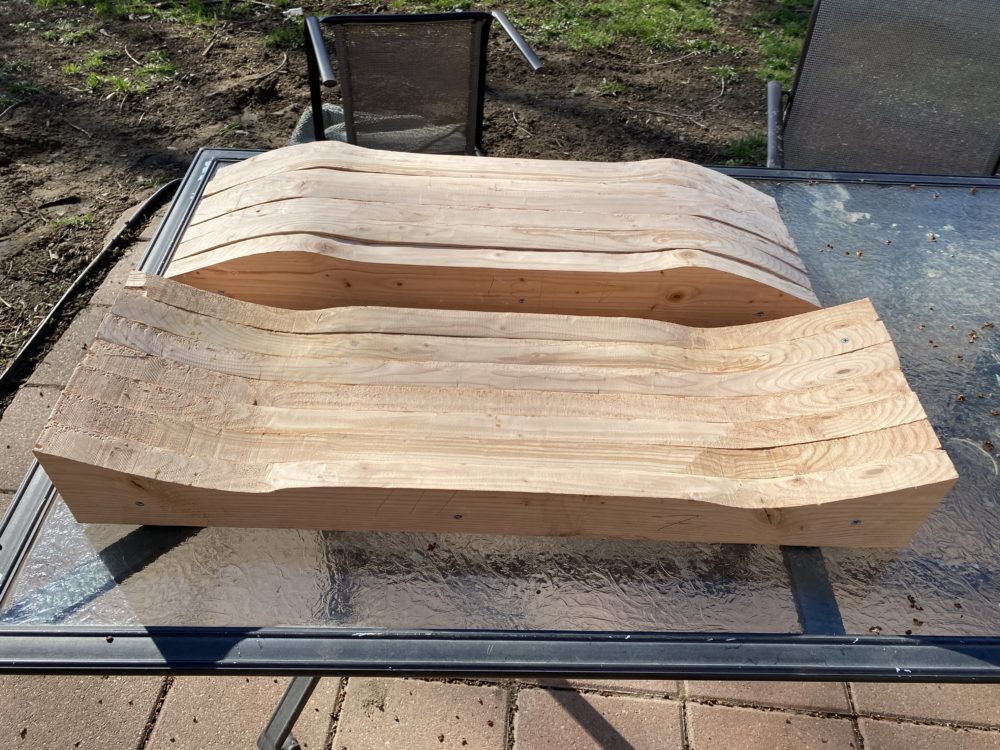
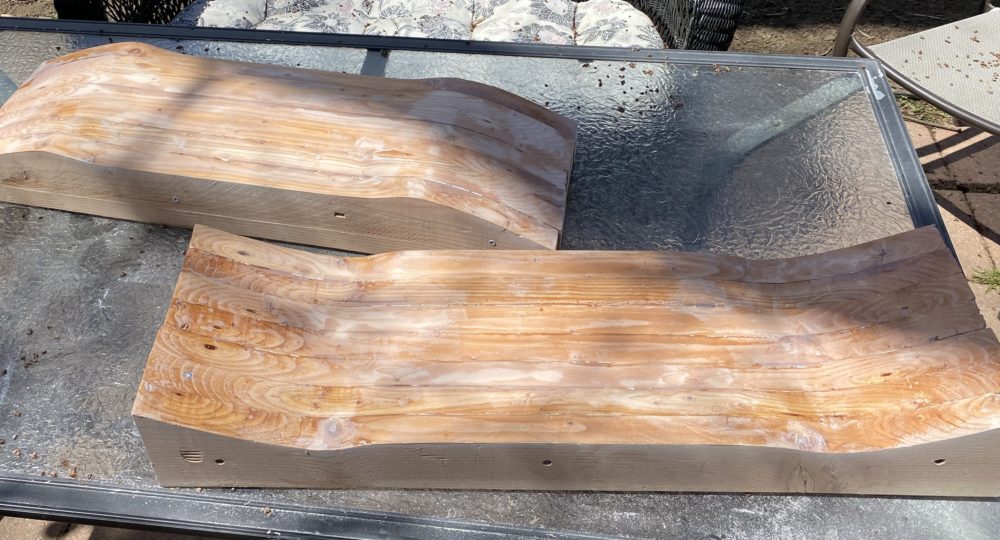
Creating the Mold
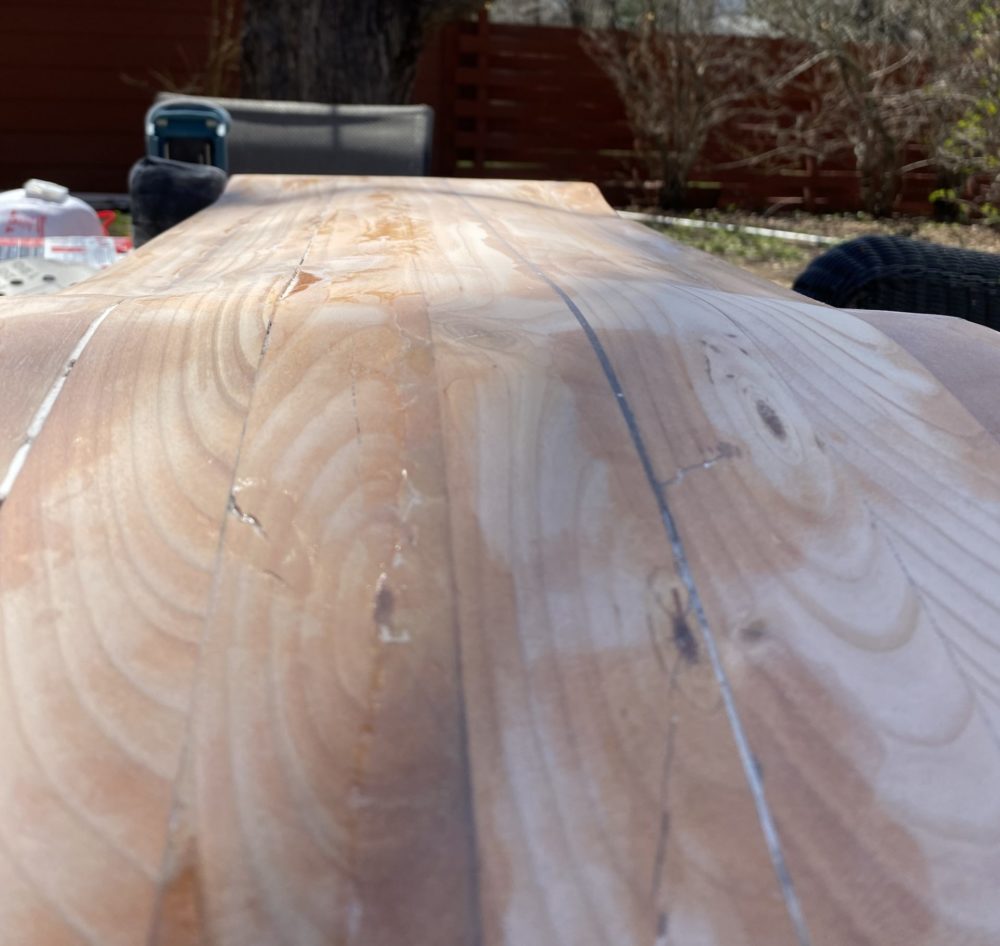
Creating the mold was by far the most time-intensive and methodical task in this project. I began by cutting my 2×8″s into 36″ pieces. I printed a set of plans which contained a profile for each piece in the mold dependent upon how much concave it needed. I altered these plans so that my mold would be set up to produce decks with a 13.875″ wheelbase. I then used these plans to cut each of my 2×8″s into a top half and a bottom half using a bandsaw.
 I took all these peices home, lined them up next to each other and traced the tops of each peice to determine how much material was to be removed on the neighboring peices. I used an angle grinder with an 80-grit sanding wheel to remove material, focussing on producing a smooth, continuous seam from one piece to the next.
Once I was happy with the pieces for the bottom half of my mold, I used wood glue and 3 screws per piece to connect them all together. At this point, I took the pieces for the top mold and improved the fit one by one. This involved placing the top piece above its respective bottom piece and marking any high spots. I then used the angle grinder again and continued iterating on this process until the gaps between all of my top and bottom pieces were 1/8″ or less. Finally, I attached all of the pieces for the top mold in the same fashion used for the bottom half.
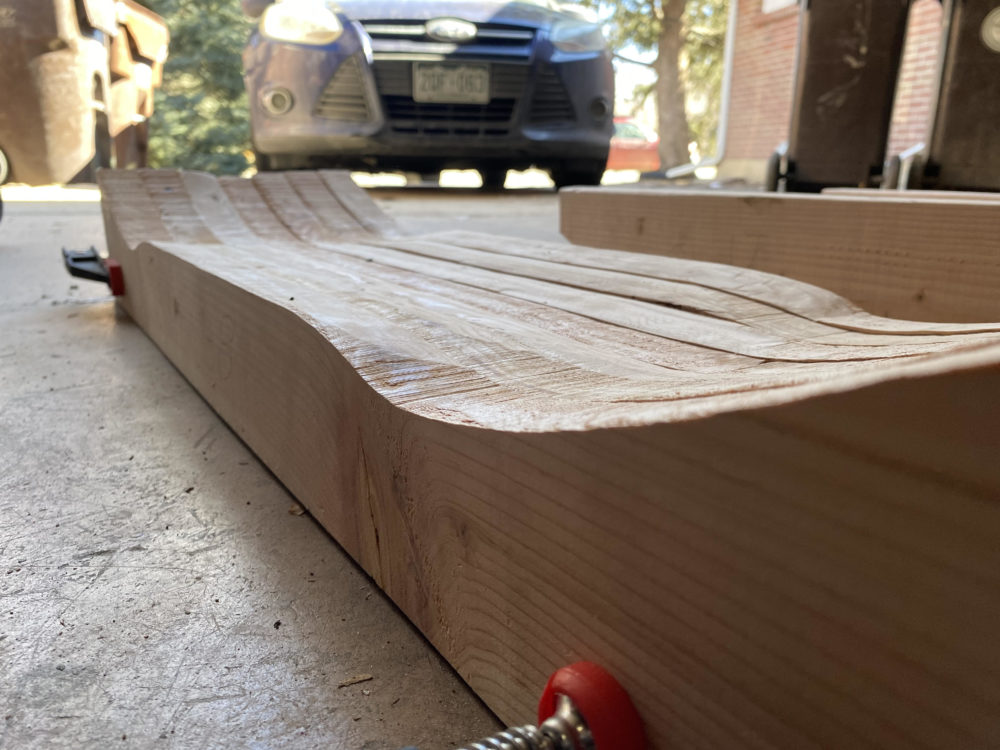
Now it was time for more sanding but this time the goal was not to remove excess material, but rather to smooth out the upper and lower portions of the mold even more. I used 80-grit sandpaper followed by 120-grit paper on an orbital sander. The orbital sander removed material much slower than the angle grinder and allowed me more precision in my sanding. By this point, the mold was looking pretty good but I knew that I should go the extra mile to ensure even distribution of force throughout the mold.
I used fiberglass epoxy to fill in any cracks within the wood or low spots where I had sanded a bit too much. Once I had filled in any crevices with epoxy, I applied a thin coat along the length of the entire mold for increased hardness during presses. Once the epoxy had dried I began my last stage of sanding. I used an orbital sander working my way up from 80 grit to 120 grit before finishing at 220 grit.
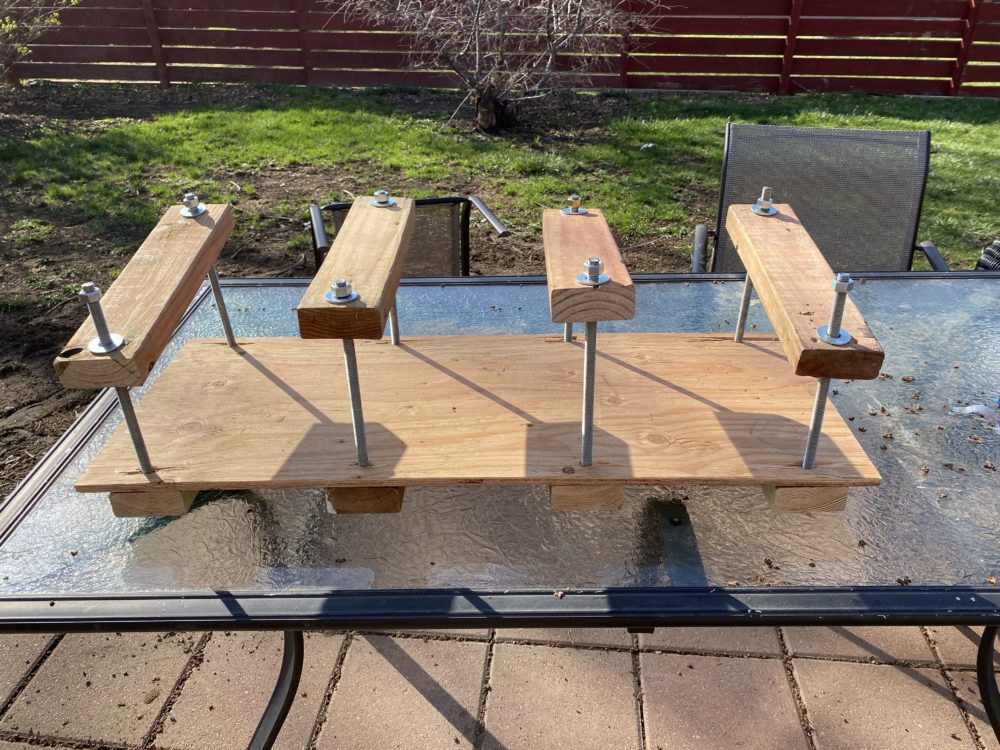
Creating the Press
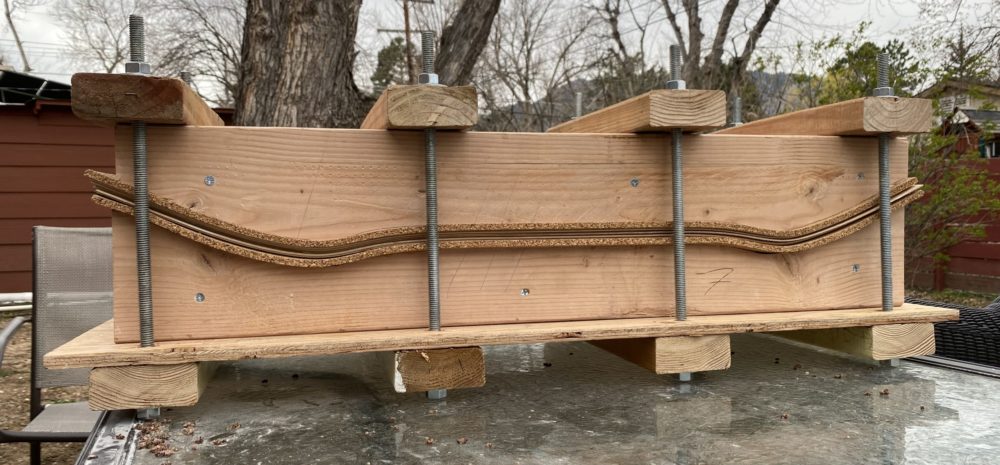
I used an angle grinder with a cut-off wheel to cut my threaded rod into 14″ pieces. I didn’t want to have to squeeze the press together when placing the nuts on top of the spars so this length is a bit longer than it needed to be. I then cut my 2×4″s into 12″ pieces and drilled a 1/2″ hole 1″ from the end of each piece. These would make up the spars and provide the force along with the threaded rod and nut combo. I used screws to attach 4 of these spars to the underside of my 12×36″ plywood an even distance apart. I drilled 1/2″ holes through the plywood so that my threaded rods could slide all the way through the assembly. I then used the washers and nuts to enclose the spars within the threaded rods. Finally, I cut my sheet of cork to fit within the mold and the press.
Pressing Blank Deck
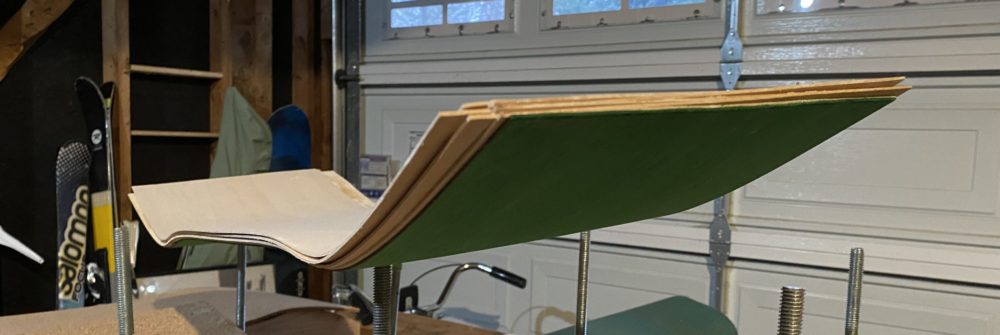
Finally, it had come time to begin work on the skateboard deck. I laid out my seven pieces of veneer in the order I would place them in the press. From the bottom to the top, that order was: the dyed face sheet, core sheet, crossband sheet, core sheet, crossband sheet, core sheet, and plain face sheet. The different sheets have grain traveling in different directions and help to add strength to the board in all directions. I applied a consistent layer of glue across the top of the bottom sheet and the bottom of the second to last sheet then used my roller to distribute this glue evenly across the surface area. I repeated this process for each sheet, stacking it onto the mold as I finished with it. Finally, I placed the cork and the top half of the mold on top and secured the press with the spars and 1/2″ nuts.
Designing and Cutting the Shape
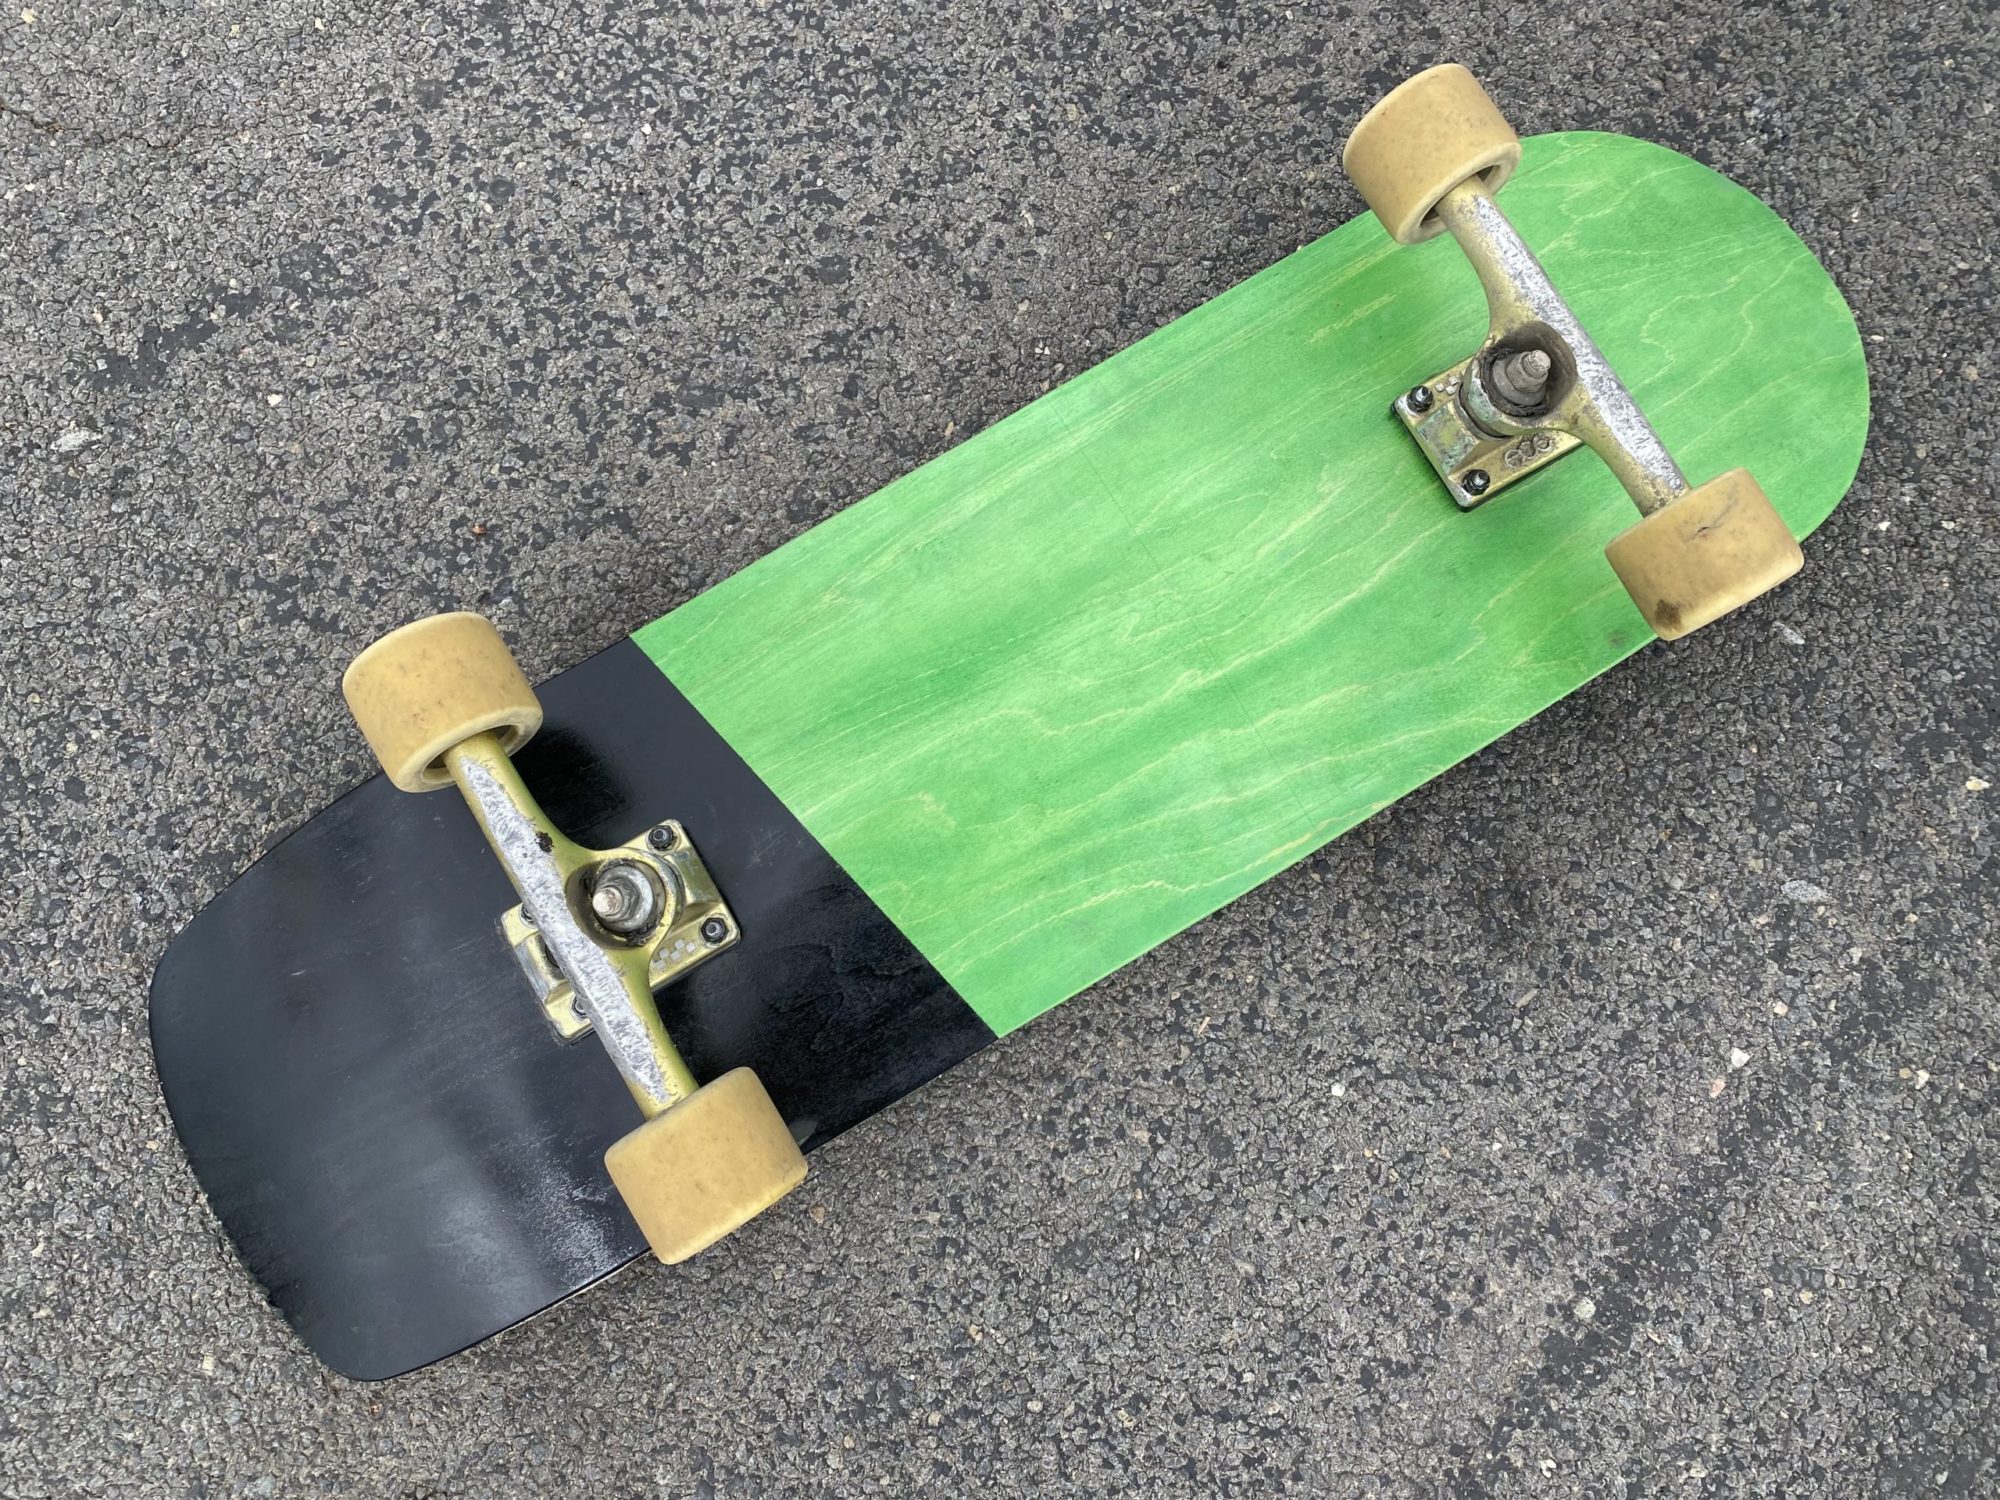
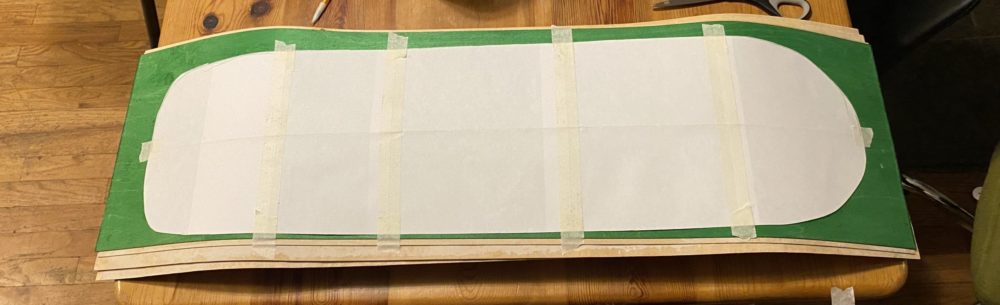
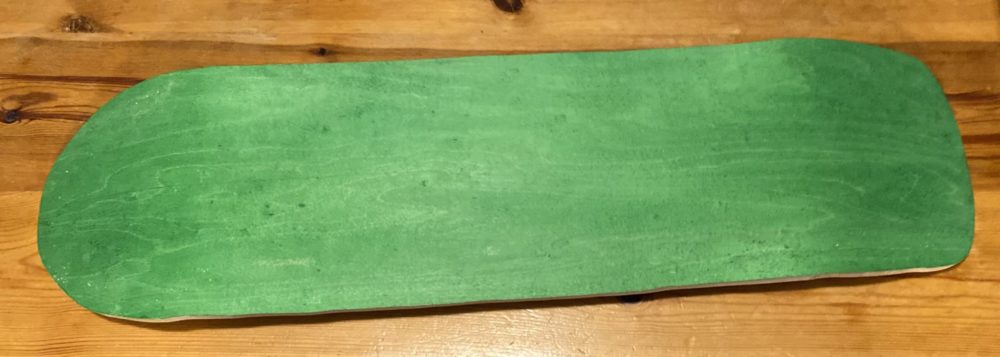
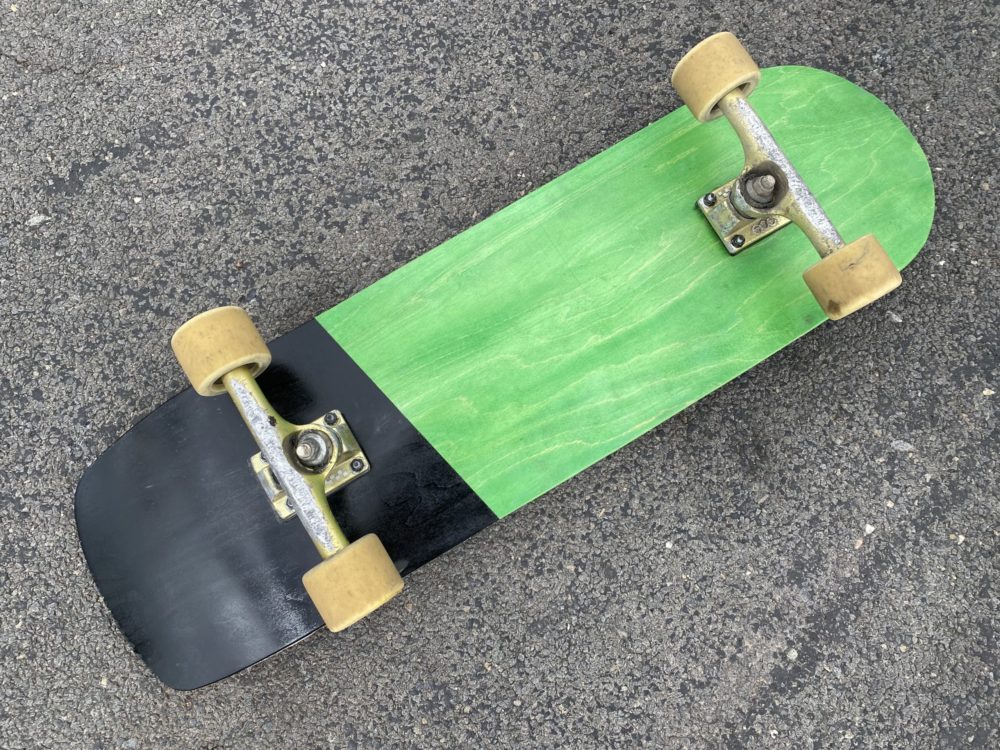
I knew it was extremely important that I found the center of the blank based on its concave rather than it’s dimensions. Otherwise, this would lead to the deck feeling uneven under your feet. I flipped it upside down and used marbles to find the ridgeline across its length and marked this. I then folded a long piece of paper in half and taped it to the deck so it lined up with my centerline. This allowed me to ensure my shape would be symmetrical about the centerline. I took a street deck I had and traced it onto the paper to get a general idea of my boundaries. Then I slowly sketched out my 80’s vert style shape onto the paper. I cut the paper out created a stencil and used that to trace the shape onto the blank. I used a jigsaw to cut my shape out of the blank and was quite pleased with the result.
Painting and Finishing
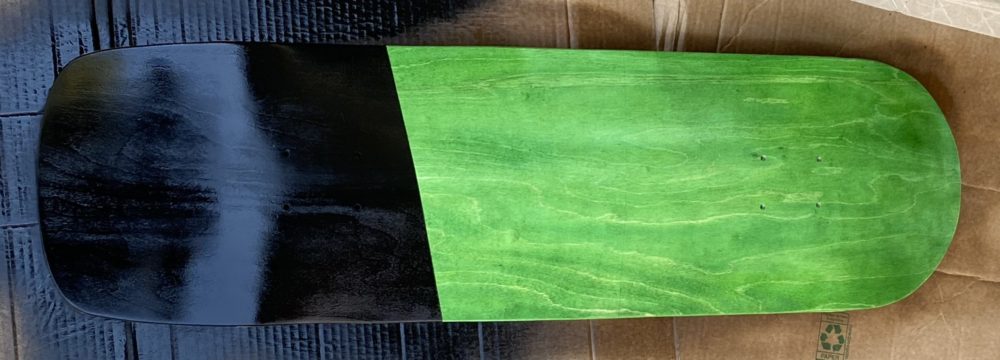
The finishing steps for this project were relatively simple. I used the orbital sander to round off the edges of the board. I then placed a pair of trucks I had onto the centerline of the board, ensuring that I was maintaining my 13.875″ wheelbase, and marked the mounting holes. I used a 3/16″ drill bit and the drill press to create the mounting holes for the trucks. Finally, I broke out the sander one more time, moving again from 80 to 120 to 220 grit sanding both the top and bottom of the deck. I used masking tape to create a sharp line across the lower half of the deck and painted it black with 3 coats. After the deck had dried, I applied 3 coats of lacquer to both the top and bottom of the deck.
 Final Thoughts
Unfortunately, my deck did not last very long. I think it would have been fine for cruising around. However, after popping a few tricks I could hear and feel the heartbreaking sound of my veneer cracking as the deck became delaminated. I believe this is a product of my gluing. I was gluing up the veneer in my backyard and almost like clockwork, the wind started blowing like crazy. I think that the wind caused some of my glue to dry before I had the press completely closed, causing minor delamination which later propagated through the length of the board while I was jumping on it. You can see the beginning of the end in the video below. Watch the nose of the board during the landing.
Nevertheless, I’m ecstatic with my work this semester. While my deck broke, my mold and press are still intact and I plan on creating many more decks in the near future.
2 Comments. Leave new
Hey Lucas, I think this was an awesome idea for the project as its something that can continuously create new boards for you and also allows you to do it relatively easily. It will be great to see how you get the process for creating these boards down to a science the more you use it!
Hi Lucas, this is some awesome work you did. What do you plan on doing differently for the next board you make?