

At this point in time my final screen and visual installment are complete. This second half of my report will be focused on the creation process. I encourage you to go read part 1 to learn more about my inspirations, aesthetic choice, and my personal feelings towards the work I produced.
Again, as a quick refresher, my chosen aesthetic is minimal modernism. My design idea was to create a dynamic project screen and accompanying visuals made partially with creative code. Before we get into all the specifics, I just want to say that while not everything came out exactly as I would’ve liked, I’ve learned an incredible amount over the past two months and I’m looking forward to continuing my pursuits in this creative field.
Sketching and Prototyping
The first stage of my design process was of course to dial in my vision through sketching. My design process is very iterative so my sketches served mainly as an idea generator rather than permanent plans. I knew I wanted to create a projector screen that hung from the ceiling and was also dynamic. I didn’t want to meddle with any specifics like measurements till I had the materials.
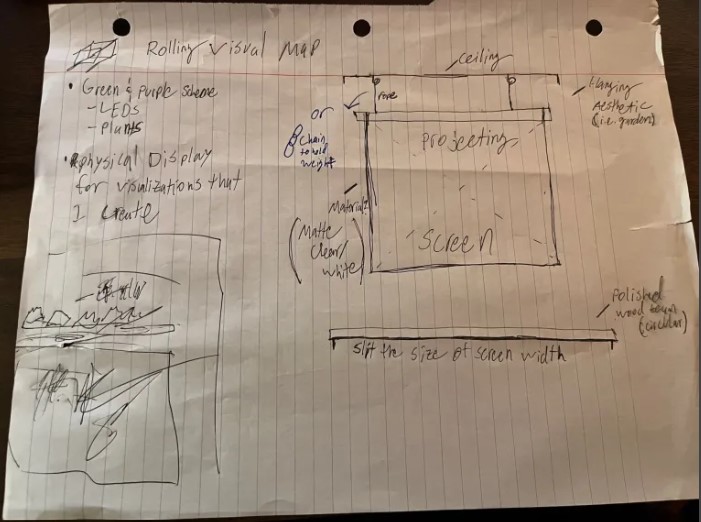
Front Facing Design
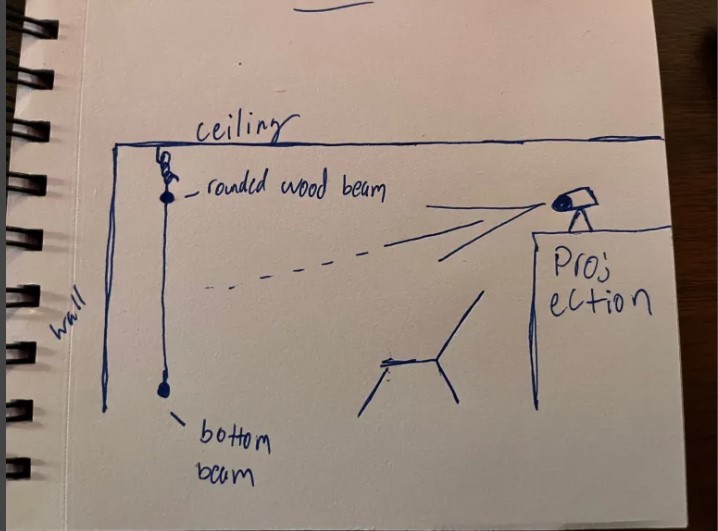
Side Cut Sketch
During this stage of my design process I also found it prudent to create some prototypes to help me see how the dynamic aspect of my design would work. The original idea I had was to use a velcro system. This would allow me to roll up the screen and attach two wood beams together.
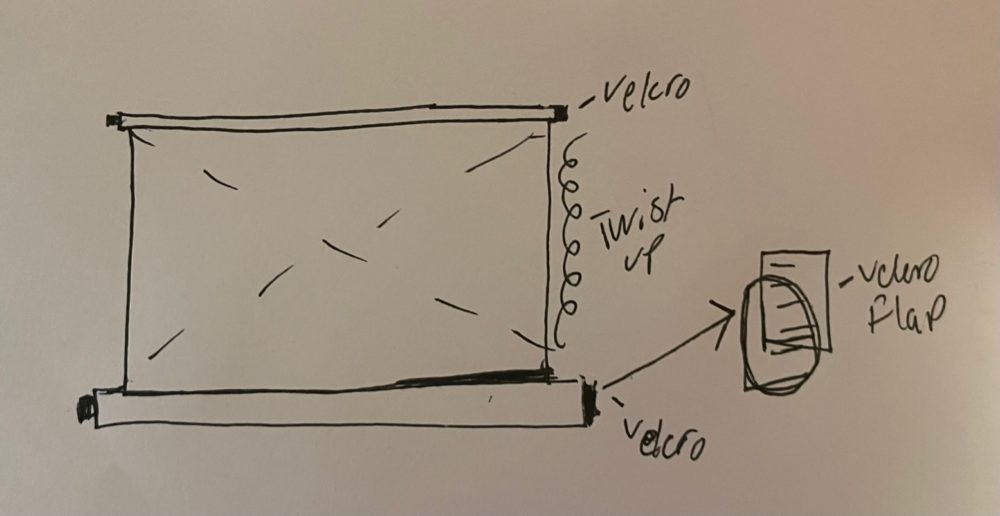
Dynamic Roll Up System
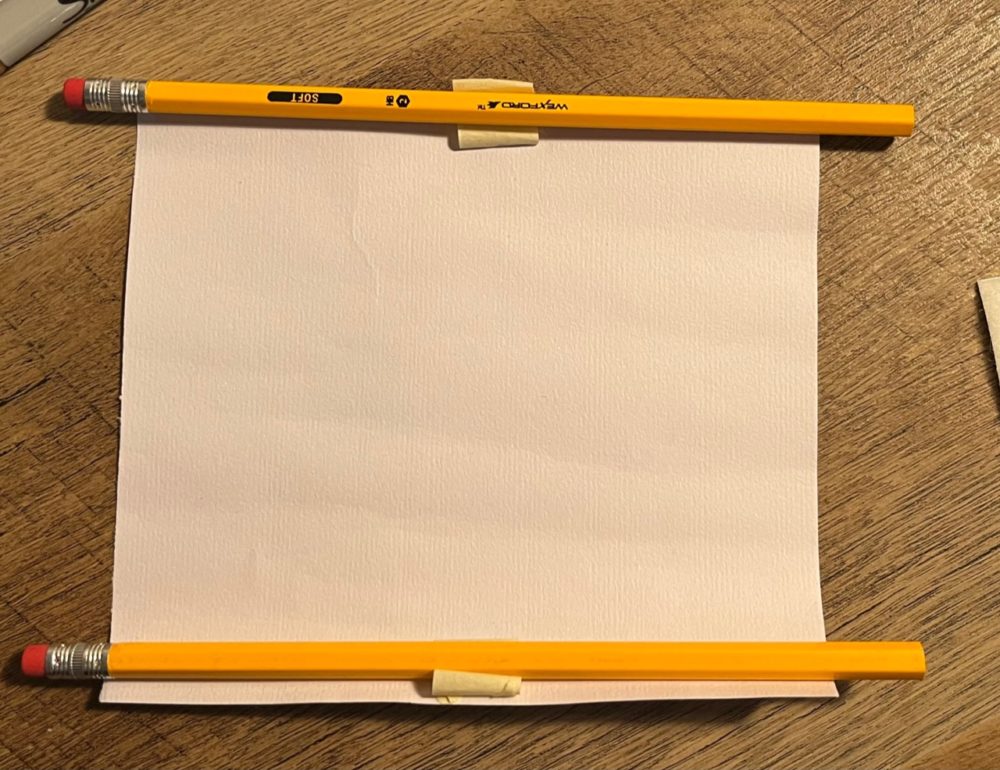
Lofi Prototype
As I mentioned above, the designs I created in this stage changed throughout the process. For example, the dynamic design I created here did not end up being included in the final product. Due to design ideas that arose throughout the project I chose to alter this. I would like to also note that the final product only utilizes one wooden beam rather than two. However, we’ll get more into this soon.
The final piece of my sketching process was to create a mockup of a visual I wanted to code. In my visuals I was trying to adhere to the modern minimal aesthetic. This led to me to be fascinated with colorful and dynamic lines. Outputs similar to my sketch ended up being fairly prominent in my final product.
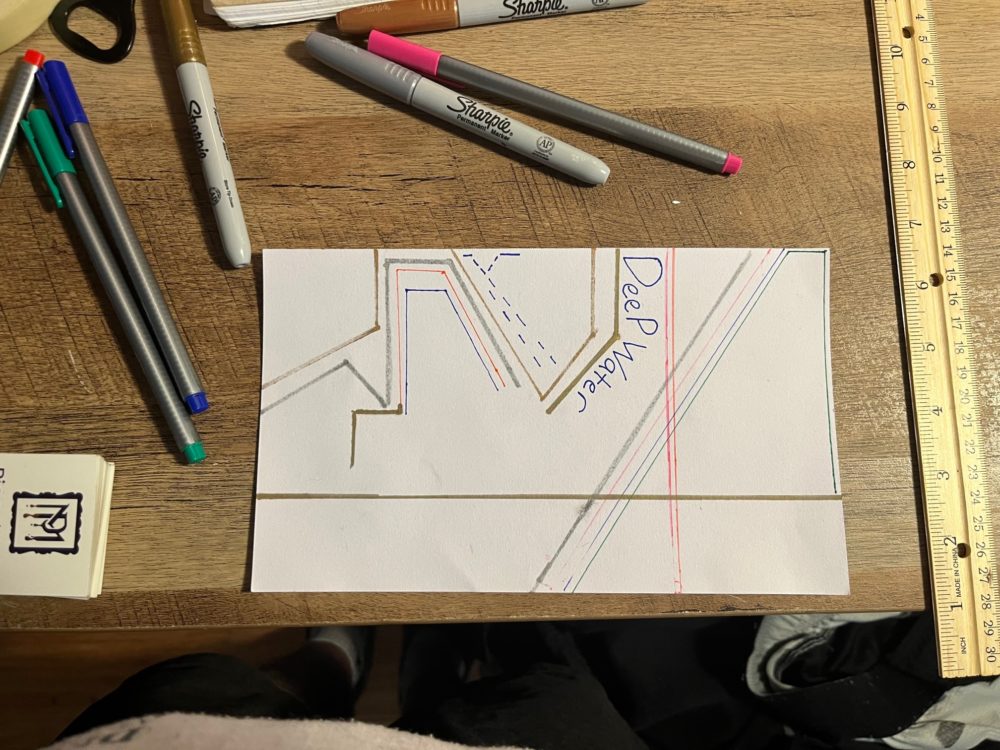
Visuals Sketch
Material Collection
As straightforward as it sounds. All the materials were sourced with aesthetic in mind. As part of my minimal modern design choice I wanted to use a combination of metallic and wooden materials. Materials such as these fall in line with modern furniture design. A minimal color palette also wouldn’t interfere with the visuals being displayed.
- Two 4 foot wood beams
- Oak finishing
- 2 6 inch stainless steel chains
- 1 set large heavy duty hooks
- 1 set small heavy duty hooks
- Projection screen – blackout fabric
- Velcro
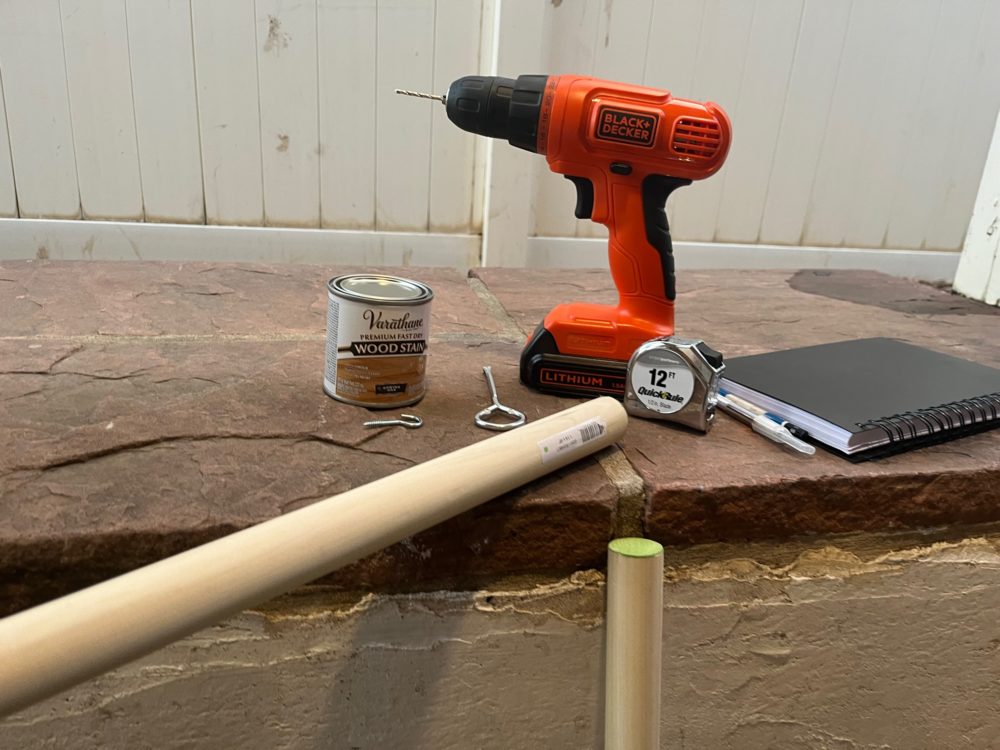
Assorted Materials
Physical Artifact Fabrication
Before entering this section I encourage the viewer to go read through my design specifications and constraints.
The first step in my design process was to stain the wood beams. This was incredibly simple but left the wood with a beautiful finish that would fit in perfectly with any surrounding.
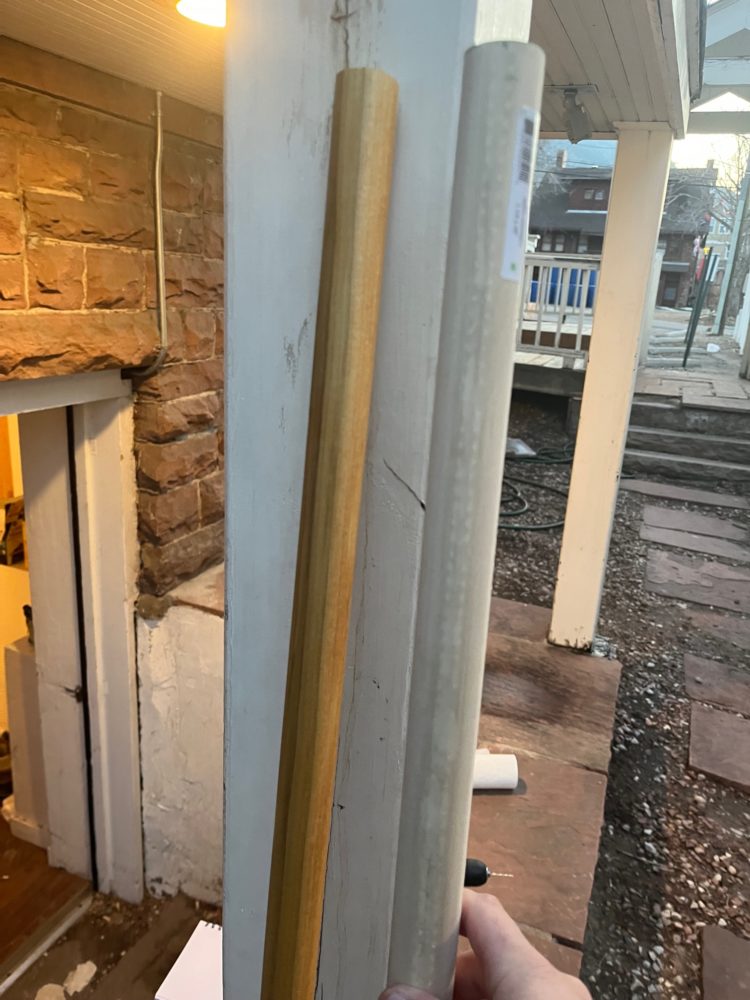
Stained Wood Beam
After this the meat of the fabrication process began. Most of this time was actually spent dialing in how I wanted it to all come together. It was during this time that I made alterations from my sketches. I was really struggling to determine how I wanted to make my roll-up storage system. It was becoming tedious to decide how I was going to attach the screen to both beams and still have this be possible. It was during this time that I was struggling to hang up a bunch of wet shirts to dry. This set a lightbulb off. If the dynamic part was creating a detachable screen this would allow for the hanging beam to be multi-functional (I could use it as a drying rack).
After making this design choice, the rest was a breeze. I drilled my small hooks into the wood beam after measuring the space with my projector screen. The hooks are approximately 2 and half inches in from the edges of the beam. From there, I measured the proper dimension of the ceiling of my bedroom. Once I was confident I had everything lined up I drilled the larger hooks into the ceiling and attached the beam to the ceiling with the stainless steel chains. It looked gorgeous.
The dynamic element ended up still utilizing velcro. I attached five velcro pieces with heavy duty adhesive to the backside of the hanging beam. This worked wonderfully because the velcro is essentially hidden from any noticeable angle. The velcro was placed with spacing of about five inches between each piece. This made sewing it onto the screen very easy. The screen can be attached to the hanging beam and removed with ease to be folded up for storage.
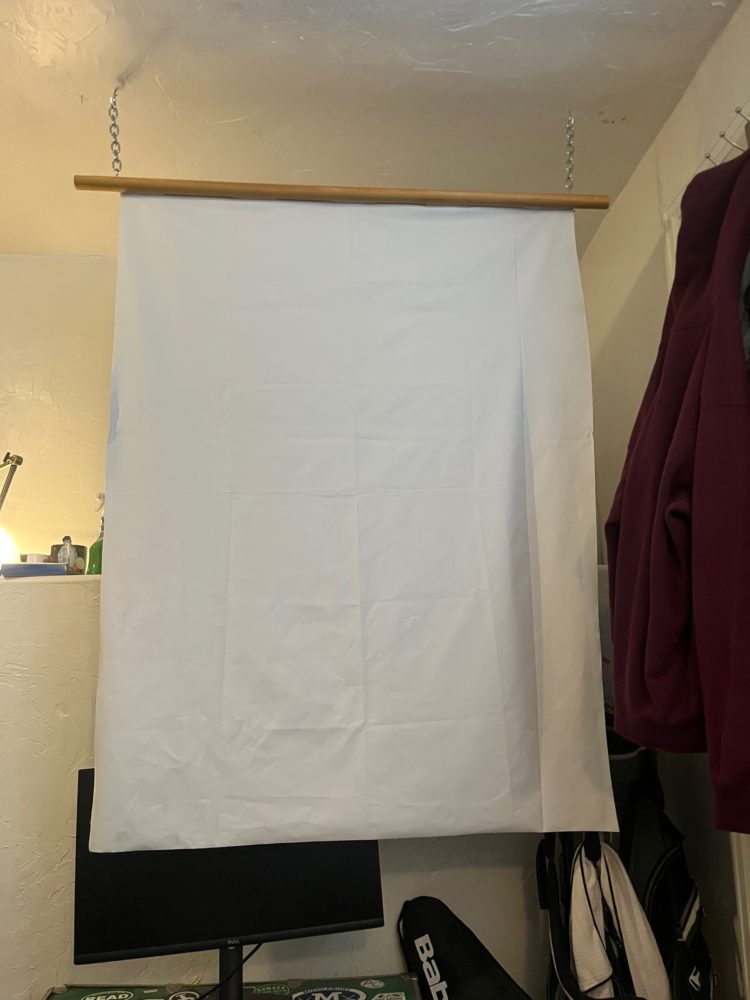
Final Screen Attached to Beam
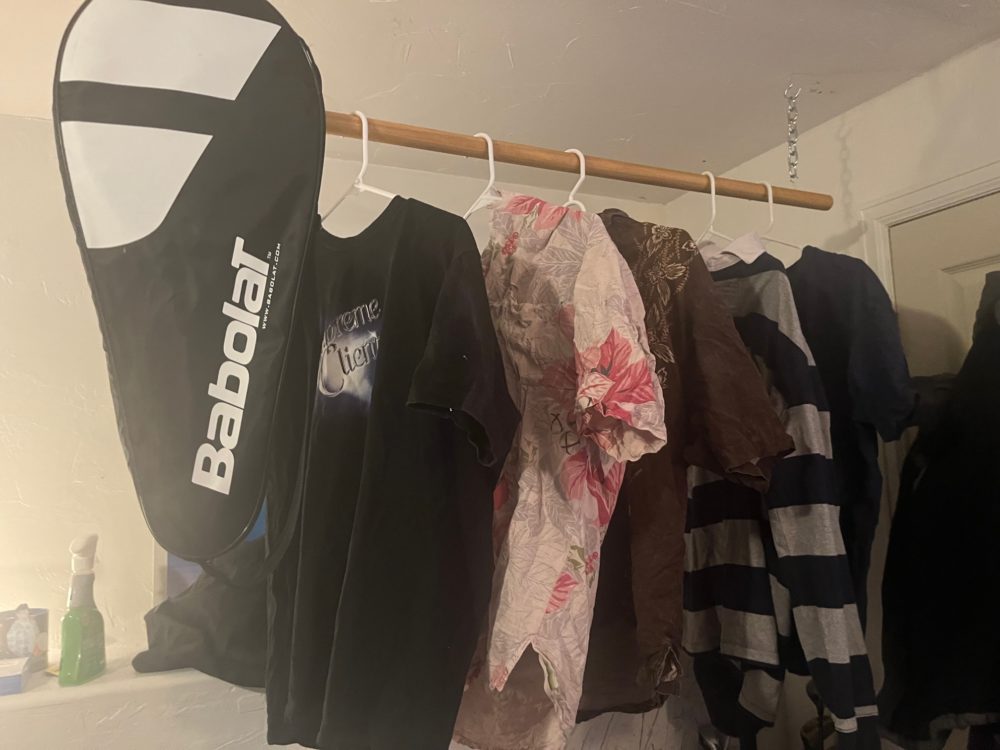
Hanging Beam as Clothes Rack
Visual Creation
For me this was the most exciting part of the project. I had always wanted to experiment with creative coding but had never had a timely reason to pursue it. I made my coded visuals using the p5js library in javascript. I also used the p5js editor which allowed me to see visual output upon running code.
This was a total learning experience as I’d never even coded in javascript before. It involved a lot of youtube tutorials and stack overflow exploration. Most of all though, it was experimentation. I learned tons of library functions like how to animate designs using geometry (cos, tan, sin) and creating 3D renderings (webgl).

P5js Editor Interface + Rotating Cube Visual
Check out the video below to watch my initial video installment created for the projector screen. The media is a combination of coded art and video clips shot and edited by me.
Song – Meet You in the Dark, Das Kope