
My upcycling project is “A Witch’s Cabin” diorama.
After settling on a concept and drawing plans, I grabbed the cardboard box that I’d be using for the base and sketched the design inside. Initially, I wanted to turn the box on its side to decrease work, but the proportions were off. The ceiling would’ve been too tall and a wall too short for my design. Since I would’ve needed to lower the roof, I flipped it right-side-up, cut out two walls, and planned on building the roof separately.
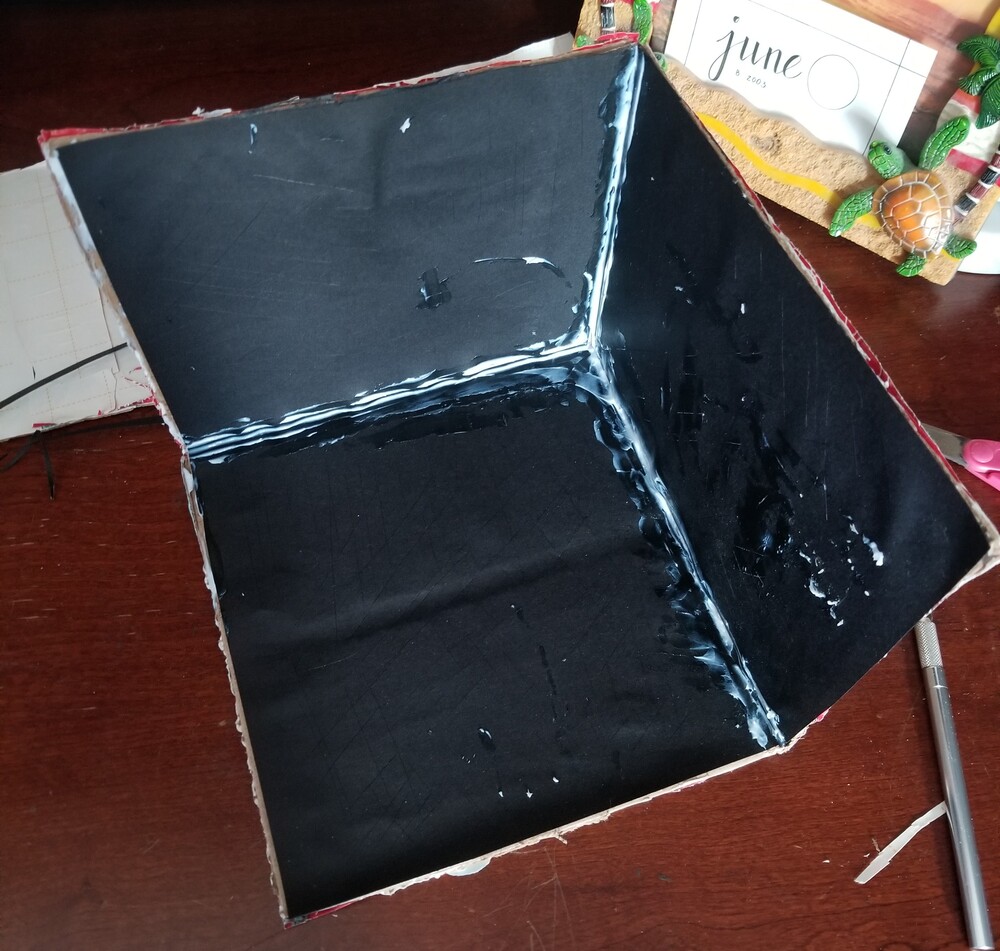
After restructuring the cardboard box, I glued black cardstock on the inside to act as a base for the clay and a black backdrop. Then, I re-sketched the design onto the cardstock. Those sketches helped me envision the placement of the furniture and served as a guide for general sizes.
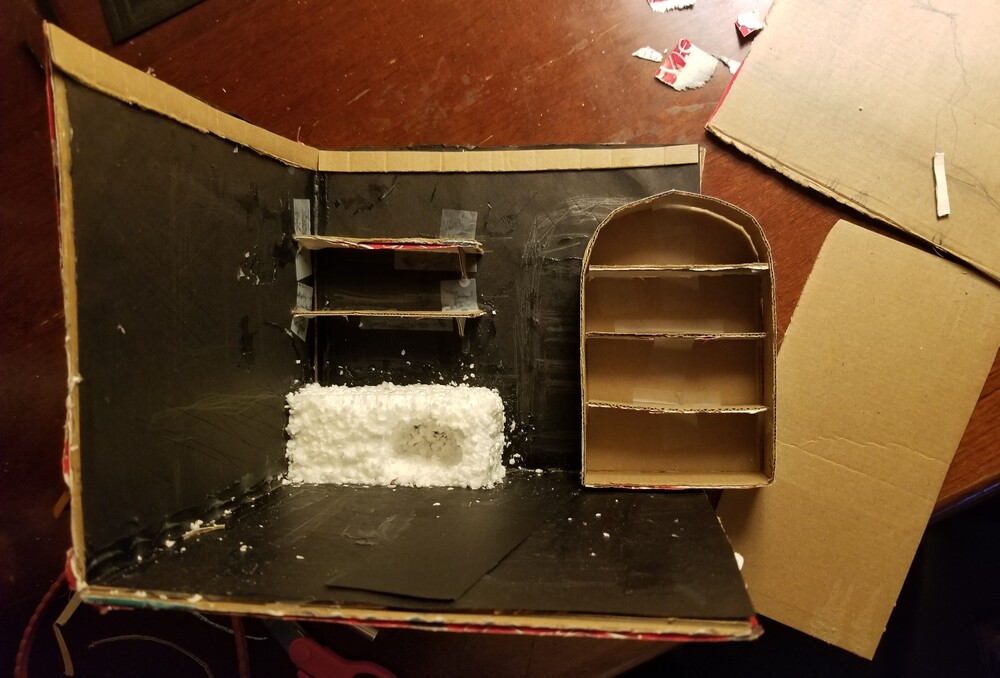
Next, I carved out a “stone” counter and furnace from styrofoam, gluing it onto the cardstock. I mixed together styrofoam scraps and modge podge to fill in the extra cracks. While waiting for the “stone” to dry, I created bases for shelves, the table, and the cabinet with extra scrap cardboard. Because I would later cover these in clay, I connected the pieces together with glue and tape to get their general placement.
After building most of the bases, I started working on the clay aspect. I covered the diorama base with a thin layer of clay and molded the wall into a stone brick pattern. Additionally, I cut the plank floor pattern into the floor. If things went as planned, painting over the “planks” would preserve the cracks between them.
Overnight, the clay dried. There were cracks and warping, but I expected that. My hope was that the cracks and warping wouldn’t be too difficult to fix. I first coated everything with a layer of white paint to gauge the damage. While the walls were fine, the floor was particularly bad because it needed to be flat.
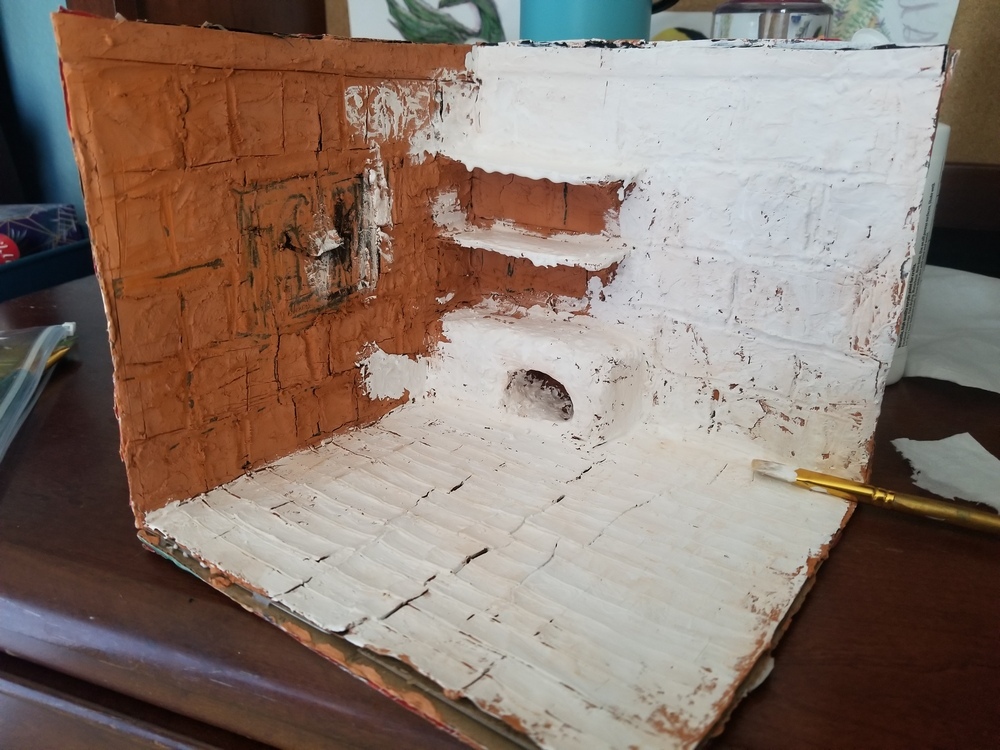
Since I couldn’t flatten it, I decided to cover everything up with my initial plan. Originally, I wanted to create the floor by laying down strips of cardstock like wood planks. However, I thought that I could cut clay straighter and better preserve the board cracks, so I didn’t try this out. It turned out better than expected, but there was still warping.
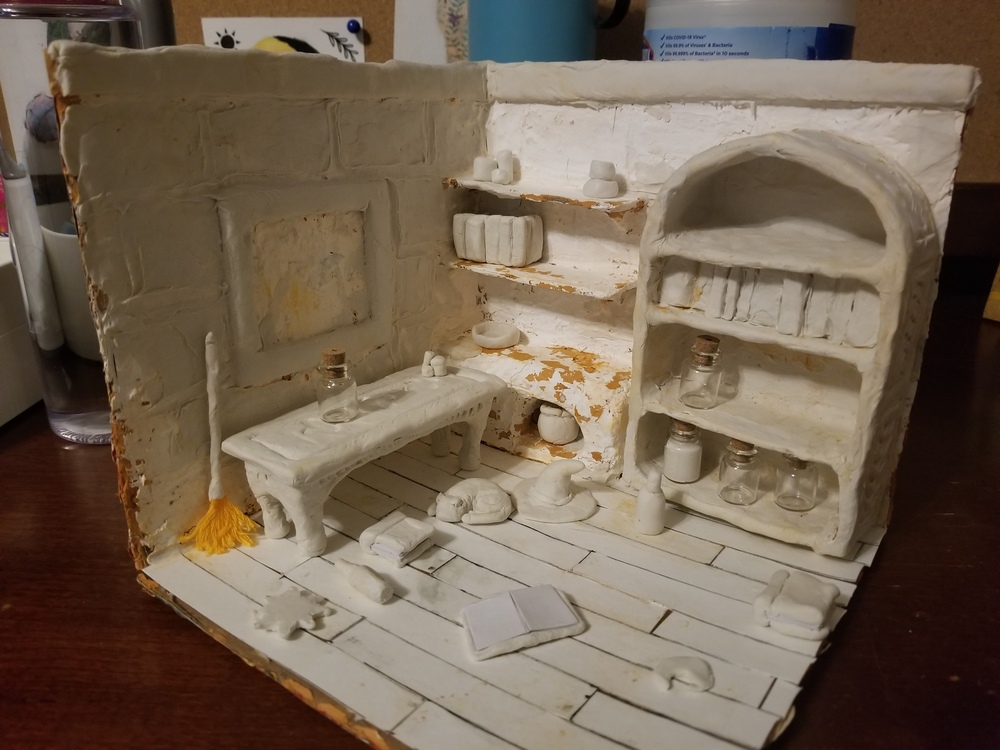
At this point, I had used up most of my supplies: modge podge and air dry clay. Thus, I went on a shopping trip to restock and buy the mini glass bottles that I needed for decor. During this trip, I decided to strip the entire floor and redo it with modge podge and watercolor paper (which is thicker than cardstock) to reduce the warping. It turned out quite well.

Afterward, I used clay to fill gaps, build up the brick structure, thicken the furniture, and create some miniature decor. It was somewhat difficult because everything was small while the clay was fragile and kept sinking into itself. But things worked out and that’s my progress so far.
When the base dries, I’ll paint everything in shades of browns, blacks, witchcore colors, and splashes of bright magical elements. Then, I’ll finish the clay furniture and decor before gluing them down. After that, I’ll work on the ceiling. I plan on buying a mini led to create a swinging light. I plan on making this an open project and slowly adding more items to decorate the scene in the future.
Note: Images 1-5 all taken by me.
2 Comments. Leave new
This is a super cool project! I like how through every step, the diorama kind of has a new aesthetic. For example, in image five, the cracked paint revealing the color underneath is really interesting and gives the diorama an old, covered-up feel, even though it isn’t near done. As you work more on this, will you add more elements for texture besides the clay, like fabric or small trinkets? I think that would give the piece some more dimension and also more opportunities to upcycle!
Hi Zoe! Thanks for your feedback. I’m considering add some fabric curtains or a rug, but I’m not sure if I currently have the scraps in the right colors. I do plan on adding twine to add more texture though. As for other small trinkets, I have to make most of them because I haven’t found many that were the right size.