
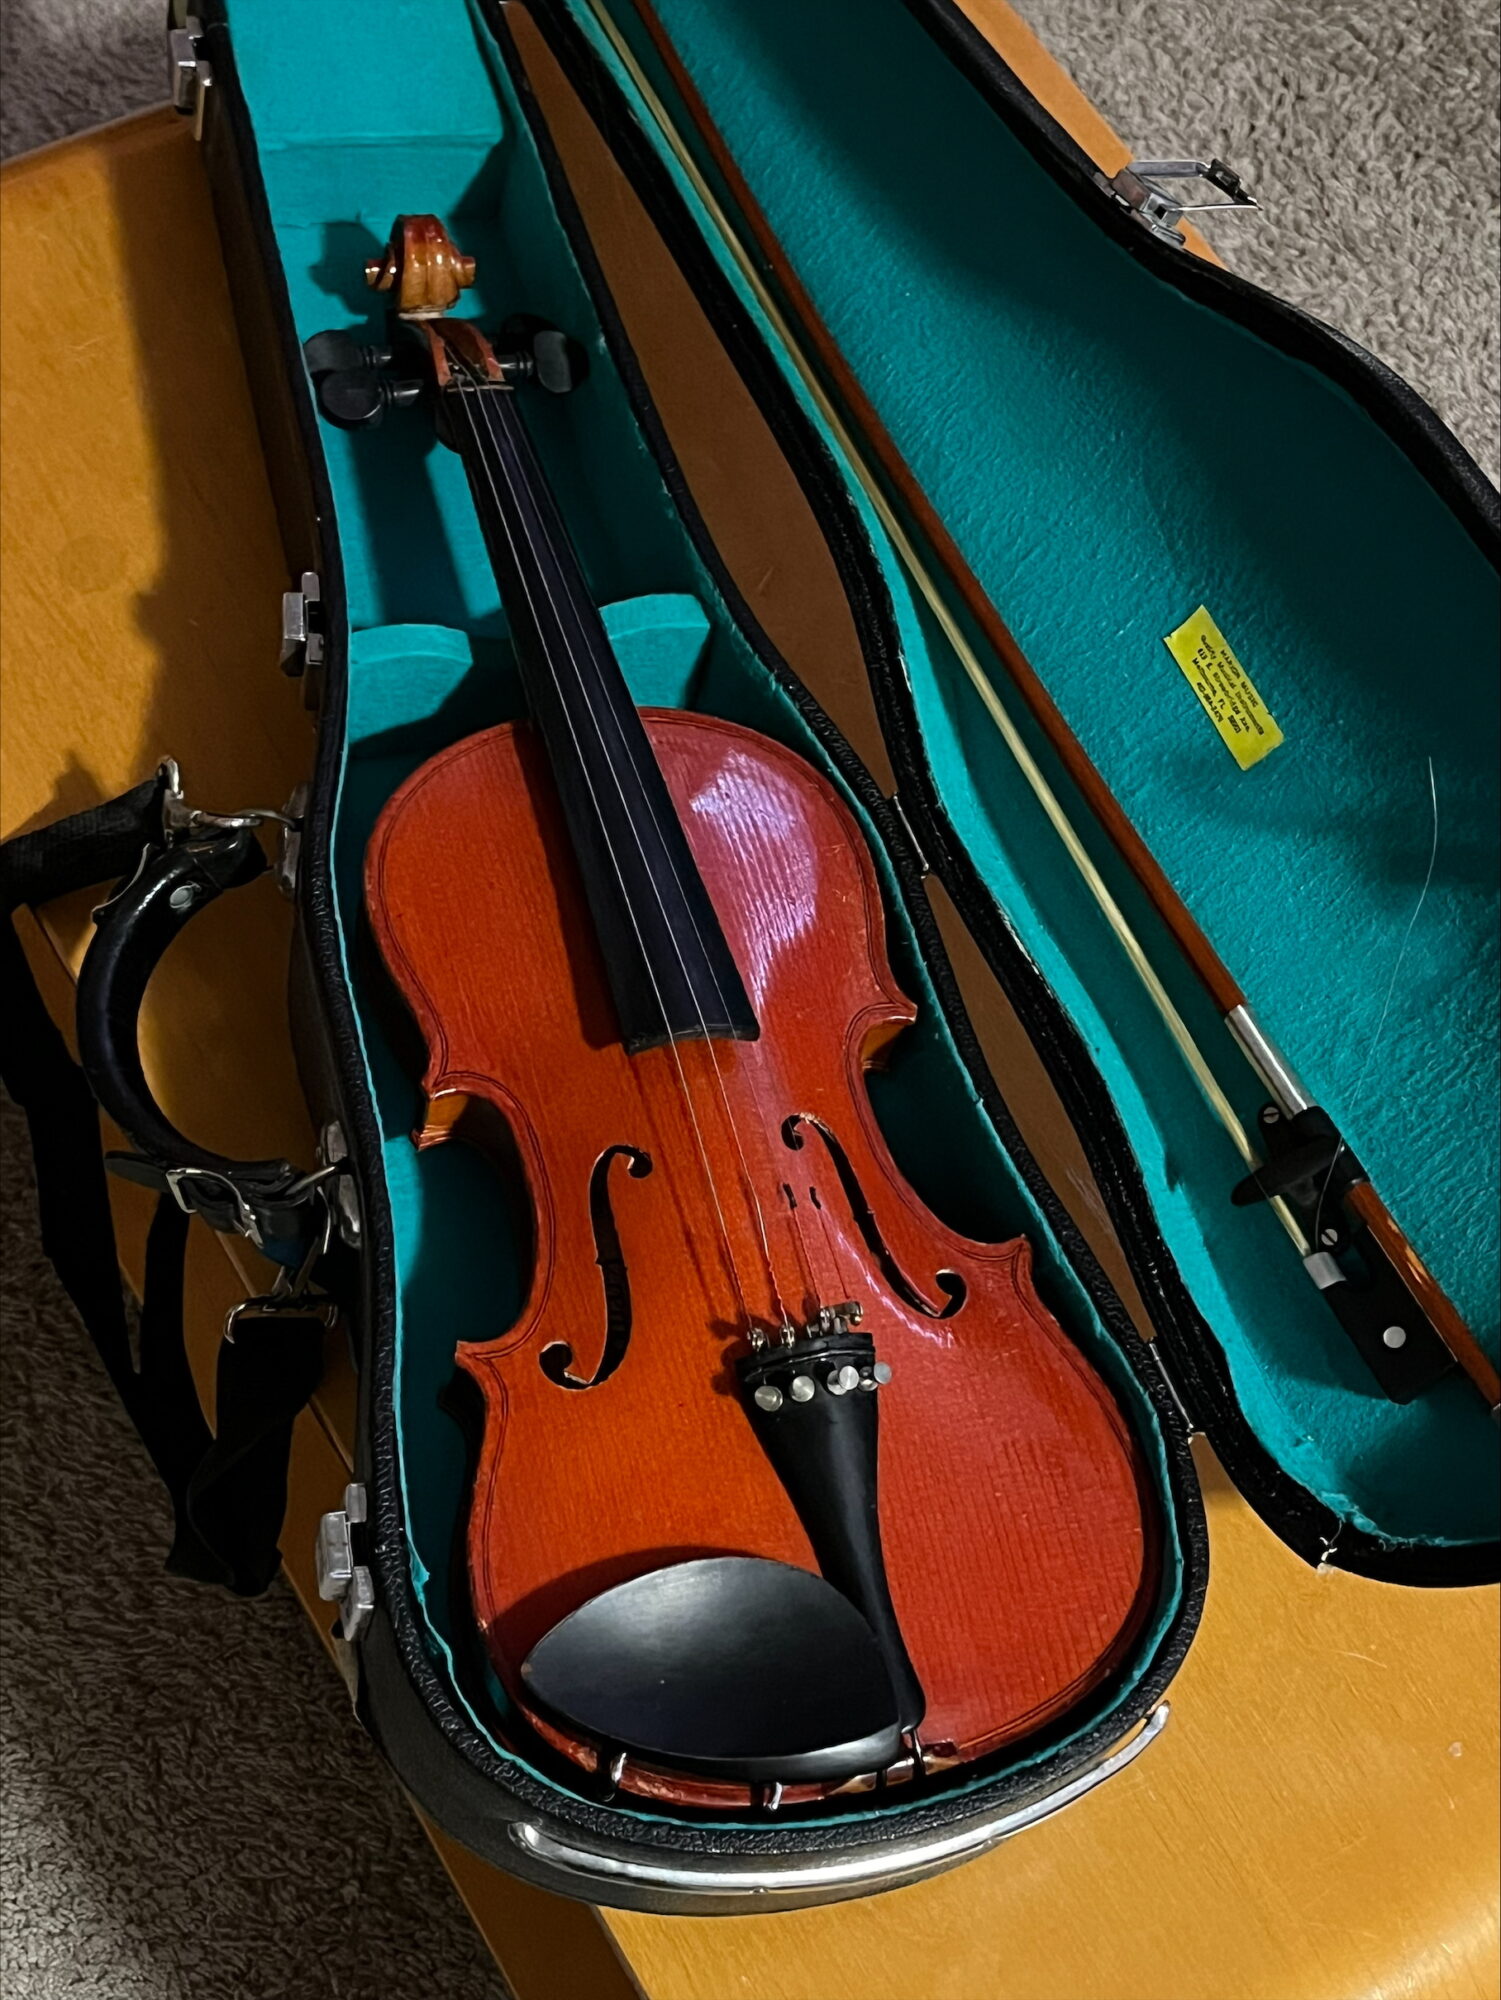
My upcycle project is currently still in the beginning stages, but I have collected several necessary materials. The first, and most important material, is the violin itself. I was lucky enough to have been given the violin for free, but it has a few issues that I will need to fix. The main issue is that it is missing the bridge, the main component which tensions the strings. This is not necessary for turning it into a lamp, but it will improve the look of the violin significantly. The color of the violin is also a very bright orange color, which doesn’t fit the baroque aesthetic very well. I’m considering looking up techniques for either darkening the finish of the wood, or just painting it. In terms of materials I still need to buy, I still need some balsa wood that I can use to laser cut the bridge of the violin, as well as an adapter plate for the lightbulb fixture to place over the scroll. I found a drawing of a violin scroll online with all the dimensions that I plan on recreating in SolidWorks and laser cutting at the ITLL.
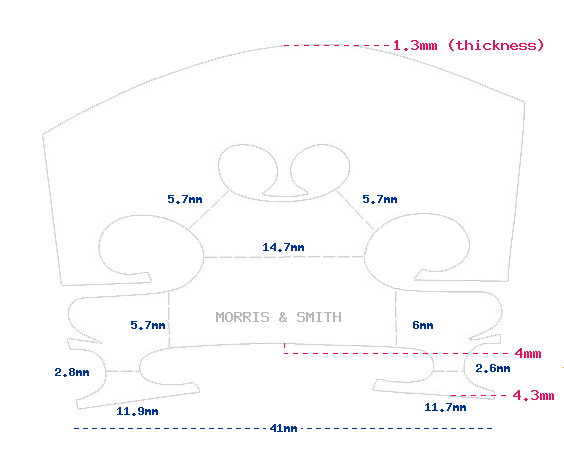
I will have to verify some of these dimensions on my own, but since replacing the bridge is more for looks, the dimensions don’t need to be perfect.
So far, the only items that I have ordered are the lamp bulb fixture, a lamp shade, and thin LED strip that I will replace the strings with. The lamp shade and bulb fixture have arrived, but I am still waiting on the LED strip.
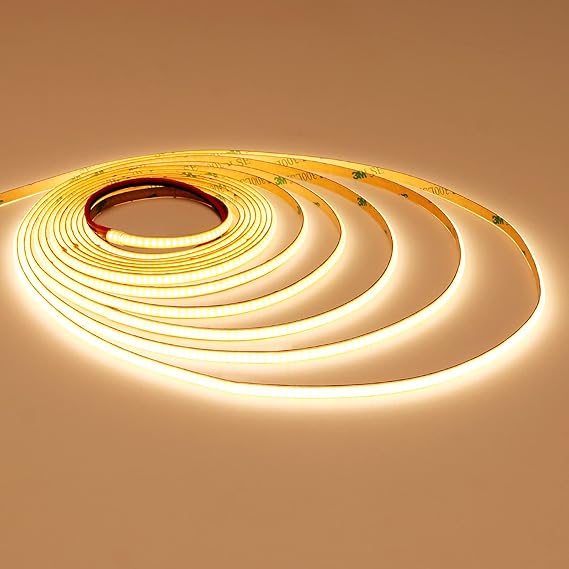
The LED strips are 3mm wide. I measured the width of the fingerboard where the strings are located, and it gradually increases from 23mm up to a little under 40mm, so there should be plenty of space for these LED strips.
I expect the most challenging aspect of this project to be designing the adapter plate for the light bulb that will rest on top of the scroll. The scroll is a relatively expensive and important part of the instrument, so I would like to avoid damaging it as much as I can.
I have made a quick schedule to plan out how I will design and fabricate the rest of this project before the 17th.:
Friday 2/7: LED lights arrive
Sunday 2/9: Finalize adapter plate and bridge designs
Friday 2/14: Ensure bridge has been laser cut and adapter plate has been 3D printed
2/14-2/17: Assembly and finishing touches
I expect the most challenges to arrive while preparing to laser cut the violin bridge, and 3D print the adapter plate. To compensate for this, I am giving myself the entire week of 2/9-2/14 to complete these two parts.
Sources;
Amazon.Com: Topai 12V Thin 3mm Cob Led Strip 6000K Daylight 16.4ft Bright White CRI>90 Uniform Dotless 384LEDs/M Adhesive Flexible Cuttable Led Tape Light for DIY, Bedroom, under Cabinet Lighting : Tools & Home Improvement, www.amazon.com/TOPAI-COB-3mm-Cuttable-Flexible/dp/B0C14C77F9. Accessed 5 Feb. 2025.
Lousyplayer. “About Violin Bridge Detail Measurement.” Maestronet Forums, 2 Oct. 2018, maestronet.com/forum/index.php?%2Ftopic%2F341142-about-violin-bridge-detail-measurement%2F.
2 Comments. Leave new
This looks great Delos! I am excited to see how this turns out. Other than darkening the wood, do you have any other plans to make it better fit your aesthetic? Also, make sure that you buy either advertised warm white LEDs or RGBW strips, or it will be tough to get the warm hue it looks like your aiming for.
Hi Bryce! The lamp shade that I have found has a relatively baroque aesthetic, other than that, I may consider painting some designs on the violin itself if I find the time. I made sure to order the “warm white” LEDs off of Amazon thanks for the tip!