
For my main project this semester, I am designing a portable bedside nightlight that will take the form of a large magical amethyst-like crystal.
Inspirations
I currently have a little electric candle that I keep between my bedroom and my bathroom. It is very useful to have as a low light bedside lamp while I am getting ready for bed and trying to keep the light level low. I also really like that I can take it with me when I need to wander around the house at night. I use it in the bathroom and even the shower as a means of seeing just enough without blinding me. I often feel like Mr. Scrooge carrying around my little candle, and I really like this form factor of a small light that you can take with you and place wherever you need.
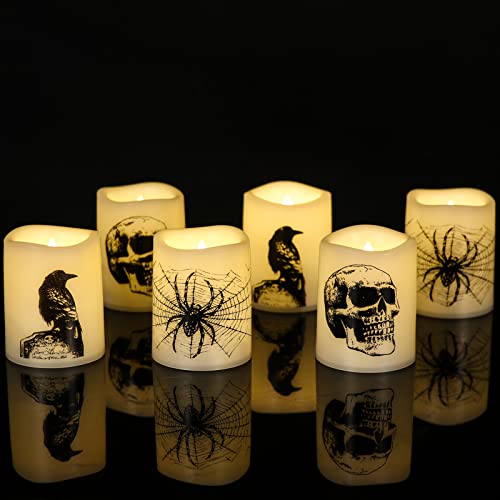
Figure 1: Example of the type of candle I have as my current nightlight.

Figure 2: How I feel walking around my house with my little candle nightlight
The biggest downsides to my little candle are that it is hard to find the switch on the bottom to turn it on. I’m often fumbling around in the dark trying to feel for the right nub, and its annoying. Secondly, it runs out of battery power about once a month, which means I then I have to go downstairs and find some AA’s and remember to change them out, which I never do. So it tends to stay dead for up to a week at a time. I would like to address these shortcomings in my design.
BEHOLD! A Soul Gem:

Figure 3: A Soul Gem from Elder Scrolls V: Skyrim
This is a Soul Gem. Its a magic crystal found in the video game series Elder Scrolls. It has magical properties to it that make it commonly sought after by wizards and warlocks. I really love the medieval fantasy aesthetic, and personally identify with wizards the most. So I would LOVE to have a giant glowing crystal on my bedside table, that I could pick up and take with me throughout the house, providing about as much light as my previous candle did.
What its going to do
When the lamp is in its base station, I want it to charge the internal battery wirelessly. When someone waves their hand in front of the station, I want it to send out a small radio signal to the light, which will tell the light to turn on or off. If I take the lamp out of the base station, I want it to automatically turn on to a medium brightness. I want it to stay on for a few minutes before slowly dimming back down to 0 brightness. If I shake the lamp, I want it to increase in brightness immediately.
How I am going to make it
Honestly, I might not actually get to finish it this semester, because I will need to buy components and iterate through prototypes, I don’t think I will have enough time to make a final design in the human meat space. But I will lay out my design plans and instructions so that anyone reading this post may build it (including myself later).
The first thing I thought of using was this old electric toothbrush I have. It already has wireless charging and a powerful battery built in, so I disassembled it to investigate if I could salvage some of its innards for my project.
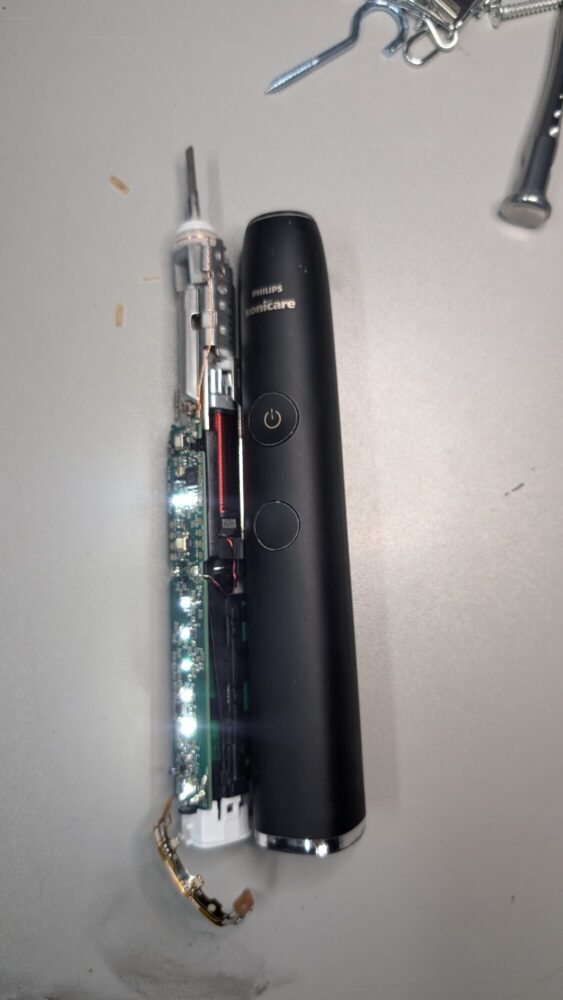
Sadly, the charging circuit is integrated into the mainboard of the toothbrush, and it would be more trouble than its worth in my opinion to try to get this to work for what I need. So we will build this from scratch instead!
Components needed:
This is what I plan on using, mostly because I have these components laying around already, but you can swap them out with similar parts if you know what you’re doing. Otherwise you will have to follow along exactly to this. These might not be the most optimal part selection for this project, however, they are mostly free for me because I already have them.
- 2X Arduino Nano
- WS2812B Individually Addressable RGB LED Strip Light
- Qi Wireless Transmitter
- Qi Wireless Receiver
- BNO055 Absolute Orientation Sensor
- VL53L1X TOF Sensor
- 2X NRF24L01+ 2.4GHz Wireless RF Transceiver
- 3D Printer
- Purple glow in the dark 3D printing filament
- Black 3D printer filament
- Assorted wires, soldering iron, electronic manufacturing tools, etc.
- Computer with Arduino IDE
You’re also going to need some pretty decent programming and debugging skills.
Since I don’t have all of the components in front of me, I can’t write code that I know will work without testing it out and playing with things first. I’m sure there is a better programmer out there who can do that, but it is not me. However, I will write a logic map and psuedocode for the project so that you know the jist of how I want this lamp to behave.
Psuedocode:
Lamp
check battery charging state
check lamp on/off state
while Battery Charging = true
begin radio listening
if radio input = true
switch lamp on/off state
end if
check battery charging state
end while
while Battery Charging = false
lamp = on
start timer
read accelerometer
if accelerometer reading = high // i.e someone is shaking the lamp
reset timer
brightness = brightness + 10
if brightness > max
brightness = max
end if
end if
if timer = 120 seconds
brightness = brightness – 10 // dim down over time
reset timer
end if
check battery charging state
end while
Base Station
if TOF sensor < 50 mm // someone is waving their hand in front of the sensor
radio output = true // output the wireless signal to tell the light to change state
end if
I am not the best at writing psudeocode but I think that should cover all my bases.
Hopefully if I can get this finished, I will be able to walk around my house like this instead:

Figure 4: I am a wizard
References
Links
Addressable RGB Tutorial: [https://randomnerdtutorials.com/guide-for-ws2812b-addressable-rgb-led-strip-with-arduino/]
QI Wireless Receiver: [https://www.adafruit.com/product/1901]
QI Wireless Transmitter: [https://www.adafruit.com/product/2162]
BNO055 9-Axis Absolute Orientation Sensor: [https://learn.adafruit.com/adafruit-bno055-absolute-orientation-sensor/overview]
nRF24L01+: [https://www.amazon.com/Makerfire-Arduino-NRF24L01-Wireless-Transceiver/dp/B00O9O868G]
nRF24L01 Tutorial: [https://howtomechatronics.com/tutorials/arduino/arduino-wireless-communication-nrf24l01-tutorial/]
Adafruit VL53L1X TOF Distance Sensor: [https://learn.adafruit.com/adafruit-vl53l1x/overview]
Figures
Figure 1: https://external-content.duckduckgo.com/iu/?u=https%3A%2F%2Fm.media-amazon.com%2Fimages%2FI%2F41b6%2BJyZwKL._SL500_.jpg&f=1&nofb=1&ipt=134832a0d1511632b09355320602452bad047ea4b47dae84b3cd60551f5b302b&ipo=images
Figure 2: https://external-content.duckduckgo.com/iu/?u=https%3A%2F%2Fi.pinimg.com%2Foriginals%2F7c%2F23%2F17%2F7c23178d336c42cec4db3930ad9fdcdf.jpg&f=1&nofb=1&ipt=45de21d8cf39504c3e6100f2cb5d9ab4e3b8e93e3501f2101268206d1e3231d9&ipo=images
Figure 3: https://screenrant.com/skyrim-find-use-soul-gems-enchanted-gear-guide/
Figure 4: https://external-content.duckduckgo.com/iu/?u=https%3A%2F%2Ftse1.mm.bing.net%2Fth%3Fid%3DOIP.LKAA9NMqgPM13shumADiNwAAAA%26pid%3DApi&f=1&ipt=8f52c7b8e4b3c709c31600e98b44e08649cd2b793f74d5e53700e10e790b1c86&ipo=images
1 Comment. Leave new
Hello Adam, I really enjoyed reading your post. I think that this is a well thought out project and it is clear to the reader that you spent a lot of time already iterating your designs. I also really enjoyed how you are able to use easily attainable materials to create your project which would make it very easy for anyone else to replicate your design.
Do you think that there would be other available appliances that you could salvage the charging unit from? Do you plan on using a 3D printed housing as your final material for the light? I look forward to seeing your final iteration at the end of the semester!