
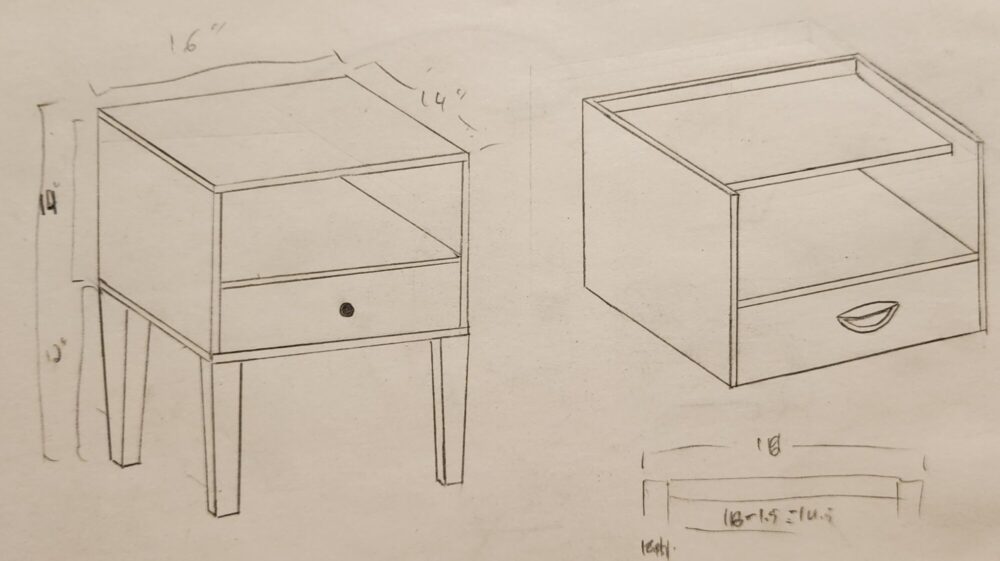
As you may have seen in my last post I am planning on creating a mid century modern nightstand. This project mostly came about due to the fact that I currently do not have a nightstand so I have no convenient place to store things near my bed or put things on such as drinks, books, my phone etc. I want to create this nightstand in the mid century modern style because I like the simplicity it can offer, and it will fit in my room quite nicely. In my previous post I discussed my initial design method, which mostly included a rudimentary sketch of the kind of form I was going to pursue, you can see this initial sketches below in Figure 1. As you can see they are not exactly what I have landed on by this point but they are in a similar avenue. I want this piece to be something that will travel with me for the rest of my life, and maybe one day be passed down to a family member. I do not want this piece to be the only thing you see when you walk into the room it is in, I want it to be able to blend into its surroundings to an extent that you need to get close and actually pay attention to the minute details of the piece, this will force the viewer to increase their interaction with the piece of furniture.
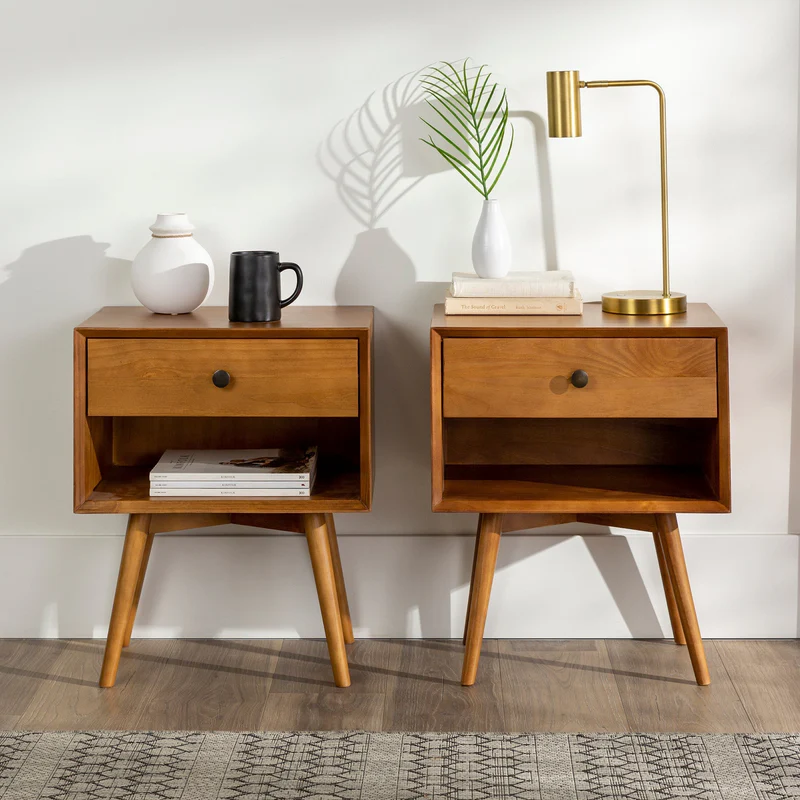
Once I had these initial sketches down I jumped directly into modeling the nightstand in SolidWorks. As I began my work I looked around for more inspiration, shown in Figure 2 is one of the pieces I found that I liked a lot and that I drew from, of course if you Google ‘mid century modern nightstand’ there are hundreds of examples to be seen and I’m sure there were many others I drew inspiration from but this is one piece that I can remember for a fact. I began to create my piece in SolidWorks, fist starting with the ‘box’ that sits on top of the legs, I wanted to have internal chamfers on the front face of the box to draw your eyes into the piece similar to the Walker Edison set below.
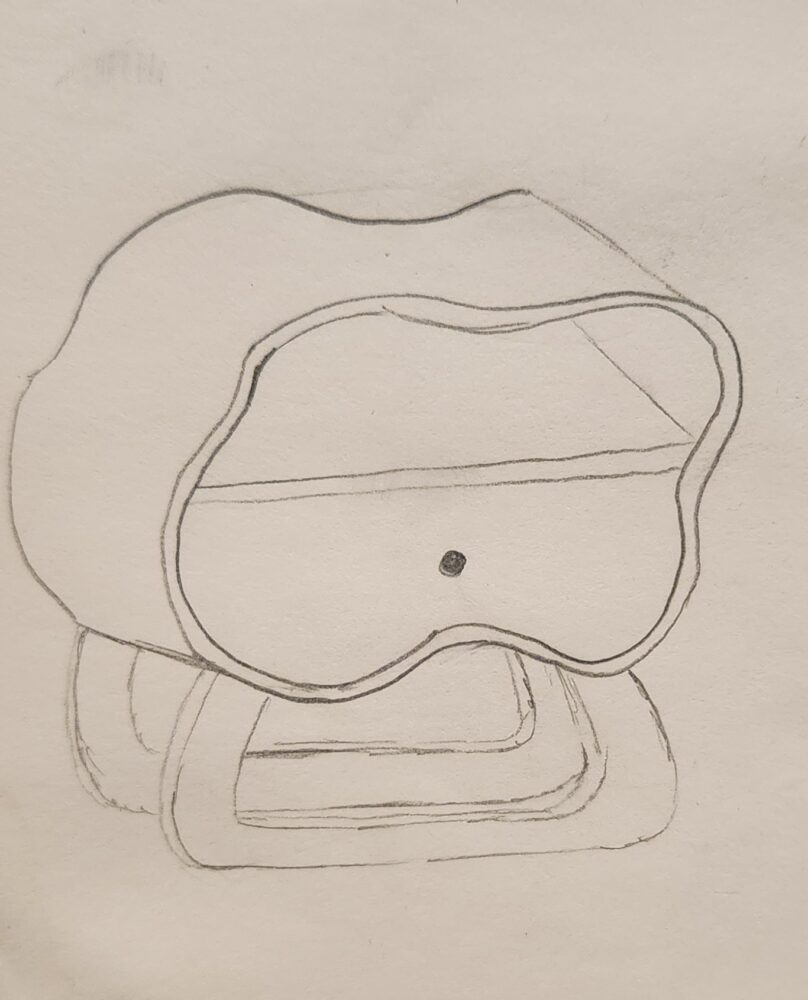
Because mid century modern is a simplistic minimalist aesthetic the first wildly different or opposite aesthetic I thought of was maximalism, shown below in Figure 3 I drew a wavy, funky, maximalist nightstand concept. This design would be much harder to create than the more simple design I am planning on but it would lead itself to a very unique aesthetic if you had a space that it fit with. To me it gives off 60s-80s vibes, you could pair it with a shag carpet, mustard couch, and funky lamps.
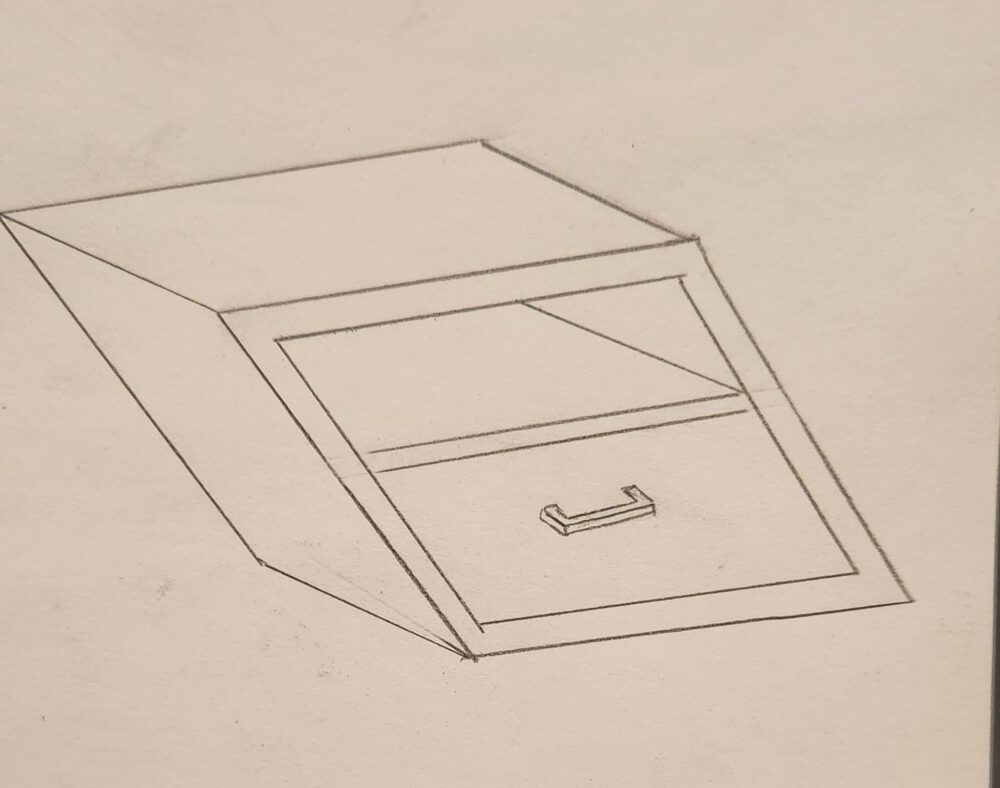
Another aesthetic that is quite different from mid century modern is brutalism, brutalism is characterized by geometric shapes, simple designs to ensure action over superficial motifs, and frequently raw or ‘unfinished’ materials. So to go along with the theme I drew up a rhombus or parallelogram nightstand that would be made of concrete and wouldn’t have any noticeable legs, this drawing is not my best work so imagine that all the horizontal pieces are level with the floor. This piece could fit in a very modern, cold, concrete filled home, which I’m sure applies to someone, but definitely not a place I would want to call home.
Neither of these aesthetics are really the vibe of my own space, I did however take on a bit of the maximalist aesthetic of the first piece in the form of the drawer front which I will explain in further detail later on. Overall exploring these opposite aesthetics was an interesting exercise but it did not sway me super far away from my original path.
Figure 5 shows the first rev of the design, as you can see the drawer is on the bottom, and at this stage it wasn’t actually a drawer at all, it was a cabinet door. However after meeting with Josh Colyer in the Makerspace in the IdeaForge for a design review we realized that mounting that door would be tricky and I couldn’t find any hinges that would work the way I wanted. So to mitigate this design freeze I decided a drawer would work just as well, and in turn also decided that having the drawer mounted below the table top would also lend to a better feel.
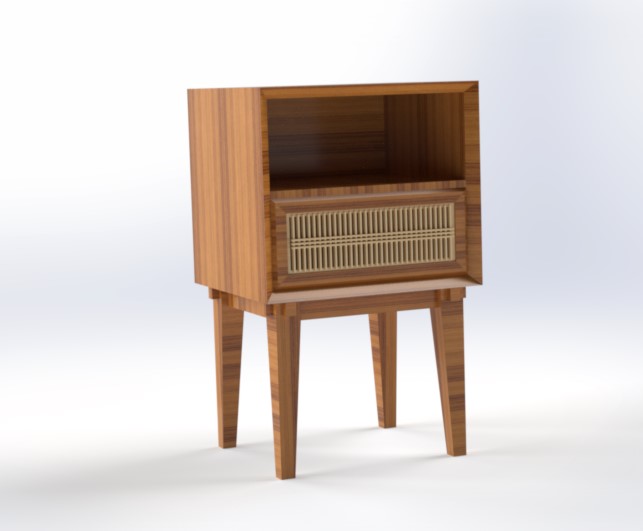
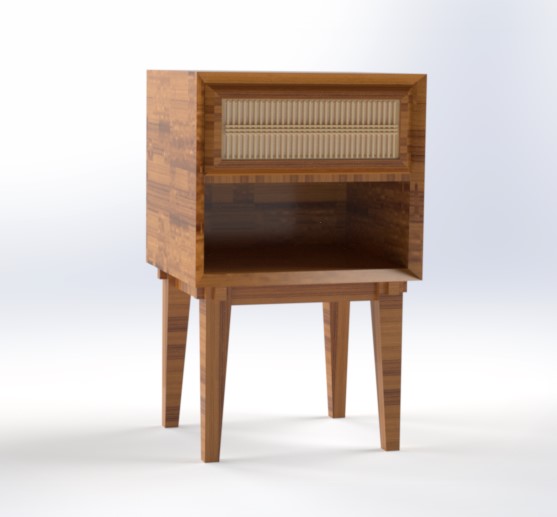
Shown below in Figures 6-9 are the current design, and exploded views of the entire assembly, the drawer sub assembly, and the drawer front assembly. As you can see the drawer front is still the ornamental design, this strays a bit away from the mid century modern aesthetic which is known for simplistic or minimal design motifs but I took inspiration from the Japanese woodworking art of Kumiko specifically the senbon-koshou style, this will add a little spark to the piece and some more uniqueness. I plan on constructing the body and legs of the nightstand in Cherry (everything brown in the model) and then for the kumiko drawer front I will probably use basswood as it is very soft and easy to carve.
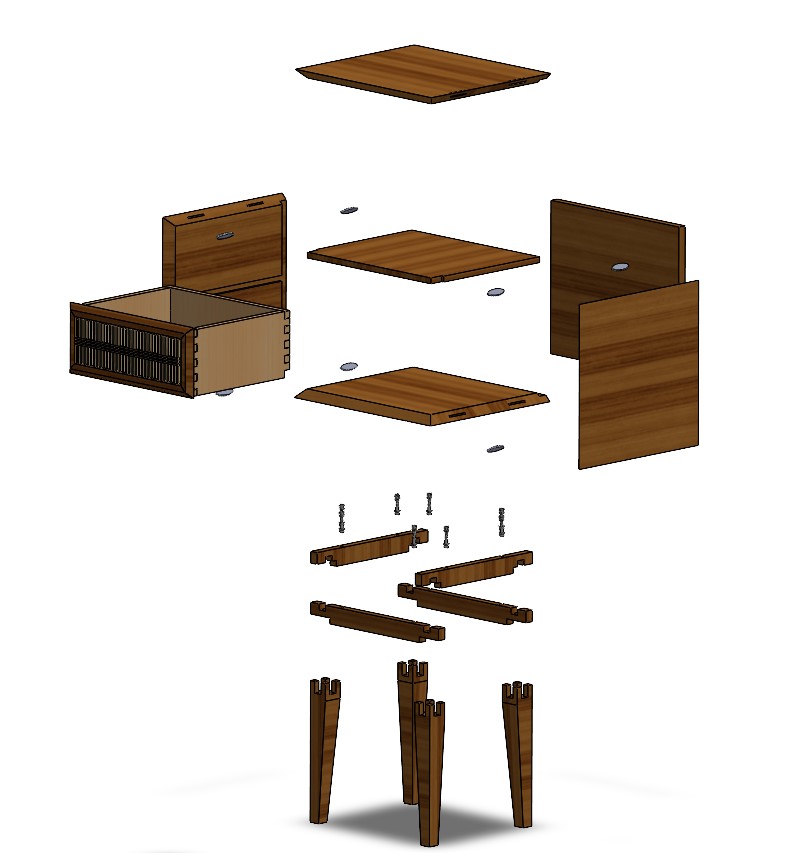
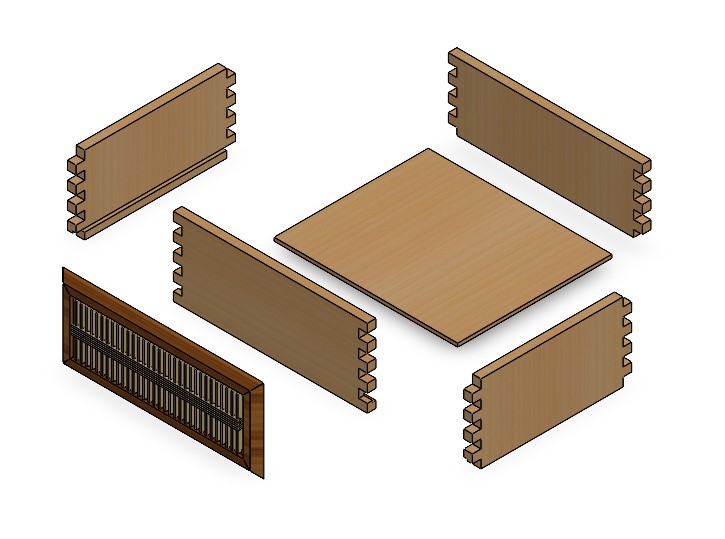
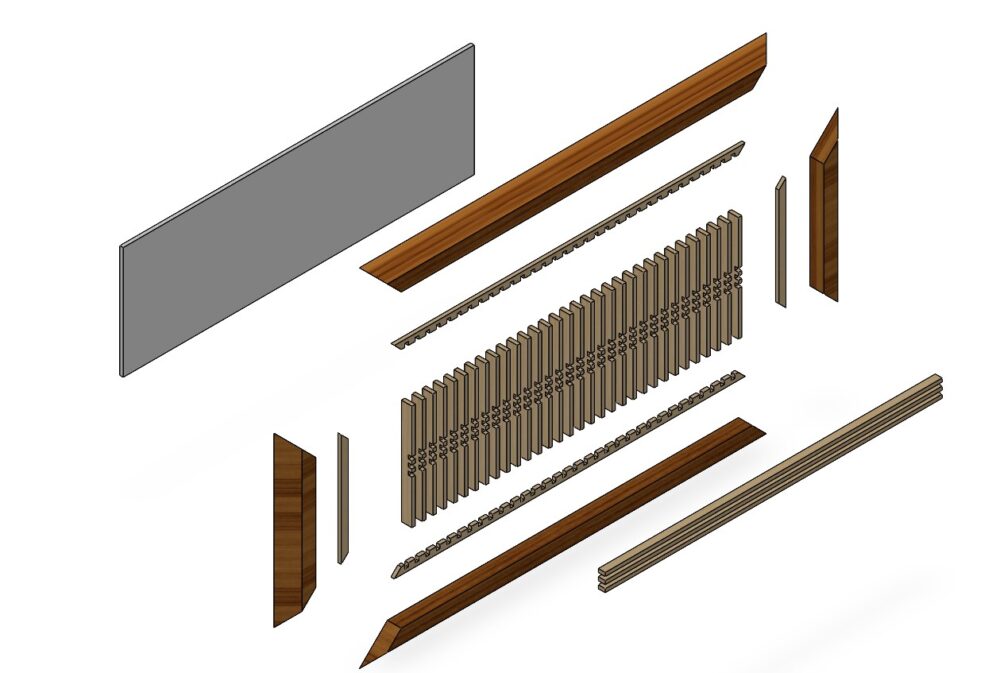
The box will be held together on the mitered (angled chamfered joints) with biscuits which are little wooden inserts that you glue into the surfaces, as well as glue throughout the joint, this will add some rigidity and ensure that the box stays square when I glue it up. The legs and the braces will be glued together at the ‘castle’ or ‘crenellation’ joints, then bolted through from the bottom of the braces to the box, which will have threaded inserts set into it, this will allow the box and legs to be separated from each other to allow for easier transport in the future.
I am not going to include all of my actual drawings for each part as this post would end up being far too long as there are 25+ parts, but if you are interested you can reach out to me and I can provide them to you if you ever want to recreate this piece.
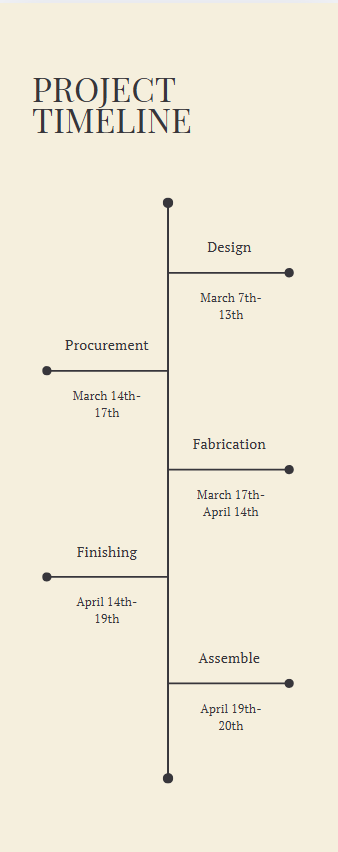
My main concern for completing this project is purely the timing, its quite a large project and will require a lot of time in the woodshop, Josh’s initial estimate was around 50 hours of work, this is a lot, however I should have the time in my schedule to get it done in time. The one thing that I can foresee myself running out of time on is the drawer, however this is a non critical piece of the nightstand and could be installed at a later date. Before I begin work on the piece using cherry I will test the mitered and biscuited box assembly with free scrap material, this will make sure that I get it right the first time I am doing the real thing. Below is a preliminary plan of fabrication, it is not the most detailed as I could go on and on about the actual specifics of each process, but it gives a rough idea of what I will need to do.
Lumber Processing (2 pieces 1”x8”x8’) (1 piece 2”x8”x16”)
- Plane boards to flat
- Mill lumber into 4” strips
- Joint sides
- Glue together (Alternate grain orientation to avoid cupping) into 16” wide board
- Plane to 3/4”
- Plane Leg lumber to 1.75”
Box
- Cut oversized top, bottom, back, and side panels
- Miter top, bottom, and side panels (45.1 or 44.9 degrees, use digital angle gauge)
- Rabbet top, bottom, and side panels to accommodate back panel
- Cut biscuit holes in all miter faces, 2 per miter face
- Dry fit miter set up to see if I made any errors
- Plane shelf panel to 0.5’
- Cut shelf panel mortise in side panels
- Cut the shelf panel to size, including notches on the end
- Sand everything
- Hand plane or sand corners to soften
- Glue up
Legs
- Cut legs into rough size
- Cut tapers on table saw
- Cut castle/crenelations on table saw
- Cut out braces on table saw
- Sand
- Soften edges
Drawer
- Cut 5/8 Plywood sheet to size for each side of drawer box
- Cut finger joints in ends of each board
- Cut rabbet in all pieces for drawer bottom to slide in
- Cut drawer bottom out of .25” plywood
- Glue up drawer box
- Make drawer front frame, cut out strips of cherry, miter to 45 on outside and corners
- Cut basswood strips to width of table saw
- Glue up everything
Overall I am super excited to get into the woodshop next week and actually start creating this piece, it will be a lot of work, effort, time, and maybe a little blood here and there, but I know I am capable and that I will be proud and happy once I am done. Stay tuned for updates!
References:
Figure 2: https://walkeredison.com/products/mid-century-solid-wood-nightstand-collection-1-or-2-drawer?bvstate=pg:3/ct:r
4 Comments. Leave new
Chris, this looks like an amazing project. I love all the designs you came up with, especially the one you are going forward with. It looks like you have put a ton of thought into this. How do you plan on doing the finish? Is there a certain color that you know you want to do? If you want a custom color, you can mix paint and a ton of water in a jar and it will make a stain.
Thank you Xander, I am pretty happy with how the project has evolved and I appreciate your comments. I am planning on doing a natural oil finish on the piece to match the first project I made, as well as I just prefer the look of natural wood finish to that of colored or artificial stains. That is a very good tip for the future though!
The use of many different woodworking techniques is really intriguing, adding to the aesthetic you are trying to achieve. I wonder if you could make a simpler drawer and add the Kumiko design later if you are running short on time. Have you considered using smoother drawer sliding rails instead of having the drawer rubbing against the wood? I’m excited to see how this turns out.
Thank you Bryan! I agree with all of your comments, I probably am going to make a more simple drawer than this (maybe using pocket screws as they would be hidden, and the Kumiko design will be the last thing I get to so will be the lowest priority as well. And great catch! I currently don’t have the drawer hardware in the design as it is a bit challenging to find the actual models of the hardware I will be using so I didn’t bother to add them as they are a “shop fit” install. Thanks for your comment.