
Inspiration
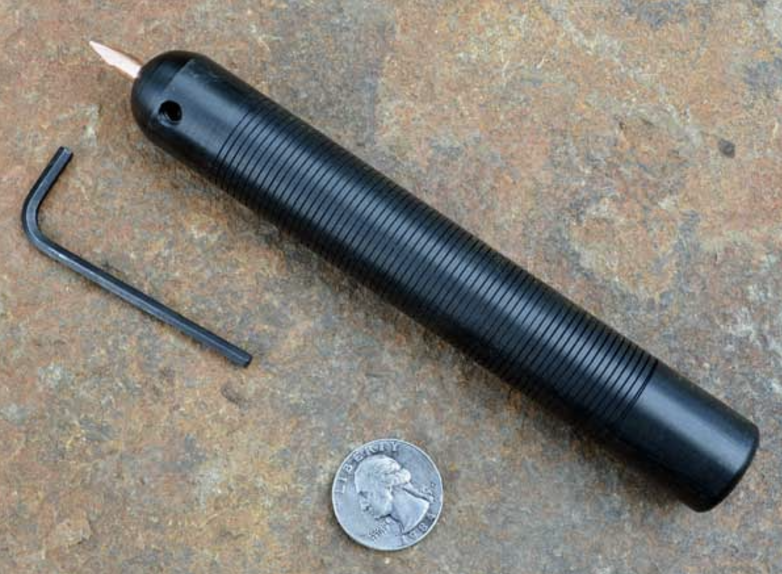
My main inspiration for my aluminum pressure flaker is a similar one that is sold on GoKnapping.com (image below). The main difference between this one and mine is material, with their tool being made of some sort of plastic, maybe delrin. This means that mine is more durable, while maintaining a similar weight. Additionally, rather than having only one large set screw, I opted for two much smaller, low profile set screws. I believe they probably had to stick with a big set screw with coarse threads to avoid stripping the threads in the softer plastic. Making mine out of aluminum allowed me to use smaller hardware/threads and keep the design very sleek. Having two smaller set screws also limits play and wiggle in the copper tip and ensures a solid, tight fit. 1645096
Vision
My vision for this project can be summed up in the following five constraints and specifications.
First, the specifications:
1: First and foremost, the flint knapping tools should function. As a tool, the most important job is to perform its job well, especially a custom tool like this. It should work better than the cheaper, store-bought tools and should be a pleasure to use. I will make sure this happens by being caareful with my design and manufacturing everything accurately so it is easy to change the tool’s copper tips.
2. Next, this being an aesthetics class, means that the tools must portray the target aesthetic and be pleasant to look at and hold. It will be machined carefully to ensure it is sleek and smooth and look futuristic. Additionally, the material choice of aluminum will make the tool feel smooth and light in the hand, while also being sturdy and substantial (because it is essentially one consistent piece of metal).
3. Durable. It must be extremely durable as it is made to be pressed into stone pretty forcefully. To make sure it is durable, the hole for the copper tips must be centered, and the exact right size so that the tip doesn’t wobble or loosen.
4. Easy to transport. I enjoy flint knapping in nature, so this often requires me to put the tools and stone in a backpack and drive/hike somewhere to find some peace and quiet. I will make a carrying sack to transport the tools easily, ensuring that none of them can fall out, get lost, or damage my backpack.
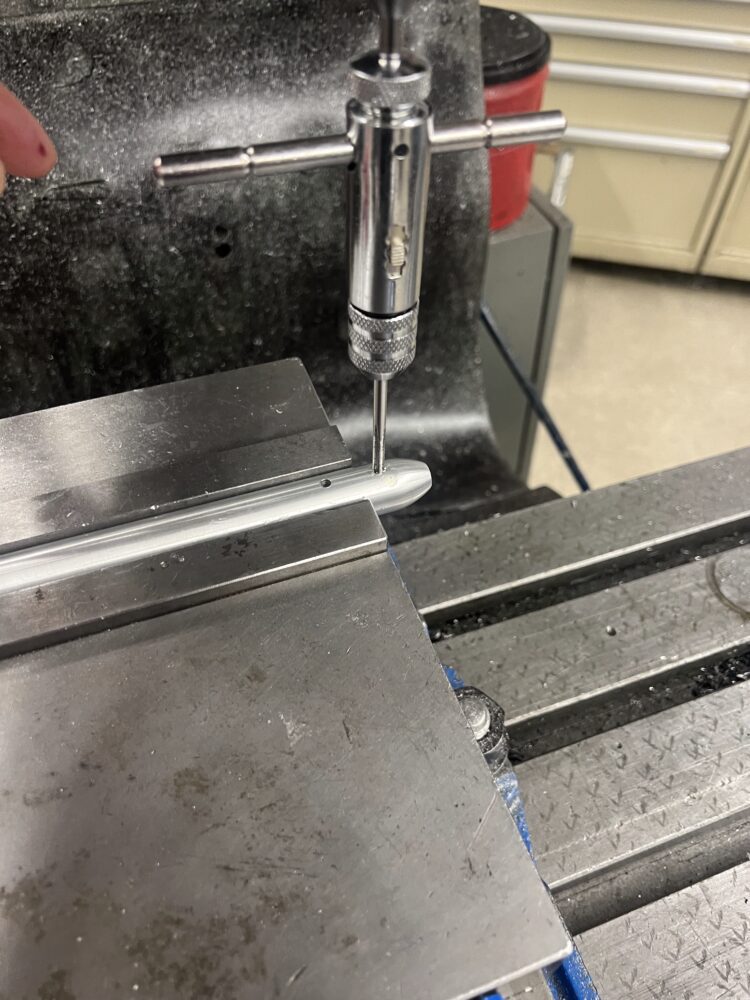
5. Lastly, the tools must be easy to use. Specifically, the set screw that holds the copper tips in needs to be smooth but stay in place when tightened down. I will make sure it works correctly by tapping the hole very carefully.
Next, the top 5 constraints:
1. Time. Time is the largest constraint because school is getting very busy with component design manufacturing, and exams in every other class. I will work around this by setting aside time on friday when I would usually be chilling and work in the ITLL machine shop.
2. Supplies. I need to make sure to source affordable yet quality materials. This is difficult because small orders of aluminum can be expensive compared to bulk, but I believe I have found good materials at a reasonable price.
3. Facilities. Hopefully the manufacturing center at the ITLL will have all of the tools needed including the correct size tap for the set screw.
4. Skills. I might need to learn how to knurl so i can add grip to the handles if they end up being too slippery. I will probably practice on some scrap aluminum to make sure I don’t mess it up on the real thing. I know how to do everything else.
5. Ideas. I was thinking about doing a second tool but I can’t figure out what else to make. Will update if I come up with something
Many of these constraints and specifications resolved themselves, and I am very happy with how the final product turned out. Below are some photos I took of the finished tool.
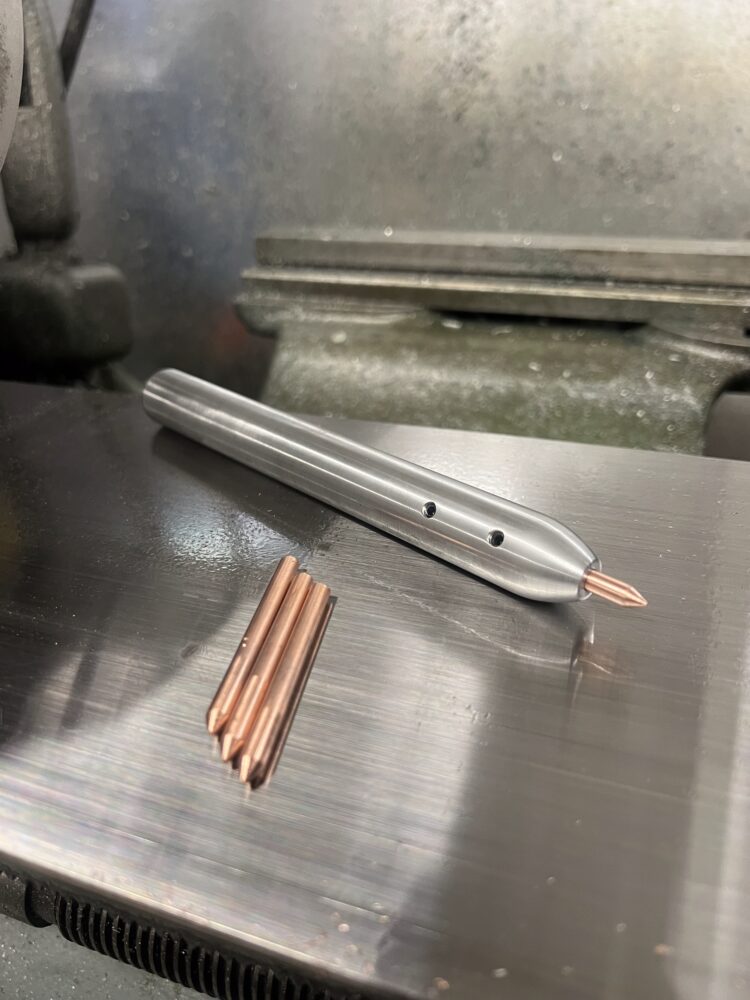
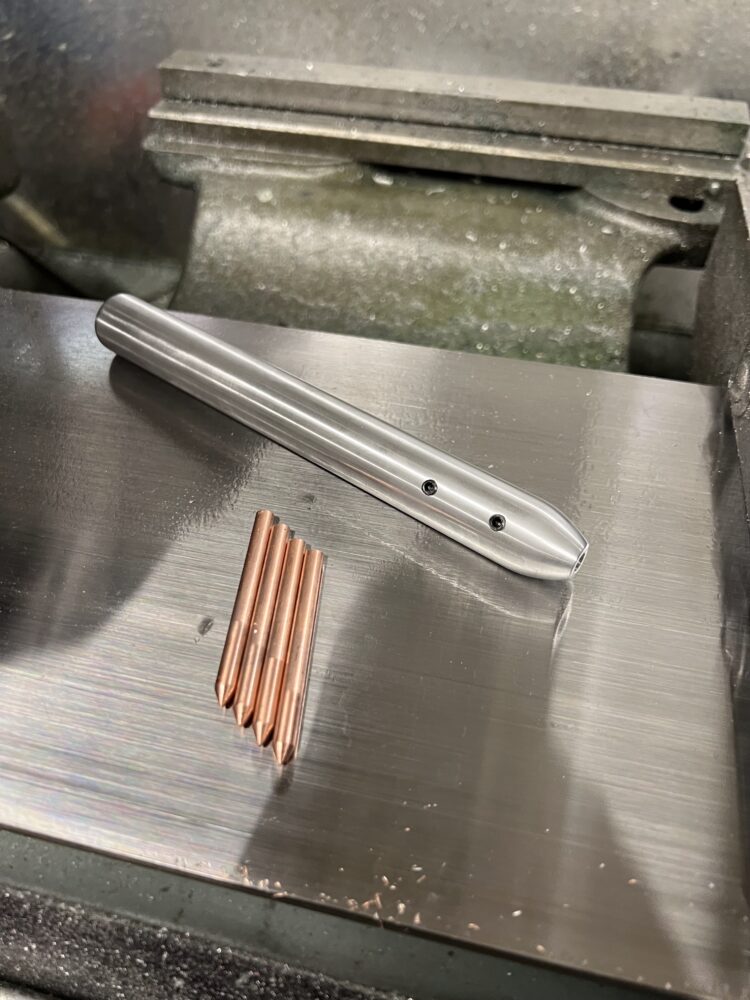
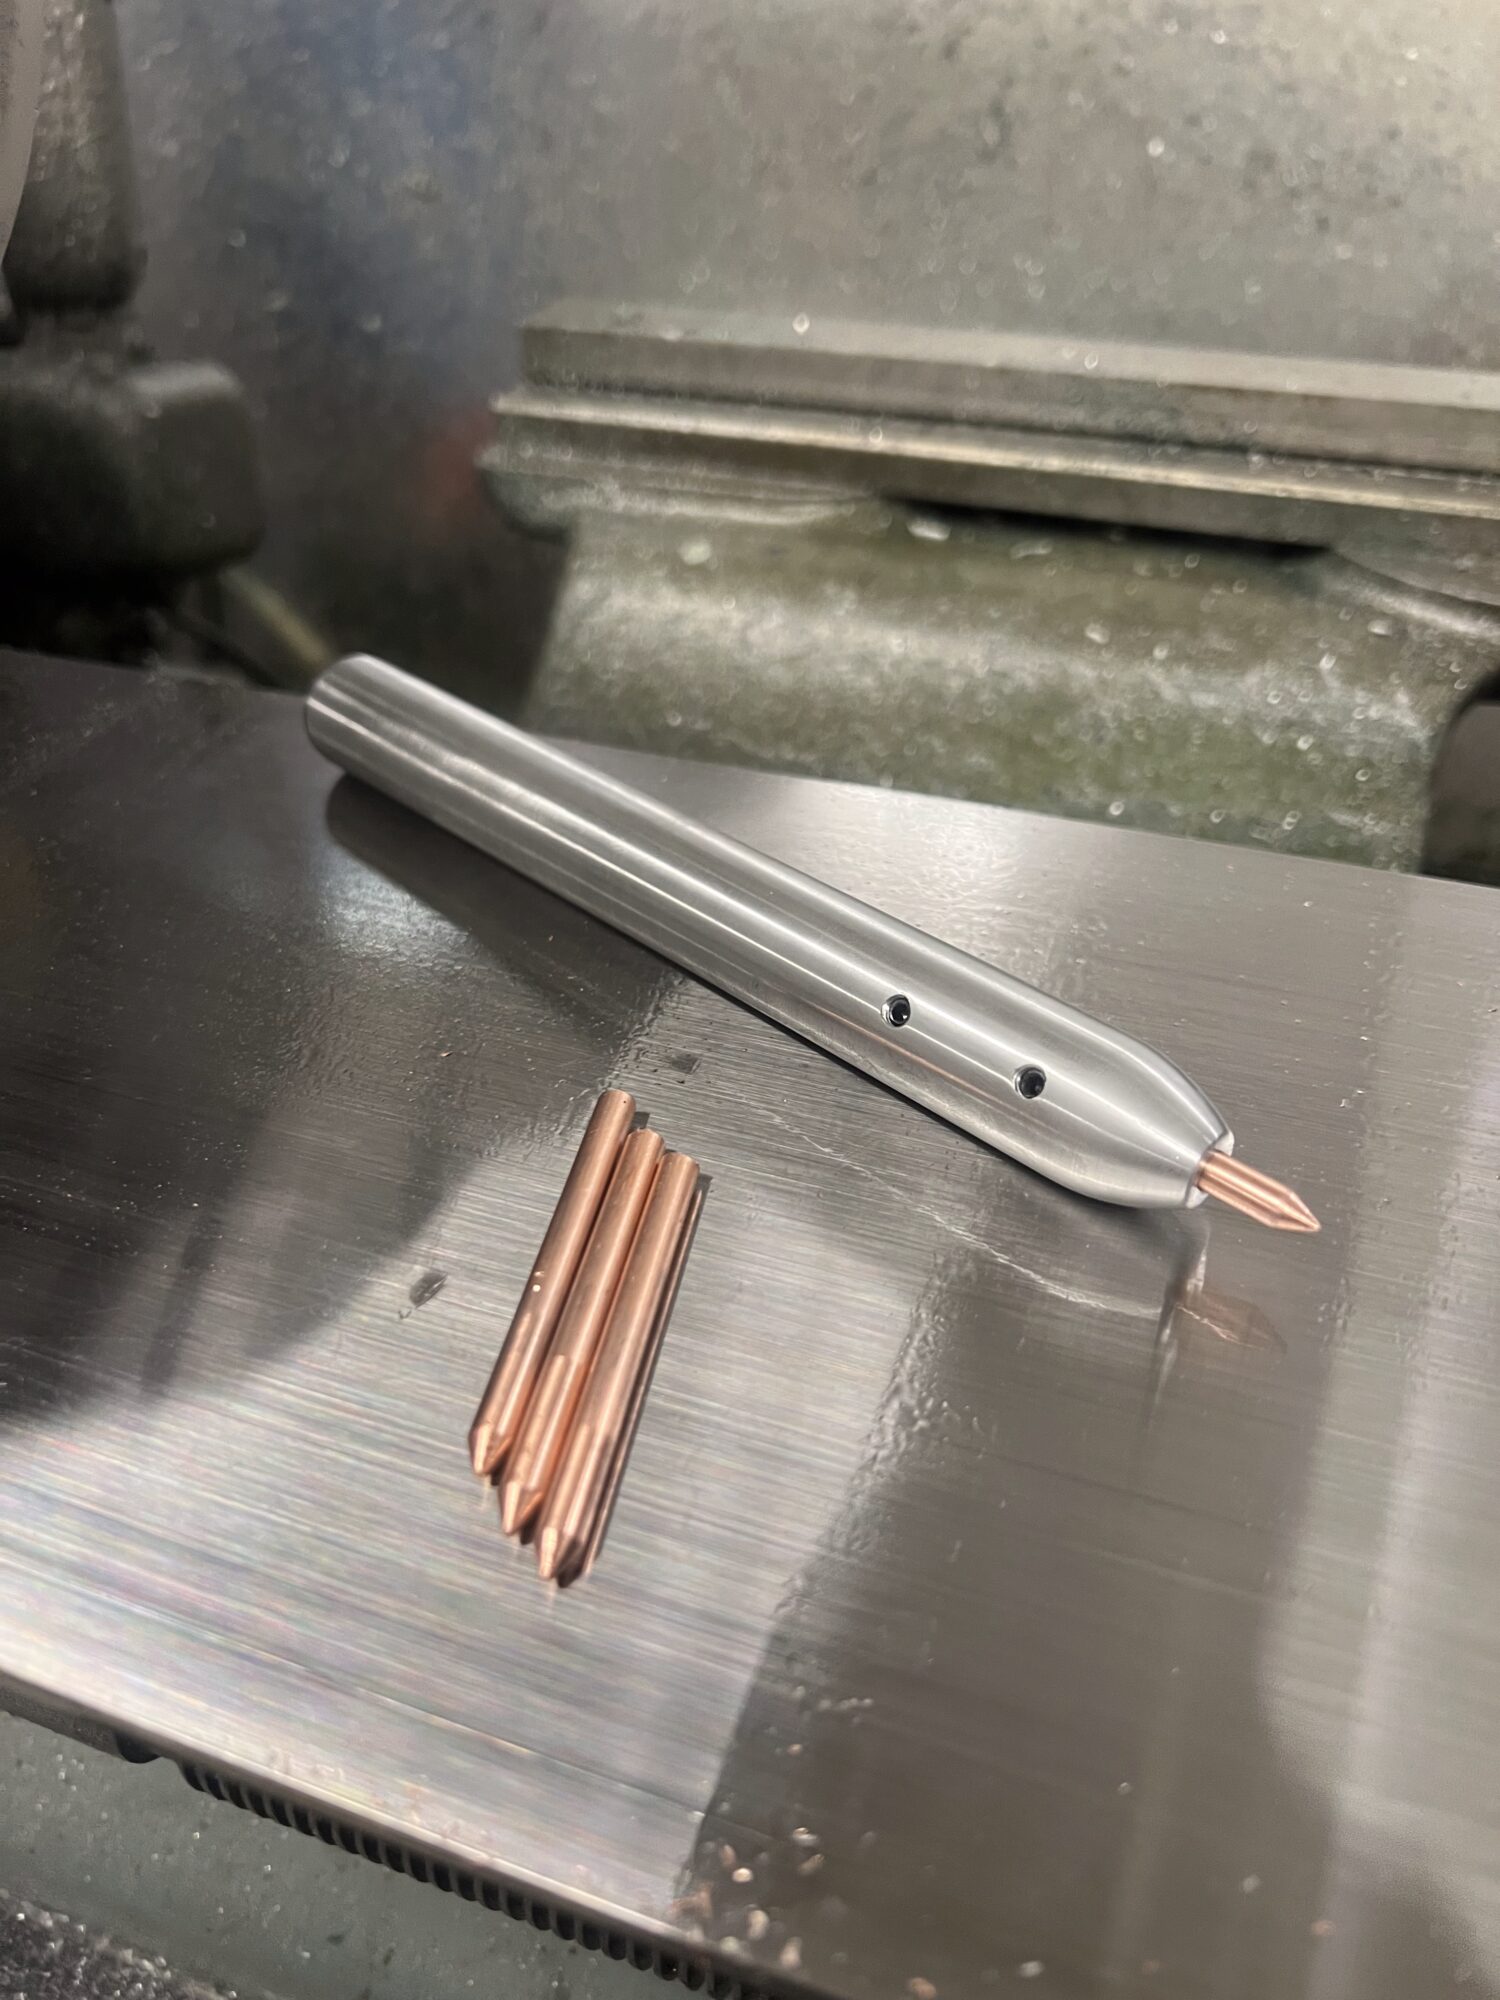
As you can see, there are two small set screws that firmly hold the tips in place. I also made four copper tips so when one wears out it can be replaced. This allows the tool to be used for many years, unlike the pressure flaker I currently own that simply has a copper nail glued into it (also purchased from GoKnapping.com).
Aesthetic
The aesthetic I was pursuing for this project was very similar to the first recycle project. The aesthetic is someone hard to pin down but I would describe it as the clean, machined, bright aluminum aesthetic. This means that I wanted the final artifact to look almost perfect, with very few imperfections and nice symmetry. This means I need to be very careful and diligent when machining it to ensure that it doesn’t get any dings or scratches during the fabrication process. Overall, I think I succeeded in attaining this aesthetic. My artifact is very smooth, sleek, and bright. There are little to no imperfections and it feels almost like something made in a factory with precision tools.
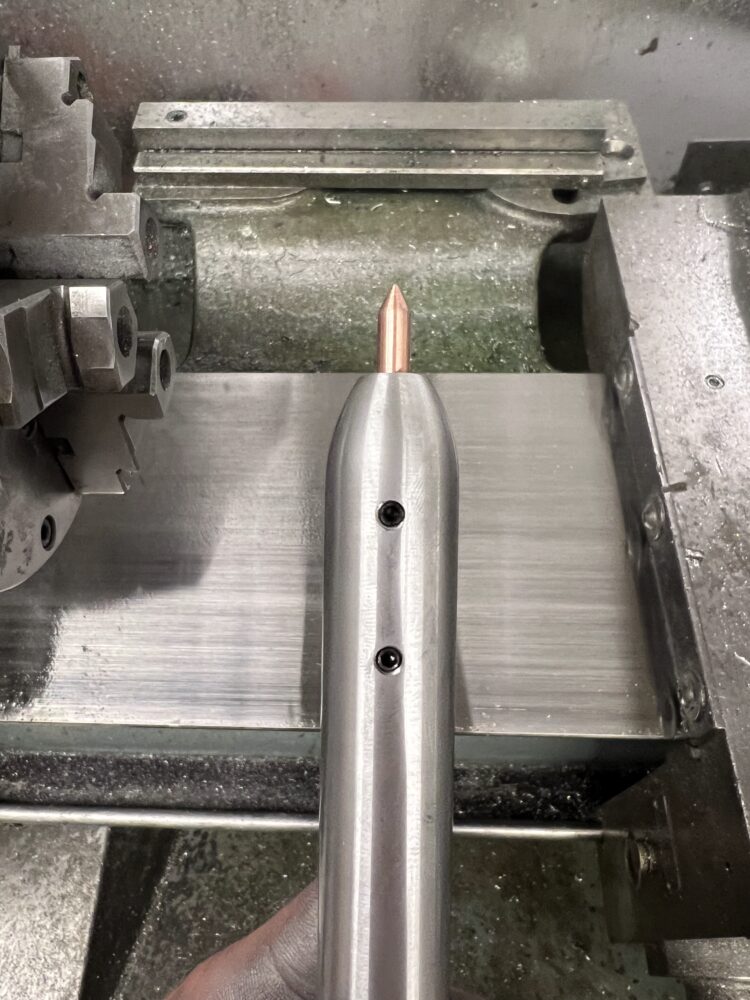 .
. 
The black set screws have since been replaced with more appropriate shiny steel set screws that blend in to the brushed aluminum better. The smooth copper tip adds a nice pop of color and, of course, is functional, as it grips the edges on the stone better than a harder metal that would crumble and shatter the brittle stone.
Conclusion
Overall, I think my final artifact follows my initial parameters, fits into the desired aesthetic, and functions very well. I will be testing it this weekend to see how it performs and will update on its functionality in the final report part 2.
2 Comments. Leave new
Your project turned out really clean and professional, the use of aluminum and the polished look fits your target aesthetic really well! I especially like how you thought about functionality long-term by making extra copper tips. Could you tell us a bit more about how you chose the specific size and thread pitch for the set screws? I’m curious how you balanced holding strength with the desire for a low-profile design.
The contrast with the copper tip and aluminum piece as well as how professional the pieces look make it seem like a quality consumer product. Looks amazing!