
The What?
I love to make matcha tea and I think the craft of it is so beautiful and delicious. I recently got a new matcha making set and have been keeping it all in my drawers in my kitchen. I also think that I have my matcha making skills down, so if anyone needs any tips on making their own let me know! :)I think the set is too aesthetically pleasing to keep stored away in a dark place for no one to see. For my main project, I decided to make my own little matcha stand/station. This project will allow me to display all of my lovely tools. With this project, I will draw my inspiration from the Japandi and Minimalistic Zen aesthetics.
Japandi Minimalist Zen Aesthetic
Minimalist Zen and Japandi aesthetics both embrace simplicity, functionality, and a deep connection to nature, creating spaces that feel tranquil and effortlessly elegant. Minimalist Zen, inspired by Japanese design principles, focuses on balance, negative space, and an uncluttered environment that fosters a sense of calm. Japandi, a fusion of Japanese and Scandinavian styles, adds warmth through natural materials like wood, linen, and stone, blending the sleek functionality of Nordic design with the timeless craftsmanship of Japan. Both aesthetics prioritize intentionality, every object has a purpose, whether it’s a handcrafted ceramic cup or a softly glowing paper lantern. The result is a harmonious space that feels both serene and inviting, where organic textures, neutral tones, and thoughtful design choices create an atmosphere of quiet sophistication.
Key Elements & Inspiration
My key elements include:
- Natural wood textures – to maintain a warm and earthy feel.
- Neutral tones – like beige, soft browns, and muted greens for harmony.
- Intentional organization – where every object has a purpose and a place.
- Uncluttered surfaces – maintaining a sense of tranquility.
- Layered shelves – for interesting places to look
My inspiration also comes from existing matcha stations, such as:
- Japanese tea ceremony setups – where every element is deliberately placed.
- Nordic shelving designs – which incorporate open storage with natural aesthetics.
-
Traditional tea houses – key design principles = simplicity and elegance
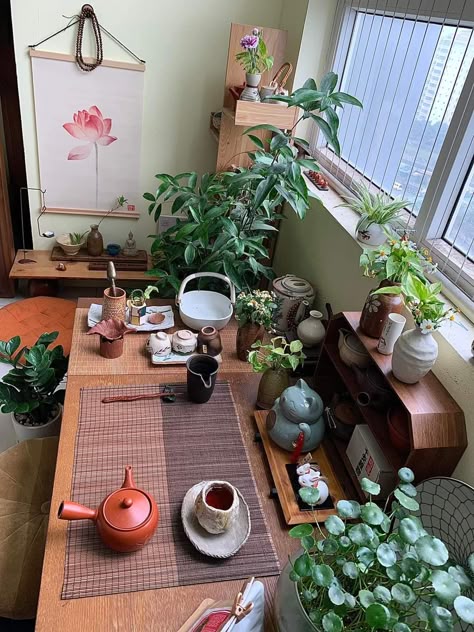
My inspiration came from a range of sources. Japanese tea ceremony setups heavily influenced the layout—the way every element has its place and is treated with respect. I also looked at Nordic shelving designs, which emphasize clean lines and open storage, often using light-toned wood. Traditional tea houses influenced my sense of proportion and simplicity. I spent a lot of time browsing Pinterest boards, Japanese interior design blogs, and Scandinavian home sites to develop a visual language that felt cohesive.
Initial Sketches & Design Plans
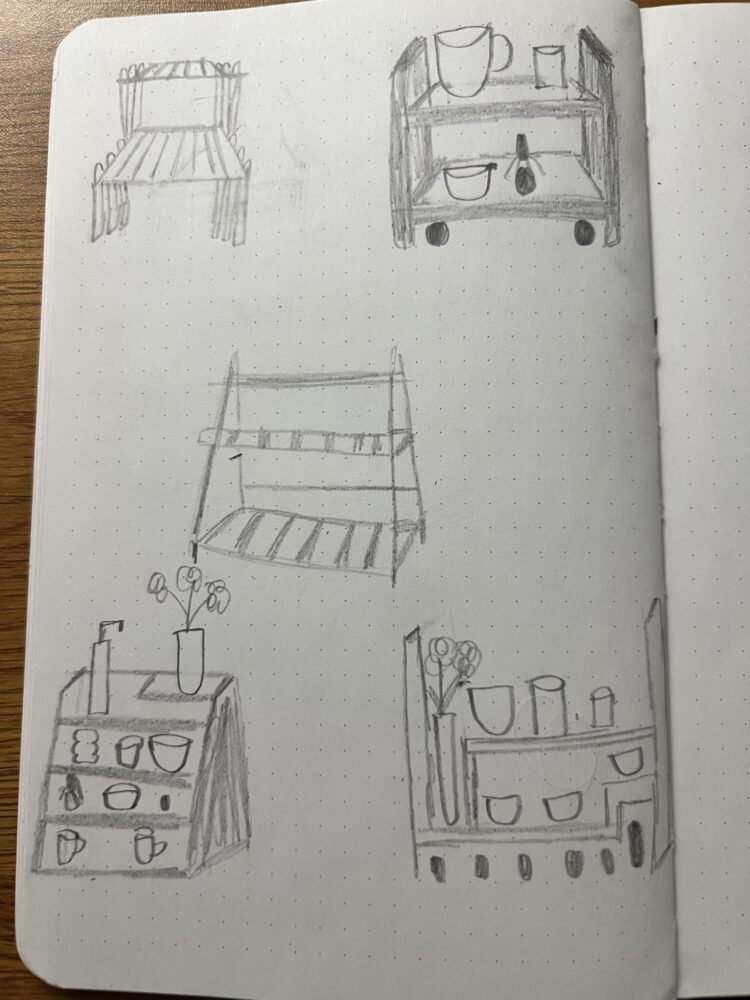
I developed multiple sketches to explore different layouts, focusing on multi-level shelving to keep the setup visually interesting and functional. From the picture of my sketch above, I decided to go with the design a lot like the ine in the upper left corner. I thought this design really leans into my aesthetic and I also thought it was enough of a challenge for me to take on. Some key features:
- Top shelf – for displaying the matcha bowl, mugs, and some sort of plant
- Middle level – for matcha canisters, whisk, and frequently used tools
- A lower space – to store smaller additional items and maybe smaller mugs
The layered height adds a sculptural quality and invites movement as you interact with it.
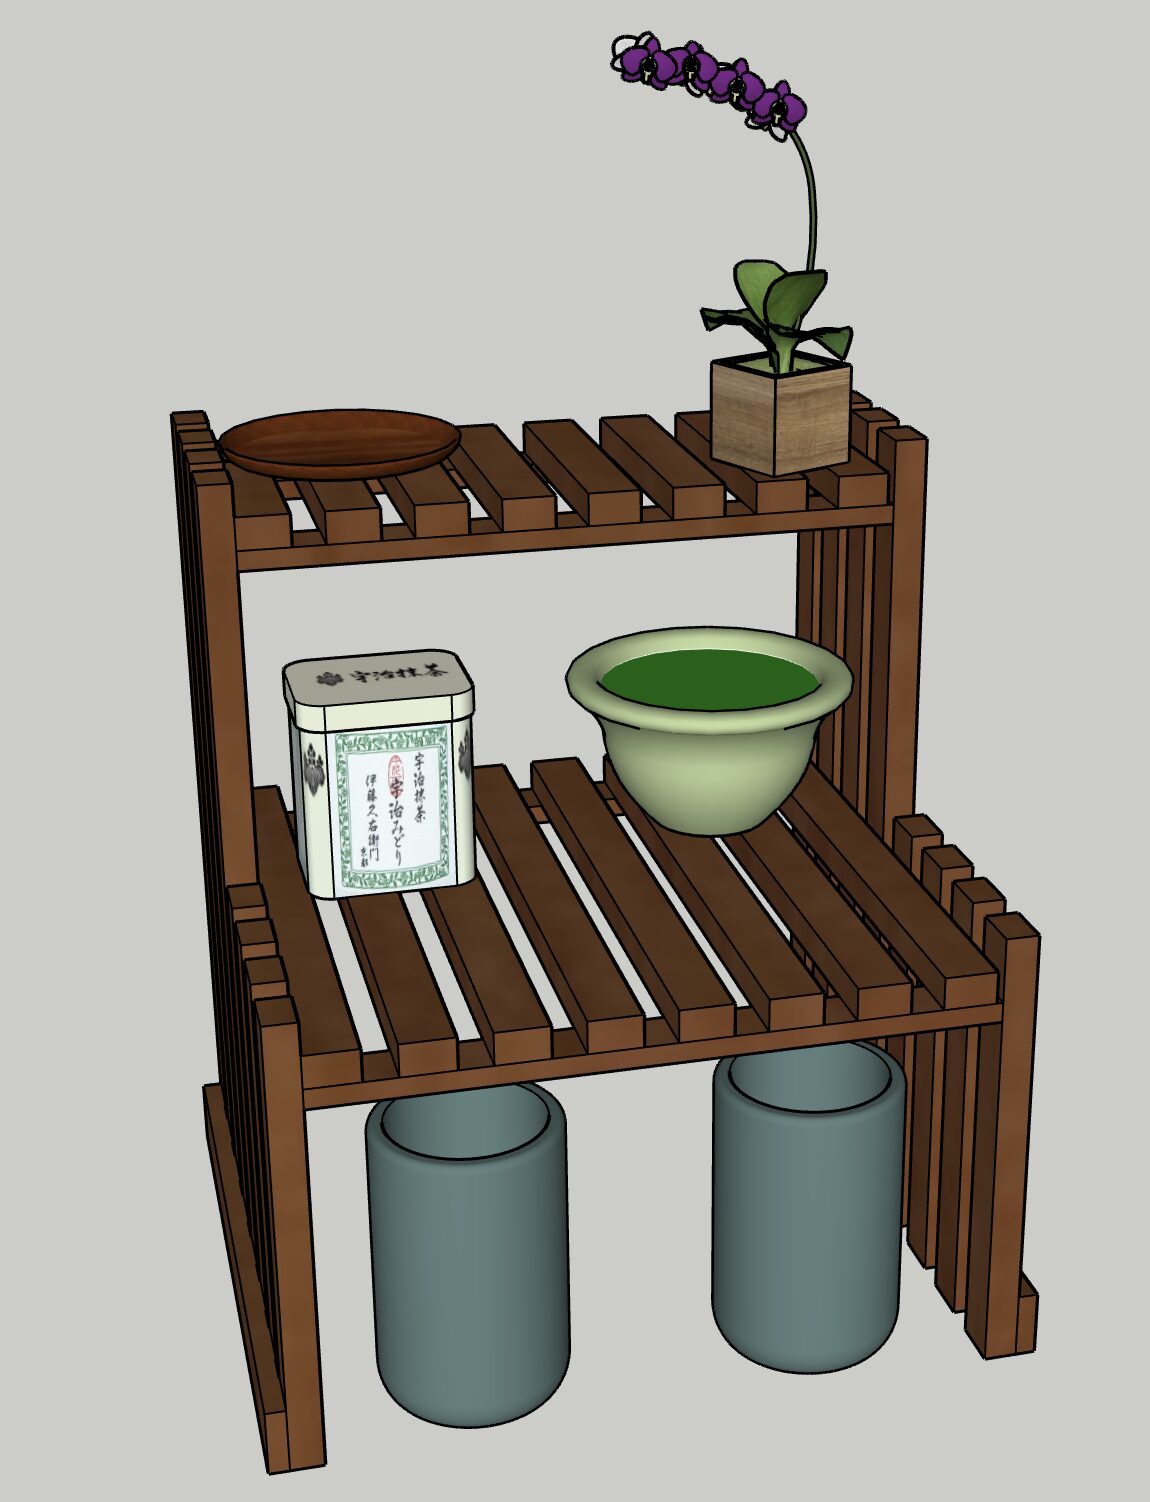
After figuring out which design I wanted to do, I modeled it in Sketchup. During this process, I made sure to keep my model to scale so I would know exactly how much wood I needed and this helped me a lot. his was incredibly helpful in minimizing waste and ensuring the proportions felt balanced. I based the CAD model off my hand sketches, and the final render in SketchUp really helped me visualize the aesthetic goal I was aiming for.
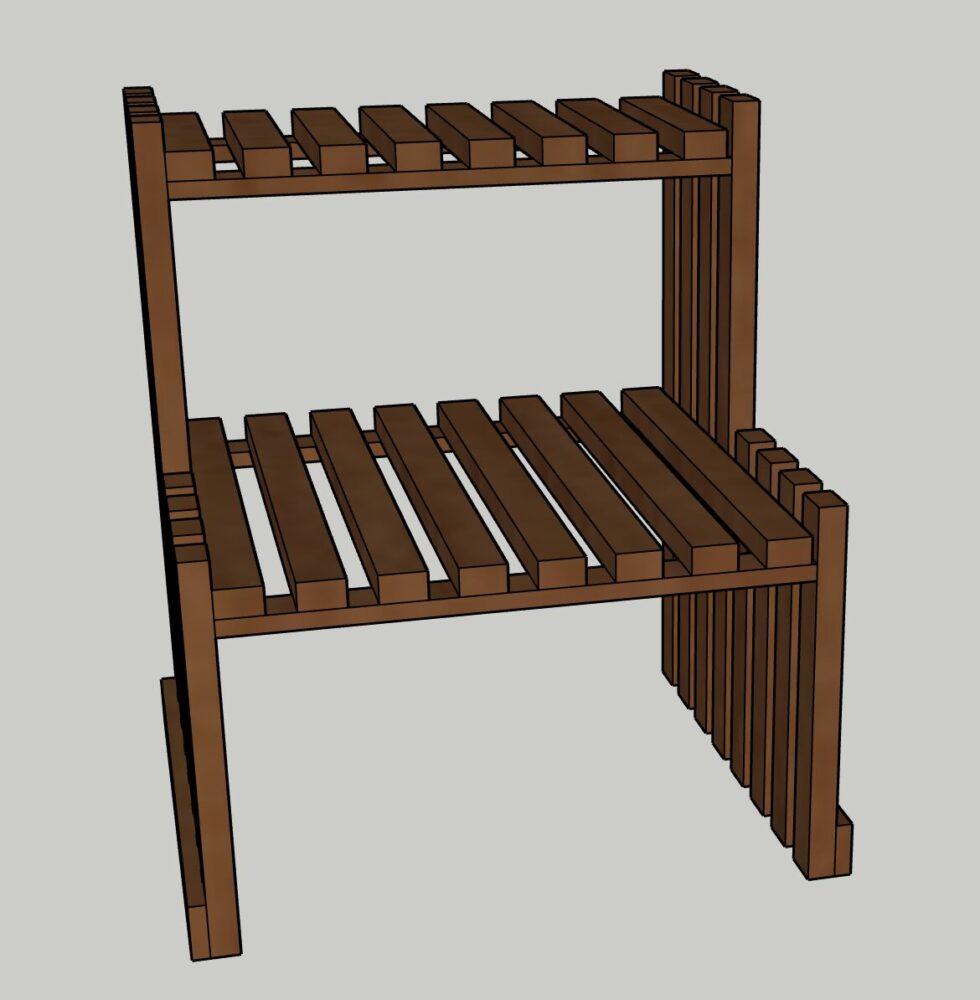
As I pointed out above, this is a design that helps me fit all of my little goodies into one small nice looking space. I wanted something that was nice to look at, with and without things there to decorate it. Obviously, it is supposed to look better with all of my things on it but even without them I was going for a look that satisfies the eye.
Specifications & Artistic Vision
The stand is designed to fit comfortably on a countertop without overwhelming the space. It’s lightweight but sturdy and should be portable if needed. Everything has a designated place to avoid clutter. My specifications were:
- Aesthetic: warm, natural, serene
- Clean Look With No Effort: The stand should feel like it belongs in a peaceful moment like something I’d want to wake up to on a slow morning. It should make the process of making matcha even more soothing and special.
- Go Off Sketchup Model
- Stain: I do plan on staining my wood. When looking through the BTU scraps, I found wood that works good for me but the color is too light for my liking and for the aesthetic I am going for.
- My goal is to get more comfortable and gain more knowledge about woodworking.
- Must fit: a whisk, 2–3 matcha bowls, 2 canisters, a mug, and a small plant
I also wanted some more decorative additions so I want to include a small orchid or a purple succulent for a subtle pop of color. I still need to go find a plant that fits this description and like in my model and also that will match my aesthetic.
Prep & Material Selection
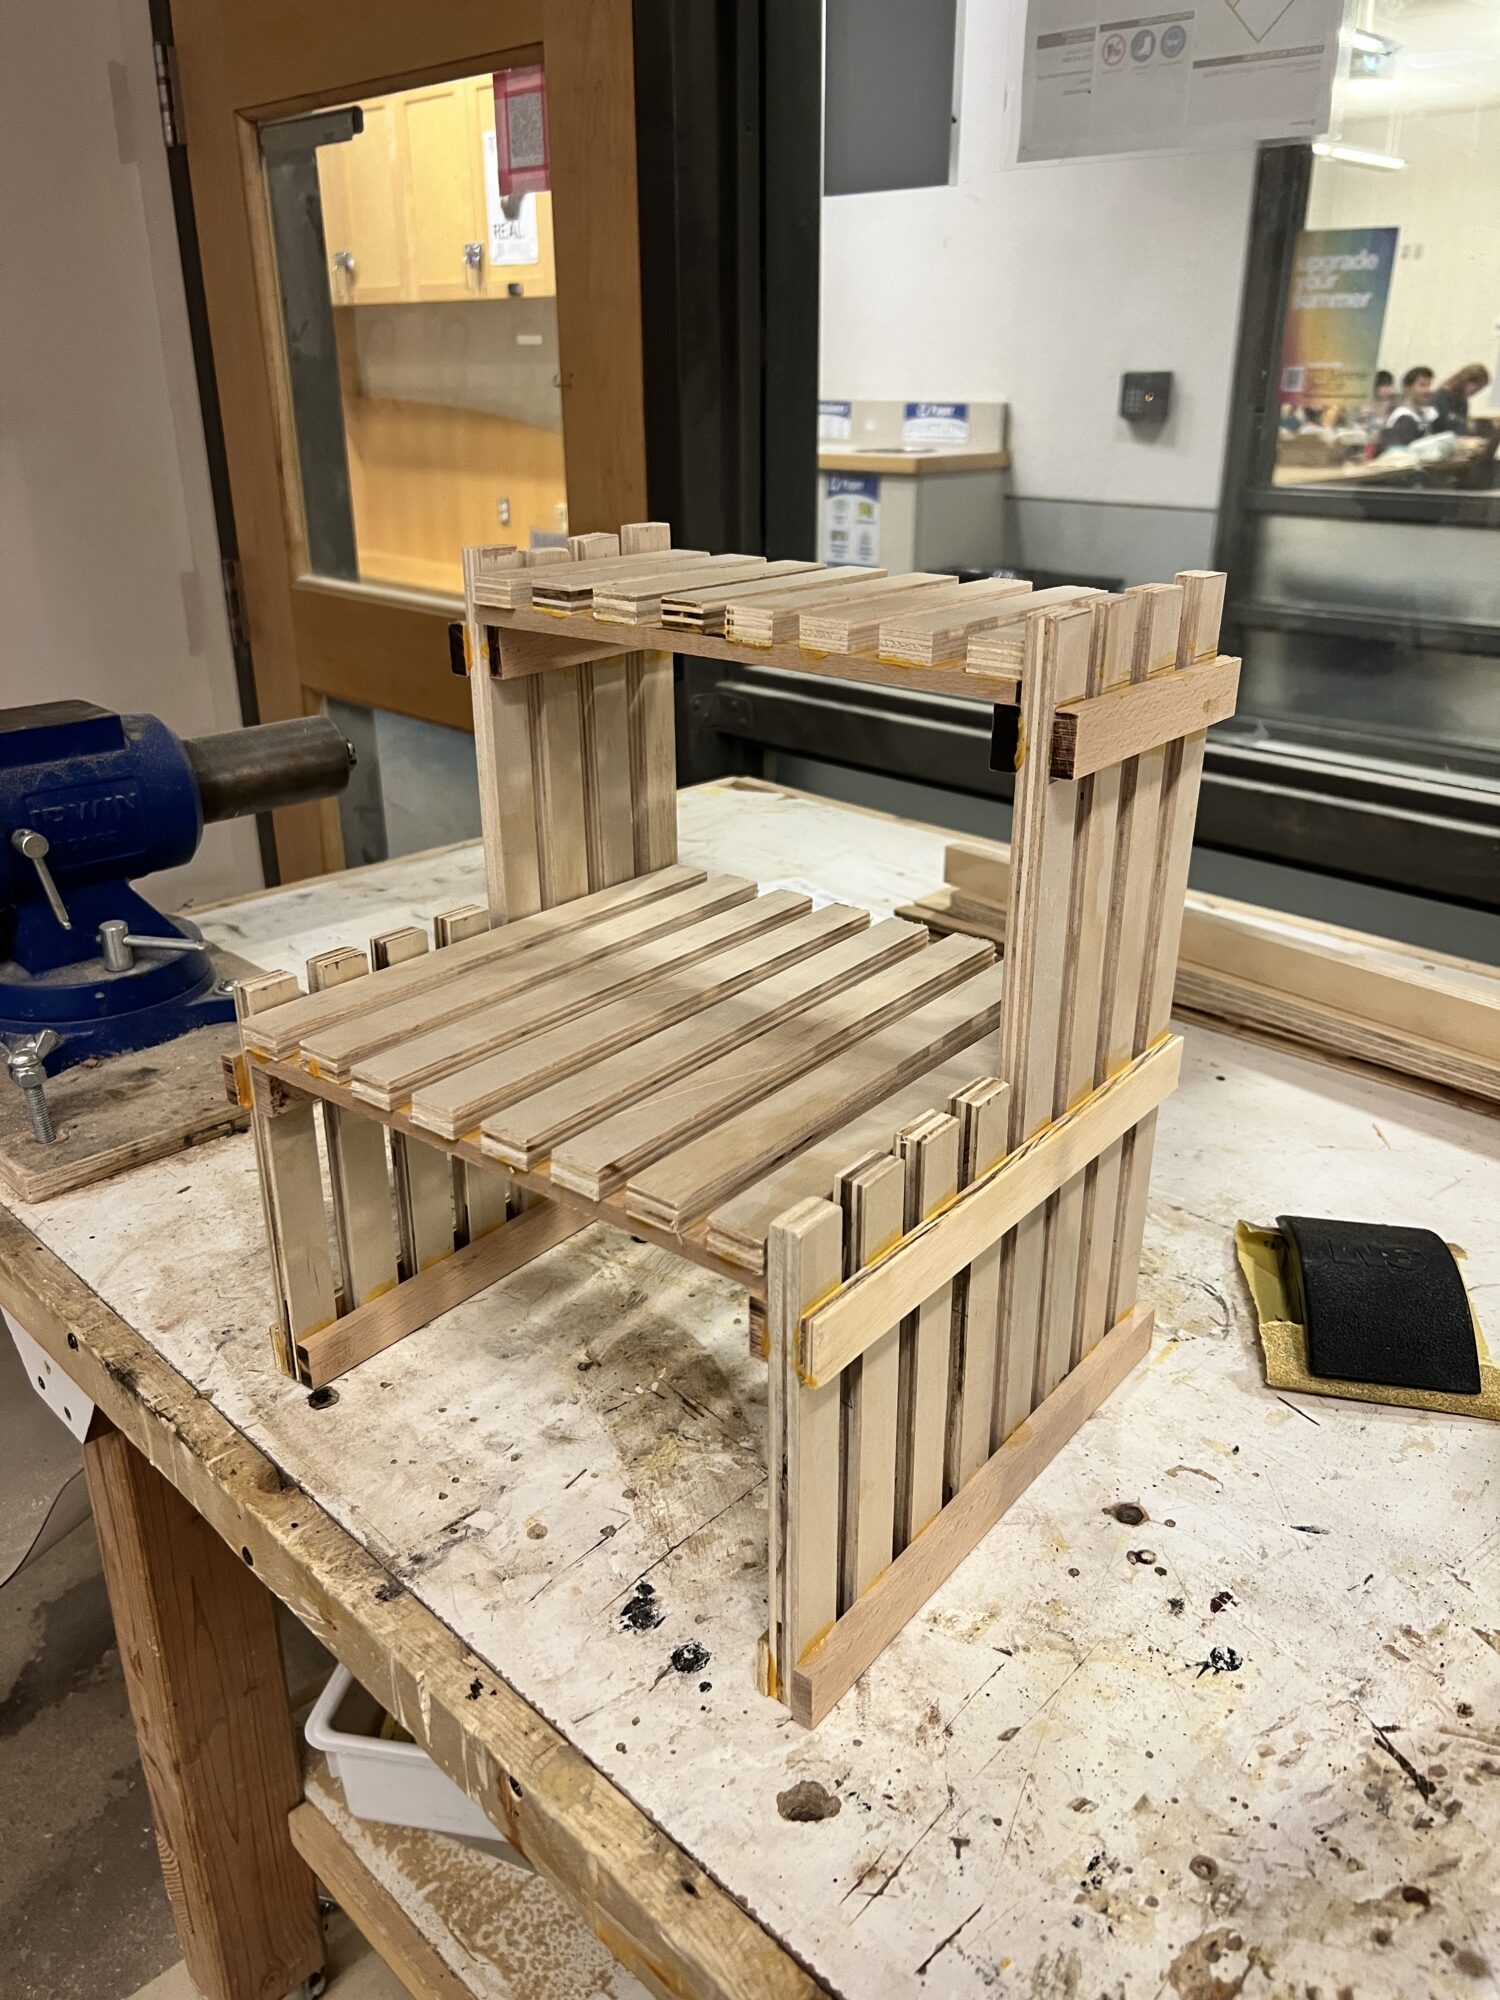
Before getting started on this project, I did have to go through my first wood shop orientation. This was a good experience, I was a little scared and hesitant at first but after using all of the machines, I was excited to get started on my project! I was also a little nervous because I do like to have my nails long when I do them and running the wood through the mahchines did seem a little scary when testing them out. I wanted to do a lot of prep work before starting any cuts on my wood that I got. This was mainly because 1. I’ve never really done a project like this before using wood and heavy duty tools, and 2. because the wood I got from the spare wood pile in the BTU was very limited and after doing some measurements, I realized I had just enough for what I was planning on using for my build. So I was very careful when cutting and measuring exactly what I needed. After going through my whole project, I am very pleased with how it came out. I did hit some obstacles along the way but that is a story for the next post! I will explain more about my fabrication process and timeline then. Stay tuned:)
I will be staining it a darker color to match the vision I developed in my SketchUp model. The aesthetic calls for a deeper, richer tone than the raw wood provides like in the picture I have as my featured image.
Final Thoughts
This project was an exciting challenge for me since I’ve never worked on a woodworking project alone. I am happy to gain hands on experience with fabrication techniques and be able bring my vision to life. There are a few things I wish I did differently/thought about before hand but again, I will talk about it in my next post. Thanks for reading!
3 Comments. Leave new
I love this project. I did a very simple version of this for the upcycle and still use it in the house. I hope yours lasts! Do you know how dark you want to go on the stain?
I think this project is beautiful! the way it merges functionality and aesthetic intention, celebrating the ritual of matcha. Your thoughtful planning shows great design thinking and respect for craft, I also liked the input of SketchUp. The natural materials and layered design add to the aesthetic, showing warmth. As a critique, consider exploring ways to make the stand adaptable or modular for evolving needs. Overall, it’s a lovely, intentional piece that elevates a daily ritual into an artful experience.
-Cort Sommer
Hi Arden,
This project is so wonderful and personal to you, I absolutely love it! My favorite part about reading your post is honestly how well you thought out your specification and key elements that you wanted to include. I am not extremely organized when it comes to my own projects, so it is inspiring to see yours so completely thought out and considerate. In your CAD model, I especially love that you placed in mock objects to showcase that it will fit everything you need it to. I can’t wait to see the final part where everything comes together!