
Schedule
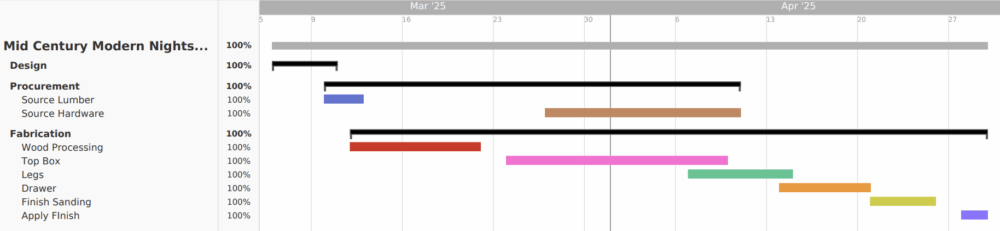
First I would like to go over the schedule of creation, shown below in Figure 1 is my post creation Gantt chart. This is the actual schedule that ended up occurring, and while I would have liked to have been completely done a week earlier to properly present my oiled project to my pod, I have fully finished at this point and will be able to display the completed artifact at Expo. This schedule is slightly approximate as there was a bit more sporadic work on different workstreams depending on if I got a little tired of one section, so in reality I started the legs earlier, and did more wood processing later at the start of the drawer making but overall this is a pretty good representation of the timeline. Also note there technically is a week gap of little work during spring break late March.
This project probably around 70-100 hours of work, or somewhere in that order of magnitude, I pretty much put 10-20 hours of work per week in the woodshop. My original estimate was around 50 hours, but every task took 50% more time on average because I was learning new skills and being cautious, I didn’t ever want to rush myself and make mistakes. Now that we have seen what I’ve made, lets get into the nitty gritty and see how I actually made it.
Materials Processing
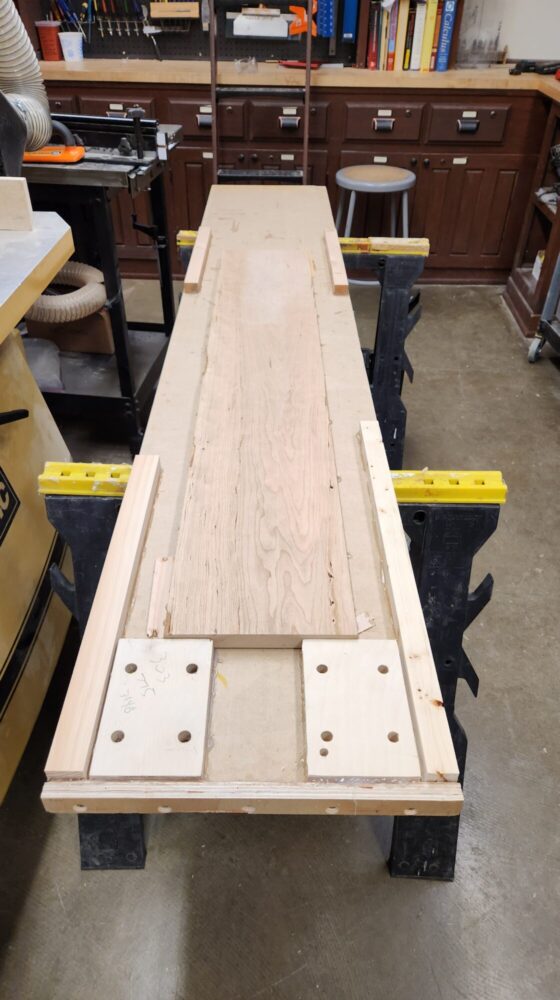
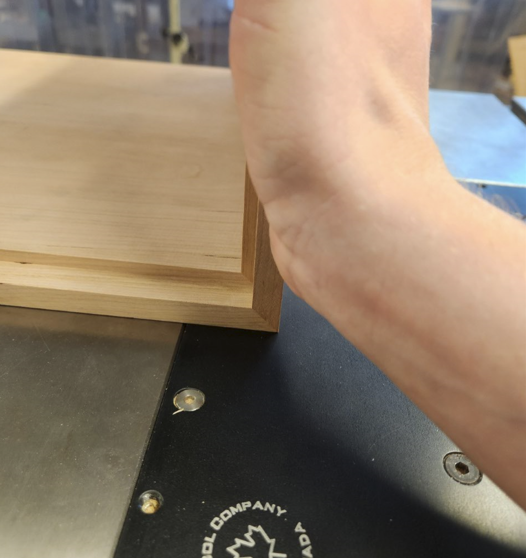
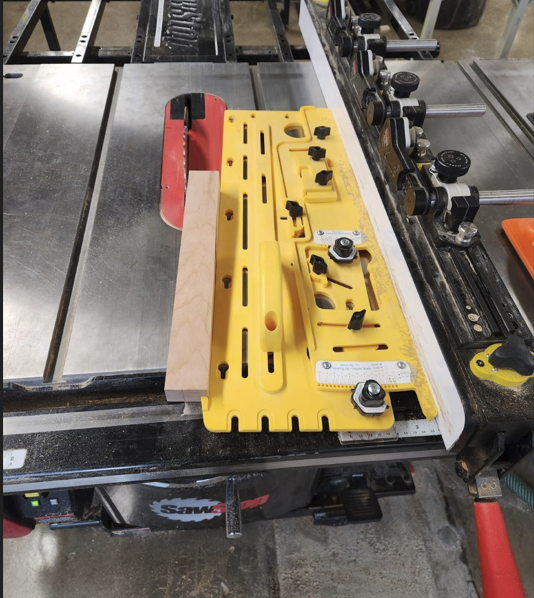
The first couple weeks of the project started by processing my cherry lumber to the sizes the project required. I was able to source the bulk of my material from Josh at the IdeaForge woodshop, this was very convenient as it had been stored there in the same dry environment for years so I didn’t have to risk purchasing higher moisture content wood from a lumber supplier. This meant that I did not have to have too much concern for warping and could trust the wood was stable. However this did not mean the boards where inherently flat… I selected 2 8’x8″ boards, and 2 4.5’x6.5″ boards, this allowed me to have a decent amount of extra material for mistakes (which I ended up needing) as well as making the drawer boxes out of solid cherry instead of plywood. To start the material processing I cut each 8′ board to 4′ as I would need 16″ wide panels to create the “box” of the nightstand. Then I had to plane the boards flat, and when you are planing you want to avoid snipe (when either end of the board gets planed more than the center due to deflection when the board enters or leaves the planer) as it results in a non flat surface. To avoid this I used MDF sleds, and shimmed and then hot glued the boards down along with support material at either end so that the sacrificial support material would take the snipe, you can see the sled setup in Figure 2.
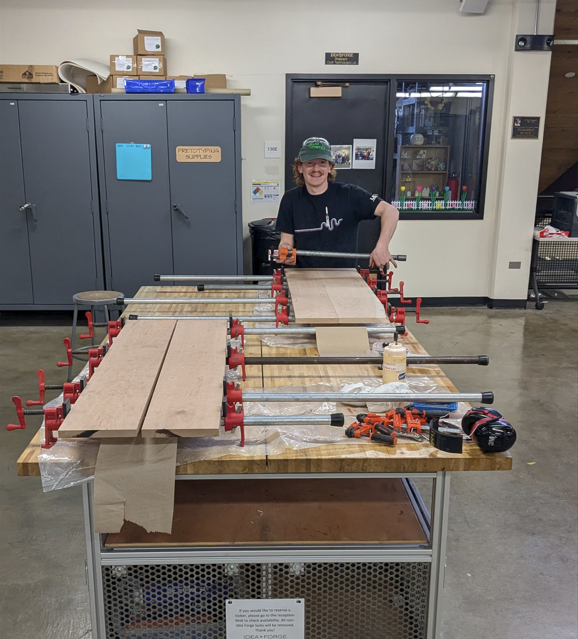
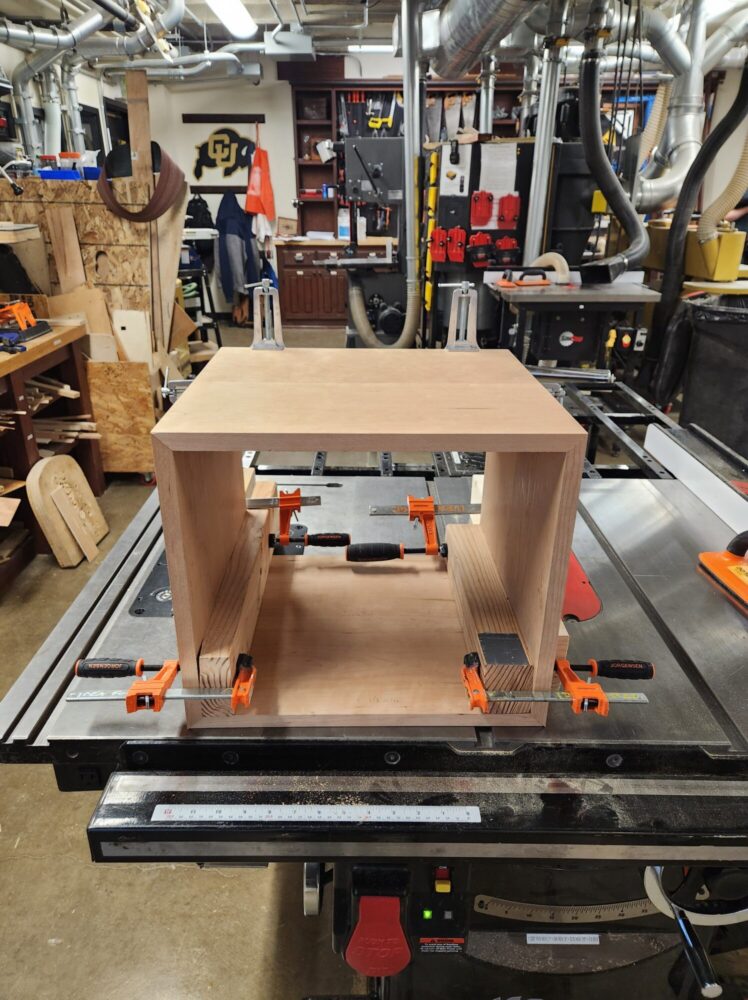
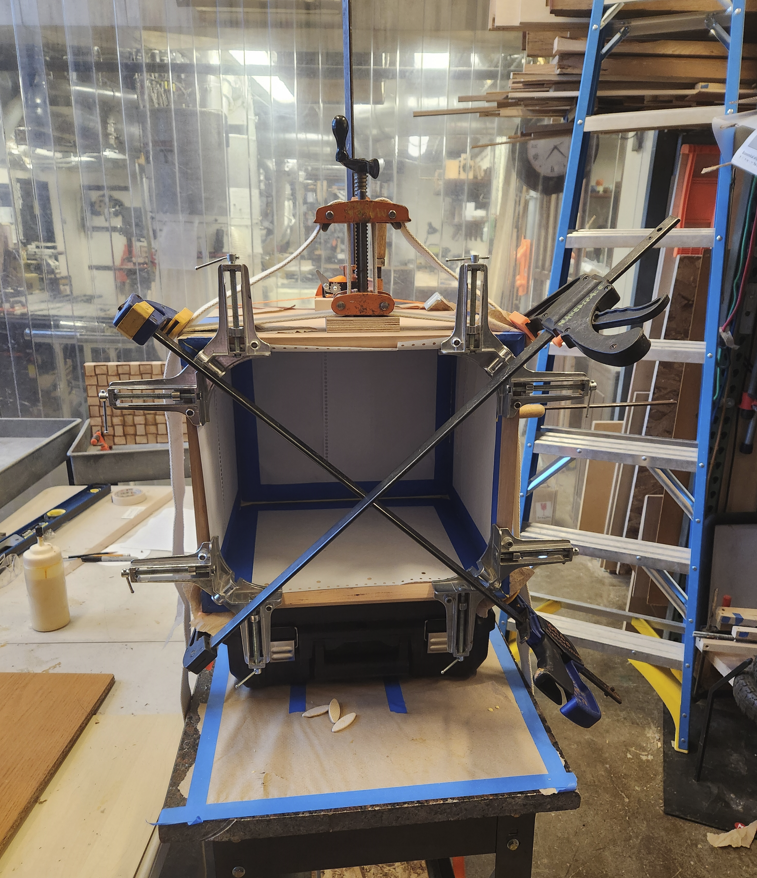
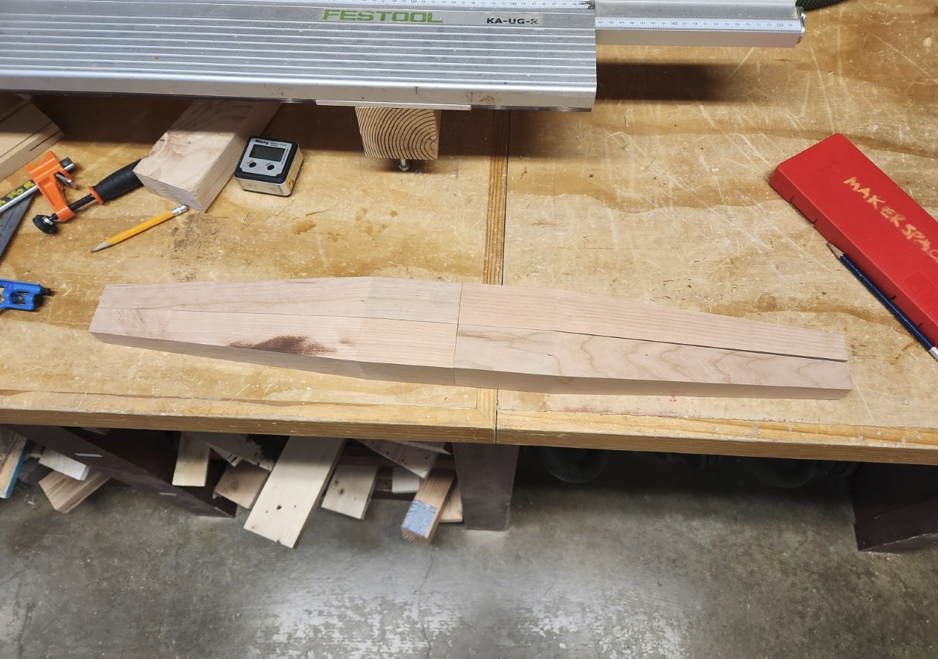
After all the boards had been planed I then cut one edge of each 4″ board to be flat on the table saw, because the other edge wasn’t flat yet I had no reference surface, so I had to use Josh’s 10′ sled on the table saw so I could create my own reference surface. Once that was done I could saw the opposite edge parallel with that reference edge I just created. Now my boards were flat, and square, to prepare them for the glue up I had to make sure the seem on the to be glued edges was under 0.005″ the full length of the board, this is the only way to make the seem on a larger panel “invisible.” To do so I hand planed the two boards edges, used a straight edge to see what was high or low, then tested the fit and use a shim set to see how small the gap was, this was pretty successful on both sets of boards except for one had slightly wider gaps than I would’ve liked on either end, but this area was excess and would not be in the final product. Now that I was ready for glue up I rallied the clamp army, one each glue up I used 7 pipe clamps, and 16 normal clamps. Unfortunately I forgot to take a picture of the entire set up and only took one (Figure 3) once I had started undoing the clamps after they dried, pictures are the last thing you think about while trying to do a big glue up.
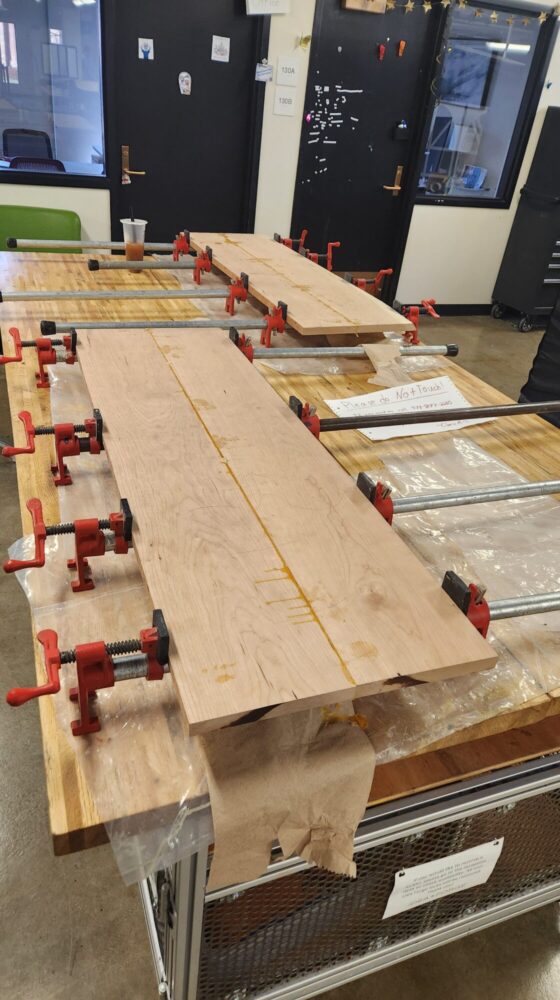
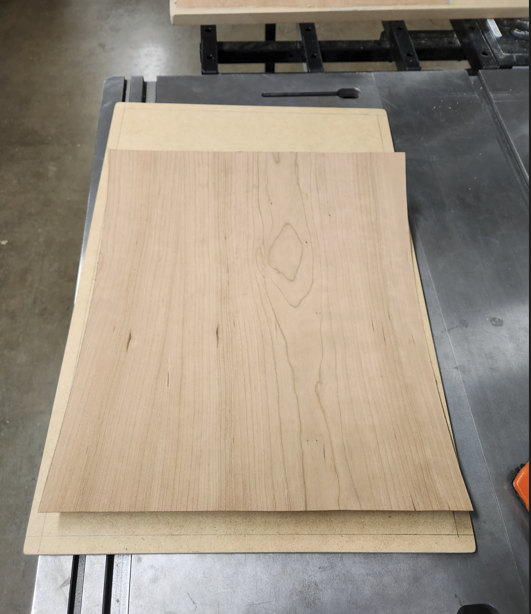
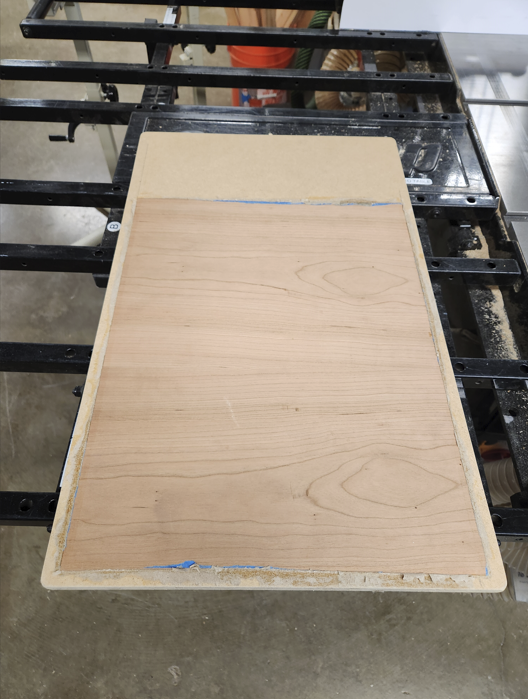
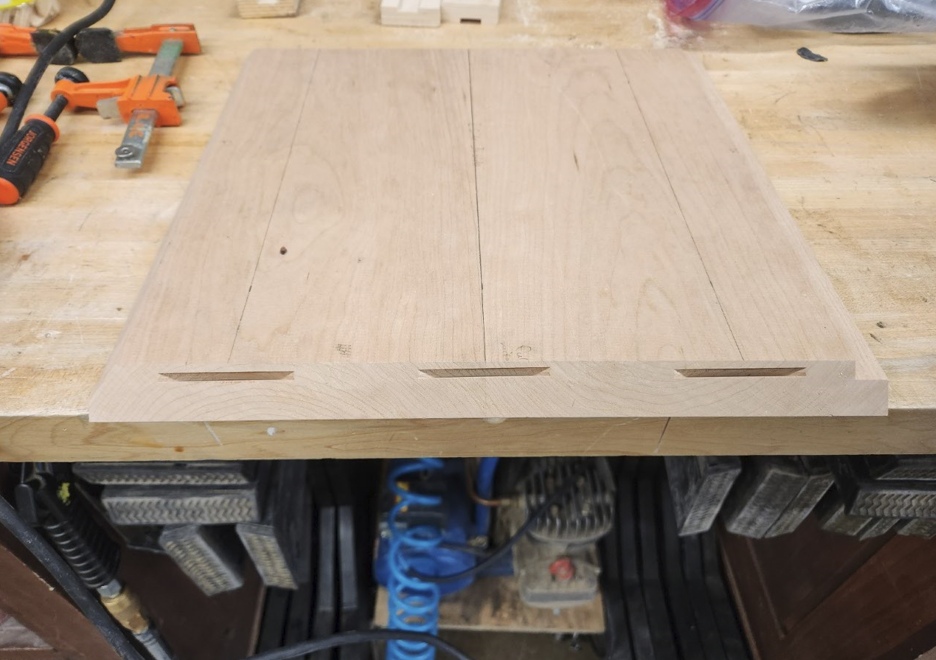
Now that each panel was glued together I needed to get the bulk of the glue off, then plane the panels again to final thickness, shown below you can see post glue up and post planing.


Box Panels
Now that the bulk of the material was processed I could actually start on the project… 10-20 hours of work in. The first step was cutting each of the panels into 3 pieces, the top, bottom, sides, shelf, and back of the box, I did this on the cross cut sled and after I had them to rough size I did the very first “assemble” of the box.
Next I began to cut the miter (45 degree) joints on the top, bottom, and side panels. This was a first to me and the most nerve wracking part as if I messed this up I would have to make the box smaller and try again. So to prepare I watched many videos on YouTube and spent a lot of time setting up the table saw to ensure my cuts where 45 degrees and changed the blade to a freshly sharpened one to ensure I had limited blade deflection and tear out (when the woodgrain pulls up due to cutting against the grain). I cut each miter and then test fit each panel to the corresponding joint to make sure they made 90 degrees, luckily I got them pretty good on the first try, I could have tried again to get them 100% perfect, but I was happy with where they were and new a couple tricks to hide the imperfections. The first miter assembly is shown below.
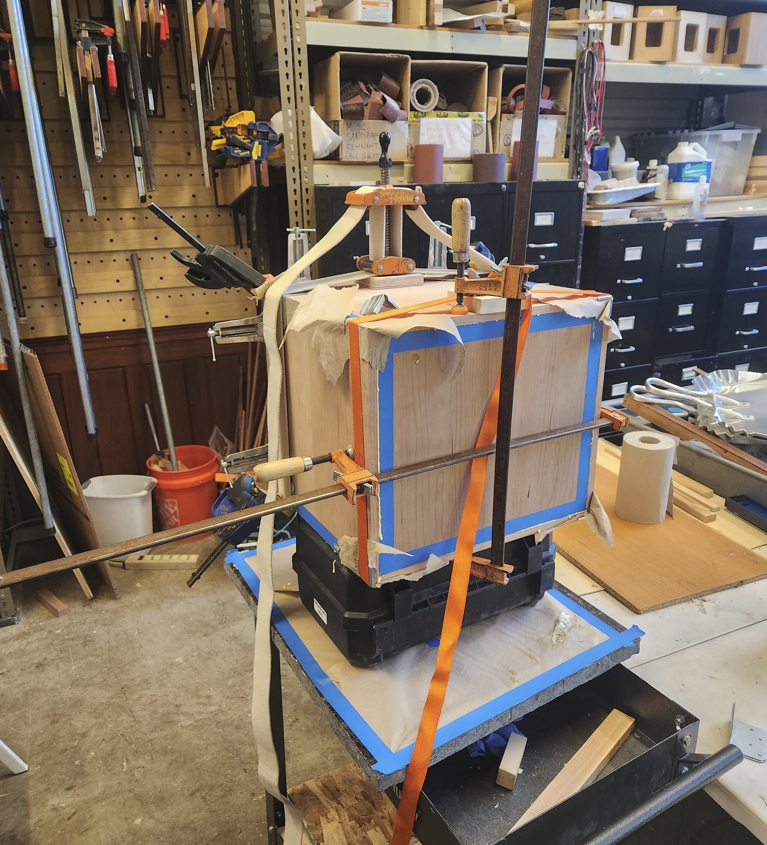
While I originally planned to create the back panel out of my glued up cherry, after discussing with Josh we came to the conclusion that if I moved the piece to a humid environment that it may push the box apart as it absorbed moisture and expanded. To combat this I decided to make the back panel out of MDF which is stable in moisture, and veneer both sides with cherry veneer, and luckily Josh had a supply of veneer I could purchase from him. So I cut out two pieces of veneer, and found a piece of 1/2″ MDF and then it was time for another glue up, this time using a vacuum bag. The reason for the vacuum bag is that it provides even pressure to the entire veneer surface. A couple images of the glue up process and results are shown below. Unfortunately on the first veneer glue up attempt, neither Josh or I thought about using a clamping caul (extra material used to ensure flatness on top of the veneer) and the vacuum bag had a crease in it which lead to a raised bump across the veneer as glue pooled in the crease. This was disappointing but not a disaster and it just meant I got to get more veneer experience when I re-did the panel, and luckily it happened on the first side not the second.

Once the back panel was veneered and cut to rough size I could route a rabbet in the back of the box panels to accept the back panel, this was my first time using a router table and I thoroughly enjoyed the experience (much better than a hand plane where applicable). The rabbets were cut to a depth equal to the thickness of the back panel so it would sit flush with the box.
Next I cut slots for biscuits on the miter joint faces of each panel, the use of biscuits would help with alignment and provide stability during my glue up. Biscuits are ~1/8″ thick ovular pieces of plywood that you insert in two opposing slots, but contrary to popular belief they do not actually strengthen a joint much if at all, you would need dominos or dowels for that. You can see the biscuit cut outs as well as the biscuits themselves in the figures below.

Finally the box was complete and I could do a dry fit of the entire box assembly, I was quite happy with the results but decided I would omit a biscuit on a couple joints as the slots didn’t align as much as well as I would’ve liked and it would be trickier to assemble during glue up. This milestone meant it was time for another glue up! To start I masked off all surfaces of the box as I didn’t want to have to spend too much time getting glue off the box and this way I didn’t have to skimp on the amount of glue I used. This was another very stressful glue up as there were more pieces and lots of joints that needed gluing, but in the end I got it pretty well square and tight!
For this glue up I employed a coupled different types of clamps, band clamps, which are large straps that then gets pulled tight around a whole surface, 90 degree corner clamps which obviously keep two planes at 90 degrees to each other, and then more traditional bar clamps. After the glue up all that was left to do for the box was scrape and chisel off any glue remnants so that they wouldn’t show through the finish down the road. I also actually did this glue up once the legs were completed so that I could put brass inserts in the bottom panel and dry fit the entire assembly, but I wanted to cover it here to keep the workstreams separate.
Legs
The legs are one of my favorite parts of my project, where I made my greatest error, and where I fixed that greatest error. The legs themselves were made out of 2″ thick cherry that I sourced from a local private hardwood dealer, this was actually a challenge because I only needed 14″ but every woodshop I called around to would only sell be 8′ boards. Luckily I found a seller on Facebook Marketplace who would sell me an offcut.
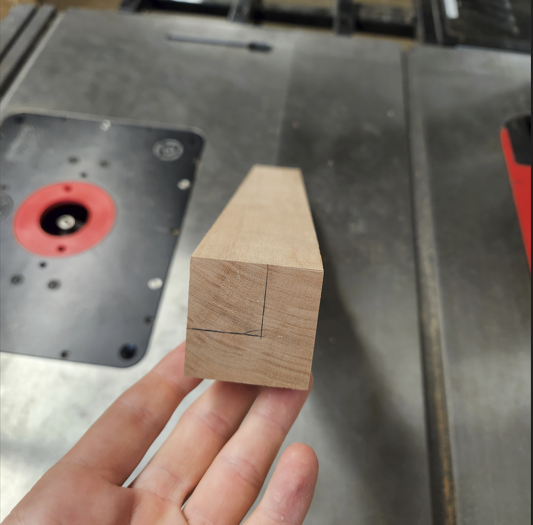
First I cut the legs into 1.75″ square strips being careful to ensure they were all the same dimension, after that I got to test out a new jig on the table saw, the taper jig. This jig is comprised of a plastic sled that you can set to an angle and slide along the table saw fence to get nice angled cuts. I did a few practice pieces to ensure I could cut the legs to a taper where the smaller bottom end was an inch square. I was pretty confident I could and worse comes to worse I ended up creeping up to my scribed lines anyways, once I had dialed in that distance I was able to cut both tapers on all 4 legs.
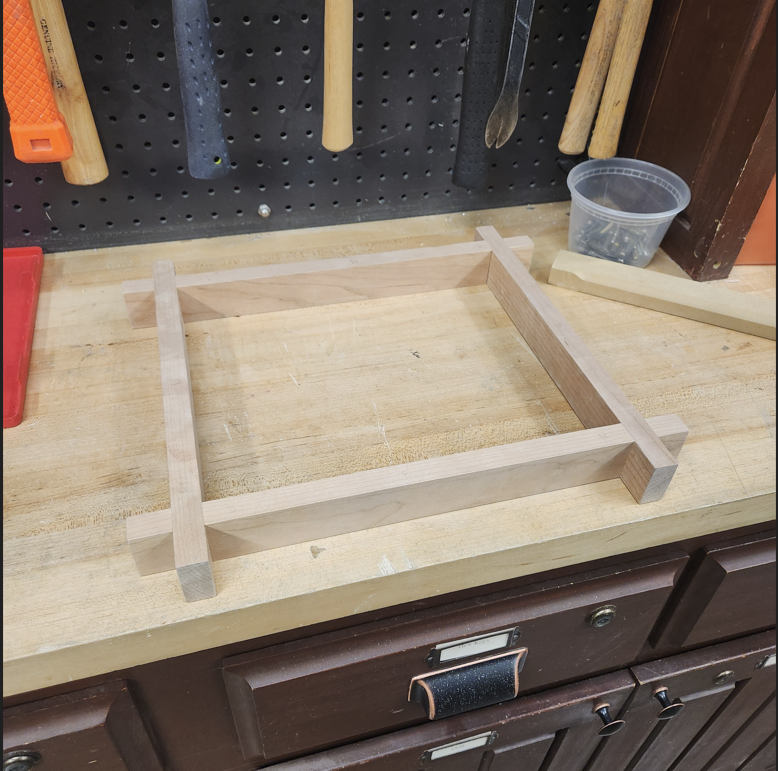
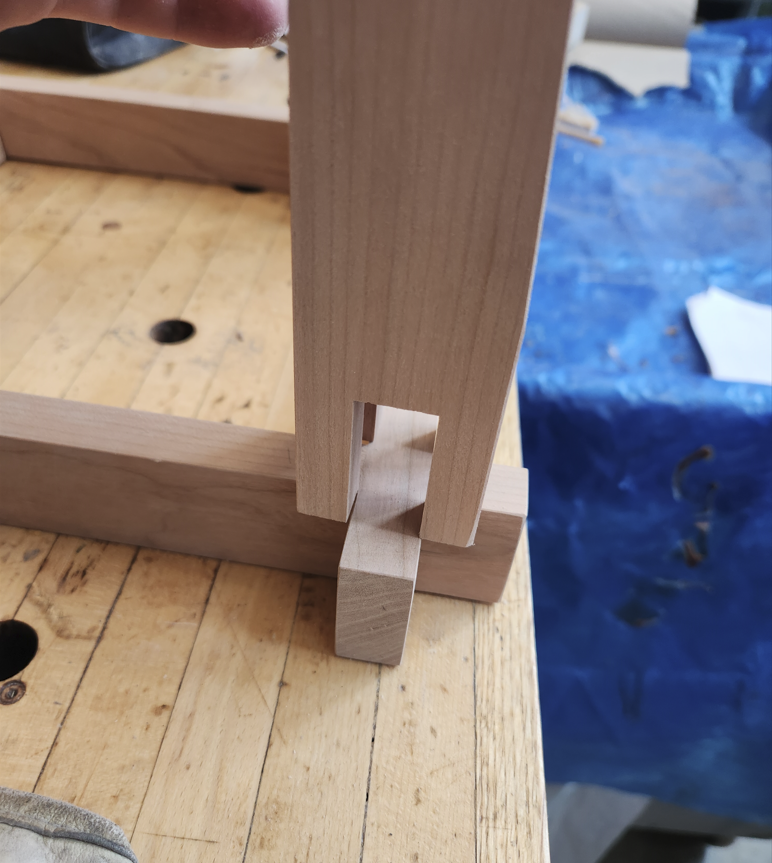
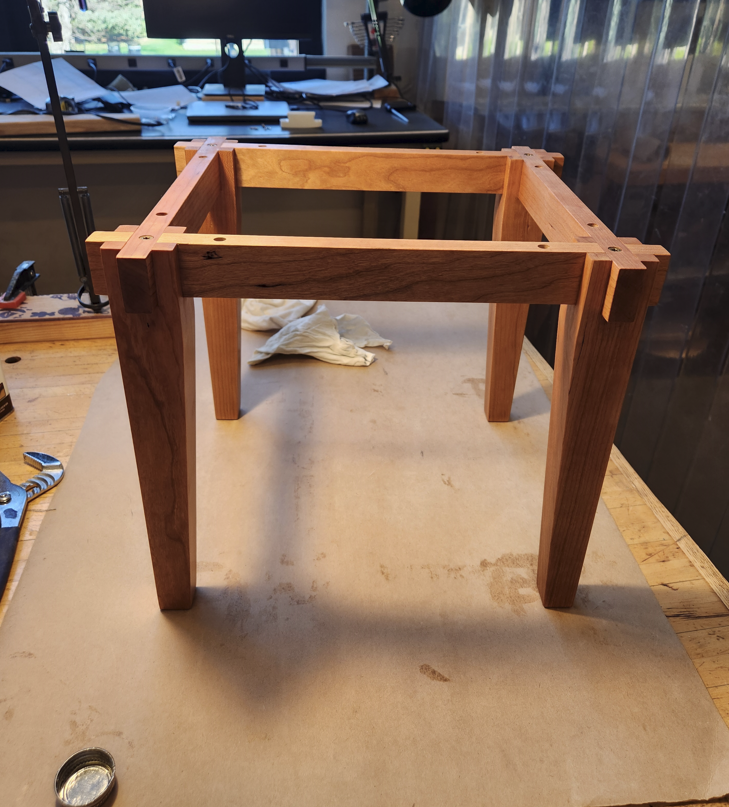
With the legs tapered I could then start making the braces that create a support structure between them. these were made with 3/4″ cherry and cut into 1.5″ strips, very simple. What came next was to cut the castle joints in the top of each leg, this would leave a crenellation type look that would allow me to nest the braces within, and because of that needed to be cut precisely to the thickness of the braces.

The actual cutting of the castle joints went very well but when I went to test the braces I realized I cut them 0.02-0.03″ too wide and the joints were not tight at all. Luckily I had some thicker cherry I could use to remake the braces to fit the legs instead of the other way around as I was all out of 2″ cherry. So after remaking the braces and being very careful and precise about their thickness I got them to a great snug press fit. I was almost done at this point and just needed to cut the cross lap joints in the braces so that two could nest in each castle joint of each leg. I cut these on the table saw cross cut sled just like the castle joints, and made sure to cut them to fit instead of some arbitrary number. That’s one valuable skill I learned from this project, whenever possible cut size to fit instead of some number you created in a drawing, you will make errors or the material wont be stable etc. but this way you know things will fit as expected.
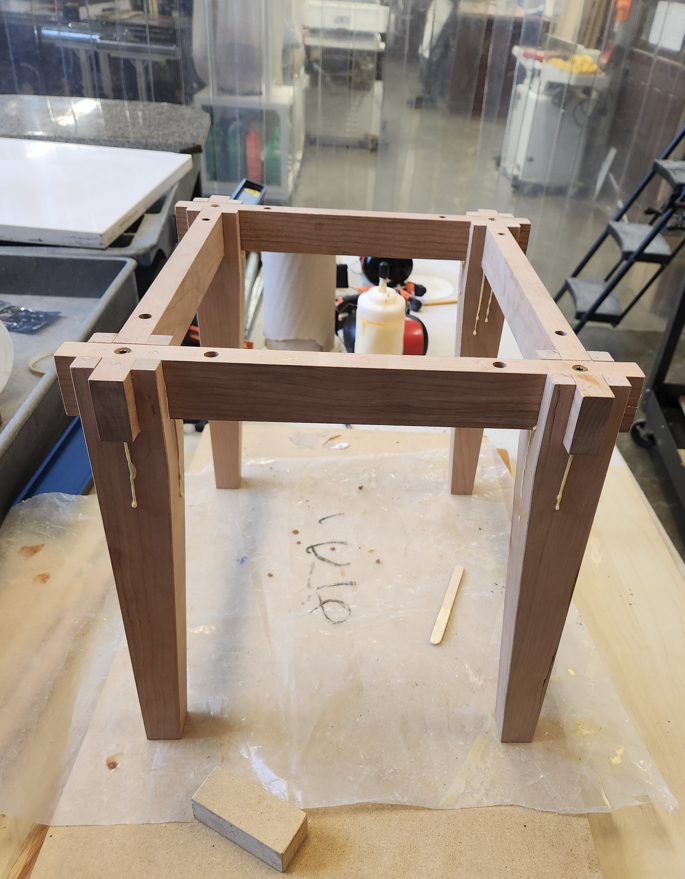
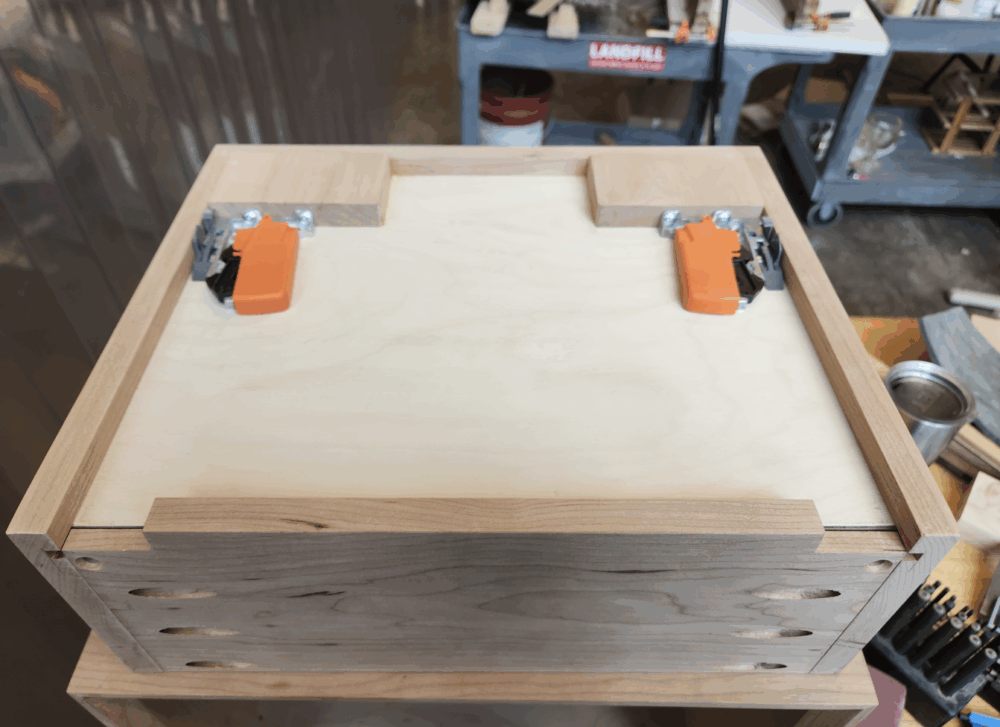
To mount the leg assembly to the bottom of the nightstand I used brass inserts, which are internally threaded brass hardware that you screw into a hole in wood, this allows you to use machine screws to assemble and disassemble repeatedly. First I drilled counterbores in the braces of the legs, then drilled through holes so that my mounting bolts would be invisible. Then I marked out the location on the bottom panel of the box where I would need to drill for the inserts, I drilled undersized pilot holes then slowly screwed the brass inserts in. I purchased 8 1.5″ 1/4-20 stainless steel socket screws to mount the legs to the bottom, and on the first dry fit I was incredibly satisfied

The legs were pretty much done but the last step before glue up was to drill some holes through the braces and into the legs from the top so that I could sink a large 4″ screw down the joint and keep everything in place. And looking retrospectively I should have left it here, the joints were tight and extra solid with this screw that I didn’t really need glue. But instead I went with my original plan and started a glue up at around 6, on an empty stomach and tired brain. And it didn’t go great. I covered all the surfaces with glue, and I thought I took care to ensure the tapers on the legs were all facing inwards, I drove the screws in, and started cleaning up. After cleaning up for about 10 minutes I walked back to the glue up and realized something looked off, I assembled 2 of the legs with the tapers facing outwards. I rushed back and pulled out the screws but the glue had already started setting, and my joints were good and tight, so I grabbed a mallet and started whacking the braces off so I could rotate the legs and in the process one of them cracked. I was very disappointed, but I didn’t have time to waste, so I put the legs back on (the right way this time) and put some glue in the crack and covered everything in extra glue so it would still be strong and screwed the joints back together. In the end the glue up came out well except for the fact you can still see the crack on the back brace but no one will ever have a reason to look back there, the lessons you learn eh.
Drawer
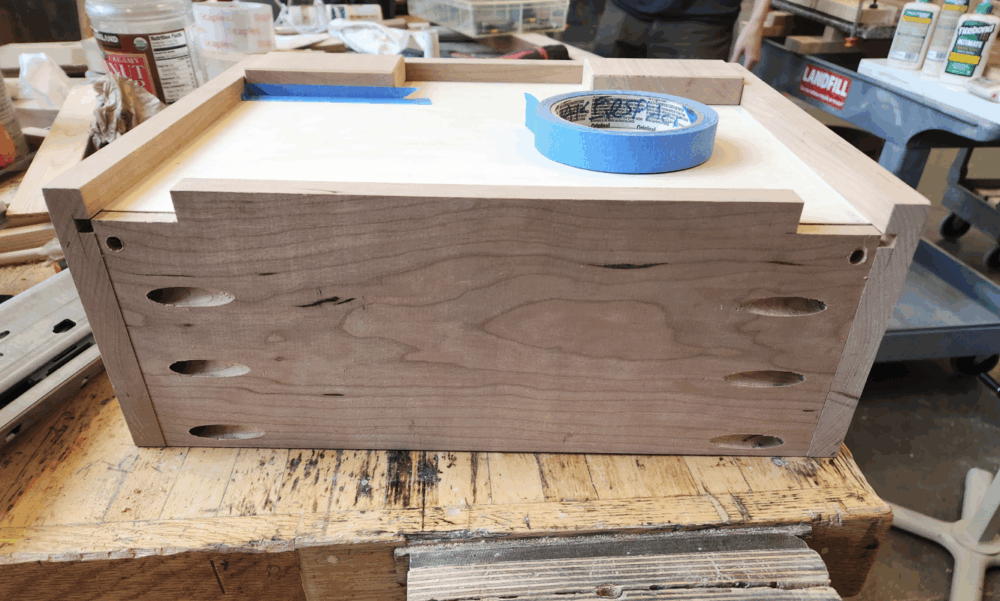
The first step of making the drawer was to decide what hardware I was going to use to mount it as this determined the type of construction and size of the box. I decided to purchase some BLUM Tandem Undermount Drawer slides, these are a Euro style, soft close, full extension drawer slide and they are very nice quality. To make the drawer I first planed some more 1″ cherry to 5/8″ thick to make the drawer front, sides, and back. I then cut these to length and width after doing some measurements of the complete top box of the nightstand. Next I cut a rabbet or slot 1/4″ thick on all 4 inside walls of the drawer box, this is where my drawer bottom would reside, of which was going to be made out of 1/4″ baltic birch plywood. next I could cut the drawer bottom out and I just used a hand pull saw and then sanded to the final dimensions. Finally I could start the actual joining method I was going to use, pocket screws. I originally wanted to do finger joints or dovetails, but didn’t want to add the extra time for minimal visual gain. The pocket screw jig was quite honestly horribly designed, it was only designed for 1/2″, 3/4″ and 1.5″ thick material so I had to use a shim to use it in my 5/8″ material. I also had to adjust the depth of the pocket drill bit and it took probably 1-2 hours of testing to get the set up correct. Once I had the jig dialed in it was quite the breeze though, I went through and put 4 pockets at each joint and they all came out nicely. Shown below is the completed drawer box.
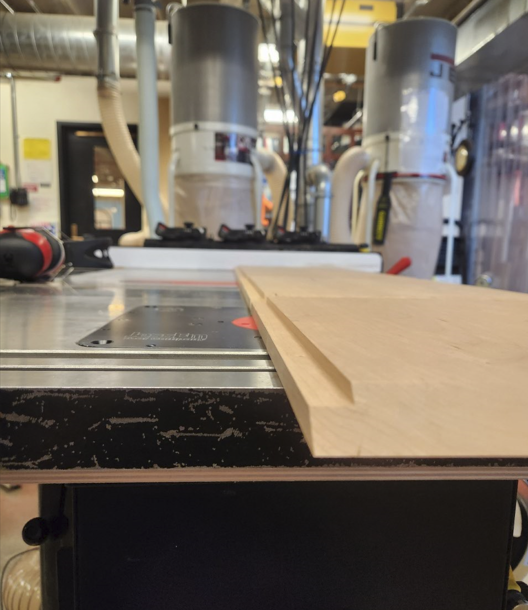
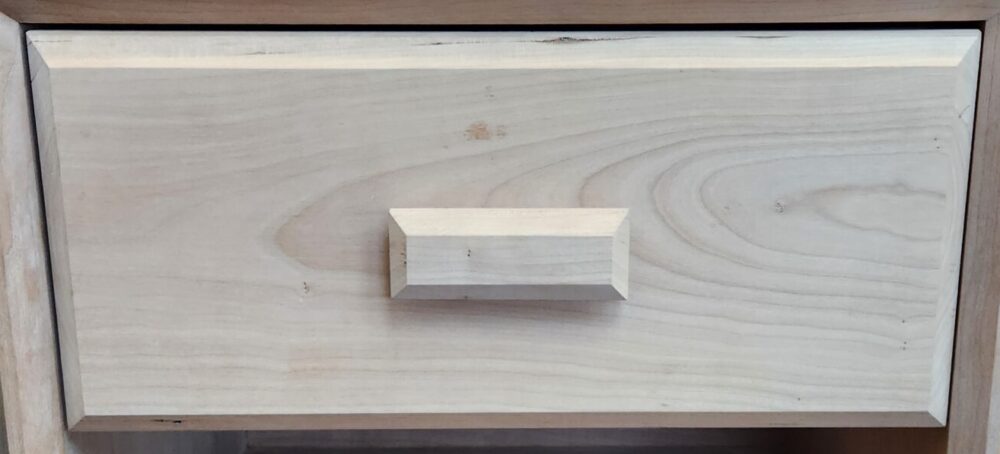
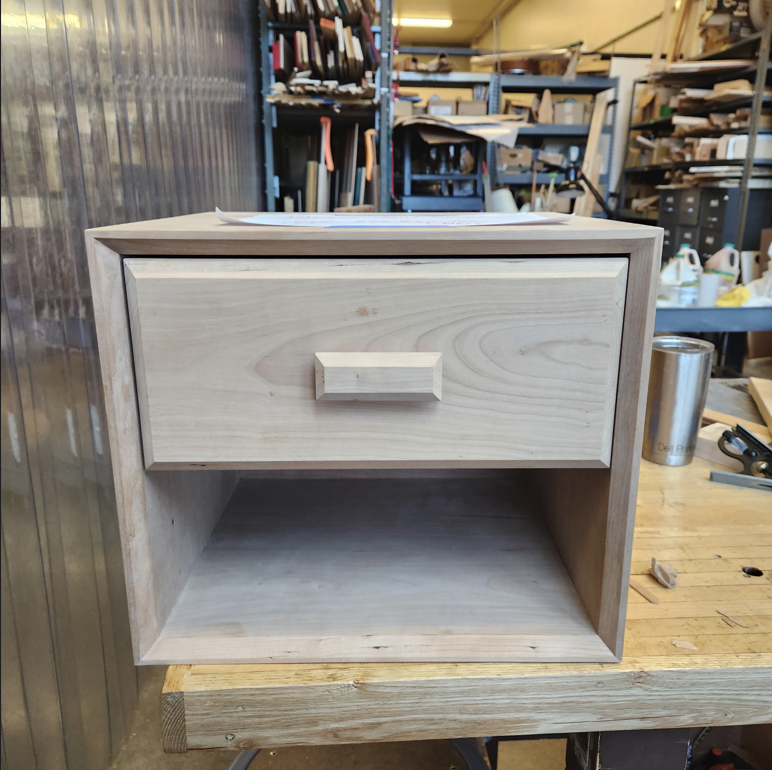
Next I could start on the drawer front, I wanted it to emulate the 45 degree angles of the top box so I just made it out of a piece of cherry and cut 45 degree chamfers on all sides of it, which I cut to ensure they two sets of angles convened at the same spot making a very cool convergence zone on the perimeter of the drawer front. I then made the drawer pull out of a piece of cherry and sanded similar chamfers all around it in a gemstone like shape, I mostly made it myself because I had never decided on an off the shelf pull and I ended up really liking the design after I spent a few minutes making it.
While the drawer box itself was done I still needed to mount the drawer slides, and I purchased 9″ drawer slides as 12″ would’ve been too long, so I needed to add blocks to move the mounting location of the hardware a couple inches deeper into the nightstand. What this meant is that I wouldn’t actually have full extension drawers and around 2 inches would always bee in the nightstand, something I don’t really care about. So I glued those blocks on, waited a day, then I used a jig that I had 3D printed at the IdeaForge that was specifically designed for these drawer slides to drill holes for the mounting hardware in the drawer box.


Next I drilled some holes in the drawer front, the drawer pull, and the front panel of the drawer box and did a quick test fit of the whole drawer assembly. I also then positioned the drawer slides within the box and drilled some holes and mounted the slides inside so I could test the drawer in the actual box itself, it came out great on the first try. I then took off the drawer slides so I could continue to the finishing process.
Finishing
Finally I could do the last steps of the project, yet I was not ready for the amount of effort it would require. I had sanded most of the project from 120 to 220 grit at this point, but much of it had either gotten a little dirty, or dinged here and there and so I needed to re-sand every surface to 220, then continue on to 320, and then finally to 600. I would’ve preferred to go from 320 to 400 or 500 but I didn’t have any of those grits on hand, and after testing the bigger jump it seemed to turn out fine. The reason I needed to sand to such a high grit was because I had chosen to use a drying oil finish, Watco Danish Oil, and when applying finish to cherry many people struggle with what they call “blotchiness.” People attribute this to an uneven finish commonly but in reality it is the natural figure or chatoyancy of the wood bending light in different ways, and unless you sand to a very high grit it is challenging to tell that its figure and poor finish. So I started sanding, and sanding, and sanding, it probably took a solid 8-12 hours of hand sanding to get everything done, the worst part was the legs as they have many small nooks and crannies that forced me to use very small scraps of sandpaper. I finally got it all done and could move onto finishing, and the first step was to clean the surface, I sprayed off larger dust with an air compressor, then wiped off the fine dust with mineral spirits. After the mineral spirits dried I started applying the first coat of oil, I finished the drawer, legs, and box all separately, so for example I applied oil to the drawer, wiped excess off the drawer, then oiled the legs, wiped the legs, then wiped the drawer off again, then proceeded onto the box.
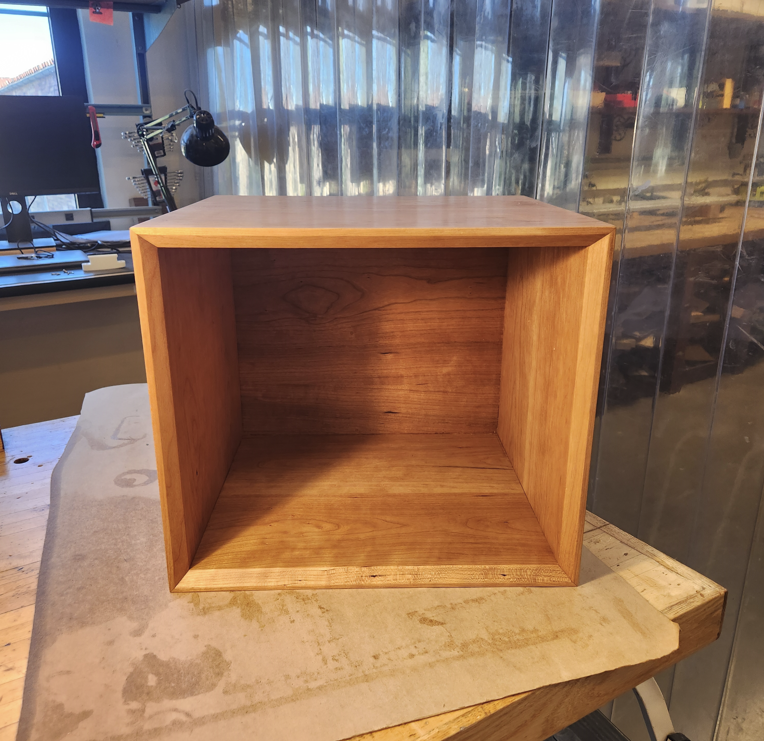

You can see the result after the first coat of oil, such a beautiful color change and grain pop you get from oiled cherry. I let the pieces dry for around 16 hours then went into the second coat, and between coats I rubbed the surface with extra fine 0000 steel wool to open the pores a bit and add more luster to the finish, then followed the same process as the first coat.
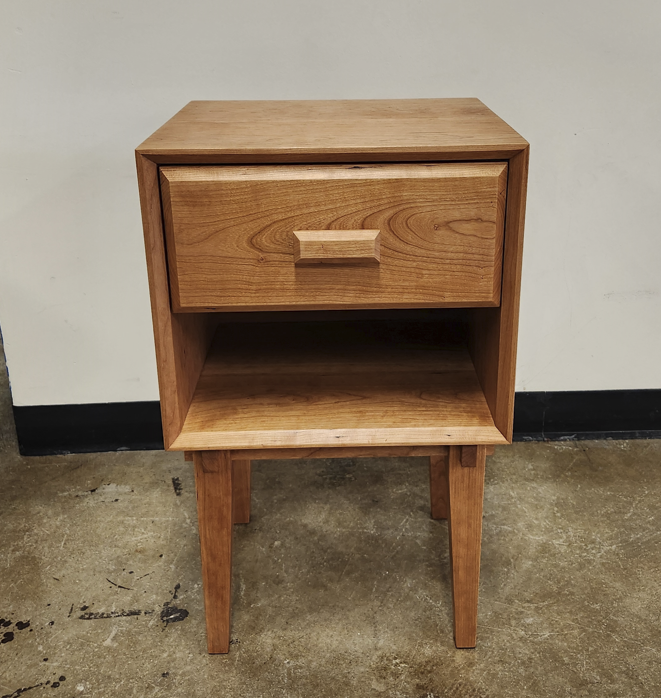
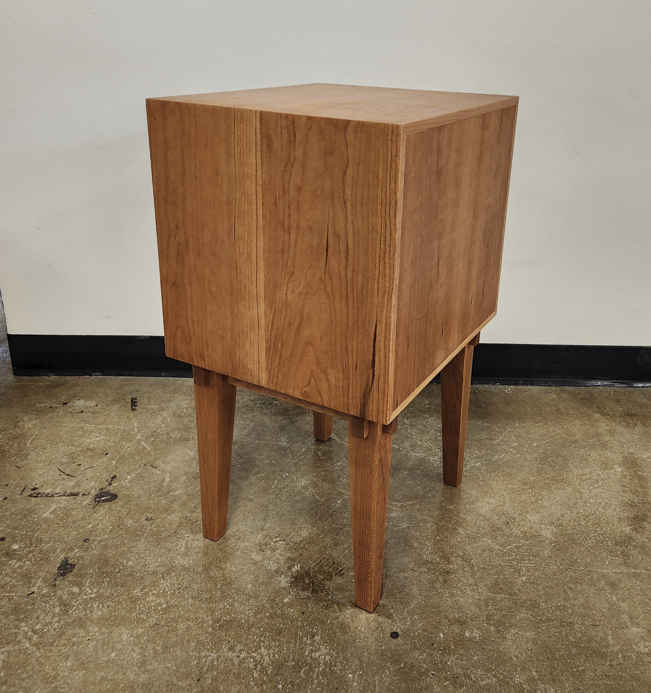
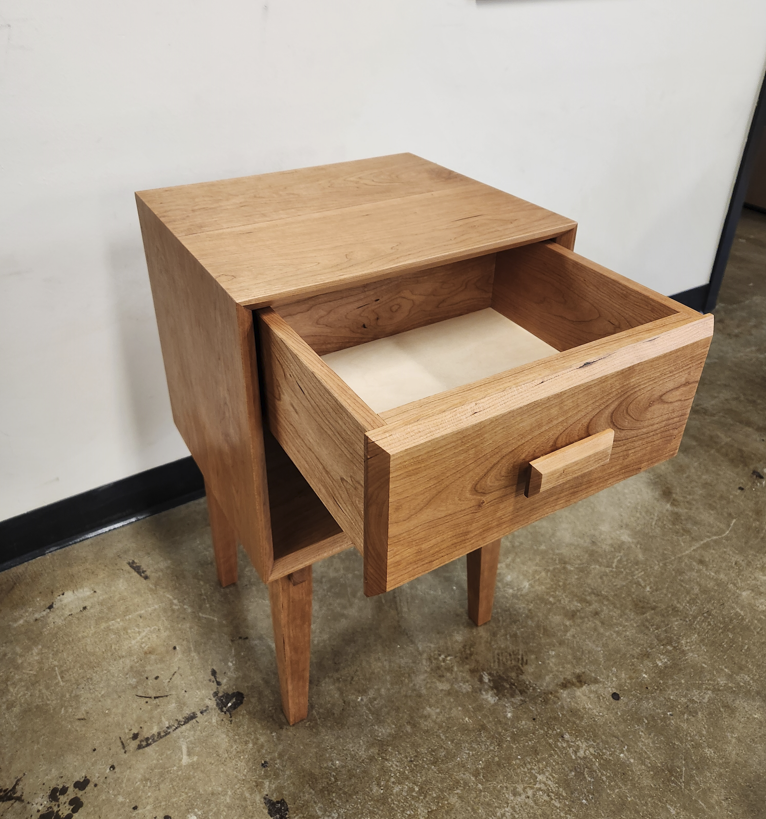
![]() Once the oil had cured after a few days I reattached the drawer slides, screwed the legs assembly on, and put the drawer on the slides. The project was complete, alongside it my college career. And what a way to end it all. Sorry this post is an entire essay worth of writing, this project was quite the undertaking and I didn’t even fully cover all the intricacies I could have. If you read the entire post I commend and thank you for your interest.
Once the oil had cured after a few days I reattached the drawer slides, screwed the legs assembly on, and put the drawer on the slides. The project was complete, alongside it my college career. And what a way to end it all. Sorry this post is an entire essay worth of writing, this project was quite the undertaking and I didn’t even fully cover all the intricacies I could have. If you read the entire post I commend and thank you for your interest.