
Designing the Cozy Cabin Perk-a-Cola Display
The Cozy Cabin Perk-a-Cola Bottle Display started out as a nostalgic idea—a fun way to bring together something I’ve loved since middle school (Call of Duty: Zombies) with all the hands-on skills I’ve picked up during college. What began as a shelf to hold old props quickly turned into a full interactive project that mixes engineering, game design, and aesthetics into one cohesive piece.
This blog post goes through what inspired the idea, the goals I had in mind, and how I translated everything into a real, physical display. I’ll also talk about how I approached the design, 3D printing, electronics, and the artistic touches that give the project its signature cozy cabin feel.
Inspirations
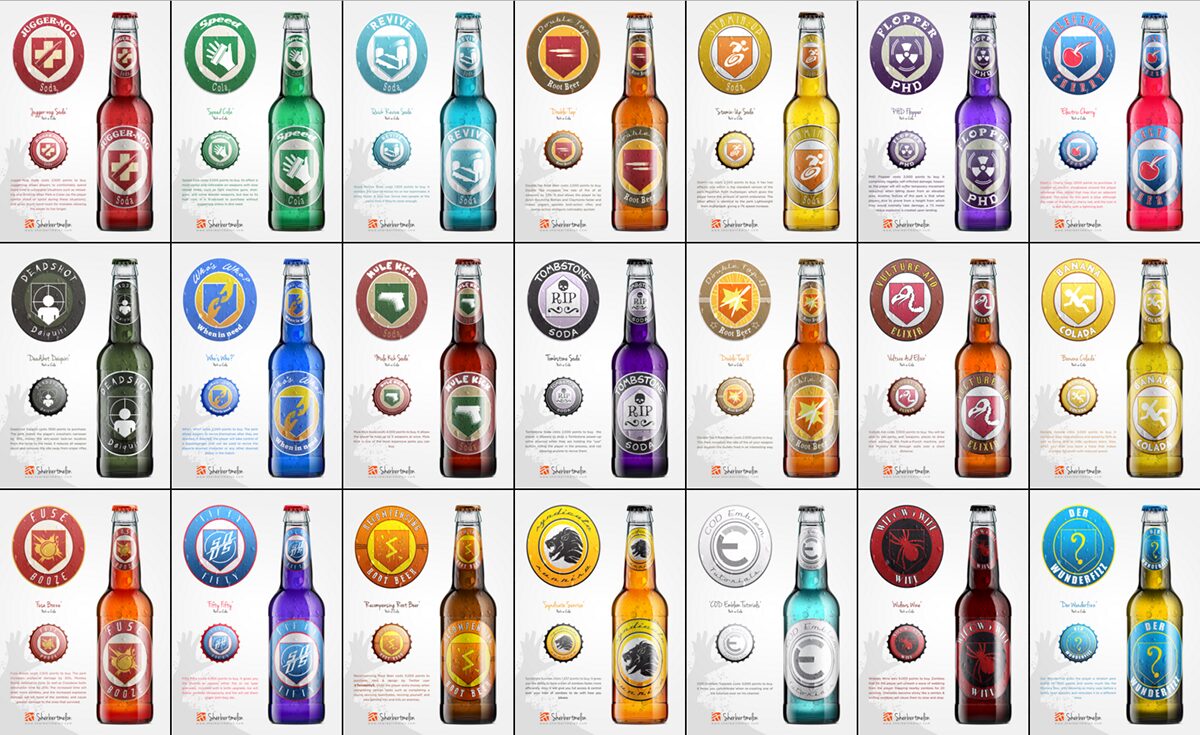
The core idea came from the Perk-a-Cola machines in Call of Duty: Zombies. I have always enjoyed the complexity of the COD zombies’ franchise and wanted to make something interesting and fun from it. These machines, each tied to a perk like Jugger-nog or Speed Cola have interested me ever since I was young, so much so, that I made models of the in-game bottles and planned to use them for this project. However, they weren’t sent out to me in time, so I had to recreate them.
- Game reference: Call of Duty: Black Ops – Zombies Mode, Treyarch, 2010 https://www.callofduty.com
Each Perk-a-Cola machine has its own glowing light, distinct jingle, and visual theme. I wanted to bring that same level of character and interactivity into a shelf display. Instead of just being static, I thought: what if the shelf responded to the bottles—lighting up, playing audio, and becoming a piece you could actually engage with?
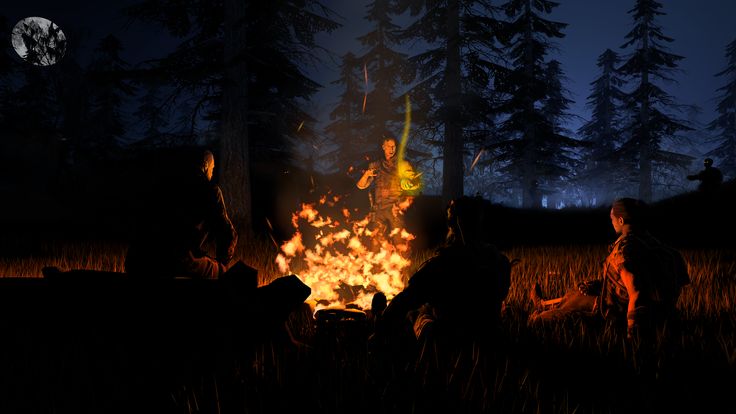
For the visual style, I leaned into the cozy cabin vibe because it felt like a natural pairing with the dark, wooded loading screens in Zombies. I looked at a lot of cabin decor and rustic shelving for ideas:
- General cabin inspiration: Cabin Life Magazine
- Rustic gaming setups on Pinterest: https://www.pinterest.com/pin/318911217237620642/
Vision: Blending Form and Function
From the start, I knew I didn’t just want a shelf—I wanted an experience. The goal was to create something that felt alive and reactive, while still looking like it belonged in a cabin somewhere out in the woods.

Function Specs
Here’s what I wanted the display to actually do:
- Light up a specific bottle slot when a bottle is placed
- Trigger a unique theme song when the bottle is removed
- Use simple components (Arduino Nano, LEDs, end switches, a speaker)
- Keep wires and electronics hidden
- Run off battery power for portability and clean mounting
Visual & Artistic Goals
- Make it look handcrafted and cozy—not like a tech project
- Use warm wood tones, moss, and trees to sell the cabin aesthetic
- Include Perk-a-Cola logos as decorative elements
- Create something that’s fun to use but also display-worthy on its own
The big idea was to keep the tech in the background. When it works well, the shelf shouldn’t look like a bunch of wires and plastic—it should just feel cool and look good.
Sketching It Out
My first sketches were mostly to figure out scale and placement. I knew I wanted five bottles spaced across a 2-foot shelf. Each one needed room for the lighting system and a coaster mechanism to press a switch underneath.
I sketched out:
- A simple backboard with space for engraving or 3D pine trees
- Recessed bottle spots with under-mounted switches
- Slots and grooves for hiding wires along the back panel
- Logo placements in front of each bottle
(Insert sketch image here)
Even though it was rough, the sketch helped lock in the main features and guided my CAD design.
CAD & 3D Printing
Using Solidworks, I created a full model of the display and its parts. It helped me visualize how everything would fit together and double-check tolerances before printing.
Key CAD Components:
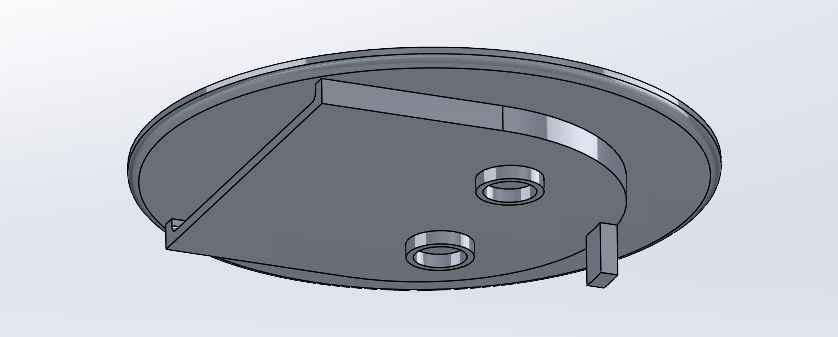
- Bottle coasters: platforms that sit on rails and press down on the switch below
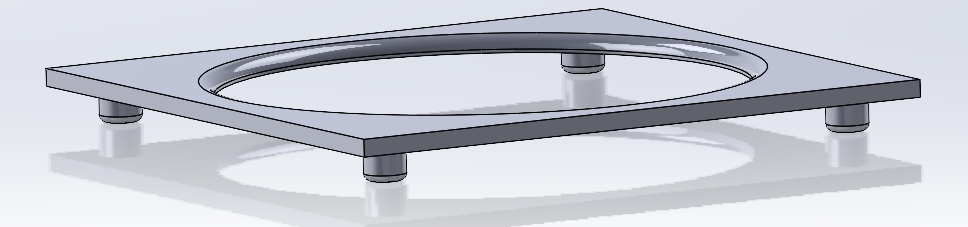
- Main shelf structure with wire channels
- Side panels with faux wood textures
- Front nameplates with engraved perk logos
- Pine tree cutouts to mount on the backboard
Getting the coaster tolerances right was probably the most important part of the whole mechanical design. Each coaster had to:
- Slide smoothly with almost no side-to-side wiggle
- Press the end switch firmly when a bottle is added
- Reset cleanly when the bottle is removed (with help from a spring)
It took a few test prints to dial it in. If it was too tight, it would jam. If it was too loose, it wouldn’t press the switch properly. Once I got it right, I printed a working prototype to confirm the feel—and it worked! Now I just need to print four more of them for the rest of the bottles.
Electronics Setup
The electronics were all built from the ground up using parts I had or sourced online:
- Arduino Nano
- LED bars for each bottle slot
- Pressure-style end switches
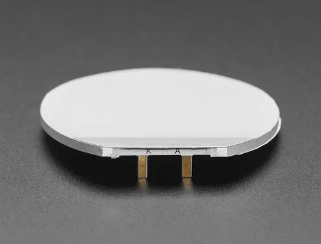
- Small 3W speaker and sound module
- Lithium-ion battery pack
Each coaster has an end switch underneath. When it’s pressed (bottle added), it lights up the matching LED bar. When released (bottle removed), it triggers a specific sound to play—like the Speed Cola or Juggernog jingle.
The wiring was kept clean by running it through hidden channels on the back panel. I also soldered all the connections to make sure nothing comes loose once everything is mounted.
Material Choices & Aesthetic Details
Most of the structural pieces are 3D printed using white PLA filament, which looks surprisingly convincing after some sanding and painting.
To really drive home the cozy cabin feel, I’m adding:
- Faux moss to the edges of the shelf
- 3D-printed pine trees attached to the back panel
- Black brackets for contrast and a more handmade look
- High-res perk logos printed in resin and painted by hand
I didn’t want any one side of the shelf to feel blank, so I included log textures and small touches on the sides and edges. These things may seem small, but they add to the overall feel of the piece.
Current Progress
Right now, I’ve:
- Gathered all my electronics (LEDs, end switches, Arduino Nano, speaker, battery)
- Soldered everything into a working system
- Built and tested a full prototype of the coaster + switch setup
- Finalized my CAD designs and tolerances
- Printed one working unit
Building the Perk-a-Cola Bottles
One of the most fun parts of this project was recreating the Perk-a-Cola bottles themselves. These are a big part of the overall display, and I wanted to get them as close to the in-game look as possible while keeping things simple and DIY-friendly.
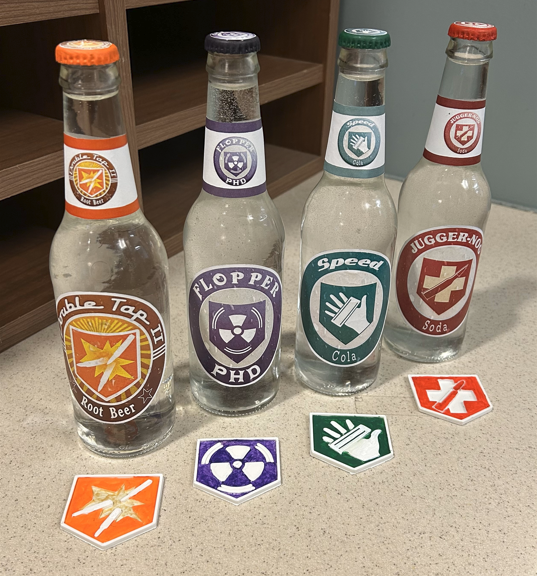
To start, I took empty glass bottles (like soda or kombucha bottles) and cleaned them thoroughly. Then I printed out each Perk-a-Cola logo on paper, scaled to fit the front of the bottles. I used high-resolution versions of the logos found through Call of Duty fan sites and forums, making sure to only use images I could trace back to original game assets.
I carefully cut out each logo and used glue to attach them to the glass bottles, doing my best to line them up cleanly. I sealed them with a matte finish spray to give them a slightly aged, printed-on-glass look. The end result isn’t perfect, but it really captures the feel of the in-game items—and they look awesome under the LED lighting on the display.
In addition to the paper labels, I also 3D printed the perk logos separately for the shelf itself. These were done in resin to keep the details crisp, and I took my time hand-painting each one to match its color scheme from the game (like the red for Juggernog or green for Quick Revive). These sit on the display in front of each bottle slot and help reinforce which perk each bottle represents.
Together, the printed bottles and the painted logos add a ton of personality to the shelf. They’re small details, but they help tie everything together visually and make the whole project feel that much more complete.
Wrapping It Up
This project has been a really fun way to bring together everything I’ve learned in college—basic circuits, Arduino coding, soldering, CAD modeling, and 3D printing—and turn it into something completely unique. Nothing about the build is super advanced, but that’s kind of the point. It’s about using the basics in a creative and personal way.
I set out to build something that looked cool, worked reliably, and reminded me of the games I grew up with—and it’s getting really close to becoming exactly that. Once the last few parts are printed and everything is assembled, I’ll have a finished piece that blends nostalgia with craftsmanship and feels like it could’ve come straight out of the Zombies universe.