

For the final project for this class I decided to create a staircase shaped display stand out of wood that I could use to show off different assorted knick knacks I’ve collected throughout the years. With this project, I really wanted the final product to be something that I liked and would actually use within my home. I initially struggled quite a bit to come up with an idea that I would find useful, but when I was looking around my room for inspiration the piles of random trinkets and various lego builds that cluttered my dresser caught my eye and made me want to create a way to better display them. The problem at the time was that everything got lost in the clutter, so a design that separated the items and gave them their own spotlight was my main focus.
When the idea for a display stand came to me, I was immediately reminded of Lego minifigure display stands I had seen online or in YouTube videos. The images below are a design from Tricked Out Bricks, which uses acrylic sheets arranged in a staircase pattern to display different minifigures in a way that allows each figure to be seen with minimal obstruction. I really like these stands and think they do a great job of showing off a lot of different things at once, but there were definitely some things I wanted to change for my own design.


First of all, while the idea for a display stand was something I was excited about creating, one of the main requirements for this project was that there is some sort of dynamic feature. While I could’ve taken the easy way out and decided that the act of putting things on a display stand is their dynamic feature, I saw an opportunity to make these simple stands into something a little more practical. Under the stands there is a large amount of empty space that I considered to be wasted space, so my idea to solve this problem was to add a drawer feature that could be used to store any items that weren’t being displayed at the time. With this extra feature, I felt good about building something so purely meant for aesthetic purposes knowing that it provided value to my space through its functionality, not just its looks.
While I appreciate the clean acrylic look of the Lego display stand as I think it puts a lot of focus on the figures, the aesthetic that I’m tried to emulate for this project is less minimalist and more rustic. I would describe my personal favorite aesthetic as cabin/cottage core. Both of these aesthetics romanticize the idea of getting away from bustling city and living in a cabin in the woods surrounded by nature. To evoke those feelings of escaping modern life and returning to a more natural and rural setting, cabin core uses lots of natural and earthy colors while employing natural materials like wood, cloth/fabric, stone, and leather. All of this comes together most prominently in home decor, but clothing is great way to channel this aesthetic through the use of things like wool sweaters, dark trench coats, and large boots as all of these things make you feel warm and cozy, similar to a roaring fire in a cabin. Those feeling of warmth and comfort are essential to the cabin core aesthetic, and through the use of natural colors and materials any room can be made to feel like its a remote snowy cabin where the only concerns are if you have enough blankets. Below I’ve include a few examples of rooms that exemplify cabin core, with the greens, browns, and beige colors that are commonly associated with our natural world, as well as plenty of natural materials like wood, cloth, and plenty of floral decor.


With these goals in mind I began drawing out sketches of what my project could look like. I explored a few alternate aesthetics during this design phase in order to feel out what I could actually make, what looked good, and what I liked. The three aesthetics I chose to explore were the main aesthetic that I wanted to implement, and then two more that were far departures from the original to show me what something that different could look like. Those aesthetics were cabin core, minimalism or modernism, and maximalism respectively. Each design, as seen below, brought a lot of interesting aspects to the table both good and bad.
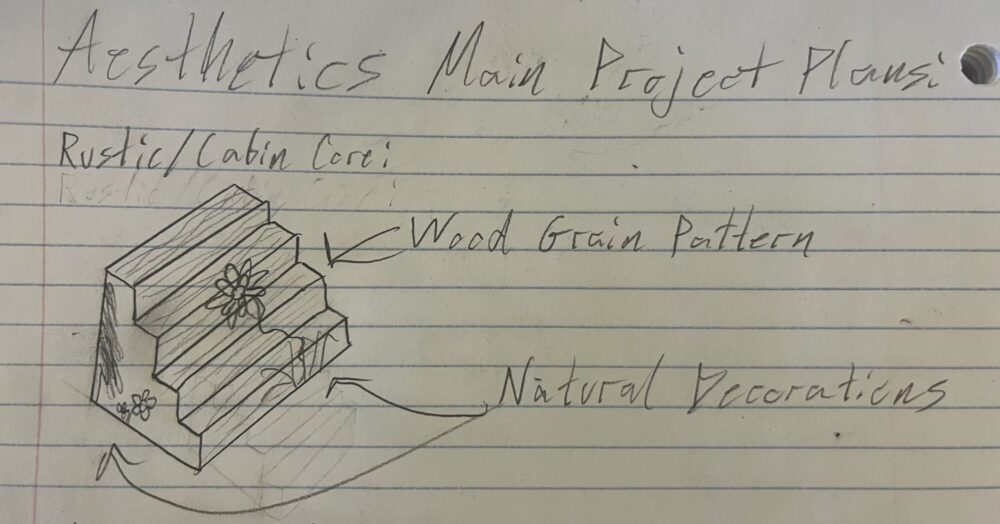
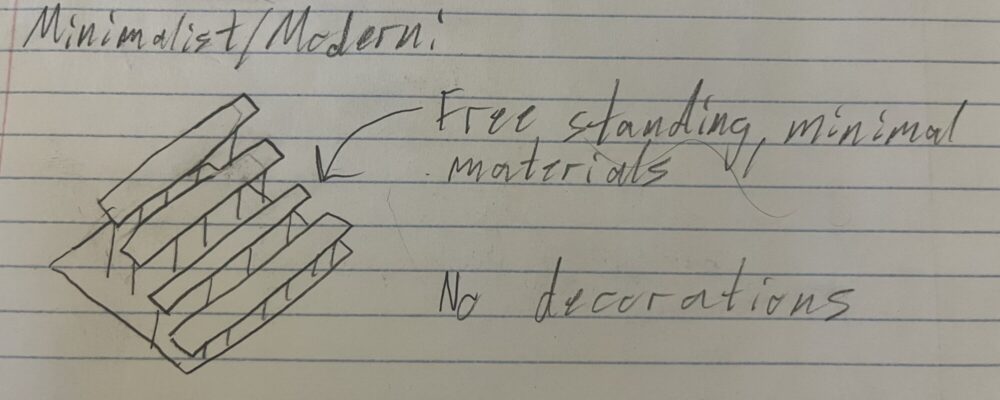
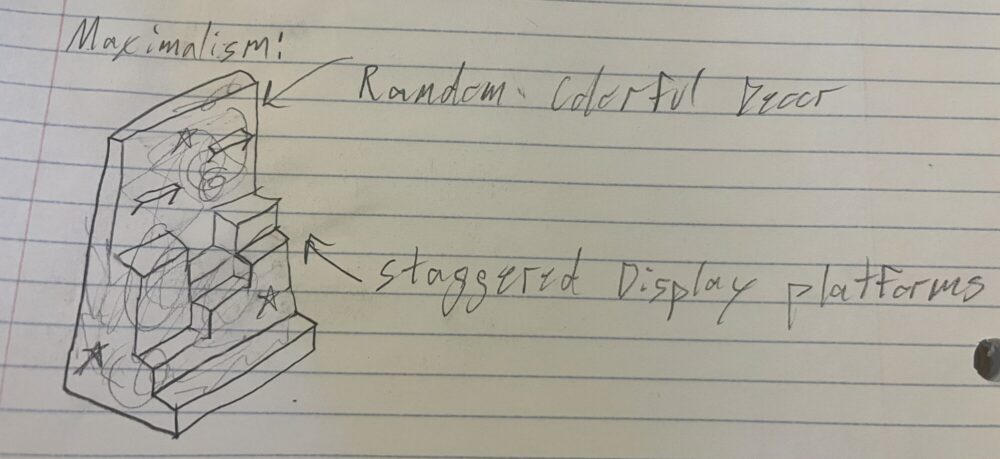
I made the first sketch with the rustic cabin core aesthetic in mind. I really want to emphasize the natural brown color of wood with my design, but I also realize that I’ll have large blank sections on the sides of the project that could look boring if I stick to only wood. Thats why I wanted to try and paint flowers, trees, and other natural features to break up the boring brown while still evoking those feelings of being connected with nature. For the second sketch, I tried to emphasize how minimalistic design reinforces function over form, and one way that could have be seen in my project is with sharp edges, minimal use of material, and stark colors that take the focus away from the display stand and puts on the items being displayed. Interestingly, it’s very close to the Lego stands I drew inspiration from since those also try to emphasize the figures being displayed. With the maximalist design, the staircase shaped uniform rows of the first two designs are gone and all the focus has shifted much more from whats on the stand to the stand itself. The different stands are all at staggered heights to keep the eye moving and to make sure no one point gets a lot of attention. The decorations are wild and sporadic, and I imagine that a finished version of this design would be extremely colorful thanks to varying materials and paints.
I got a lot of inspiration from exploring these alternate techniques by going outside my comfort zone and seeing what my project could be. Finding a nice balance between focussing on the display stand itself and the things being displayed was something that I didn’t expect to be so challenging but by keeping my design between the two I explored helped me stay on track. I did come up with one last design that incorporated aspects I liked from all three designs, but my final design ended up being much closer to the first sketch I made.
With my my idea for the project settled and my aesthetic chosen it was time to begin the fabrication process, which always starts with a plan. First, I started by collecting the resources I would need to build the stand, primarily the wood. I wanted to keep this projects budget at a minimum wherever possible and remembered that Resource Central was very helpful with finding materials for cheap. While there, I found a butcher block which was perfect for the top of my stand, and two large boards that would work great for the sides and front ‘stair steps’. With the material I needed found, I could come up with a more detailed fabrication plan. Below are the drawing I made based on the dimensions of the material to help me know where to cut.

I decided that three flat tiers would be easiest to create since I wanted the steps to be large and easy to display things without having to worry about knocking anything else off accidentally. Also, while the staircase pattern in one of the larger boards separates the two pieces cleanly, since I was using a hand saw to cut the boards to size I had to cut through one of the sides in order to get the look I was going for. This made the assembly process much more difficult, but the final result still turned out quite well. Since a large amount of the aesthetic design in this project is based on the material selection and final decorations I added, the actual fabrication process and the planning that went into it didn’t consider the aesthetic very much. My plan for those flourishes at the end included using spray paint and paint pens to add natural decorations around the sides and top of the design. I went and got stencils to use to create different flora like trees, grass, and flowers. I do really like natural wood grain and think it looks great when exposed, so I didn’t plan on adding an excessive amount of paint and decorations.
References:
(1, 2) – Tricked Out Bricks – https://trickedoutbricks.com/product/80-figure-podium-stand-for-lego-minifigures/
(3) – Stacy Ling Bricks n’ Blooms – https://stacyling.com/painting-the-piano/
(4) – My Domaine – https://www.mydomaine.com/cottagecore-decor-ideas-5270411
(5, 6, 7, 8) – My own sketches