

Figuring out what I wanted to make from objects around my house was a hard decision to make. Stumbling across fidget toys that “high quality” made me want to try and make one for this project. Of these toys, fidget spinners caught my attention the most. Many of these are 3D printed or milled with a CNC machine. Many of the CNC milled metal ones sell for about $100.
[1]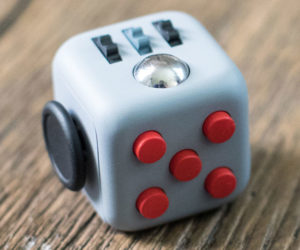 [2]
[2]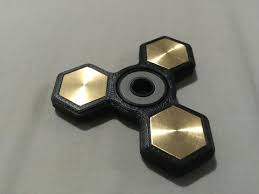
 [3]
[3]
Even though 3D printing a case for the bearings to be houses in would have been easy, I felt that it would have defeated the purpose of the project of using items laying around the house. So I played with different materials to bind some bearings I have from my skateboard together.
I wanted a way to securely fasten everything but still be able to undo anything that I wanted to keep. This was an essential part for this spinner. The artistic look I was going for was minimal but functional. The pleasing aspect of it would come from how smooth it would actually spin.
I tried using things to bind the bearings like duct tape and rubber bands. I avoided using glue simply because I wanted the ability to put my bearings back into my skateboard whenever I wanted to. In the end, zip-ties seemed to work the best because of the ability to tighten in increments.
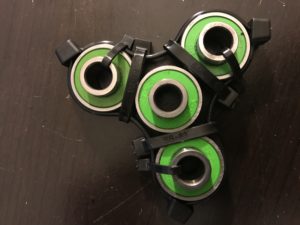
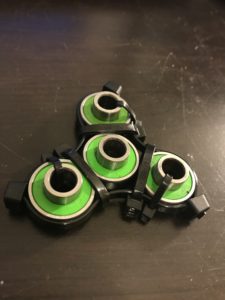
The bearings I got from my skateboard were so dirty that they barely even spun. Yet when compared to the “real” product, I didn’t see much of a difference in performance.
 [4]
[4]
Simply coming up with an idea was the hardest part of the project. The only thing I knew I wanted was that I wanted the final product to be dynamic. My design process was fairly linear once I knew what I wanted. It was more of a trial and error to see if certain materials would work or not. My original design process graphic gives an accurate representation of my actual process.
I had a last minute upgrade I decided to go with. Many of my friends liked the spinner I made so I decided to make another to give away. But the idea came to me that I could attach it to the first one so that I could either have one large spinner that could rotate in two directions at the same time. I ended up liking the feel of this much more.
I achieved my artistic goal of looking/being as cheap as possible. Just bearings and zip-ties, but functionally it performs similarly to a $100 “real” spinner.
Next I plan on making a “higher quality” spinner. I will use solid works to model it how I want to then 3D print it. If I like the design I think I will go about milling a casing out of metal to put my zip-ties to the test.
Presentation:
Sources:
[1] – https://cdn.thisiswhyimbroke.com/images/fidget-cube-640×533.jpg [2] – https://s-media-cache-ak0.pinimg.com/originals/3e/e4/eb/3ee4ebaf28a38db08a6e1ad9311683cc.jpg [3] – http://efdesign.bigcartel.com/product/hypno-spinner-us-antique-brass [4] – https://i.imgur.com/hY0tHpK.gif
8 Comments. Leave new
I loved how it had two, I think it looked so cool when they were spinning in opposite directions! I think this is one of the projects that looks better when upcycled vs building new. I know you mentioned making another one from scratch, using the CNC mill and laser cutter, etc. but I think the zip tie and bearings look much better than somethin like that. This is for people looking to keep their hands busy, I think the rather busy look of the zip ties and repeated circles of the bearings looks just right. I like how its a bit greasy too.
Super entertaining. It is amazing how simple it is and I could only imagine hours passing by without notice while playing with it. The zip ties was cleaver, you did a good job using them though. Machining one from metal would be awesome, if people actually pay that much for one… you might have a business plan here! You could put whatever you want on the ends of the arms.
Great project, I had a lot of fun just messing around with it after your presentation. I would love to see you possibly include this idea somehow into future projects in this class and make something really interesting. Not only do people love using these, they will pay good money for them as well
As someone who constantly spins and clicks pens, this is perfect for me. The spinning in opposite directions is meseizing to watch. Great job
Great project! I really like how it spins well and you used skate board bearings and zip ties. Very creative, and great idea. Nice job!!
This is so fun to play with. I have never really heard of things like this before. It’s interesting that so many people always want to have a pen to click or a ball to bounce, and this fits right in that category. It just feels so smooth spinning in a hand.
Playing with this project is a ton of fun! I can almost see how someone might pay $100 for it…almost. 🙂 I am very impressed with the duration of the spin and overall lack of friction. You clearly balanced each piece very well. I would be excited to see how the 3D printed version turns out.
Crazy that people will pay upwards of $100 for these things, when you can fidget on your own for free.
Double spinner is a creative idea. If you had extra parts, it only makes sense. What if you added another spinning segment to it?
A metal one (stainless) would look very sleek and elegant.