Final Report Part 1 – What and How

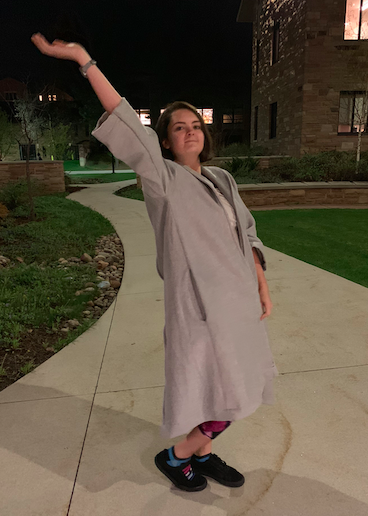
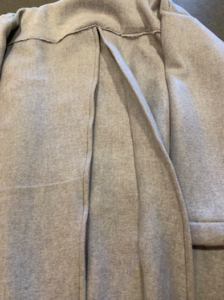
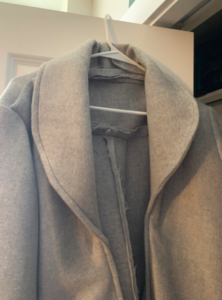
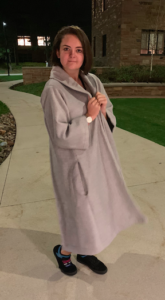
For my final project I made the 50s style coat shown above!

Process:

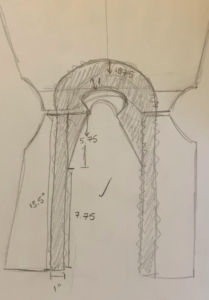
Here is my original sketch that I made when I was still unclear what I wanted to make for this final project.

Original Sketch
After looking at the scene in The Marvelous Mrs. Maisel when she wears the coat, I sketched the coat out with a little more detail.
Back sketch
Front sketch with sleeve


Prototype Number 1: 1/4 size paper coat

I decided to make a 1/4 size version of the coat out of paper to see if it would look right using the dimensions I had figured out. I didn’t end up making the sleeves because they would have stuck straight out if they were made of paper. This helped me figure out some problems with my sketches. Then I made some sketches with even more detail. These dimensions correspond to a 1/4 size coat.

1/4 coat back panels with dimensions
1/4 coat front panel with dimensions


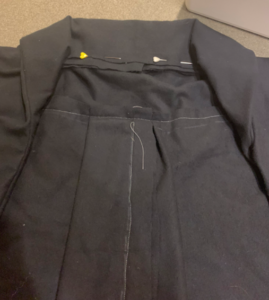
I realized that the collar was going to be hard to figure out so I made some sketches to wrap my mind around it.

Final 1/4 size coat out of paper
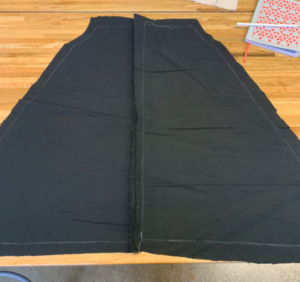
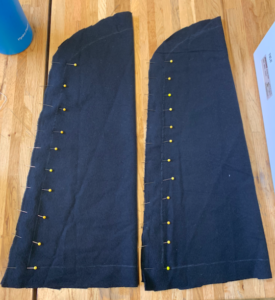
Prototype Number 2: 1/2 size coat

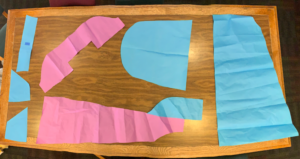
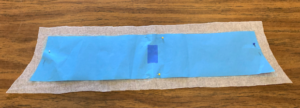
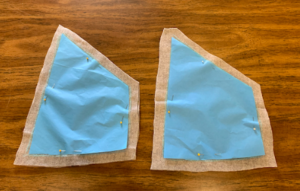
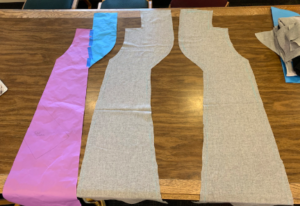
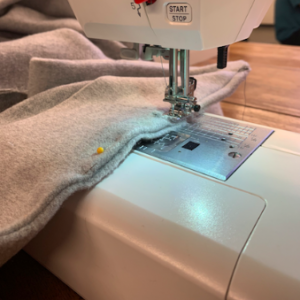
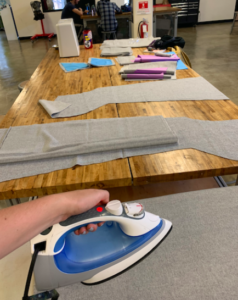
Next I made a 1/2 size coat out of fabric. I got some bad quality fabric for free and I decided to make a small version of the coat to see how it will turn out. I made the sewing pattern out of paper and then cut out the fabric leaving room around the edges for the seams.


Then I sewed the coat together.
Back panels sewed together
Sleeves pinned together before sewing


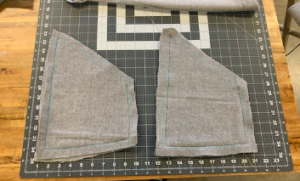
Prototype 2.5: Full size vest
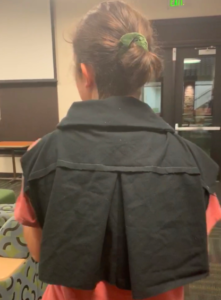
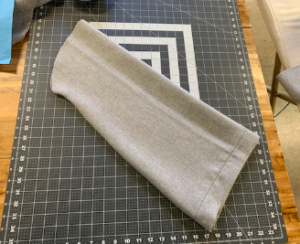
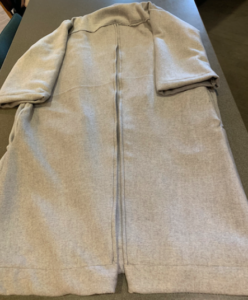
 
The 1/2 size coat ended up really weird around the collar so I decided to use more of the free fabric to make a full size vest that would help me figure out the correct dimensions.


Final Product
 
I started out by making the full size sewing pattern shown below.


Then I cut out all the pieces by pinning the paper to the fabric and leaving room for the seams. I was much more accurate with the seam allowances on the final product than I was during the first prototypes. 


Upper back piece
Pockets cut out of fabric
Front panels for full size coat


Then I started sewing! The whole process took around 15 hours. It didn’t go very fast because I didn’t want to mess up a seam and have to do even more sewing. Also, the fabric was really thick and I sometimes had to have up to 4 layers of fabric under the needle at one time. This made it really hard to sew and the sewing machine sometimes glitched.
 
Sewing the most important seam around the opening of the coat.
Back sewed together, laying out the front piece before pinning.
Sewing machine problem on the bottom seam


Sleeve sewed together!


Sleeve sewed to the coat
Pockets sewed together


I also had to iron down the seams so that they would look right. A lot of the seams needed to be sewn in one direction and then flipped inside out so that the seam is hidden. In order for the seams to stay where they needed to be, I had to iron them down. I also added a cord into the bottom seam of the coat to weight it down. This made it fall correctly.
 
Ironing the seams


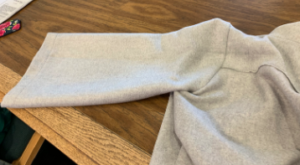
Last minute changes!
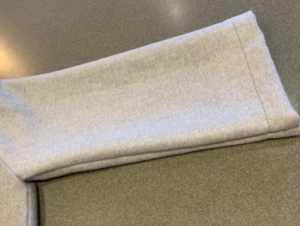
 
The day before my presentation I realized that the back pleat of the coat was flowing outwards too much. I realized that the coat I was trying to replicate had seams down the back of the pleat so I sewed those.
Seams down the back pleat


I also changed the sleeves the day before the presentation. I didn’t like how big the sleeves were so I made them shorter and less wide at the bottoms.
New sleeve
 
Hardest Part
 
The hardest part of this project was figuring out the collar. It took a lot of different iterations and a lot of sketches before I understood how to make the collar without any visible seams. The collar still ended up lopsided as you can see in the picture below. I am not sure why the collar is lopsided so I don’t know how to fix it.
 
One of many sketches of the collar 
Final lopsided collar


Here is another picture of the final product! I am really proud of it even if there are some wonky parts.
Final coat!
 
 
Here is a link to my in class presentation: https://youtu.be/kHN1btdQWDg 
Previous Post
Final Project Report (P1): Dehydrator
Next Post
Final Project (Pt1): Floating Faucet

11 Comments. Leave new

  • Max Buechler
    April 22, 2019 1:15 pm

    A really cool final product, especially because sewing functional clothing is a large undertaking and very easy to mess up. The coat looks great and is very impressive! You kind of touched on where next, do you have any other ideas for future sewing projects?

    Reply
  • Awesome! I love how much work you put in to this piece. It really achieves the aesthetic you were after, but I do think it would be really cool to sew that space patterned fabric inside!

    Reply
  • Conrad Trybus
    April 22, 2019 1:13 pm

    Very impressive, especially considering that you made your own sewing pattern. Cool that you went through multiple interations on your way to the final one. Do you think you’ll ever do any more projects like this? Maybe make a fabric version of your paper dress?

    Reply
  • Andrew Lapham
    April 22, 2019 1:12 pm

    A very unique project. Very ambitious to reach out and try to make your own clothing. I think you definitely hit the aesthetic you were looking for. Great Job.

    Reply
  • William Benson
    April 22, 2019 1:12 pm

    You did a great job taking on such a difficult project. You have created a functional coat, which is very impressive!

    Reply
  • The initial sketches you showed were great! You put a lot of thought and effort into this project and it showed! The amount of prototyping you did showed how much detail went into this coat. The uneven collar gives the coat character and I absolutely love it! You made your own sewing pattern after never having sewed before which says a lot. Great job!

    Reply
  • I like that you focused your inspiration on 50’s style jackets and I think overall you nailed it on the head. Sketching out your design and mapping out all the aspects was a great idea and I’m sure you were able to learn a lot about the final design before you even had to sew the fabric. Also impressive that you didn’t know how to sew before this project.

    Reply
  • Jared Campbell
    April 22, 2019 1:11 pm

    It is amazing that you used your own sewing pattern, I wouldn’t have even known where to begin. I am curious on how your design is dynamic, but I guess the flow of the jacket itself could be considered dynamic.

    Reply
  • Nicholas Degenhart
    April 22, 2019 1:10 pm

    Your final product came out awesome! I like that you challenged yourself by designing your own sewing pattern rather than finding one online. Do you have any plans to create any other article of clothes now that you’ve developed sewing skills?

    Reply
  • Hussam Alzahrani
    April 22, 2019 1:10 pm

    Ellie,
    Your design process of this 50s style dress really interests me, I did not know all the things that went into it along with the iterations. I appreciate the skills you had to learn to construct this. Was the color scheme intentional to the 50s, or was it more personal preference?

    Reply
  • Yousef Alqattan
    April 22, 2019 1:10 pm

    It’s nice to see that you went through design prototypes to make sure all the dimensions were as you expected. Also, amazing job, especially since you never knew how to sew before. Since you have the coat as you like, would you like to use a more premium material to make another one?

    Reply

Leave a Reply to Andrew Lapham Cancel reply

Your email address will not be published. Required fields are marked *

Fill out this field
Fill out this field
Please enter a valid email address.