
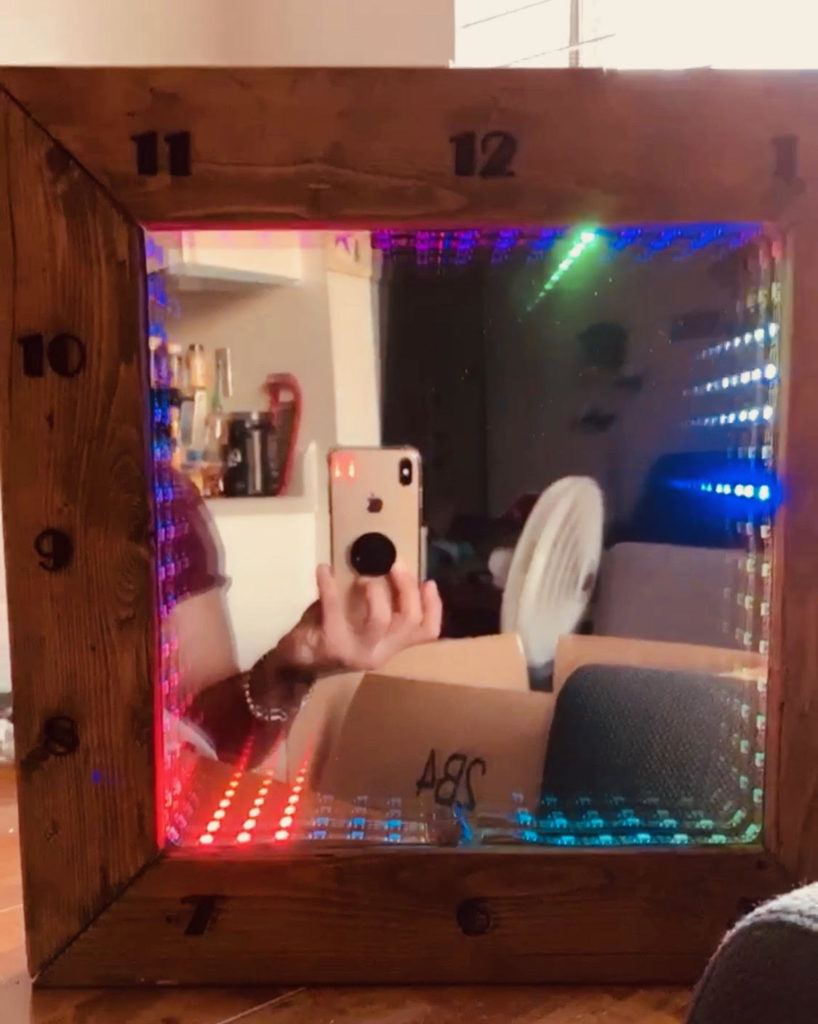
For my project, I made an infinity mirror clock that uses LEDs. The way it works is quite simple. AN LED strip is programmed to display time and is placed between a regular mirror and a one-way mirror. This creates an infinity effect and adds a really cool, futuristic aesthetic.
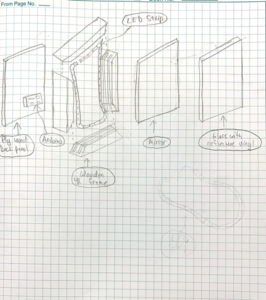
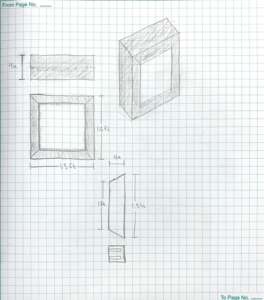
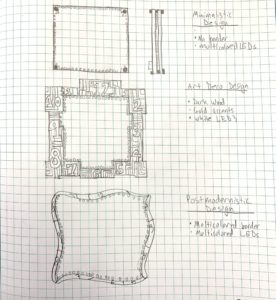
I started off with some sketches of my clock design as well as sketches for potential aesthetics. The initial design was a clock that is 18″ X 18″’X4″ with 6” borders. It will be enclosed by a frame consisting of 4 pieces with two slots on the inner surfaces.
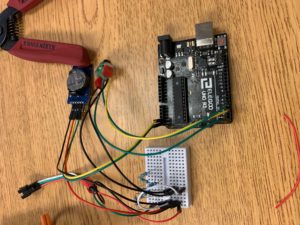
The materials used were a mirror, reflective acrylic sheet, a WS2812B RGB LED strip, an ELEGOO Uno, black paint, wood, a ply wood panel, wood glue, wood stain, hot glue, wooden biscuits, a rotary push button encoder, a RTC (real-time clock), screws, and a 9V power cord.
The allotted budget for the project was $90. I ended up spending $57.50.
- Wood – $2
- Wood Panel – $4
- LED Strip – $10
- RTC – $7
- Acrylic – $15
- Power Cord – $6.50
- Mirror – $9
- Rotary Encoder – $4
The first step was to model the frame on CAD so that I could work on it using the wood shop at the Idea Forge on campus.
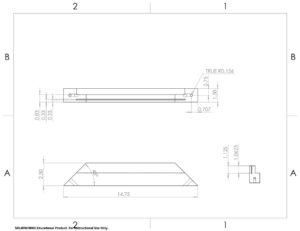
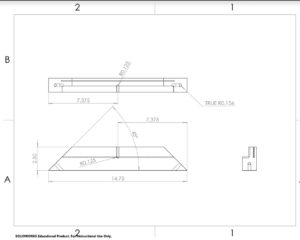
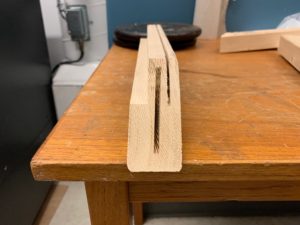
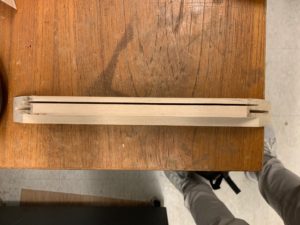
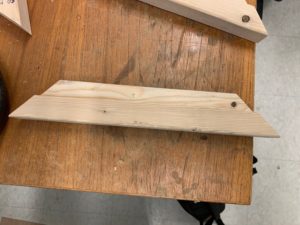
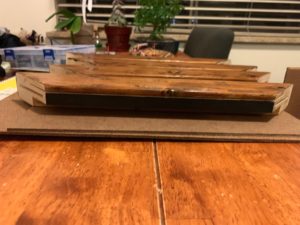
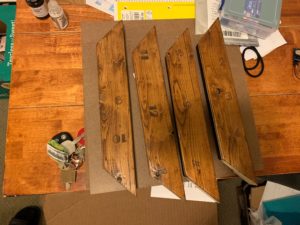
The next step was to cut out the frame. I stared by sawing out the slot. Then I sawed off a corner. After that, I cut the wood to length and then cut the ends at 45 degree angles. I finished by cutting out slots for the wooden biscuits. I also got the back panel cut to size. Lastly, I drilled out slots on the frame to feed the wires through over the mirror.
After that I laser engraved the numbers onto the wood.
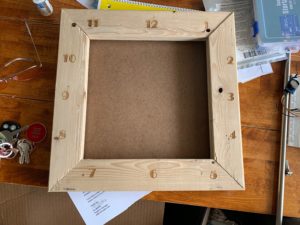
The next step was to stain the wood and paint the inner border of the frame black to enhance the infinity mirror effect.
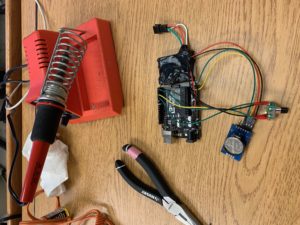
The wood frame was now essentially finished. It was time to move on to the circuitry. I used an ELEGOO Uno and had to hook up the rotary push button encoder, the LED strip, and the RTC. The RTC is what feeds the time and date information to the ELEGOO and allows for the time to be kept even when the clock is powered off. The encoder is what is used to toggle between displays and to set alarms and timers. The LED strip had to be a specific kind that had 60 LEDs so that it could function as a clock. It is a RGB strip so that it can display multiple colors. I built the circuit, soldered the tips, taped and glued wires down to compact the circuit, and then uploaded the code after setting the time on the RTC.
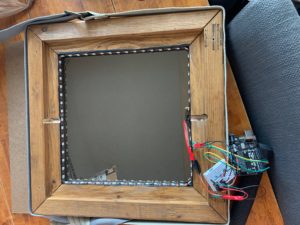
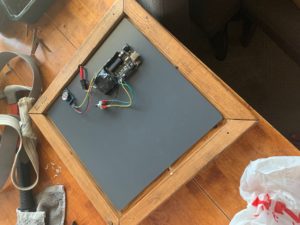
Finally, I assembled the clock. I glued three panels of the frame together, inserted the acrylic sheet in the slot, then glued the final panel. After it dried, I stuck the LED strip on the inner border. Then I connected the LED back to the circuit, and glued the mirror down with hot glue on the corners I cut out. I then glued the circuit down onto the back of the mirror. I drilled 4 holes through he back panel and the frame so I can screw the panel on. I then drilled out a hole in the back panel for the button to feed through and another for the power cord. Then I screwed the panel on.
I got my code from Source Forge under the user, Rise and Shine LED Clock.
- https://sourceforge.net/projects/riseandshineledclock/
8 Comments. Leave new
[…] Final Report Part 1: Infinity Mirror Clock […]
Your clock turned out really cool! It’s obvious that you put a lot of time in and you nailed the aesthetic. Good job!
Really cool project! I was fascinated that you got all the code online. Looks like a fun project. Might make one for myself
Hi Yazen,
This is a really incredible project you got here! The construction was really well done and the LEDs/ coding was super cool. I really enjoy how much effort and time you put into your projects to make sure they are of high quality. Good job!
Cool project Yazen, wow good job. Liked visual aesthetics and the multiple functionality of the project.
Hello Yazen, you did a great job with your project. It’s really cool that you were able to create this using an Arduino and code from the internet. You created a final piece with an incredible aesthetic
Your project is so cool! The finished product looks very professional. I really like the wood frame with the numbers on it representing a clock. I have never seen an LED infinity mirror clock like this before so props for having an original final project. Great job!
You have really nice documentation! I can see this being something that people will refer to for future projects. The frame color and stain looks polished and refined. Great work!