

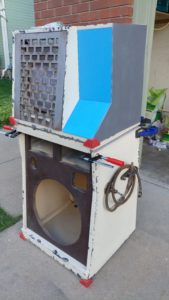
I built a bass amp. Two, actually. One is 50 watts with a 10-inch speaker and one is 200 watts with a 15-inch speaker. More accurately, I built the cabinets for two combo bass amps. I gutted a prior pair of amps that I owned before this project commenced.
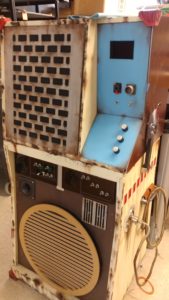
The 50-watt sits atop the 200-watt. I have designed them so they can be buckled together and then rolled into the venue for a show. A punk show. Because that’s the sort of show we intend to play with the amp.

For the aesthetic considerations, I modeled the amp after the equipment found on Tatooine in Star Wars. This is why you can see so much wear and tear on the amps. The colors were inspired by the troopers from the base on Scarrif (also from Star Wars).

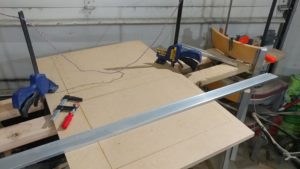
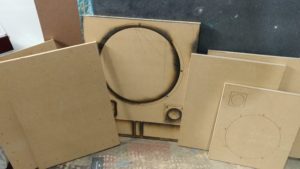
I started fabrication using a laser cutter to make the parts from MDF. I needed 3/4″ MDF due to its rigidity (it won’t likely vibrate with the bass frequencies), but it was too thick for the laser cutter to get through, so I used the cutter to etch the patterns on the MDF and I finished cutting it with saws and routers in my personal shop.
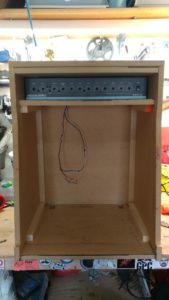
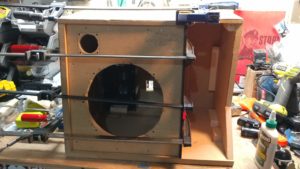
I screwed and glued the boxes after testing the fit. I then laid a base coat of paint on the cabinets. I let this cure. I used a technique that implements salt and water to create a chipped paint effect. This was done by putting water where the chips were needed (on corners, edges, areas of “wear”), then salt is added to the water and allowed to dry. The topcoat is applied, and the salt chipped away to reveal the base coat.
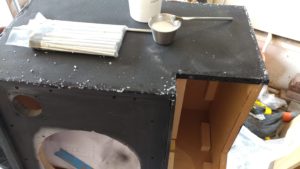

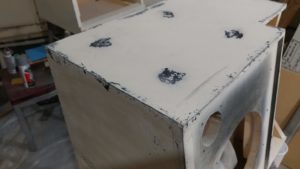
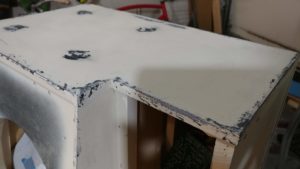
My first run of this proved to be faulty, but not in a “that really looks like worn metal” way but more in a “someone doesn’t know how to paint” sort of way. I then redid the whole procedure and gave the paint more than enough time to cure.
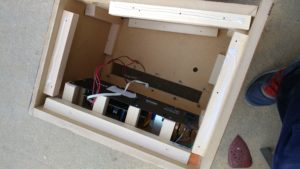
After painting, assembly, and mounting of electrical hardware, I wired up the systems and added the greeblies. Greeblies, also known as “greebles” and “nurnies” are additions to a prop that do not add to its function but increase the complexity of the design and make the item seem to have more utility than it does.
The connection between the amps is achieved through airplane connectors wired to an xlr connector, with the wire covered in a fabric tube to further confuse its use (I didn’t want it to look like an audio cable).
The story behind the amp design is that a band of former resistance fighters have stolen a pair of transmitter modules from a desolate Empire base and have had to repair it over time with whatever parts they can find (thus the dark brown panel on the side of the smaller amp).
4 Comments. Leave new
[…] Final Presentation […]
Wow Tyler. You are an artist. You made something that every star wars fan would buy. Even though I am not a star wars fan, I just like its aesthetics, rusty and kinda fallout.
This turned out so good! It’s also huge! Is this the size you were expecting to end up with? Also I really love the color scheme you ended up going with, it definitely achieved the aesthetic you were aiming for.
I love how big it is! It looks like the kind of junky robot you’d seen waddling around in the background of a Star Wars scene. I think you hit the mark exactly with what you were trying to accomplish. The ware and tear especially looks very convincing. Hopefully you play some bass at the expo!