

I had to come up with a Plan B due to the limitations imposed from the Coronavirus safety precautions. I was planning on making a nightstand I could use in my apartment, but once the school wood shops closed I had to come up with an alternative project. I decided to make a virtual rendering of my nightstand. Since I was planning on making 3D models of my project anyway, to make official drawings I could follow, I decided to go further. I created a DIY “how-to” set of instructions for aspiring novice woodworkers, (as well as for future me). The “how-to” instructions include multiple engineering drawings, and a set of step-by-step “instructions for dummies”.
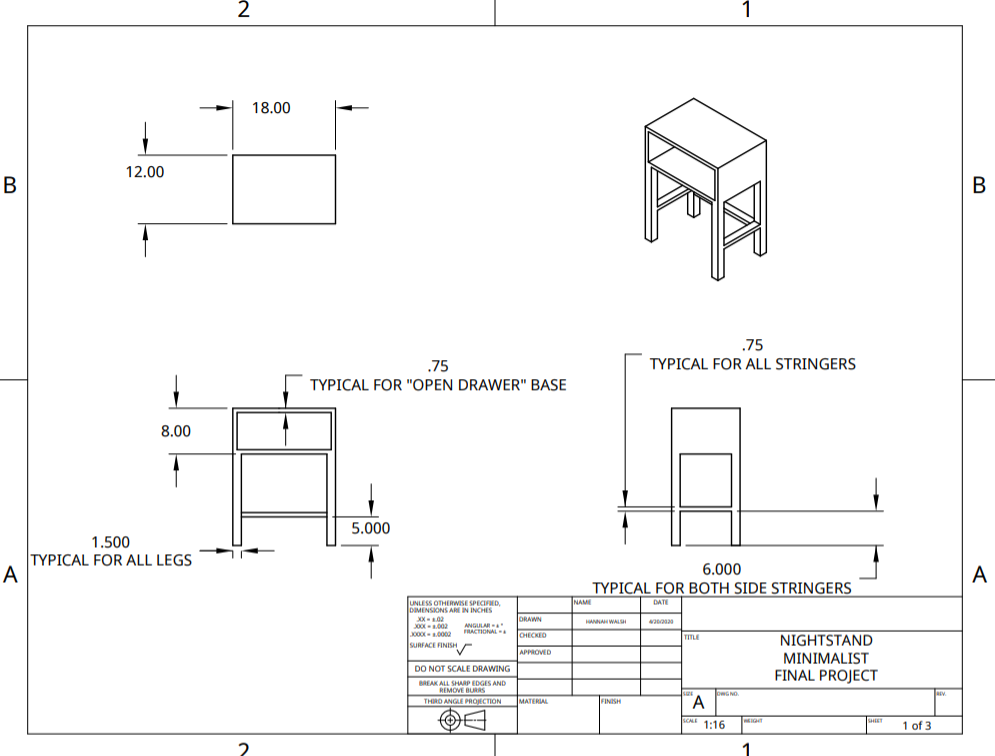
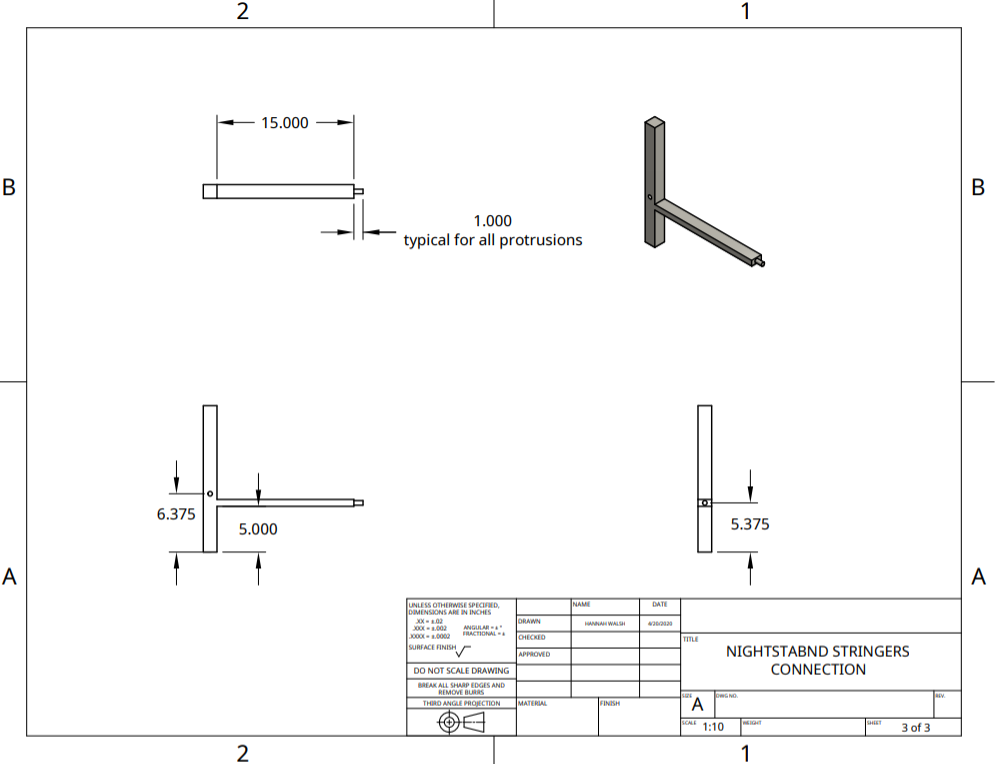
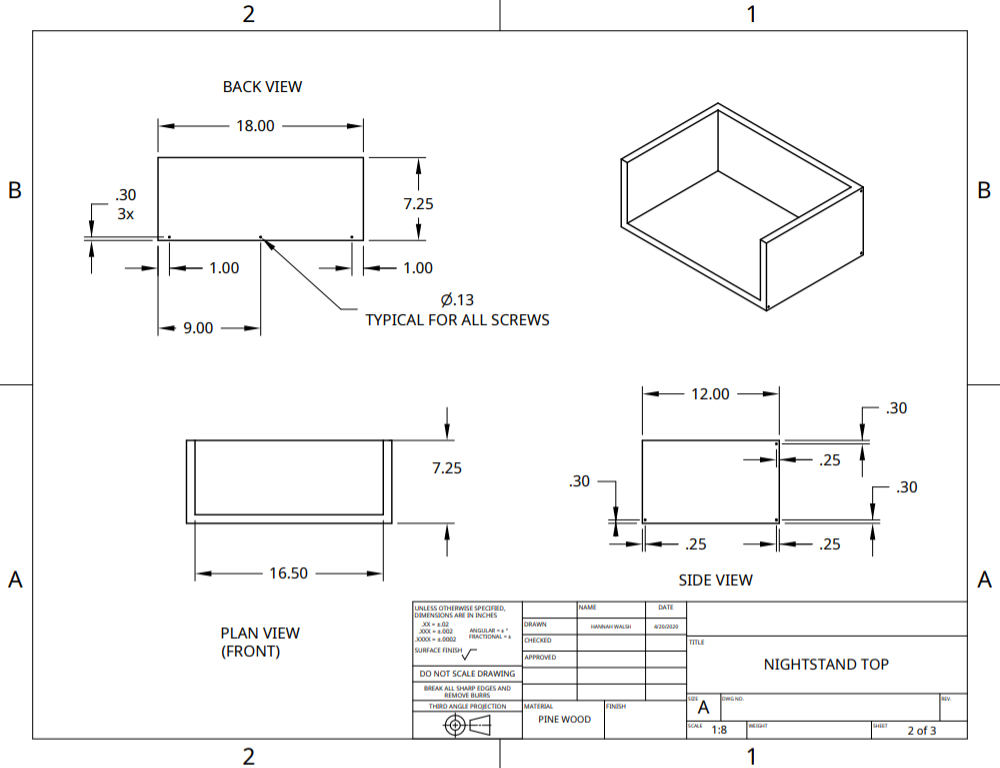
Creating a set of drawings allowed helped me see construction issues I wouldn’t have noticed. Often, I prefer to cut and create as I go, instead of taking the time to plan. I caught a few places I originally designed that either wouldn’t be feasible in the real world, or I could make it, but the nightstand would most likely collapse. For example, I had all the stringers at the same height. However, for strength, I had the stringers going in an inch into the nightstand legs. If all the stringers were at the same height, they would hit each other when being installed. Below are some of the drawings I created.
The set of instructions helped me weed out installation issues. While I was able to create a “complete” nightstand virtually, realistically there was no way to attach certain items – I had to change the order of what I did multiple times. Creating the set of instructions also allowed me to double check I had all my materials. When first designing and creating this problem, I originally left out wood glue and a finish coat. I was able to revise my list of materials and budget. Below is the set of instructions I created for the project.
final instructions – Google Docs nightstand blueprints
Finally, I used an online 3D system, called OnShape. It’s free through my school account, and the ITLL lab is familiar with it’s abilities. Despite spotty internet, Onshape was fairly straightforward, although I had to watch a lot of YouTube tutorials to navigate the system. Below is the final rendering of my nightstand.

1 Comment. Leave new
Hey Hannah!! I’m sorry your plans had to change so much due to the pandemic 🙁 but I think you turned out with a really solid plan for your final coffee table and have a dynamic approach to the fabrication! I think you did a really good job of adapting to the situation and doing what you could with the restrictions! Good job 🙂