
Inspiration:
Creativity is not one of my strong suits and thus my Upcycle project took quite a bit of searching. At the beginning of the semester when we discussed our comfort levels with design I rated myself at the very bottom of the list. Therefore, I needed to take a different avenue to come up with my Upcycle project. I therefore, found it was easier for me to think about my favorite seasons and holidays as inspiration for my project. After much thought, I finally arrived on my project idea which was a Christmas aesthetic as I enjoy the winter season, Colorado, and Christmas happens to be my favorite holiday.
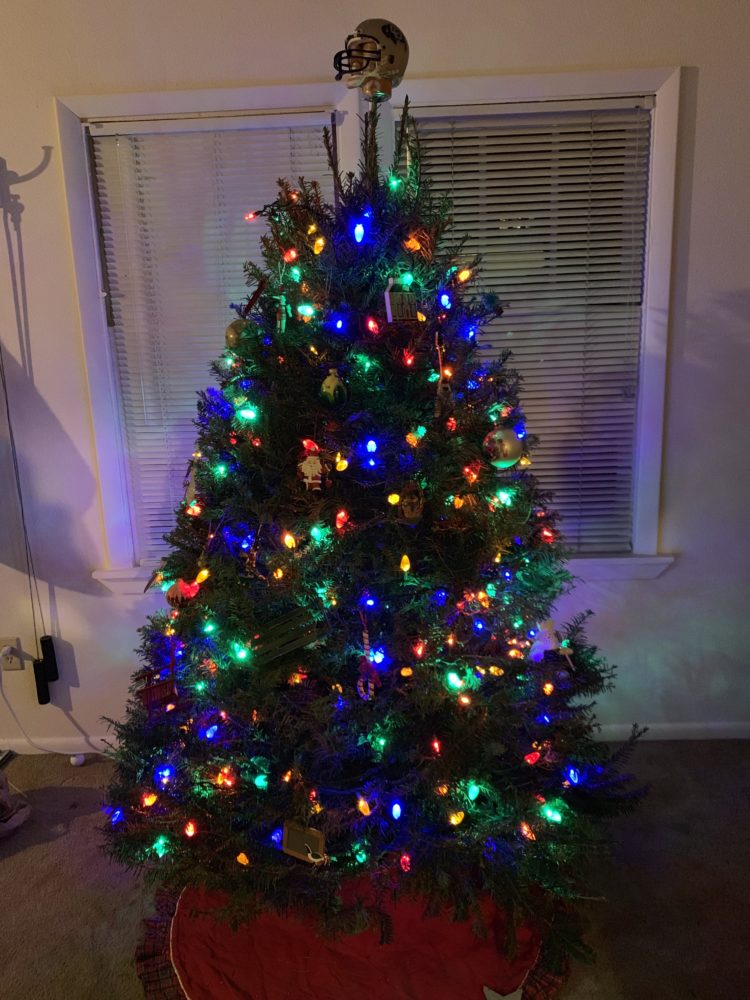
Photo by Spencer Negri
Looking at this photo I can smell the pine needle aroma of a fresh Christmas tree just recently cut down. Suddenly, I remembered how enlightening the smell of a fresh Christmas tree was and how much fun decorating a Christmas tree can be. Christmas is a unique holiday as we are able to express ourselves in various ways. One way we celebrate the Christmas spirit is with various colors creating a vibrant display of ornaments. We may also express Christmas in a more simplistic aesthetic where the majority of the decorations are a white or other simplistic color. These two forms of expression for the same aesthetic are completely different which in my mind makes Christmas such a fun and exciting holiday. Also being with family and maybe getting a few presents doesn’t hurt either. Thus, the inspiration for my project was complete.
Design Process:
For the design process I began by drawing a few sketches of how a Christmas tree could be constructed out of Upcycle materials. After staring at my sketches for a bit, I remembered I had a few empty beer cans laying around my house. These aluminum beer cans just so happened to recyclable material and ones that I could turn my vision for a Christmas tree into. However, I didn’t feel that mismatching beer cans and other cans with holes did the Christmas aesthetic justice. How could I display my love for Christmas using beer cans in a way that provided justice to the amazing aesthetic Christmas creates? Then all the sudden it hit me. I could create uniform rows of beer cans that could be arranged in such a pattern to resemble a Christmas tree. So, I got started!
Ideally, I would need to have perfect beer cans without any dents or other deformations to them, so the viewers would never know if the beers were full or empty. However, that became very tedious and difficult as I needed to gather a lot of new beers. Thus, I ended up redesigning my Christmas tree to include cans with deformations and hide them in the middle of the tree where no one would be able to see them. I also originally planned on using velcro to keep all the cans pushed down on there cardboard cutouts but cutting the velcro became too strenuous. Instead of using the velcro, I found a hot glue gun laying around the house which I was able to use to glue the cans down with. This idea ended up working better than I anticipated as it created a nice firm sticking display.
Fabrication:
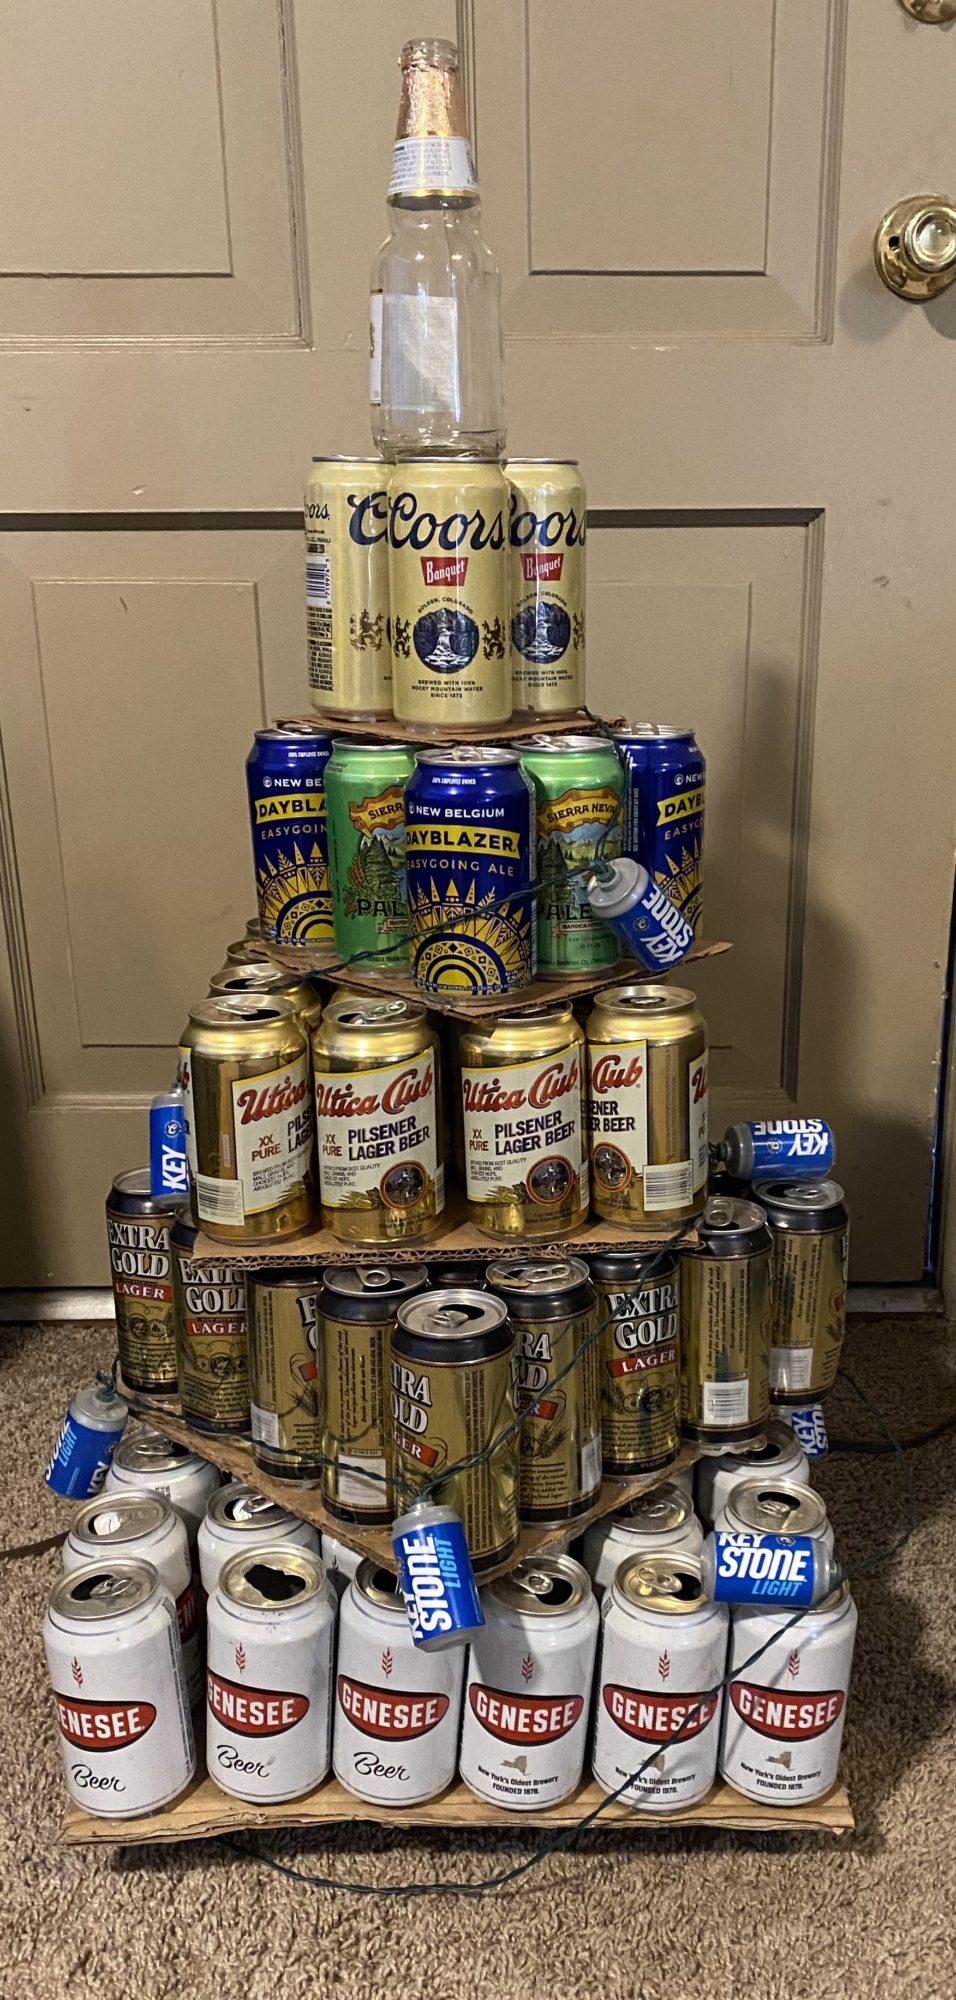
I gathered my cardboard, my beer cans, and my hot glue gun and began constructing my Christmas tree! One by one I began laying out beer cans in a uniform 6 x 6 square on a nicely cut piece of cardboard. I left little to no room between beers as I wanted to create a nice finish for the final product although, it wasn’t perfect. After confirming a 6 x 6 square was larger enough for the base of the tree, I began gluing the cans down to the cardboard in their respective rows.
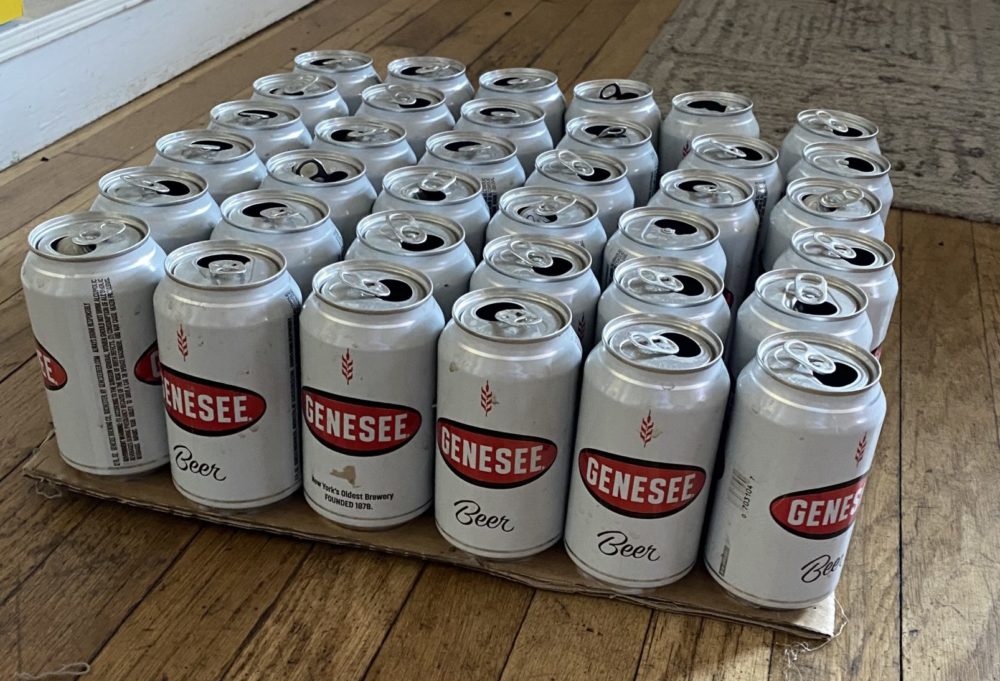
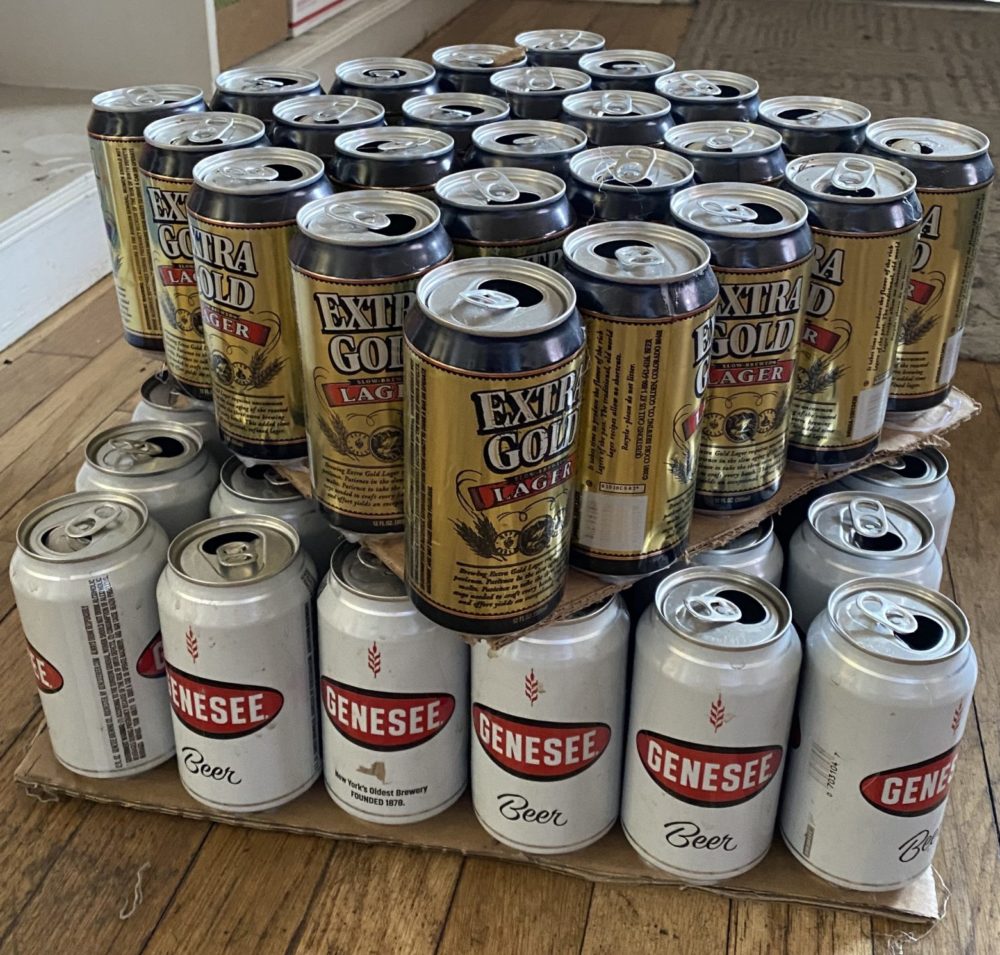
The base of my tree was inspired by a fellow classmate Chris who recommended the use of Genesee beer cans as they were white with red writing. In my mind, these cans corresponded perfectly with the Christmas aesthetic. The next step in the process, was to figure out how I was going to assemble the remainder of the Christmas tree. For the bottom of the tree I used a 6 x 6 square of beer cans and wasn’t sure how tall I wanted my tree to be. I didn’t know if I wanted to follow a similar pattern with the next level being a 5 x 5 square or if I should make it a 4 x 4 square and incrementally decrease by 2 cans per row as opposed to 1 can. However, after laying the cans out onto the cardboard and assembling the next row I was able to conclude that incrementally decreasing by 1 beer can each level looked better. This gave the tree a bit more of a realistic feel as it was fuller in size. Again, Chris presented another good idea in his comment to my previous blog post, where he asked how I was going to incorporate the family feel into this project. I had previously discussed how Christmas reminds me of family as it is one of the few times a year my family can be all be together since everyone is now older. Therefore, the next layer of my Christmas tree was constructed using extra gold lager beers as this is a beer all of my family enjoys drinking together during the holidays.
Now it was time to construct the upper portion of my Christmas tree. After previously finding beers which reminded me of my family, I thought the next few layers could follow a similar idea. Therefore, I turned to my roommates for help and we began drinking a few of our favorite beers together. The next row was then constructed out of Utica Club beer which is brewed in Utica, NY. This very special place just so happens to be the birthplace and childhood home to one of my roommates.

The fourth and fifth rows of my Christmas tree were constructed following the same theme. Utilizing me and my roommates favorite beers while also creating a Christmas tree with some color to it. The next two layers were constructed out of Sierra Nevada, New Belgium Dayblazer Easygoing Ale, and Coors Banquet.
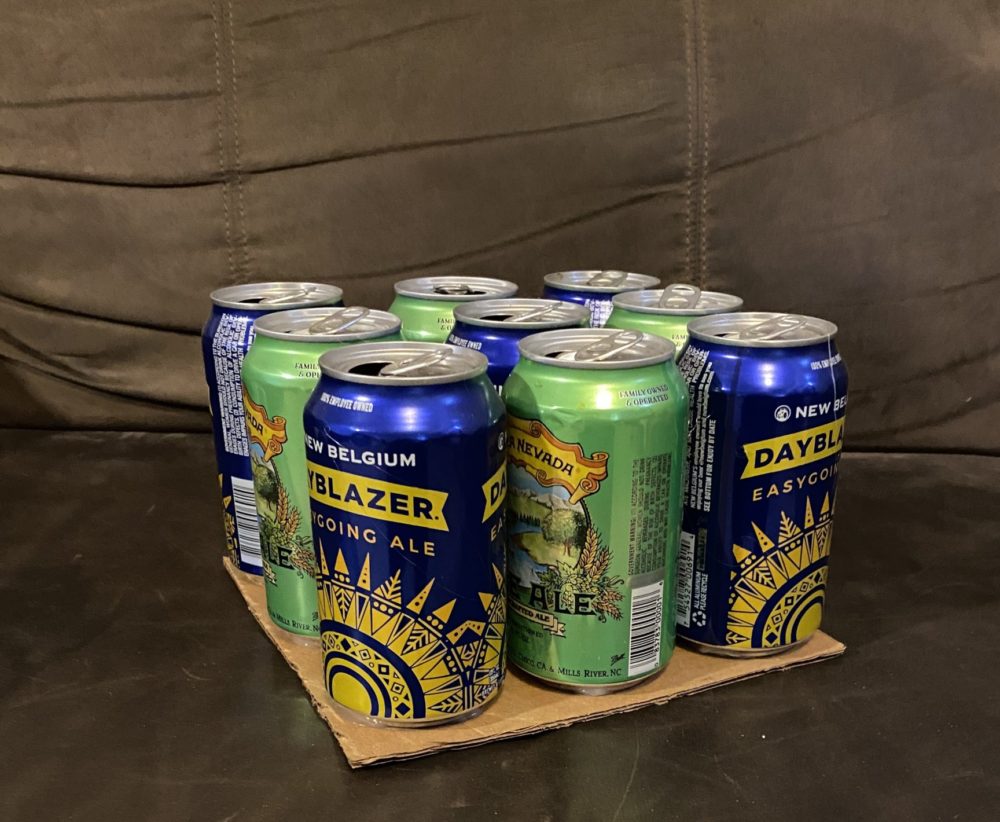

To achieve a realistic Christmas tree, I strung some lights which happened to be keystone light beer can lights around the outside of my Christmas tree and used a Modelo glass bottle for the tree toper. The final artifact pictured below consists of 6 layers of different beers arranged in an organized fashion. Each row ended up having a significant meaning to myself which have all been discussed in earlier parts of this report.

Functional Goals:
My functional goals for this project were essentially to create something that reminds me of my family. I believe this artifact accomplishes that goal. In the future, I may add more layers to the tree or figure out a way to incorporate ornaments into the design. Maybe I use plastic shooters and string them together to create an ornament display. I could also buy colorful shooters which haven’t been drank and use those to accomplish the same type of ornamental display. I think either of these additions might help make the artifact more realistic and even more meaningful.
Artistic Goal:
I am very proud with how this project and my artifact turned out. I think the level of thought I put into selecting the beer cans really helps gives the artifact a bit of meaning. I think my creativity shined through a bit throughout this project as I created a Christmas tree out of recycled beer cans. I know for most people this might not sound creative what so ever but for me these projects push my limits and require a great deal of thought. I wanted this artifact to look timeless and rustic which I believe it does.
Closing Remarks:
It is not often you can create a project that requires the help of your roommates in both the design process and the drinking process. With that being said, I want to iterate that the main takeaway from this project isn’t the beer drinking or the fact my artifact was made from empty beer cans. I want people to look at my artifact and remember the Christmas aesthetic and think back to times where you are sitting around a fire with your loved ones. Or times when you are hanging ornaments with your family in your pajamas. Or running down the stairs on Christmas morning because Santa came. These are just a few of the Christmas traditions that encompass this aesthetic design. So please, take that into consideration when looking at my artifact and remember to give those closest to you an extra hug or two during these difficult times.
Link to Video:
Below is a link to the video of the zoom presentation I gave on my Upcycle Christmas Tree:
3 Comments. Leave new
Hi Branden, I really like how this project turned out, and it is only made better when you explain meaning behind the layers. I was wondering if you think adding weathering aesthetics to your cans would lean into the rustic aesthetic of the Christmas tree more or not?
Hi Branden,
I love how your project turned out – although you said in the beginning that you struggle with creativity, I think this project helped you tap into a creative mindset. The color scheme of the overall tree is great – I remember suggesting the Gennesse cans and I’m happy that you chose to use them! The red and white color scheme on those cans go well for the base. Moving up, I like the alternating colors, and especially like the Sierra Nevada layer. My favorite aspect is the Modelo on top – the gold really reminds me of the star on top of the Christmas tree. What do you plan on doing with the tree now that you’re done? I think a “trunk” made out of brown beer cans/bottles would be an awesome addition. Great work!
Hi Chris,
Thank you! I agree with you when you say this project may have tapped into my creative mindset slightly. It definitely challenged me and pushed my comfort zones, but I am happy with how the overall artifact turned out! I think the Gennesse cans were a great touch and one that helped the overall aesthetic of the tree. I also like all the layers but would have to agree that the Sierra Nevada layer in my favorite, minus the model tree topper. It is hard to tell in my photos but I did make a stump from beer cans but capturing that angle in the photos was a bit difficult. As for next steps, I think we may keep it in the living room of our house and see if maybe we can’t make it a bit bigger before we graduate this May!