
Figure 1: Project Timeline
Fabrication
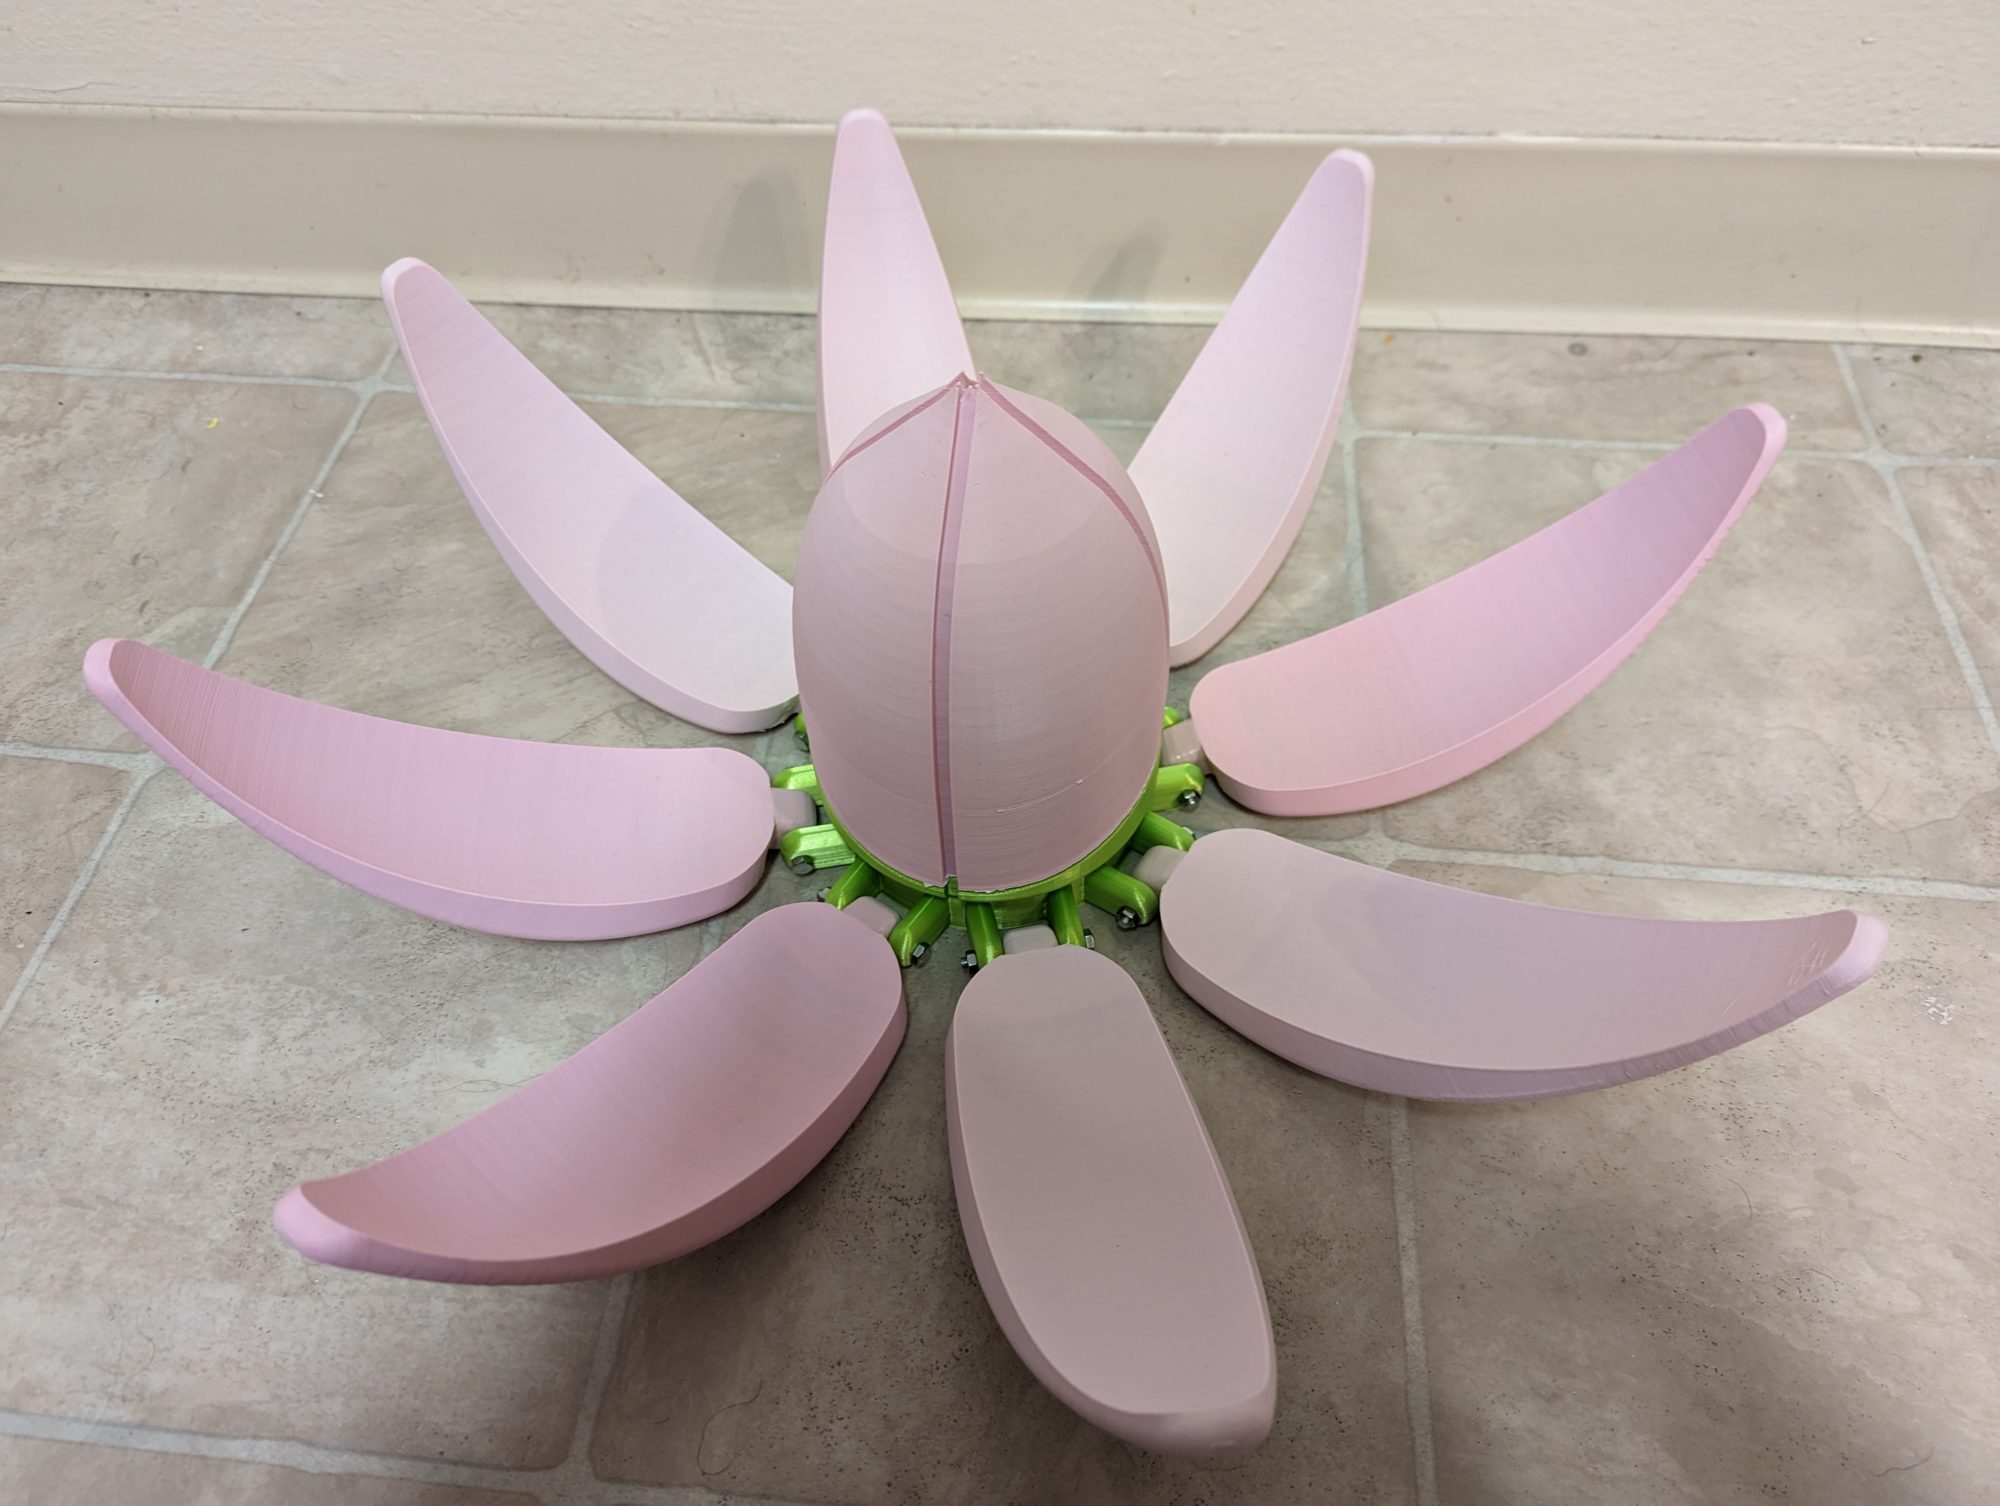
In order to make my final artifact, I started with my completed CAD models of each component and exported each one as a STL for 3d printing. I then printed test components to determine if the dimensions and fit were appropriate. In printing test prints on scrap PLA I discovered that the prints were unstable with my usual tree supports and thus had to resort column support. I also discovered that I had incorrectly dimensioned the placement on the holes through which the base attaches to the petals and corrected this before the final prints. Each print was initially done at 10 percent infill at 80mm/s, but over time, this resulted in nozzle jams and under extrusion. To prevent this I reduced the printing speed to 30mm/s. All petal components were printed in pink PLA and the deck box base and petal bases were printed in green silk PLA. Originally ABS or PETG was planned to be used for less deformation over time, but the desired colors were not available for purchase for these filaments. All the inner petals took approximately 10 hours each to print, all other components took approximately 24 hours each to print. With a total of 8 inner petals, 8 outer petals, 2 base components, and 2 deck box components printing had to begin about a month before it needed to be completed. Unfortunately, with the unforeseen need to reduce the print speed this meant that I was only able to complete the deck box and inner most set of petals. To fix the petals to the base the bottom arm of the petal is placed in between two arms on the edge of the base and a bolt is run through a set of concentric holes in all three arms and a nut is attached on one one side and tightened to a small preload in order to have high enough friction to allow the petals to stay in place when the box is closed up. On the outer petals there were to be holes on the side which would allow for small magnets to be press fit into them for a stronger lock in the closed position, however the friction from a small preload proved to be more effective at fixing the petals in place than expected. Finally, the base of the inner deck box is placed concentric with a set of three holes on the base and 5mm bolts are run through these holes to hold it in place.
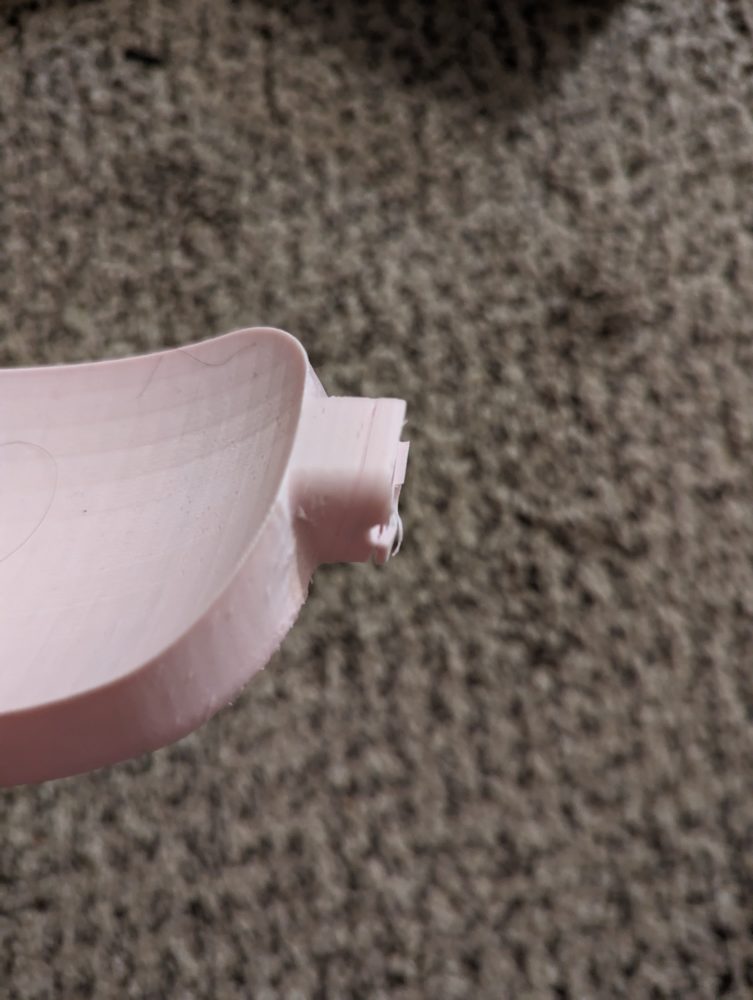
Figure 2: shear failure due to under-extrusion on print
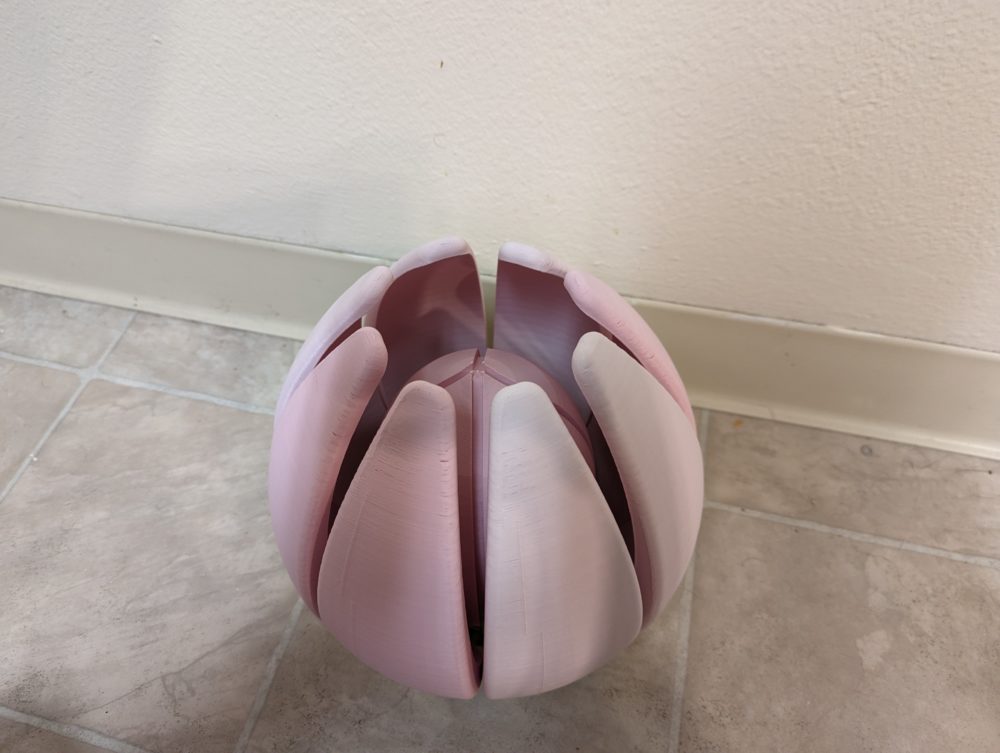
Figure 3: fully closed box
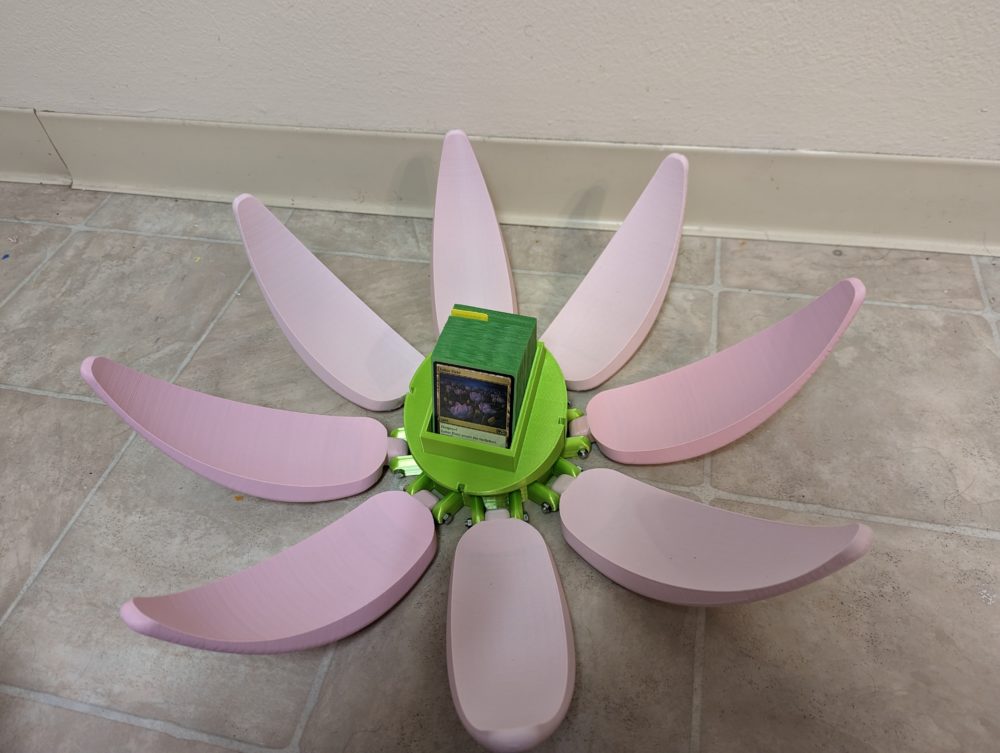
Figure 4: fully opened box

Figure 5: partially open box
Reflection
Though the removal of the outermost pedals of the deck box resulted in reduced complexity from the original design and the use of PLA resulted in reduced durability from the original design, I feel the aesthetics of the box were still fully achieved in the manner I set out to. The use of accurate colors and glosses reminiscent of a flower as well as the use of natural organic shapes in the pedals and inner deck box worked effectively to create my desired natural aesthetic. In retrospect, I should have included a greater time buffer for failures in my prints and for testing my initial designs in order to avoid being pressed for time. In the coming week, I will be finishing the prints required for the outermost petals and completing the initial design. This deck box, due to its size will mostly be used as a display piece and remain at home, but I do plan to take it to at least one weekly magic tournament to show it off.
Presentation Video:
1 Comment. Leave new
This looks great! Quite a lot of print time on all of those, way to think ahead. It sounds like you worked through some good challenges and I’m impressed. Nice work!