
In fulfilling the Aesthetics of Design final project, I wanted to build a cabinet for my dart board. I decided on wood as my medium, as I wanted to learn a new skill. I have little to no experience in woodworking, but have always admired the craft.
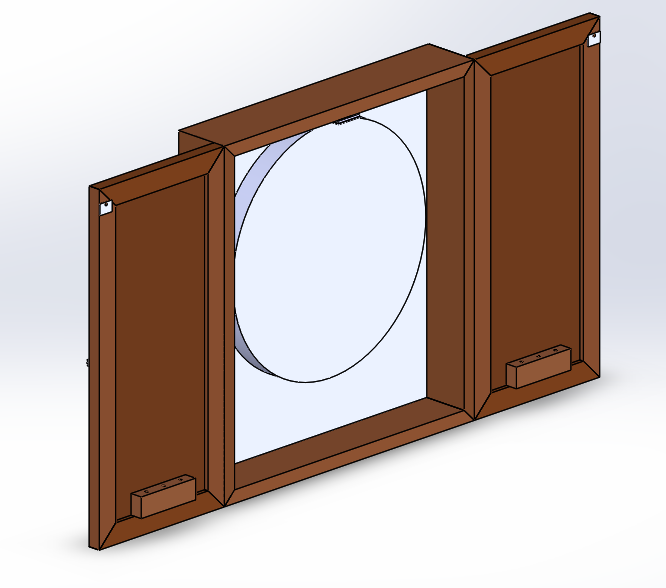 The first step was modeling and material selection. Using solidworks, I modeled a simple version of my cabinet. I decided on a simple yet elegant almost minimalist style. In order to get contrasting wood and hardware I chose to use dark walnut with stain and silver hardware. Where wood is not seen, I decided on MDF panel and veneer in order to save weight and cost. I used minimal hardware and mostly wooden joinery and glue.
After selecting material,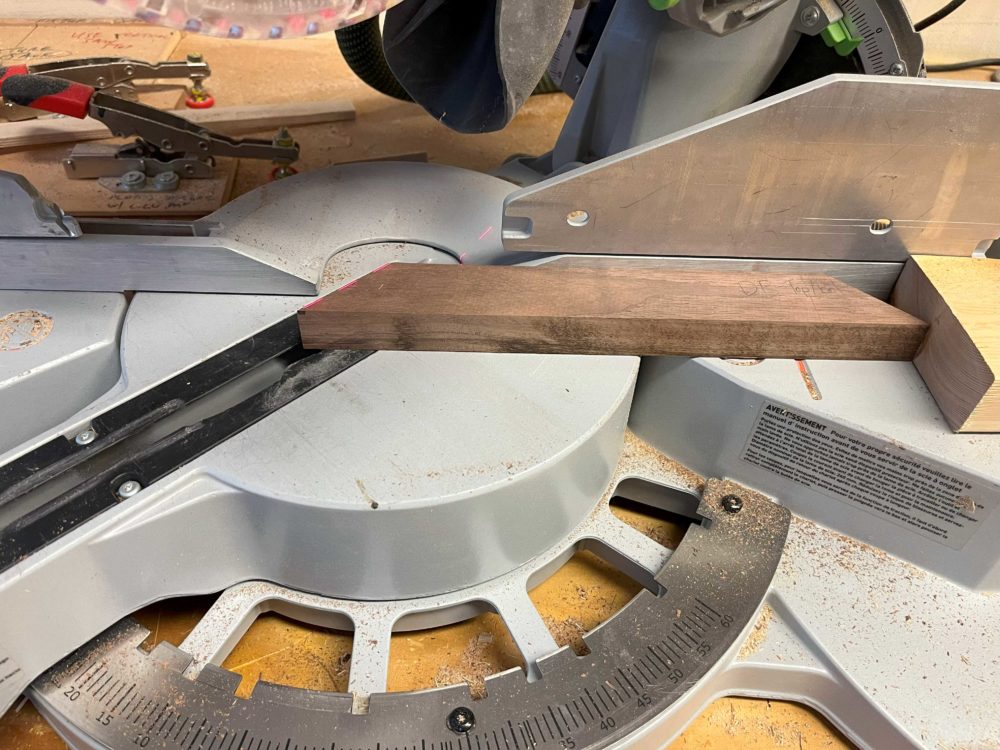 I moved on to cutting my structural pieces. This included MDF and the walnut frames of both doors, as well as the box. After cutting each to width on the table saw, a miter saw was used to cut the boards to length and subsequently cut 45 degree miters. I cut identical pieces in the same jig in order to create consistency.
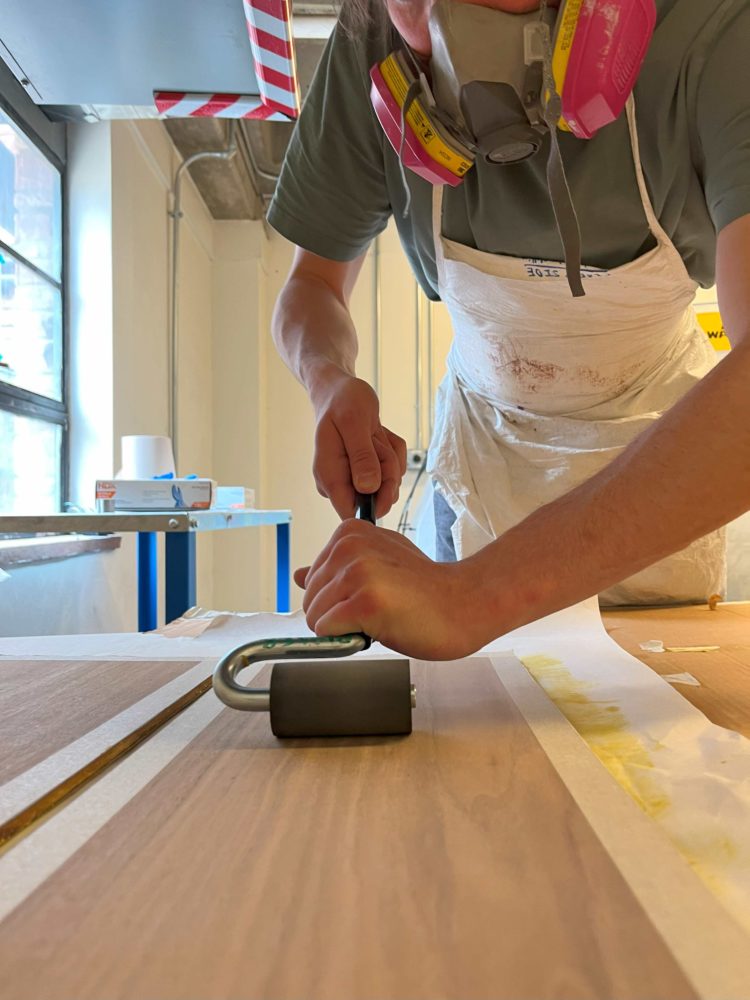 After cutting frame pieces and miters, I had to veneer each door panel. This involved cutting 4 rectangles of veneer (1 for each side of each door), applying contact cement to both the veneer and the respective side of the MDF panel, and carefully rolling the two materials together to remove any air in between. After cement dried, I used a safety blade to trim the edges, and briefly sanded the edges.
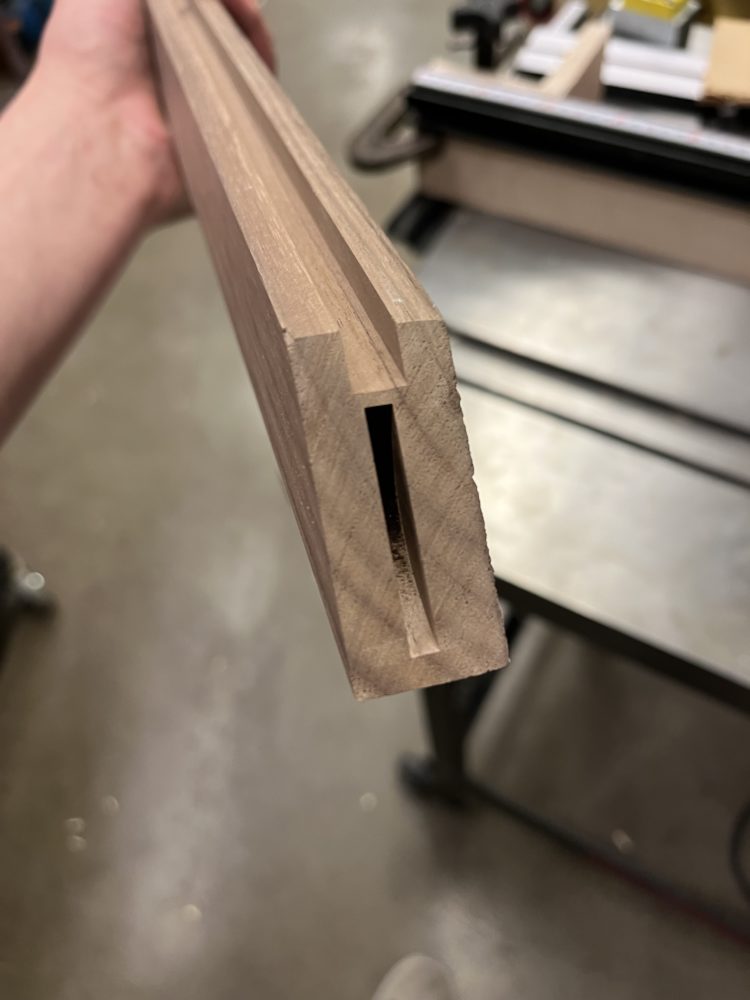
The next stop was slotting both the box frame and each of the  door frames. In order to do so, I used the table saw, raised just 1/4 inch above the edge of the table. This method produced nice, clean slots, and allowed me to assemble for the first time:
I then had to strengthen the miter joints in my doors. I did this by ‘biscuiting’ the joints: inserting small ovular wooden pieces into custom cut slots in the miter faces. This step required a lot of custom design: a custom jig to cut slots as well as trimming down biscuits by hand, as the Makerspace did not have small enough biscuits available.
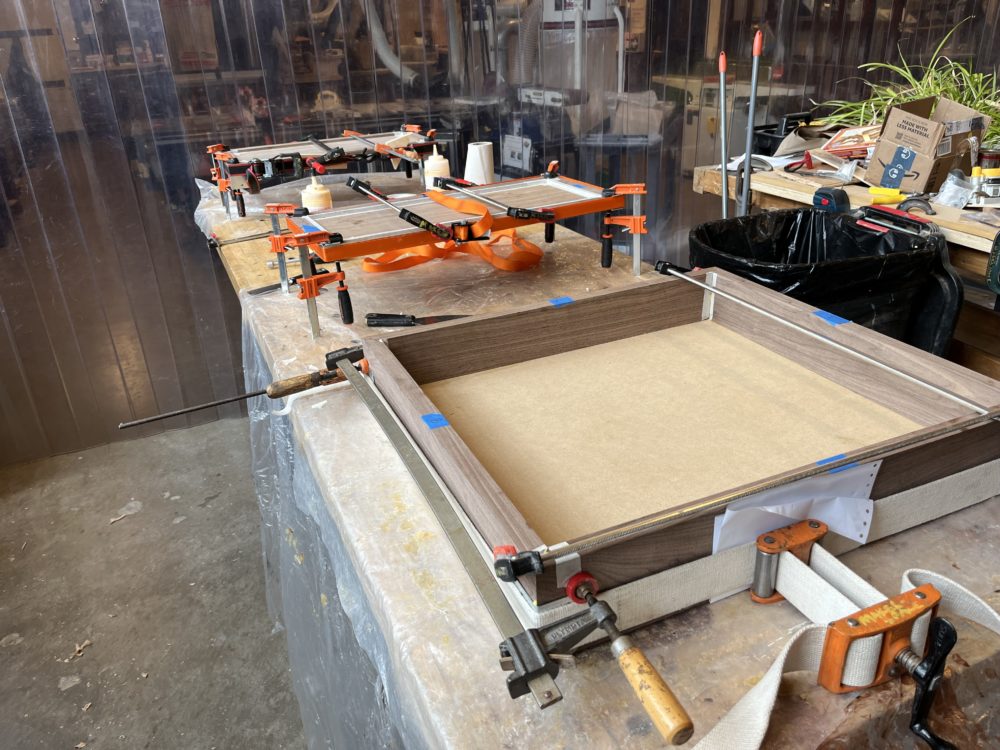
Glue-up was the next logical step. I wasted a lot of time taping/removing tape, and have a couple techniques I would drastically improve next time. Both doors and boxes were glued simultaneously, with glue being applied to the slots in each door, as well as miter faces. Clamps were used at all four corners of each door as well as the box, as well as two across the door faces. Both doors and the box were wrapped using a tension clamp, holding everything snug very effectively.
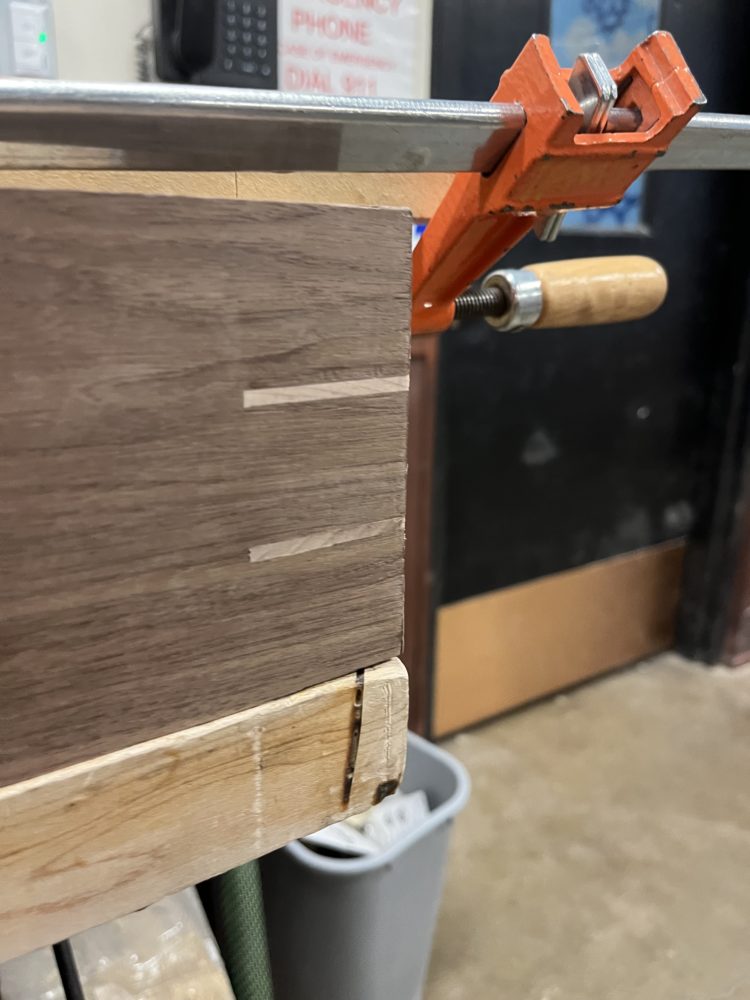
After glue-up, I decided to spline my box’s corners in order to strengthen those miters. I decided on two splines, placed at the box’s interior thirds. For another level of contrast, I used maple board, whose light color contrasts walnut well. This step included designing a custom sled in order to push the box across the table saw at a 45 degree angle. After cutting slots, rectangles were cut out of maple panel, inserted in the slots, and glued. Upon glue drying, I used a Japanese pull-saw to cut off the excess, and then a hand-plane and scraper to cut the splines flush.
Now, hardware had to be considered. Mortices had to be cut to allow the hinges room to function. To do this turned out to be a far more complex process than I had imagined. Because my top and bottom board were 1/8 in different, I had to account for angles when cutting mortices on the box. A custom jig was made, and the mortices were routed using a hand router (with washers to add displacement).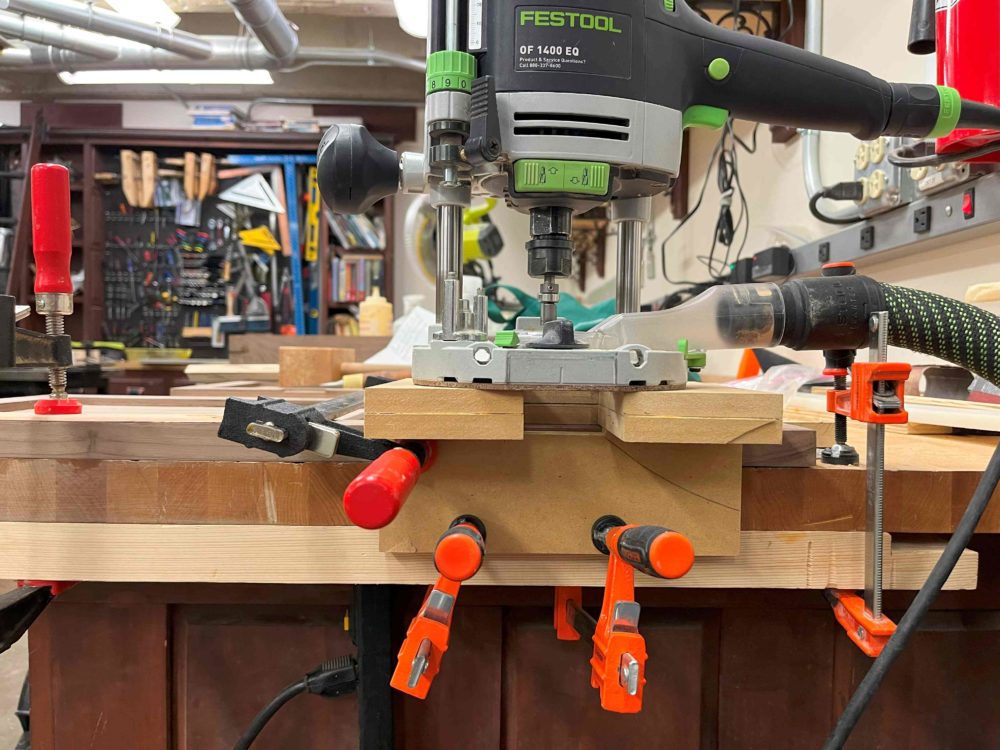
After cutting mortices, I drilled holes for hinges, magnetic closures and handles. As I write this post, the only steps left are to fix my dart holder blocks to the doors and stain the cabinet.
1 Comment. Leave new
This is a really cool project! I’ve been looking over your shoulder in the shop but seeing it all come together here is really satisfying. As a woodworker, I have approximately way too many opinions and suggestions, if you’re open to hearing them.
First of all, The walnut and maple combo is a classic. Those splines look awesome and super clean!
Second, related to that, I would urge you not to stain this piece. To me, staining walnut is like gilding a lily. It’s such a beautiful wood just the way it is. I think it would look fantastic with an oil finish like tung oil, linseed oil, or Danish oil. Maybe with a little wipe on poly overtop to protect it. With how much time we have left before expo, I’d recommend Danish oil, since it dries fast. It’s what I used on my nightstand.
Third, when I cut angled pieces, I find it super helpful to use an angled stop. I notice in the picture you’ve got a regular, flat stop, which works well for 90º cuts, but when you start cutting angles, you’ve got a single point of contact and things start to get out of whack. If you flipped that piece around, turned the saw the other way, and used an angled stop, I think you’d have more consistent results. If that made no sense, I can draw a picture and show you what I mean. That being said, miters can be a challenge and you did a great job with them.
I hope after this project you’re inspired to do more woodworking! If you’d ever like any pointers, feel free to reach out.