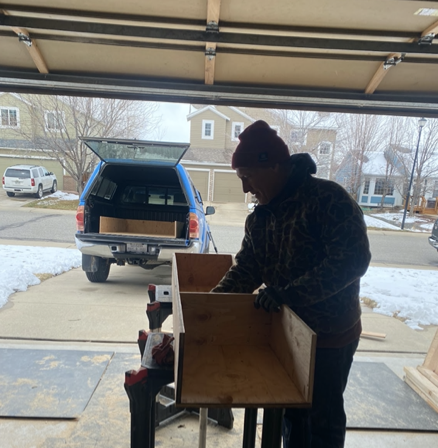
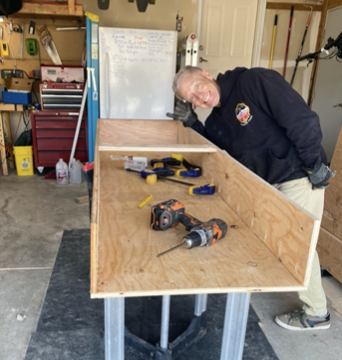
I started this build by sourcing materials. I had initially planned on building the main structure out of 1” plywood and building the drawers out of ¼” plywood. However, I had a family friend give me five sheets of ½” plywood which I used for the entire build. I also bought four twin closet tracks to act as drawer slides and 36 bearings for the tracks to roll on. I also enlisted the help of my dad, since he has a lot more woodworking experience than I do. We Started off by cutting out the bottom and top of the “box”. We then cut out four “partition” pieces and attached two partition pieces to the bottom of the box using a kreg jig for the screws and wood glue.
After that we cut out another piece for the back of the box. We attached it using the same screw and glue method.

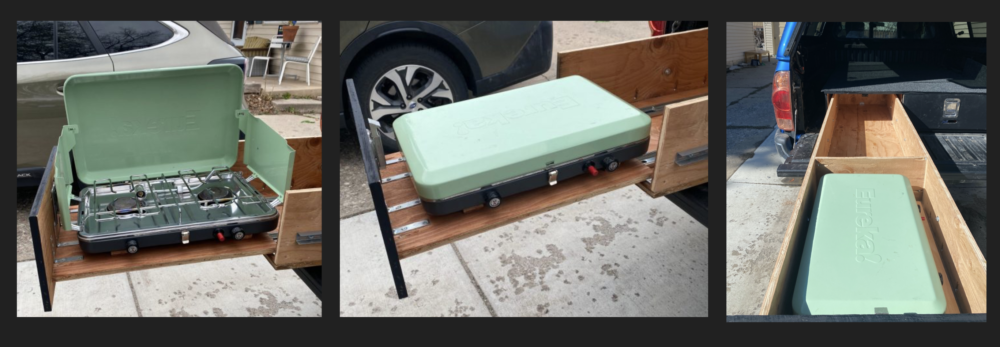
The next step was to build the drawers. We built the “kitchen” drawer first. The width of this drawer was based on the dimensions of my camp stove, the Eureka Ignite, which is 12.8” deep. In order to have proper clearances we decided to make the drawer 15” measured from the interior. After cutting out all of the pieces we built the drawer using the same method as the box. For this drawer we also added a partition 20” back from the front of the drawer in order to have a space to house the stove. The partition was also added to give the drawer more torsional rigidity.

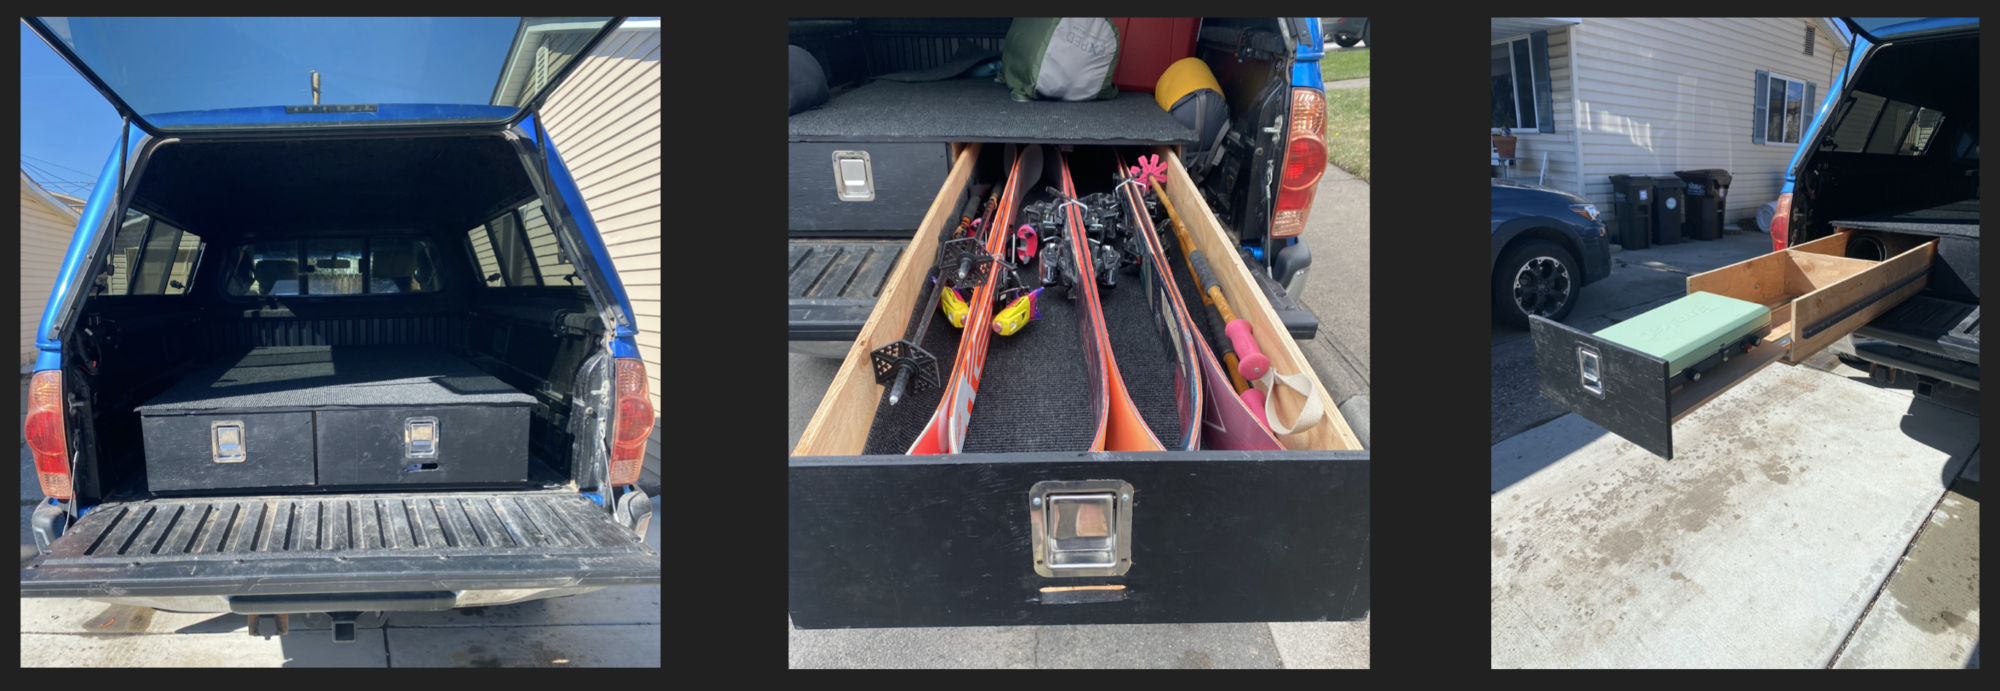
Next, we built the other drawer. We calculated that the other drawer should be 20” wide internally. More on this later… This drawer was pretty similar to the first one, but we only placed a partition at the top of the drawer, instead of having a partition run the entire height of the drawer. This was done in order to accommodate skis.
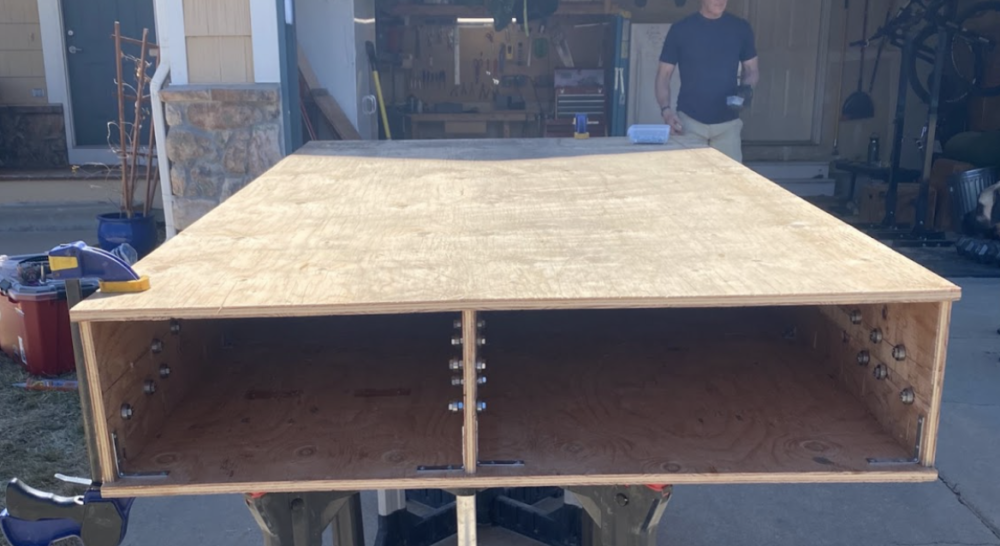
Once the drawers were built, we started working on where to house the stove. In order to have access to the front of the stove, we added store bought drawer slides and an additional piece of plywood to the end of the drawer. This is where the difficult part came in. We had to figure out the drawer slides. We decided to mount the closet tracks half way up the drawers. We drilled holes in the sides of the drawers for the tracks and used bolts to secure them. However, I accidentally bought the wrong length bolts, so they stuck out about an inch into each drawer. I ended up using a reciprocating saw to saw the ends off of the bolts.
After this, we had to mount the bearings that the tracks would slide on. We ended up driving T- nuts into the outside of the box and the partition between the drawers. We could then screw a bolt with a bearing into the T- nut. At this point we realized that our math was off. At first we planned on having two different partitions within the main box, but we realized that we only had enough space for one partition. Fortunately the bearings for both drawers could be mounted on the one partition, with the dimensions working out for the most part.

After this, we were able to put the top of the box on. Once again we used our method of pocket screws and construction adhesive to secure it.
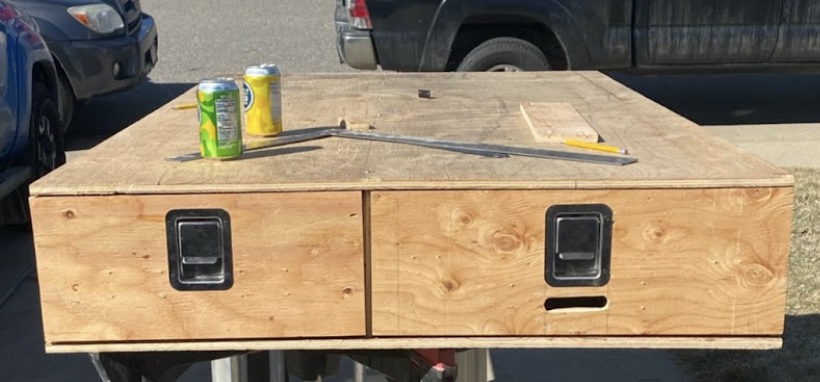
Once the box was completed, we slid the drawers in, in order to figure out the size and shape for the drawer fronts. With the drawer fronts cut out, we were able to use a jigsaw to cut out holes for latches. I also added a slot to act as a handle on the heavier drawer to relieve some of the stress on the latch.
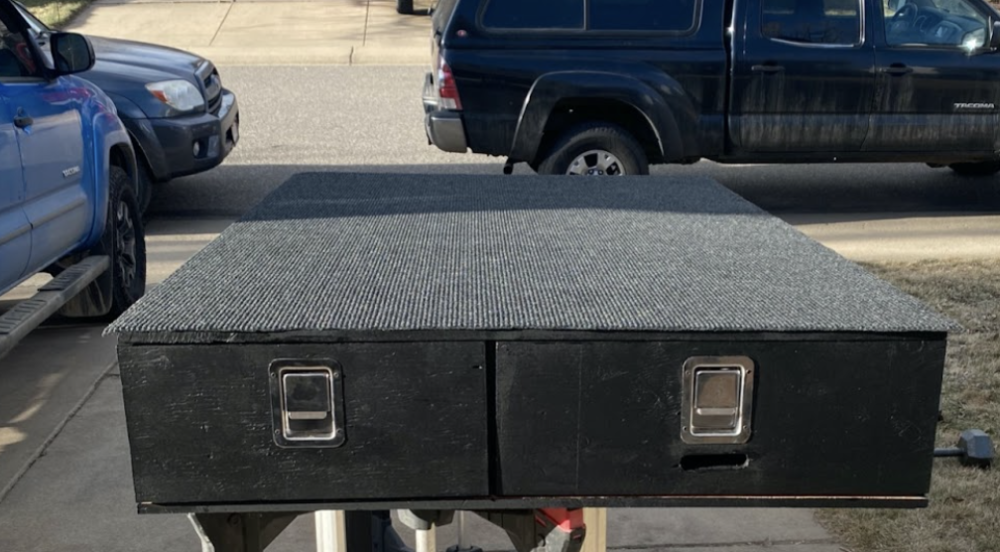
At this point the box and drawers all that was left was paint. I chose a black enamel paint for the outside of the box and the drawer faces. I also added some carpet to the top in order to protect my camping mattress from splinters.
After painting the box and adding the carpet I thought I was done with this project. However, as with a lot of projects you’re bever truly finished so I found a few things to fix after the fact. For example, the latch for the drawer on the right ended up pulling away from the drawer front, so I ended up replacing the screws with bolts. I also ended up adding metal loops and turnbuckles in order to be able to hole the drawers down to the bed. Finally, I stained the inside of the compartment that holds the stove. I’m sure I’ll end up refining the kitchen drawer and adding more organizational features, but I want to use the drawers a few times first.

All said and done, I think this project ended up pretty similar to the original plans. I ended up with two drawers with a dedicated kitchen space as well as a space for skis. I really only made slight tweaks to the dimensions. Aesthetically, this turned out exactly how I wanted it, at least on the outside. I think the black paint paired with stainless steel latches gives it a very utilitarian aesthetic. I would like to add on and finish the insides of the kitchen drawer a bit more. For example I want to add more flat surfaces on the top of the drawer. I also think that further finishing the insides of the drawer would add to my goal of a clean aesthetic going forward. Going forward, I’m super excited to do a ton of camping this summer and keep refining my project.