
With RailGlow now fully built and ready to debut at the Design Expo, I wanted to reflect on the journey, from initial inspiration to final form, and break down the ideas, influences, and techniques that brought this project to life.
This lamp isn’t just a lighting fixture. It’s a solution to a real problem, a statement about form and function, and a representation of the rugged minimalist and craftsmanship aesthetics that has guided my work from the very beginning.
Inspiration & Concept Development
The project began with a simple need: the kitchen stove area in my apartment had poor lighting. Every time I cooked, I found myself frustrated by the dim workspace. Rather than buy another plug-in lamp, I saw an opportunity to create something functional that also reflected a personal design philosophy. I didn’t just want a light, I wanted a piece that felt purposeful and considered.
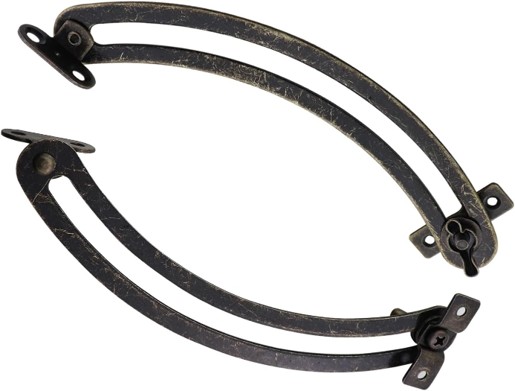
Figure 1: Curved sliding rails.
That’s where the idea of a lamp with a sliding rail mechanism came in. Instead of relying on a traditional on/off switch, I wanted the act of turning on the light to feel physical and engaging. As the top portion of the lamp is lifted, a momentary switch is released, activating the light. Lowering it down presses the switch, turning the lamp off. This system makes the function tactile; you interact with the lamp in a mechanical, satisfying way. I will touch on some issues with this momentary switch here shortly.
The movement and shape were inspired by old spotlights and industrial lighting, objects built for performance and simplicity. Their forms are unapologetically functional, with sturdy materials and visible mechanics. I adapted that language for RailGlow by integrating a sliding rail and a swivel mount, giving the light adjustability while preserving a small, clean footprint.
Aesthetic Vision: Rugged Minimalism
RailGlow is grounded in the rugged minimalist aesthetic, a design philosophy that strips objects down to their most essential elements without sacrificing presence, character, or function. Central to this aesthetic is the use of raw materials, those that reveal their natural textures and imperfections, and that gain richness and personality with age. In RailGlow, this takes the form of solid wood that will darken and develop depth over time, and steel hardware that might slowly tarnish or take on a patina with use. These changes aren’t flaws, they’re features, contributing to the authenticity and longevity of the piece.
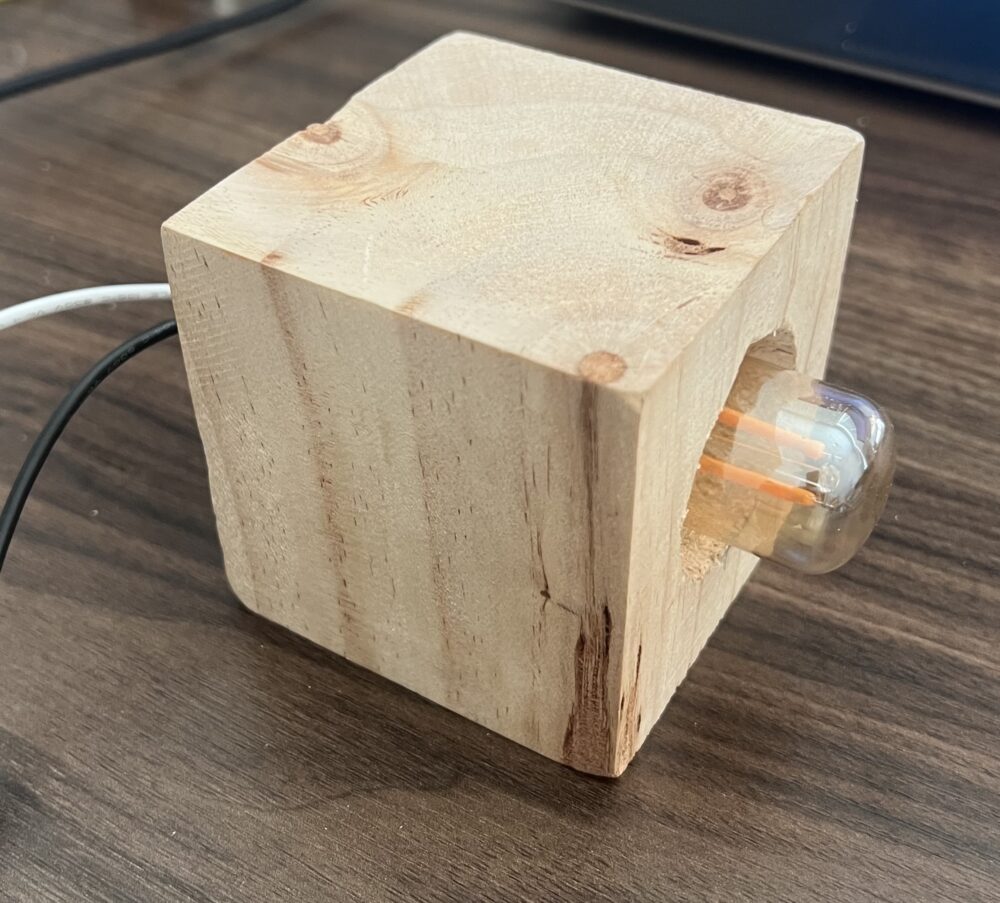
Figure 2: Top portion of lamp prior to wood stain and assembly.
Another core principle is mechanical honesty. Rather than hiding the functional parts, rugged minimalism highlights them: the screws, rails, joints, and fasteners are visible and intentionally integrated into the design. This creates a piece that feels grounded and real, where the way it works is part of the way it looks. Finally, functional beauty brings it all together, where the interaction itself, like sliding the top to turn on the light, becomes a satisfying part of the design. It’s not just a lamp that looks good on a shelf; it’s one you want to use and engage with.
Throughout the project, I explored alternative aesthetics. Industrial Futurism would have leaned into precision using polished metals, angular forms, and touchless sensors to activate the light. Organic Modernism offered a softer direction, with flowing lines, concealed joints, and warm materials like frosted glass and curved wood. Both had appealing qualities, but ultimately I stayed committed to rugged minimalism. It felt the most honest, real materials, exposed mechanics, and purposeful interaction. I wanted the final piece to feel tactile, resilient, and unafraid to show how it works. Something that fits seamlessly into its space while telling a story of craft and intention.
Design Details: Sketch to CAD
The design process began with rough hand sketches that helped define proportions, layout, and how the sliding mechanism might operate. These early drawings focused on building a compact silhouette that balanced form and function.
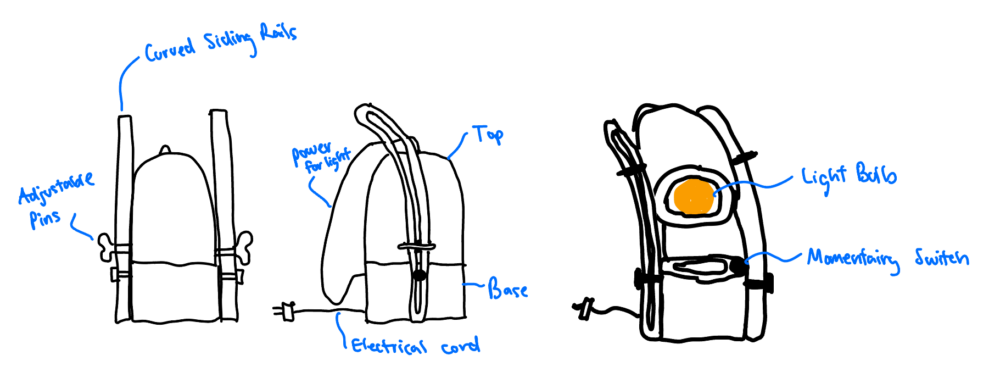
Figure 3: Design sketches
Once the concept was solidified, I moved into CAD modeling to refine internal dimensions and mechanics. The CAD helped ensure that the socket, bulb, and wiring would fit cleanly into the top housing without interference. It also allowed me to place the switch in a precise, recessed position, and confirm that the rail and swivel joints aligned as intended. Modeling also helped visualize the exploded view of each component and how they’d come together during final assembly.
One of the more challenging pieces was designing the recessed switch cavity. Again I will touch on the complication with this in a bit, but I would have used a forstner bit to create a flat-bottomed hole in the top enclosure, giving the momentary switch a clean fit without sticking out or requiring extra trim. The CAD helped me determine this fit and test spacing between the lamp’s “capsule” top and the rail structure.
Fabrication and Material Choices
After sourcing all the components, rails, switch, bulb, socket, wiring hardware, I turned to the physical build.
The Top and Base:
Both were shaped from blocks of solid wood using the lathe in the woodshop. This process required precision to ensure that the center bore (for the socket and wiring) aligned perfectly with the exterior profile. The base also needed to accommodate internal wire routing, which I carved using a combination of forstner bits and chisels.
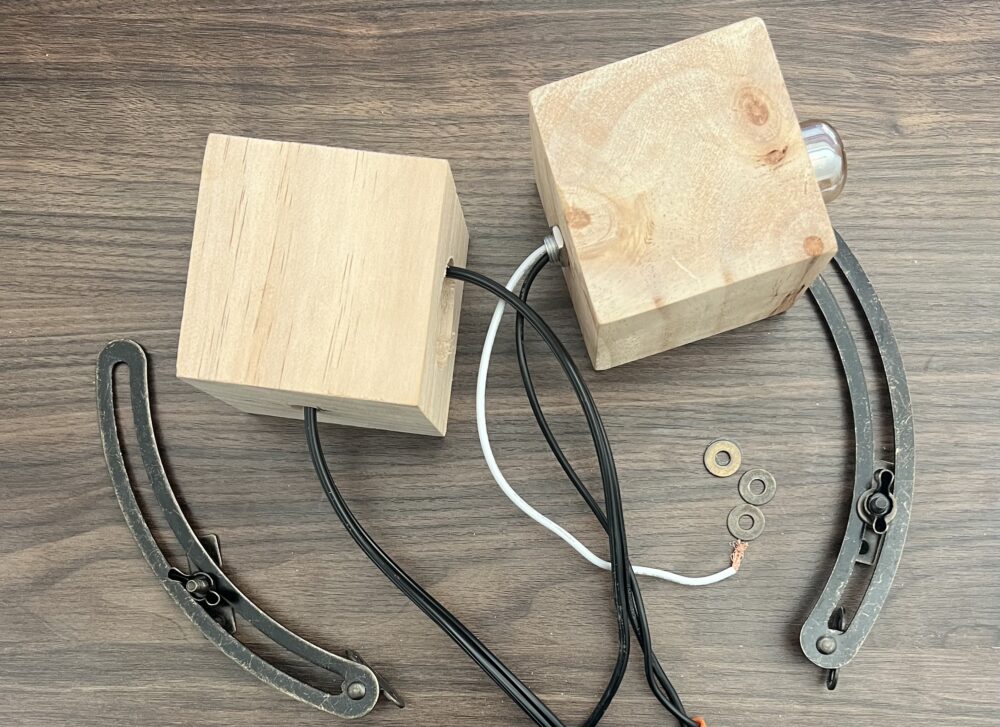
Figure 4: All components of base
Electrical Integration:
The wiring was routed through the interior of the lamp and finished with heat shrink tubing and protective sheathing. The original plan was to wire in a momentary switch to enable the sliding on/off functionality, which leads to a major challenge in this project…
Design Challenges and Adaptations
One of the more frustrating setbacks during this project was sourcing the momentary switch. I ordered it early on in the process, but the first company I used ran into multiple fulfillment issues. After two failed deliveries and a lot of back and forth, I had to cancel the order entirely.
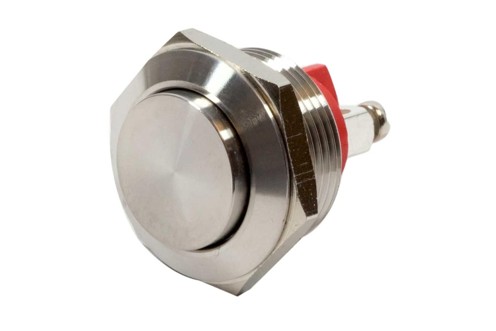
Figure 5: Momentary switch
I attempted to source the same part from a second company, but by the time they were able to confirm availability, it became clear that the component wouldn’t arrive in time for my final build and presentation.
As a result, I had to adapt. Instead of using the momentary switch and rail-triggered interaction I originally envisioned, I built the lamp using a more traditional straight plug in setup so the rest of the project could be completed on time. While this change was disappointing, especially because that physical interaction was a big part of the design intent, it reminded me how unpredictable fabrication timelines can be. Flexibility was key.
In future iterations, I plan to reintroduce the momentary switch once it’s available. The housing is already designed to be machined to accept the part, so retrofitting it into the final lamp should be straightforward. The wiring is also straight forward as I will disconnect the existing line, insert the switch into the circuit, and install the switch into the base piece of wood.
Testing and Final Adjustments
With the structure complete, I conducted a series of dry fits and final tests. The rail motion is smooth and responsive, and the swivel mount holds the lamp angle securely without slippage. The internal wiring sits cleanly within the base, and the amber light gives off a warm, diffuse glow that works beautifully in the kitchen setting. In hindsight however, I would have chosen a different LED than the amber light. It was a good idea and still looks really good, but it does not light up the space as well as I had hoped. I will be looking to test out some other LED’s to determine which light is best for the space that it is in.
Looking at the wood, the final finish, a wood stain, brings out the wood’s texture without making it too glossy. It feels durable and inviting, the kind of surface that you want to touch. This wood stain is complemented really well by the look of the rustic metal sliding rails.
Looking Back
From the early concept work to the finalized sketches and component sourcing I did recently, this has been a complete journey, from idea to object. I learned how to adapt my expectations, solve real-world design problems, and stick to an aesthetic that matters to me. Even with the momentary switch setback, I believe RailGlow reflects its values: durable materials, honest construction, and meaningful interaction. Thanks to everyone who followed the process. I’ll be presenting RailGlow virtually at the Design Expo on May 7, and I’d love to hear what people think, especially thoughts on interaction, rugged design, or how to integrate mechanical features more seamlessly.
Sources:
Images 1 and 5: Amazon product images
Images 2,3, and 4 are sketches and images I took myself
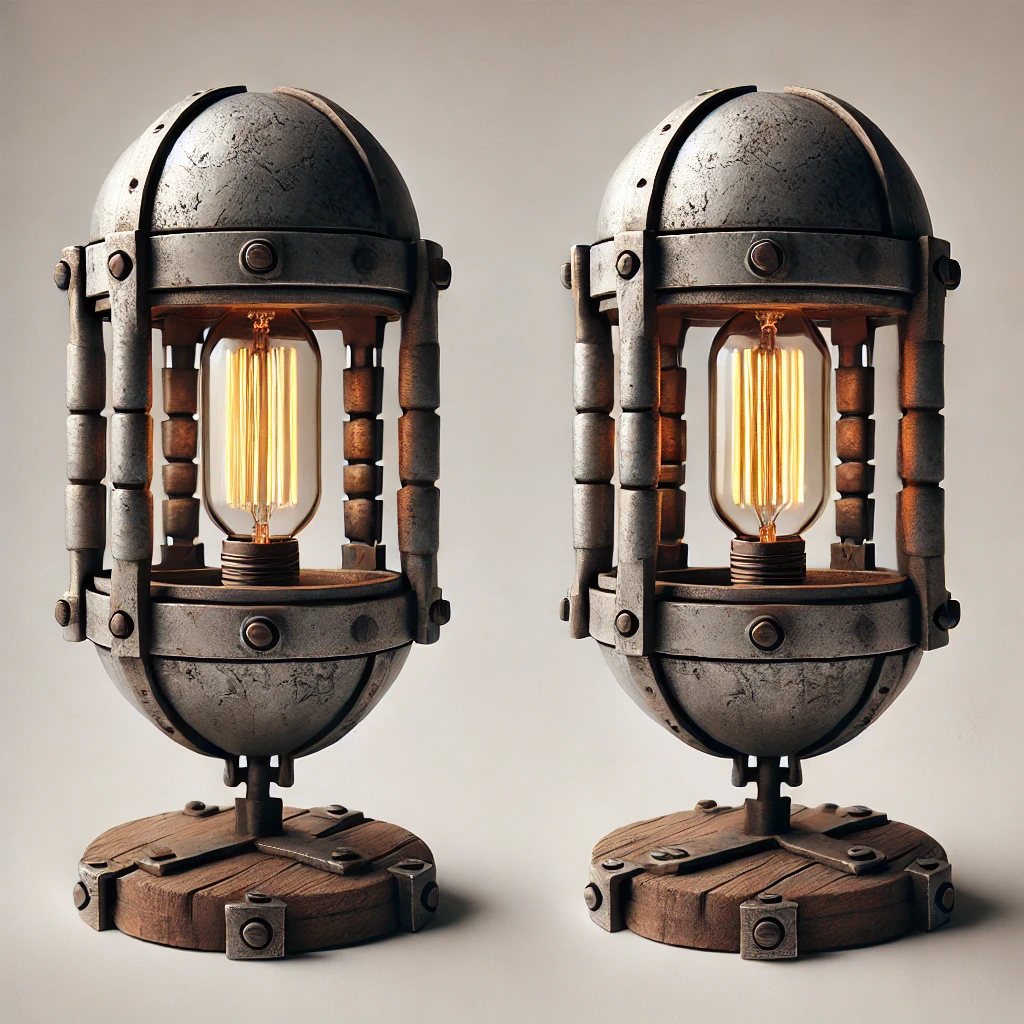
Feature Image: Created using DALL-E Ai image generator.
1 Comment. Leave new
Hello,
I think you did a great job justifying your design philosophy while documenting the journey and conveying it in this final post. I feel like you enabled the viewer to connect with your thought process effectively.
Based on the challenges you encountered, I have a question: If you were to do this project again, what changes would you make regarding sourcing components? Additionally, if you had the chance to start over, would you stick with the theme of having a service purpose, or would you prefer to focus solely on creating a purely visually aesthetic piece? Either way, I can’t way to see it at the expo