
After much CAD design, painting, and various jobs and adjustments I needed to do by hand, I have a piece which I am quite pleased with. However, I don’t feel that it is done as time constraints limited some of what I could do. This being said, I will walk through the inspirations I took some design elements from, the vision I had, the specifications I came up with, and some basics of the design process and the aesthetic choices, and show the final piece as it stands.
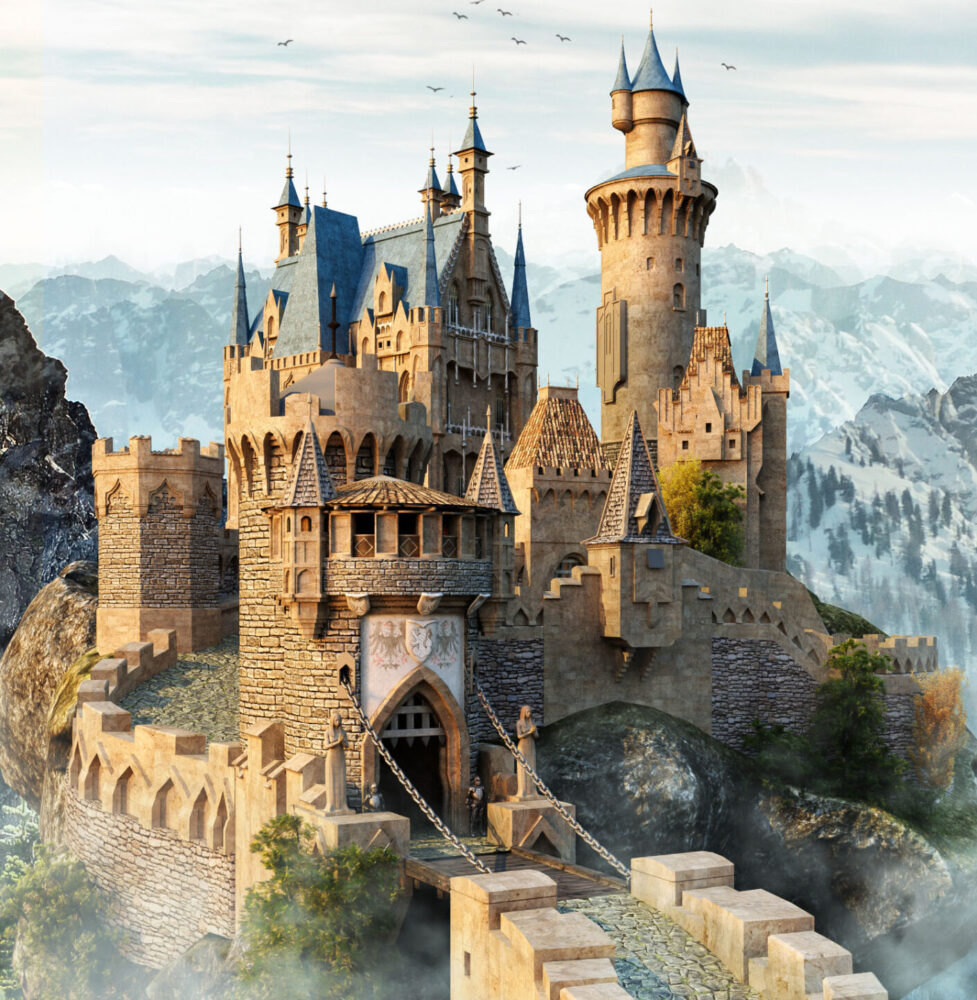
My inspirations came from numerous places, and my design is definitely very influenced by existing designs and real-life structures, many of which coalesced to create my piece, so I can’t take much credit for the basic design elements. I’m sure we are all familiar with the basics of medieval castles/fortresses, and I included many of these without too much creative liberty. There are a few specific photos and drawings which I referenced when making a decision about the design. I’ve discussed these in previous posts, so as a recap, the following image from yarpen (1) set the initial foundation for how I wanted the entrance to look, with the wooden drawbridge with chain moving through the walls and a checkered front gate. It also has some foundational design elements like the roof flourishes which extend into the sky and the brick layout.
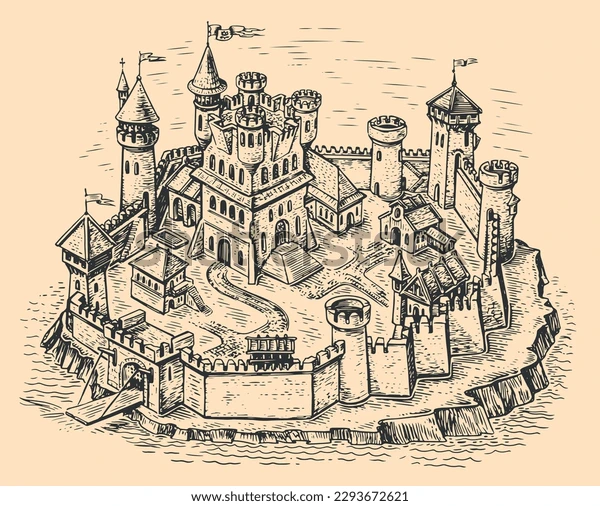
The following drawing from AVA Bitter (2) also represents much of what I initially envisioned. The front entrance is much the same as the previous image, but this layout emphasizes the surrounding wall with the intermittent towers. I definitely took inspiration from the front chunk of wall with the drawbridge to use in my design.
Also at the time I was playing a game called “Kingdom Come Deliverance” which takes place in early 15th century Bohemia, and so the fortress and castle design in that game stuck out to me when considering this project, and so I think I incorporated some of those design elements into my print.
In terms of the vision of the project, I think I successfully developed the aesthetic I was looking for, but due to time constraints I wasn’t able to fully realize some goals I initially laid out. Generally, my vision was to 3D print a larger piece than my upcycle project, something with incorporated a dynamic component which came from 3D printed parts. In thinking of what I could realistically do, I had the idea of a sort of classic brick-built medieval inspired castle, or part of a castle, or fortress. I wanted it to have historically accurate features, although the various pieces of the architecture didn’t necessarily need to be to scale relative to each other. The rigid nature of a building of this type would be well suited for creation in SolidWorks, which also contributed to why I chose it. I developed the following five specifications which would act as the main guide I used when creating it.
Top 5 Specifications
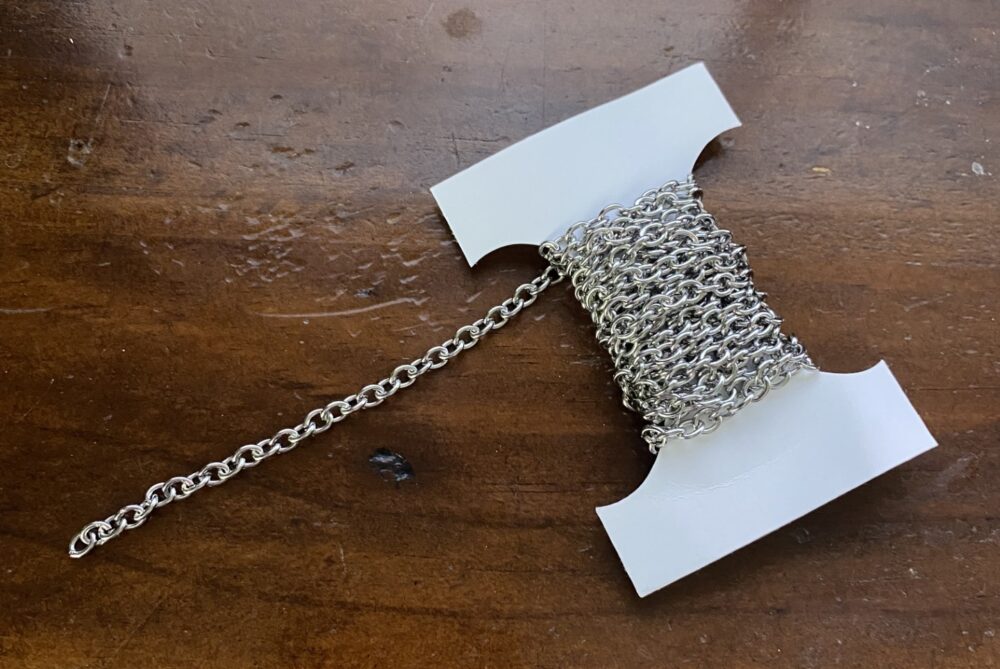
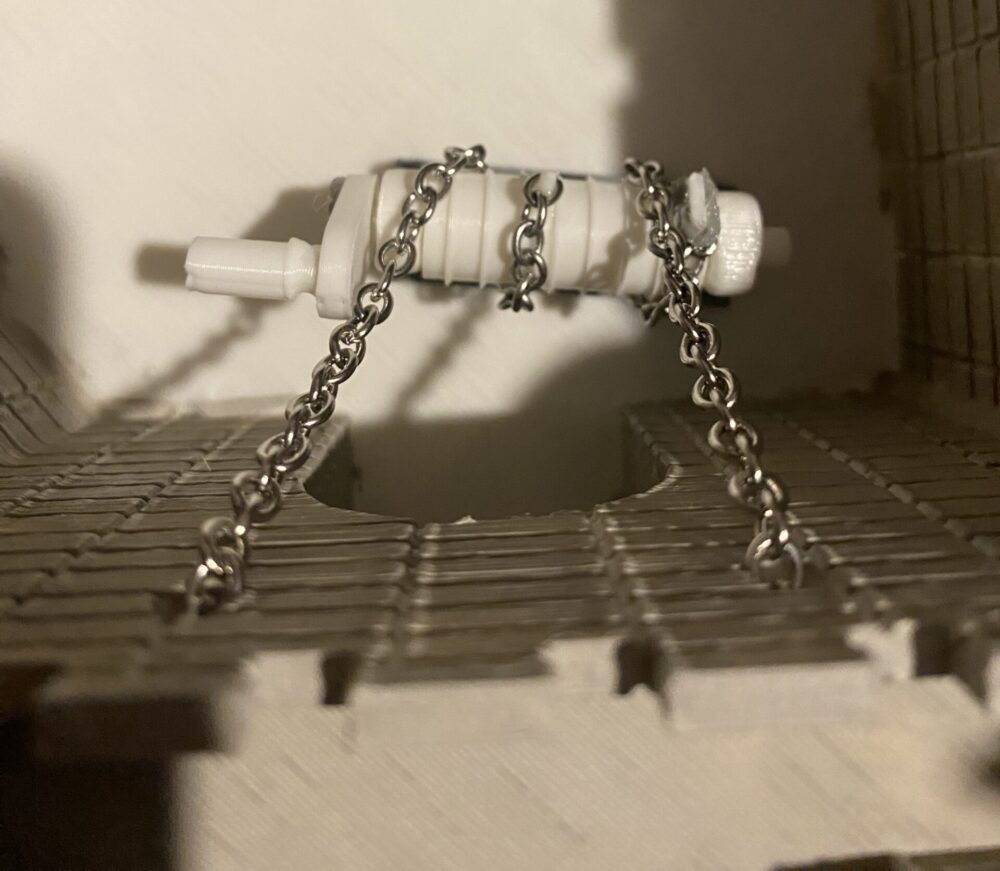
- My first major specification has to do with the dynamic piece which is a liftable drawbridge. I need an interfaceable crank of some kind which will raise and lower the drawbridge and hold it in open and closed positions. Below is a small chain I have acquired which will interface with 3D printed parts to achieve this and add to the medieval aesthetic.
2. In association with this first spec, this entire project is purely an aesthetic art project. There is no functionality or load point required anywhere in the project other than the fact that the drawbridge needs to move. I want the piece to look impressive sitting on a shelf from across a room.
3. I want this project to look authentic and detailed. This includes features like brick formations on the walls, accurate railings or rampart design, textures on applicable parts, and more.
4. I want the project to look good when painted. I expect most of the project will be gray to match the stone features of the walls, but there will be spots of color where applicable. I want the paint job to be thorough and accurate.
5. I want the project to be large enough that it can be easily seen from across a room, and something like the drawbridge crank can be easily accessed.
Overall, from my subjective perspective, I believe my project meets these specs, as I will show below.
When deciding on the specific design itself, I sort of started with the following basic sketch.
![]()
A simple, rectangular fortress with a front gate and drawbridge, peaks on the corners, and square ramparts. My project followed very close to this initial idea. Below you can see the final CAD design that I created, made up of three major parts.
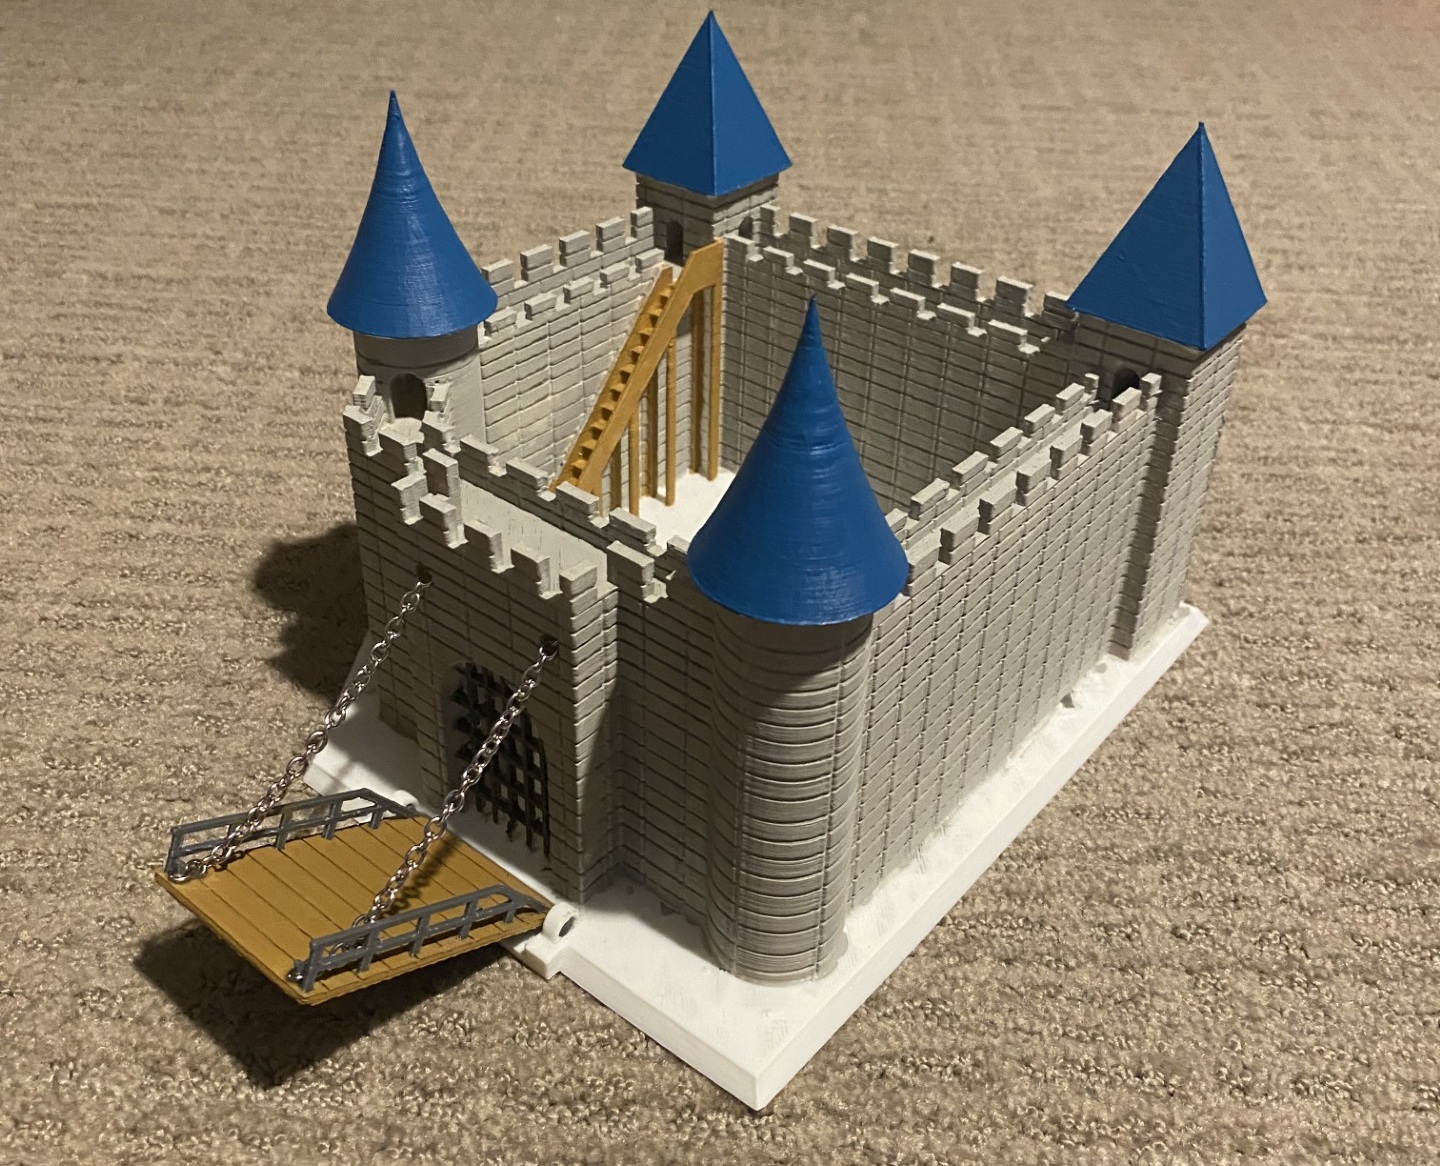
The first is the largest main piece, the main walls and all the static things connected to it. You can see how it resembles my initial sketch, with the front gate, rampart design, conical and pyramid bosses on the four main pillars, and the relatively simple architectural plan. I opted to have one angled wall instead of making it purely a square because that would be too boring. I also included something like a staircase up to the walls as it would have really bugged me if it was completely unrealistic in how it would be used if it were an actual fortress. I also made sure to add doorways so someone could theoretically walk around the whole thing. Making the brick pattern on all walls was time consuming and slightly draining, but a necessary feature for the aesthetic.
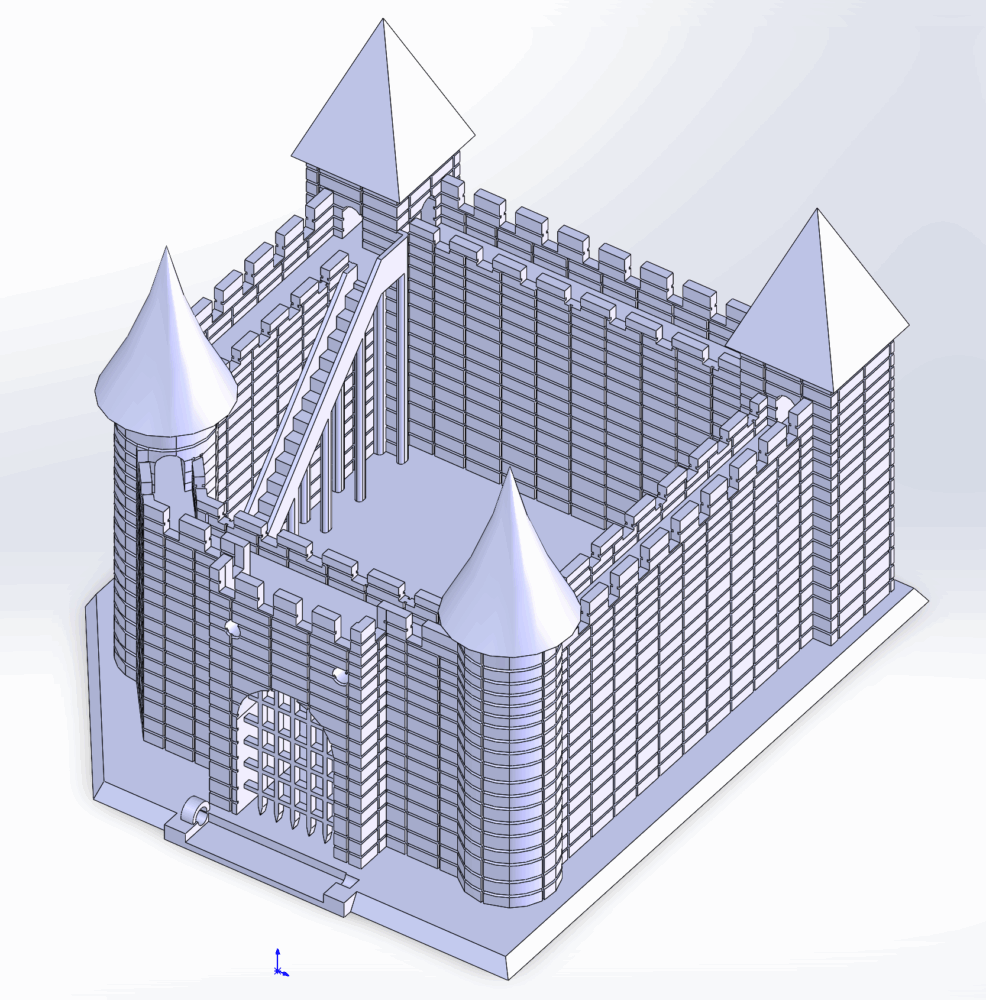
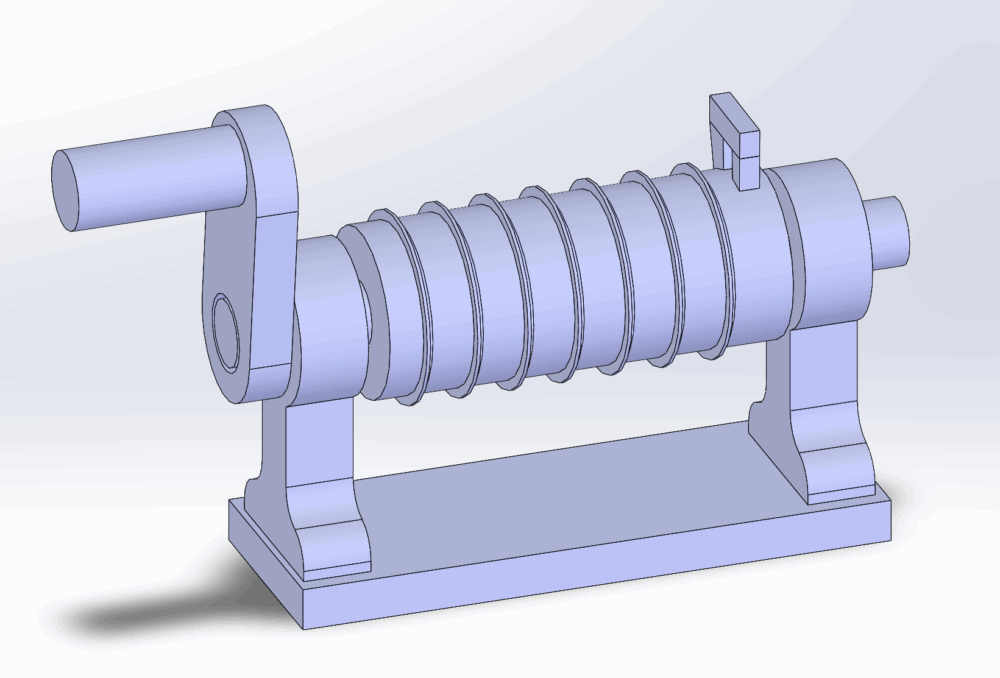
The second is the crank assembly which is made up of multiple smaller pieces. The parts would be glued together (except the spinning central piece) to create a working crank. The chain attaches to the extrusion on the right, and wraps around to the left as the handle is turned.
The third is the drawbridge, which needs to hinge relative to the main wall. This is made of “wood planks” to be accurate with a nice guard rail on the sides.

So, in terms of CAD, I am able to just directly import these files to my 3D printer, so I don’t have to worry about drawings or manufacturability beyond understand what can and can’t be 3D printed effectively. The cool thing here is that up until I commit to the large print, I am able to change various parts of the design, as long as they don’t break the CAD model too much, so my design was able to stay quite fluid as I reflected on it. In the next post I plan to more thoroughly discuss this process and how I created the CAD models.
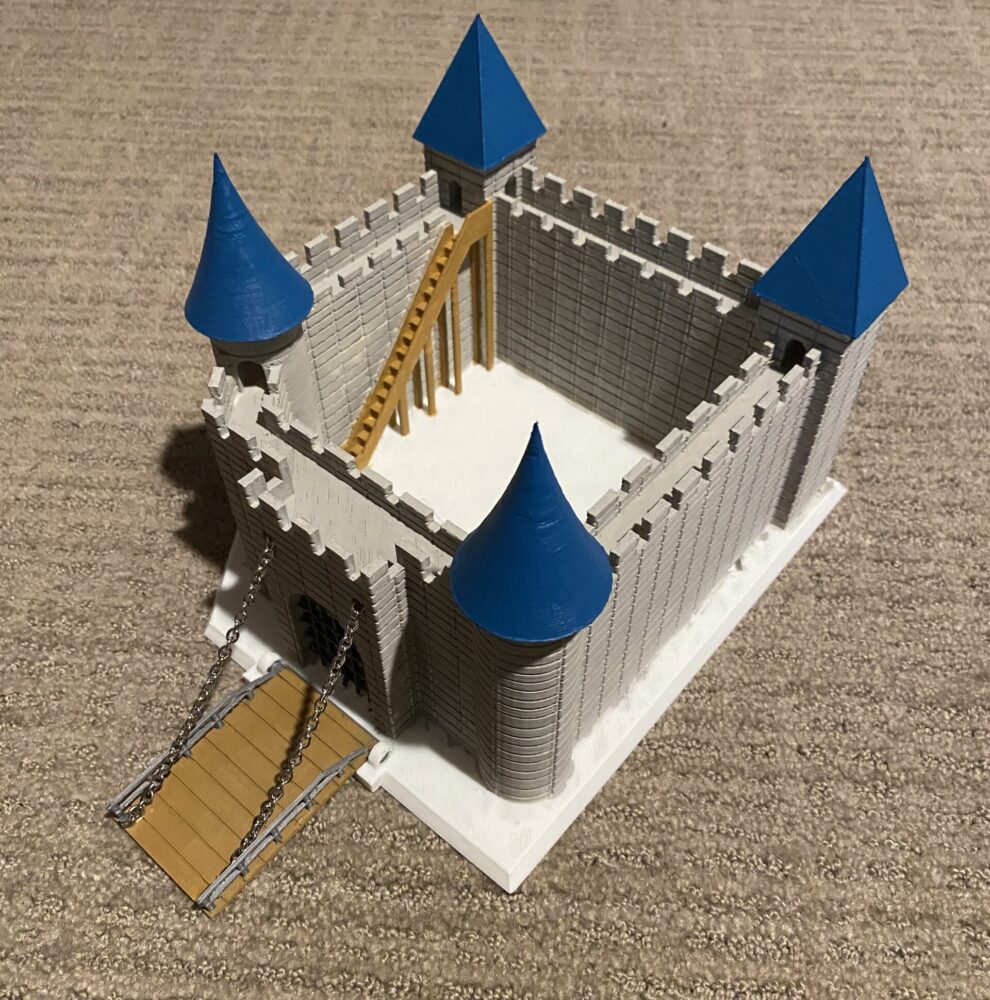
Now, we can take a look at the final product (for now). The first two images show the total model. You can see the drawbridge in both its up and down positions, adjusted through the crank which works, even if it is not perfect. You can see that the main walls are gray brick, which nice wood accents from the staircase and drawbridge, and a nice, subdued shade of blue on the pointed tops. After painting I questioned whether the tops should’ve been a red/orange instead, but it is too late to change now! As a scale, the width and length of the model are both about 8 inches, and it is about 6.5 inches tall to its highest point.
![]()
I also have the crank positioned on the inside of the walls. I still haven’t permanently fixed it anywhere because I’m not quite decided on the best place for it. I might want to make a platform for it to sit on, which I haven’t made yet, but I do want it to be mostly hidden when looking from the outside, but it is still easily accessible. The crank isn’t perfect, as the width between the chains doesn’t match the width the crank has for the chain connection points, but it is quite sturdy, and turning the handle indeed turns the chains without issue, and it even holds its position well.
Overall, I am satisfied with my design and my progress, but I don’t feel the project is quite done. Mainly, the inside of the fortress is just empty. Initially I thought about having various buildings, or maybe one big building on the inside, but in the time I had I prioritized the features I have shown. I still want to think of something to occupy the inside space, and I think I’ve designed it in such a way where I could print a separate piece and glue it to the base, without needing to reprint and paint this whole thing. So, I will continue to consider how I can improve this piece.
In the next post I plan to more thoroughly discuss in-depth how I actually created this assembly and some of the challenges I faced, including the CAD design, printing, and hands on work.
Sources
(1) yarpen, 2016, Medieval castle – Artwork / Finished Projects – Blender Artists Community
(2) AVA Bitter, Old Medieval Castle Various Buildings Surrounded Stock Vector (Royalty Free) 2293672621 | Shutterstock
1 Comment. Leave new
[…] 2: Medieval Castle Fortress 3D Printed Art (Final Report Part 1: Medieval Castle Fortress Final Report Part 1 – Aesthetics of Design, Final Report Part 2: Medieval Castle Fortress Final Report Part 2 – Aesthetics of […]