

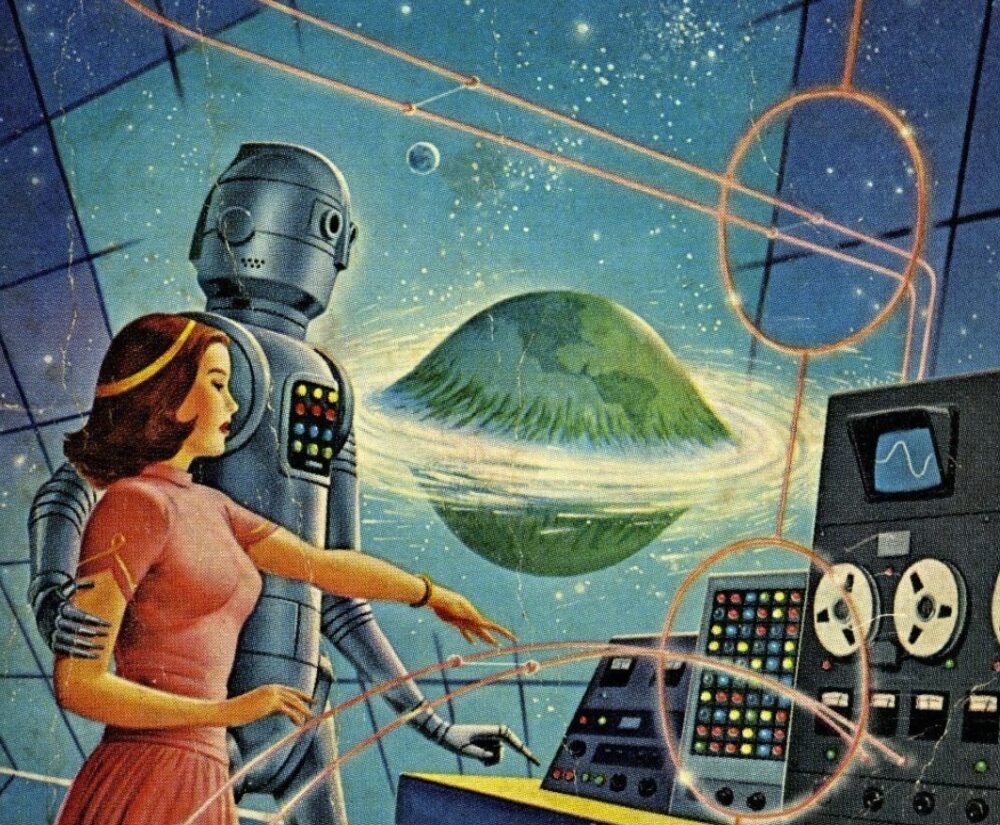
For my final project I built a vinyl lamp in the retro futurism aesthetic. I picked a vinyl lamp because I wanted to build something functional I could use long after this class is over and I picked the retro futurism aesthetic because I felt it fit well with the lamp design and vision. Retro futurism is a creative movement that draws from past visions of the future. Unlike futurism, which focuses on forecasting what’s to come, retro-futurism looks back, exploring how earlier generations imagined tomorrow. It’s less about prediction and more about revisiting the dreams and expectations of the future from a bygone era. I am very guilty of romanticizing things and often the anticipation is greater than the reality so this aesthetic really speaks to me. Some of my other personal aesthetics’ such as cyber, synth and other technology based aesthetics’ also have common themes with retro futurism.
 I started my project by collecting all my materials. I began with some single vinyls I got from a garage sale a few years ago, I got them originally to hang on my wall but could not find a good place for them. The issue I wanted to tackle was that I have a record collection in a dark corner of my living room that could really use some lighting to bring more attention to the area. A vinyl lamp would be perfect solution for both of these issues and it also fits nicely into the retro futurism aesthetic. I found an old lamp stand at goodwill and bought the threaded rods, nuts, sand paper, spray paint and a color changing bulb. The threaded rods were silver originally but I wanted to paint them black to match the black of the vinyls. Once I had my materials I planned out my schedule in excel.
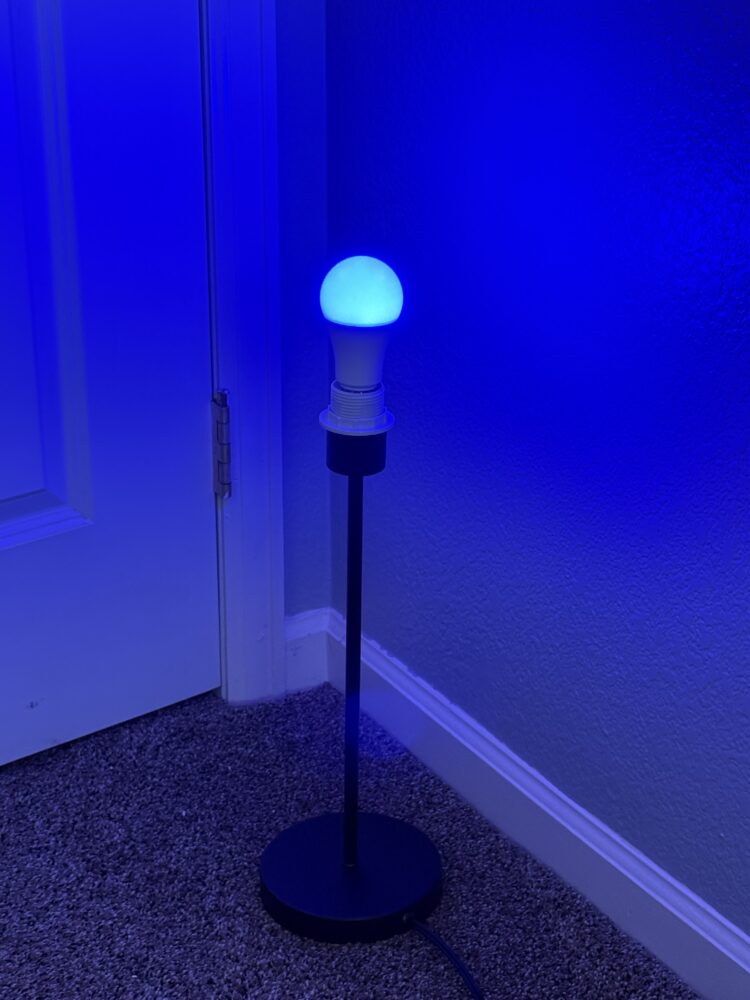
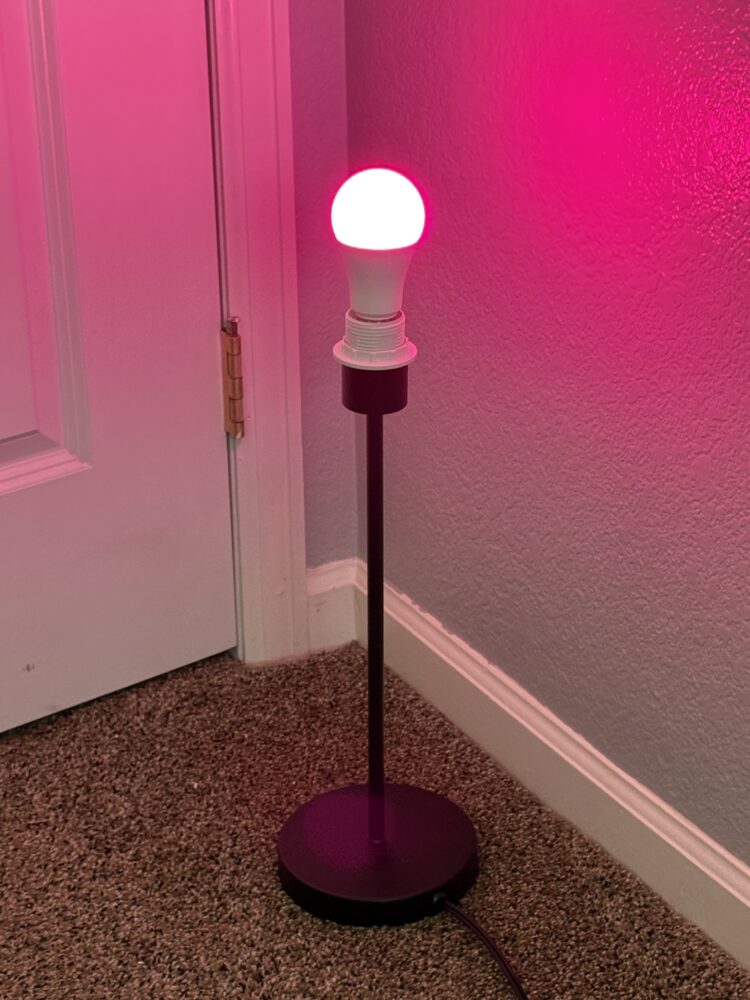
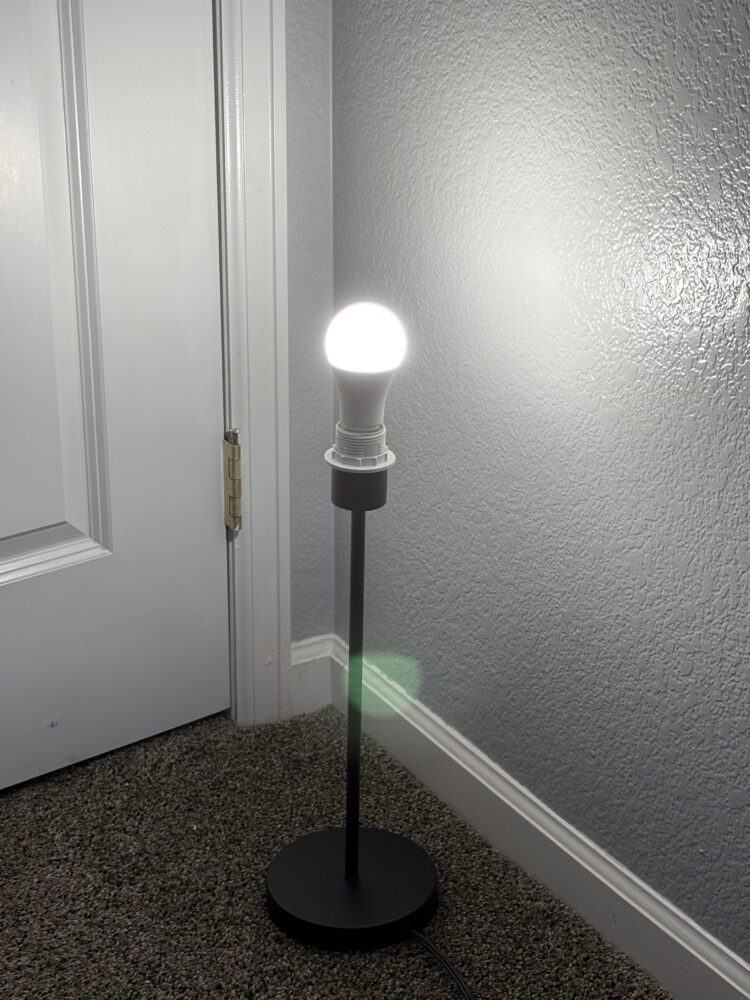
 Once I had my schedule I just had to follow it. Easier said than done. I began with the lamp stand. I sanded down and repainted areas of the stand that showed some old wear. I then removed the old bulb and screwed in my color changing one. I plugged it in and it worked. I changed the color a couple times and verified everything looked good before moving on. I picked a color changing bulb because I felt it would make the lamp fit into the aesthetic i picked better as well as allow me to create a more relaxing feeling when I’m playing various records.
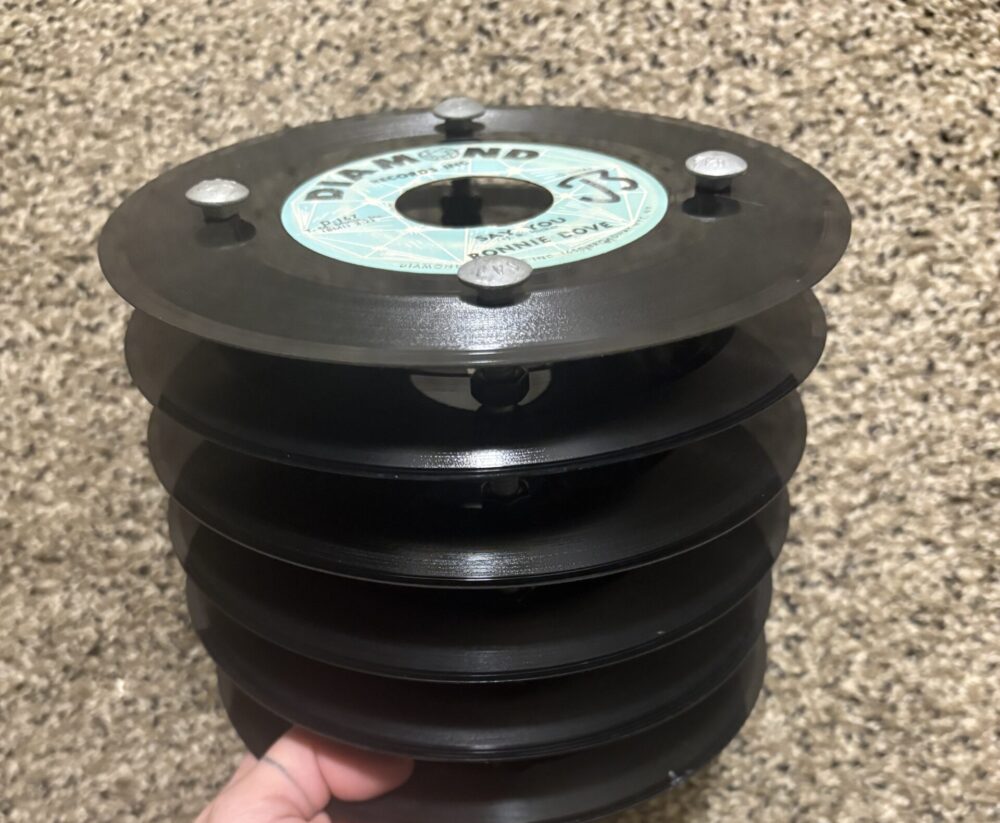
Now that my lamp worked it was time to move into the bulk of the project. Making the lamp shade out of the vinyls. I began by making a stencil out of paper so the holes in the vinyls would be in the same place. I quickly realized the paper was to flimsy and I wasn’t getting the placement results I wanted. I then decided I would sacrifice one of the vinyl’s to be my stencil. Thankfully I had more vinyl’s than I needed so this wasn’t an issue. I created my stencil and then used it to drill small holes in all the vinyl’s. Next I used various drill bits increasing in size in order to get the holes big enough for the screws. In a previous blog post I mentioned my concern with the brittleness of the vinyl’s and how I was worried they would crack during this process. I made sure to use a hard backing when drilling the holes as recommended by a pod member who worked with a record in his upcycling project and this worked great. Unfortunately this process took longer than I anticipated and as it got later in the night and I grew tired I got more carless with my drilling and ended up cracking one of the vinyl’s. Thankfully I had enough to move on. This was a valuable lesson however. I decided to call it for the day in that moment and continue in the morning.
The next morning I completed the drilling and moved on to hollowing out the center of a couple vinyl’s in order to make room for the bulb. This time around I was extremely careful to use a dremel with a low grit sandpaper. Using a dremel I hollowed out the centers of the middle few vinyl’s in order to fit the bulb. Although it took longer since I was being very meticulous not to break anything it was worth it as no more vinyl’s were damaged in the process. Once all the cutting was complete I wanted to put the lamp shade together to verify everything fit before I got to polishing and painting.
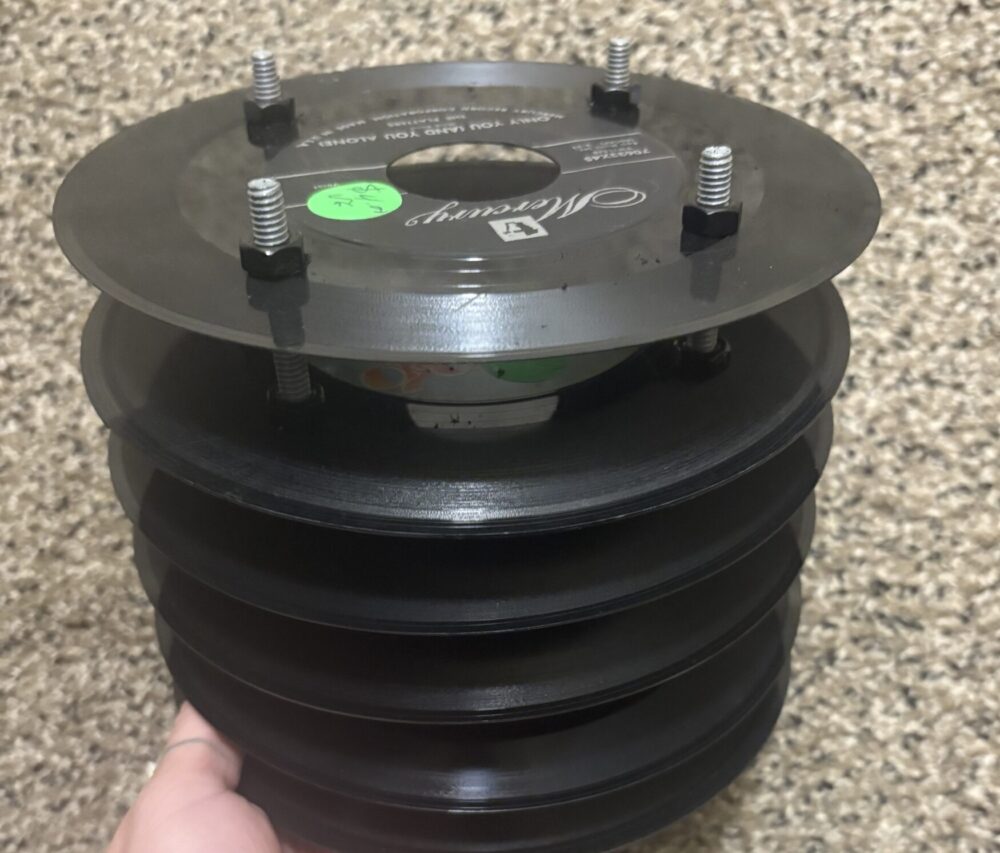
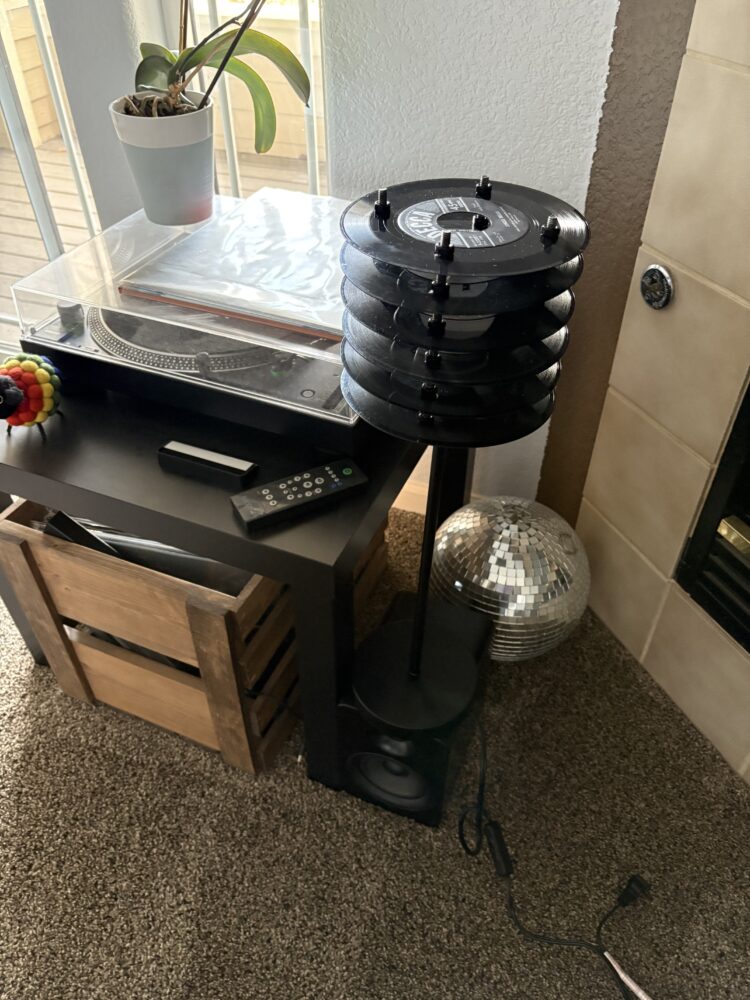
Now that I knew everything would fit together I took it all apart again and began polishing. I sanded down all the drill and center holes with fine grit sandpaper and cleaned off all the dust. I then spray painted the screws. Finally I was able to put everything together. I began with the bottom few vinyls before mounting them onto the stand. I then screwed in the bulb and mounted the center vinyls and finally the top few making sure to space them each out respectively. I then carefully moved the nuts up and down to make sure everything was evenly spaced before tightening it all up. I then wiped everything down as things got pretty dusty. I plugged it all in and the project was complete!
Overall I really enjoyed creating this lamp and I think in the end my vision and aesthetic was met. Lets reflect back on my initial goals and how/if they were met.
- Look professional – Overall I think I met this goal. Considering this is my first time making anything like this I am happy with the outcome. I made sure to polish the piece to elevate the look. If I were to make another lamp in a similar fashion I think I would use smaller diameter screws.
- Be Original – Although the vinyl lamp itself isnt entirely original I think I made this project my own by modifying certain aspects such as keeping the original stickers and using a color changing bulb.
- Show the original vinyl stickers – I was able to keep these intact on every vinyl except the center few that needed to be hollowed out to make space for the bulb. I made sure to use the vinyl’s with the stickers I wanted to display as the outside ones so they are most visible.
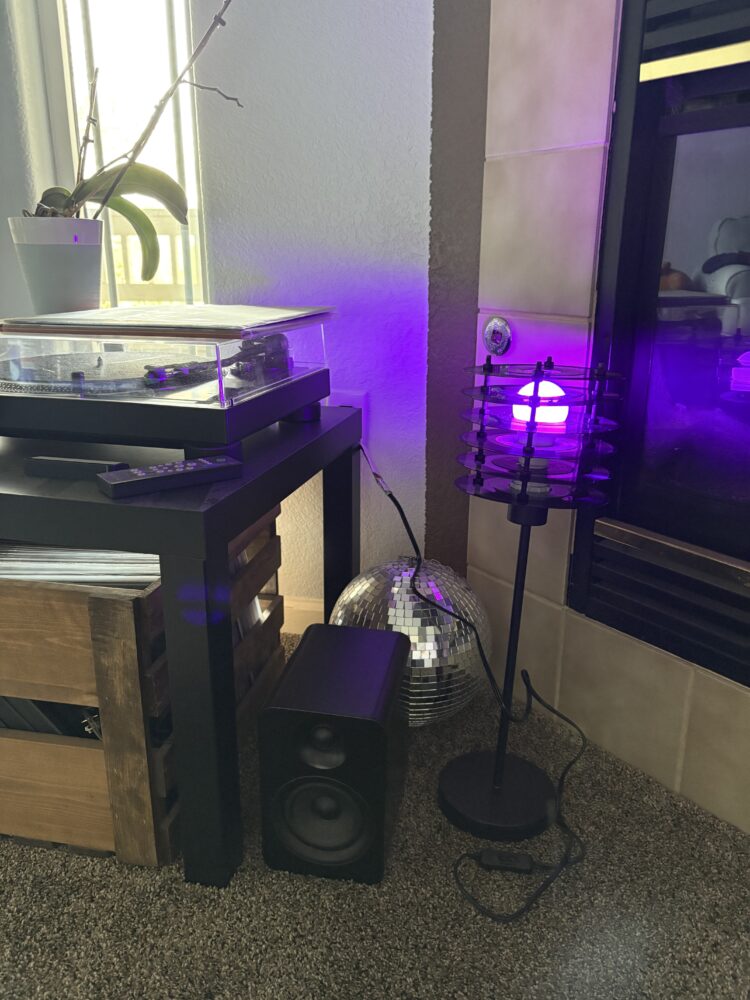
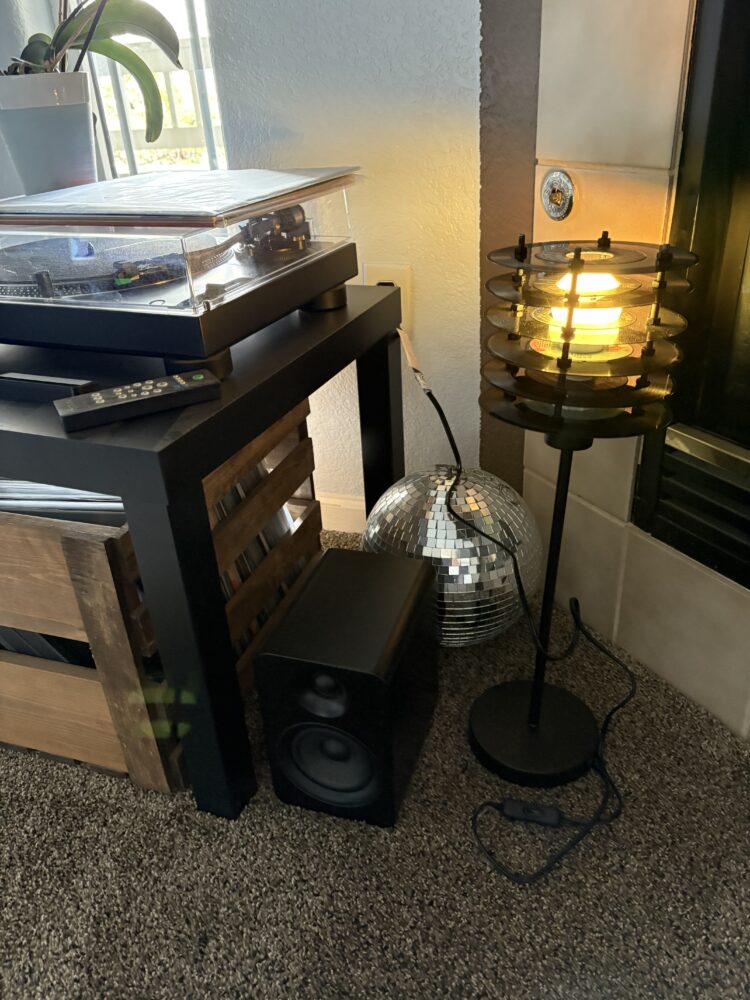
- Functional Lighting level – The bulb is very bright and lights up the area nicely. Even when it is set to less bright color modes it lights up the area perfectly.
- matches my chosen aesthetic – I think the old look of the vinyl’s with the futuristic aspect of the color changing bulb and sleek design of the stand embodies a vision of the future with aesthetics of the past nicely. As a bonus I think it fits perfectly in my record collection corner as well.
When I began this process I was quite lost with what I wanted to make. After some brainstorming and reflecting on my personal aesthetic I created this plan. I think overall things went relatively smoothly. When I first created my schedule I anticipated some roadblocks and I’m glad I overcame them. Thankfully having more vinyl than I needed was really my savior in the end as I ended up breaking one and using another for a stencil. The lamp works great and meets my aesthetic goals. Moving forward there are some lessons and improvements that can be made. In terms of lessons this project was a reminder to be patient and move slowly. In the end slowing down was the key in preventing more records from breaking and completing the project. Along the way I learned new manufacturing skills and I am happy because I loved the initial upcycling project I did for the first part of the class so being able to upcycle my second project was really appealing. I am passionate about the environment and being less wasteful so using materials I already had was very exciting. I was able to create something by upcycling something old and giving these old non-playable scratched up singles a new life. If you have any suggestion on small touch ups or things I can add please feel free to leave a comment below.
3 Comments. Leave new
I really like how the final product turned out! The light reflects nicely off of the other components and contributes to a warm overall appearance. Do you plan to make more pieces in this style in the future?
This aesthetic is awesome, I love the vibe of the lamp. It fits really well in your room. I can’t wait to see this at the expo! The purple color looks especially cool. Great work!
I love the 1960s vision of space aesthetic as well; I have all the visions of space posters from NASA printed and in a 3 x 3 pattern on my wall. I am curious if your current room follows that aesthetic and how the design of the lamp integrated into it? Or, have you been inspired to fill your space with more of the similar aesthetic following the developmet of this piece?
Thanks!