
Timeline
When I was first beginning this project, I had created a Gantt Chart that outlined all of my tasks and was supposed to help me follow a certain process to ensure I stay on schedule. However, not too surprisingly- my plans were altered as I started in the woodshop and received advice/guidance that impacted how I approached fabrication. Although fabrication took a lot longer than initially anticipated, I was thankfully still able to finish on time! I do greatly appreciate all of the help I received from the staff in the Idea Forge’s woodshop. I believe that my product turned out better than it would have if I alone tackled the project without support from staff who knew what they were doing (whereas I was tackling a very new area with very limited skills).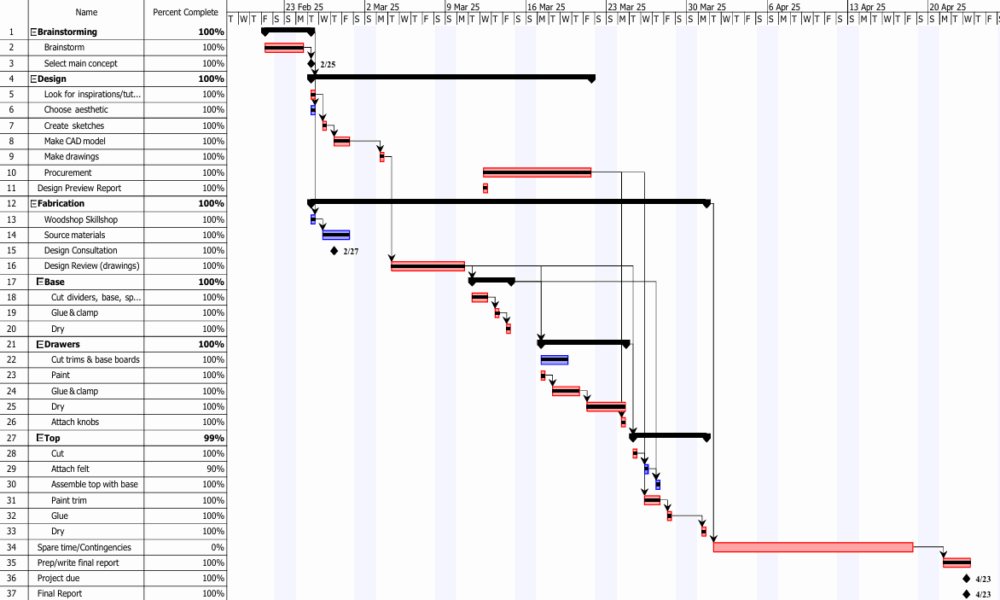
My Gantt Chart, although helpful in serving as a checklist of sorts, ended up being replaced with a different procedure once I actually got into the woodshop. Thus, I believe a better representation for my process is the timeline graphic I created that gives a rather general breakdown of my process. 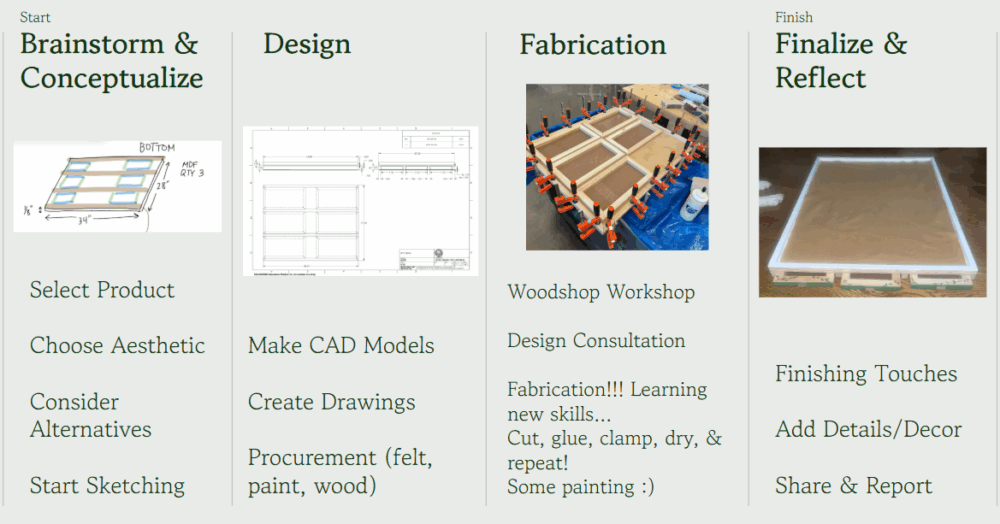
Fabrication Process
My fabrication process can best be summarized in the following steps:
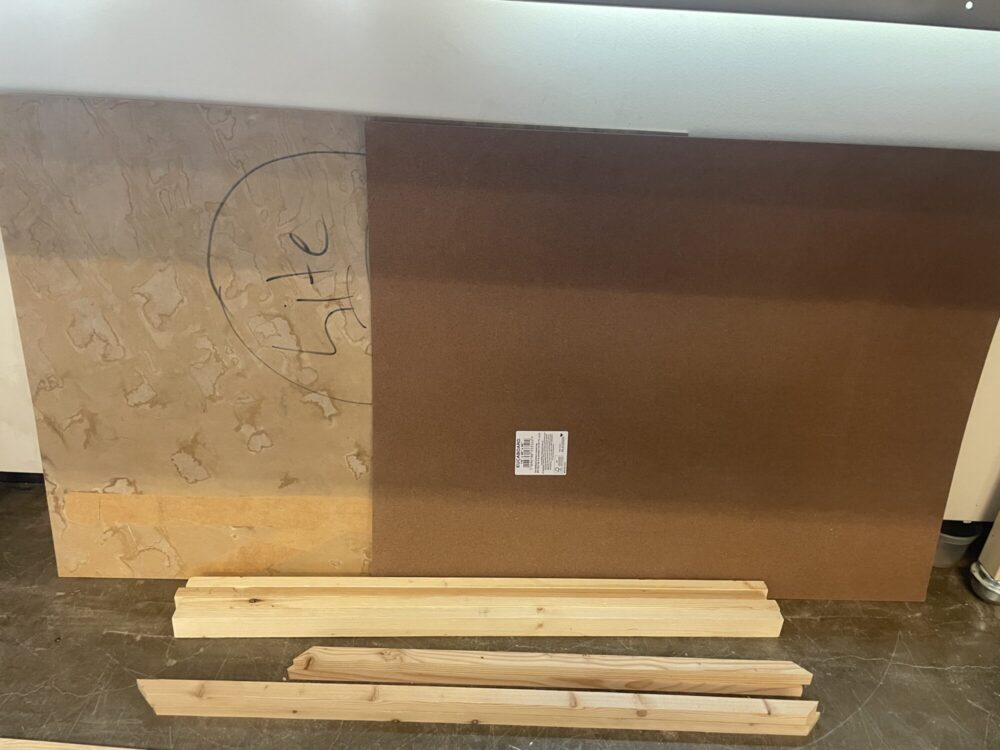
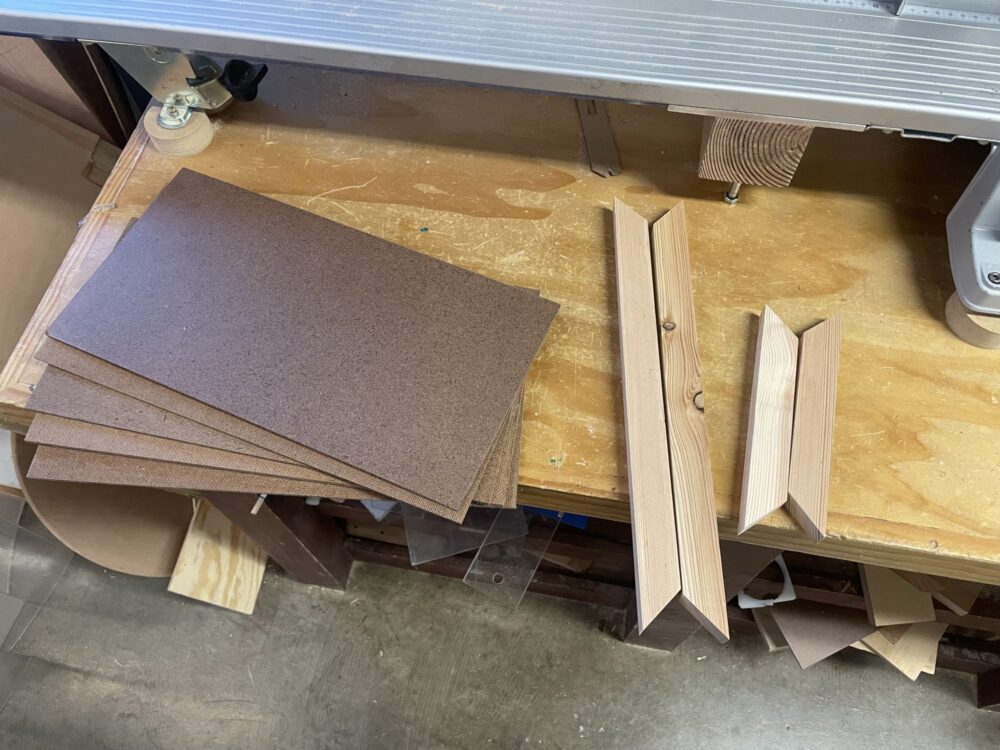
- Cut all of my wood pieces (top & bottom boards, drawer trims, etc.). I was very lucky that the woodshop had some older wood available to students that I got to rummage through for my project… because of this, I was able to find all of the wood I needed for this project in the shop as opposed to purchasing from the store. That being said, since I was using some older wood, not all pieces were in the best condition… so I ended up using a couple less than ideal pieces (twisted) which did create some hardships farther down the fabrication process. However, for the most part, all of the wood I got worked out just as I needed it to! Originally, I was going to approach this project in sections- work on the base, then the drawers, then the top. However, it was recommended to me that I rearrange my steps and instead focus on tasks- cutting, gluing, etc.- rather than the sections themselves. Thus, I cut all of my pieces at once so that the likelihood of dimension discrepanices was lower. I cut the two large boards (the top and bottom), the top trims (short and long), the bottom rails, the drawer trims (short and long), and the drawer bases to the proper length. The only pieces I waited to cut were the drawer spacers since I wanted to check the drawer fits between the rails first… so the spacers were the only piece cut towards the end of the process. Certain pieces (the top trims and drawer trims) also required 45 degree angled cuts on the ends to create neater corner joints, so these cuts were made after the others. For these cuts, the table saw and miter saw were used.
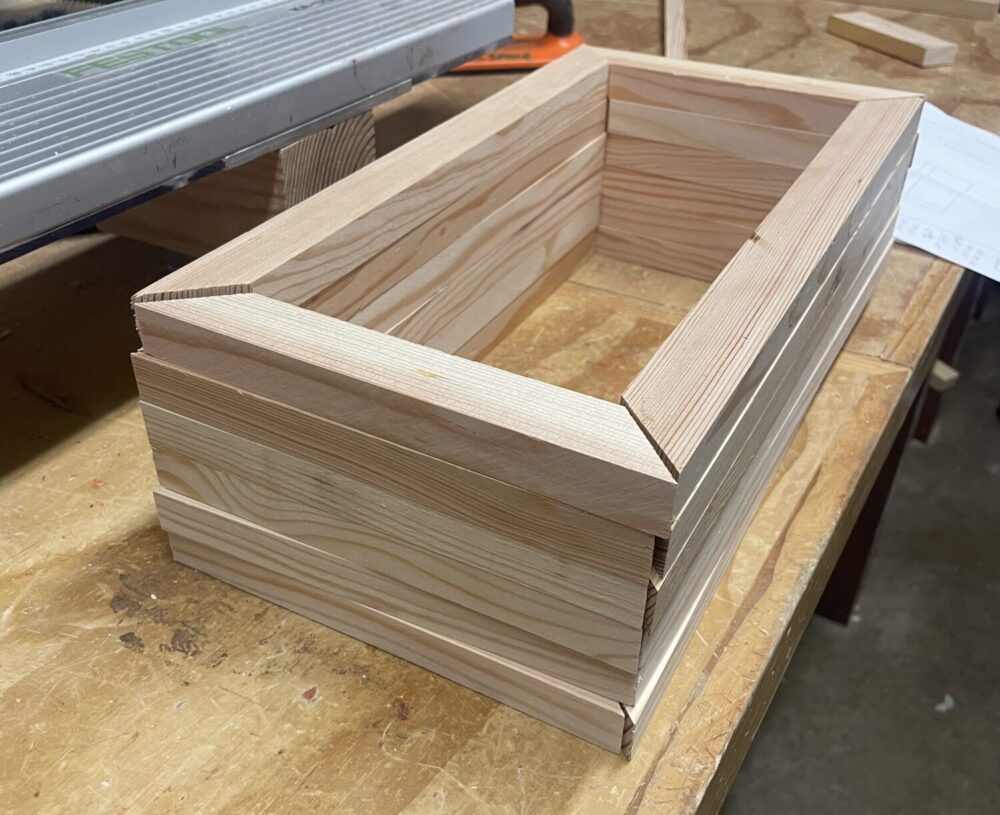
- Assembled & trimmed drawers (trims, bases). Once all my pieces were cut, I started focusing on making the drawers. I had 6 in total to make. Since these were the first pieces I was gluing and clamping, my first few showed signs of inexperience (trim not perfectly aligned or corners askew). However, it was with the drawers that I better learned some tips and tricks for how to get the best gluing and clamping results. I would position my drawer trims on the drawer base, get them set how I wanted them to be, clamp the trim to the base, and then take the clamps for one piece of trim at a time. This allowed me to apply glue to only one piece of wood and place it back into position without the other pieces moving (since they were still clamped). I would then re-clamp the piece with glue and repeat this glue-and-clamp process with the other trim pieces. Depending on if the trim pieces were making adequate contact in the corners or not, I sometimes tied tire tubes around the clamps to add some tension (which would help achieve better contact in the corners). By the 3rd drawer, I felt like I was getting significantly better gluing results than my 1st or 2nd drawers. So, some learning was definitely involved and you could tell if I was taking my time or rushing… since the drawers looked WAY better if I was patient during the glue-up. With the set up for assmebling the drawers, I could only do a few at once and had to leave them to dry overnight… so the drawers took a couple of days to completely assemble.
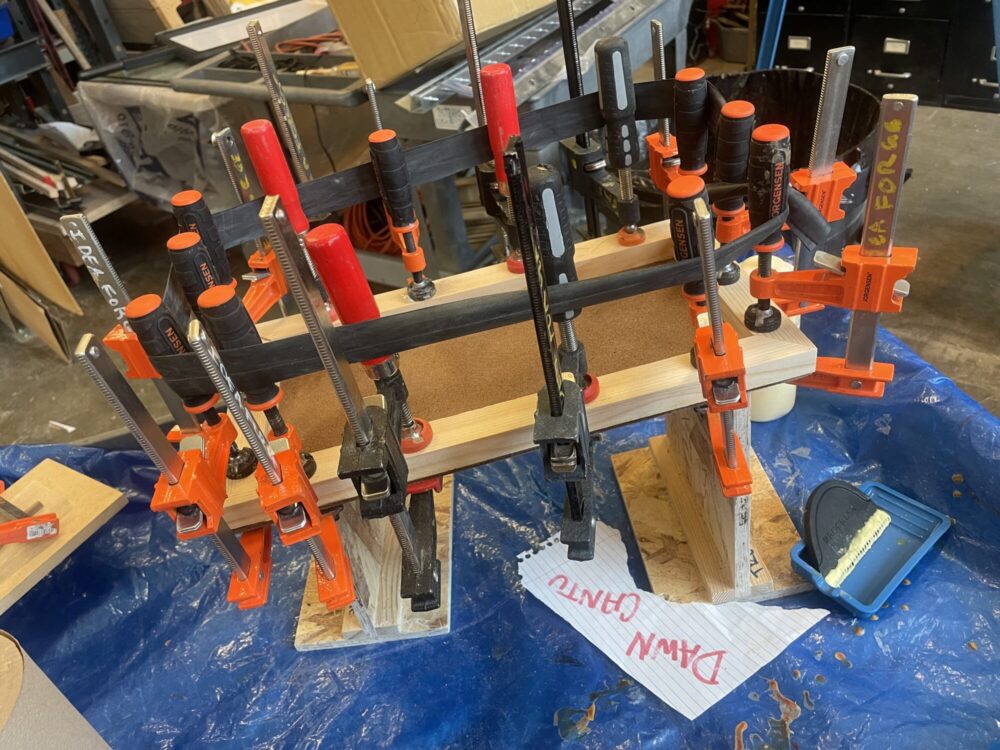
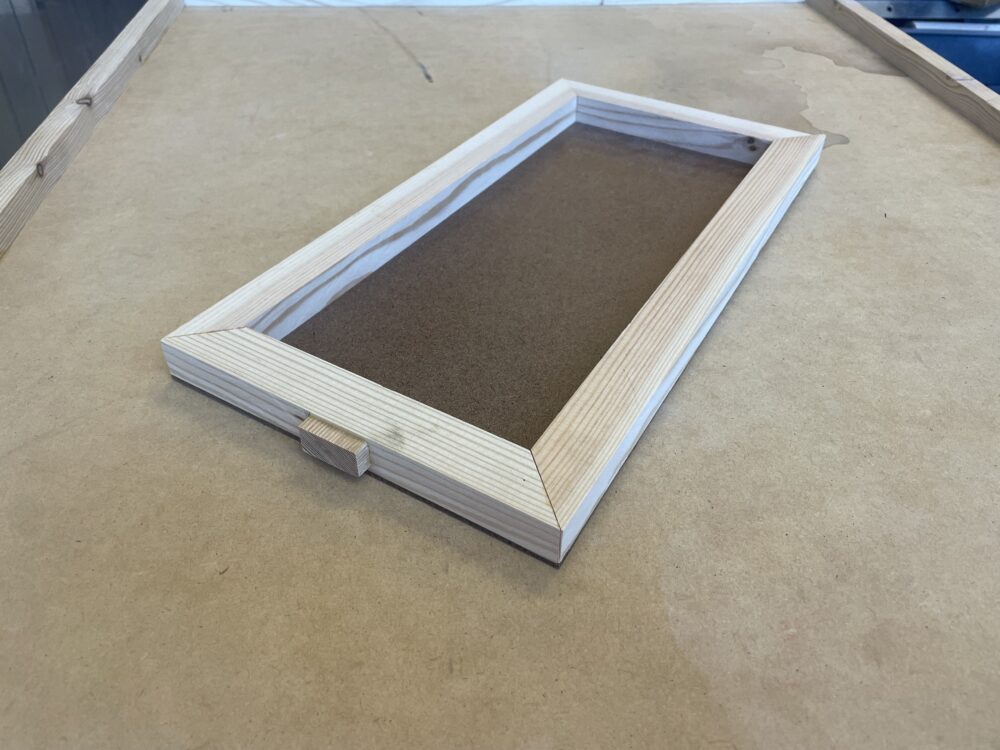
- Assembled top piece (trims, board). Similar to the drawers, I had to assemble to top piece via glue and clamps. The top piece was composed of the thicker piece of hardwood and the 4 pieces of top trims. I got the trims positioned on the top board, clamped, and then started the gluing process. I glued each piece individually like I did with the drawers. As the top piece was significantly larger than the drawers, A LOT of clamps were used. Unfortunately, the trims did slightly get offset which led to more work being required down the road to clean up this piece and correct the mistake (was corrected mainly through sanding and trimming during clean-up).
- Cut & glued wooden “handles” on to drawers. I was initially going to buy knobs and fasten them to the drawers, but later decided I wanted to consider other minimalist handle inspirations. As I was working in the woodshop, I came across a piece of wood that I thought would work great for the drawer handles. It was slightly darker than the rest of the wood I was working with for the drawers and it had a beautiful cross-sectional grain pattern! I figured it would contrast the drawers nicely and further emphasize the organic minimalist look I was going for. So I cut small rectangular pieces on the miter saw, glued them to the drawers, added a clamp, then allowed them to dry.
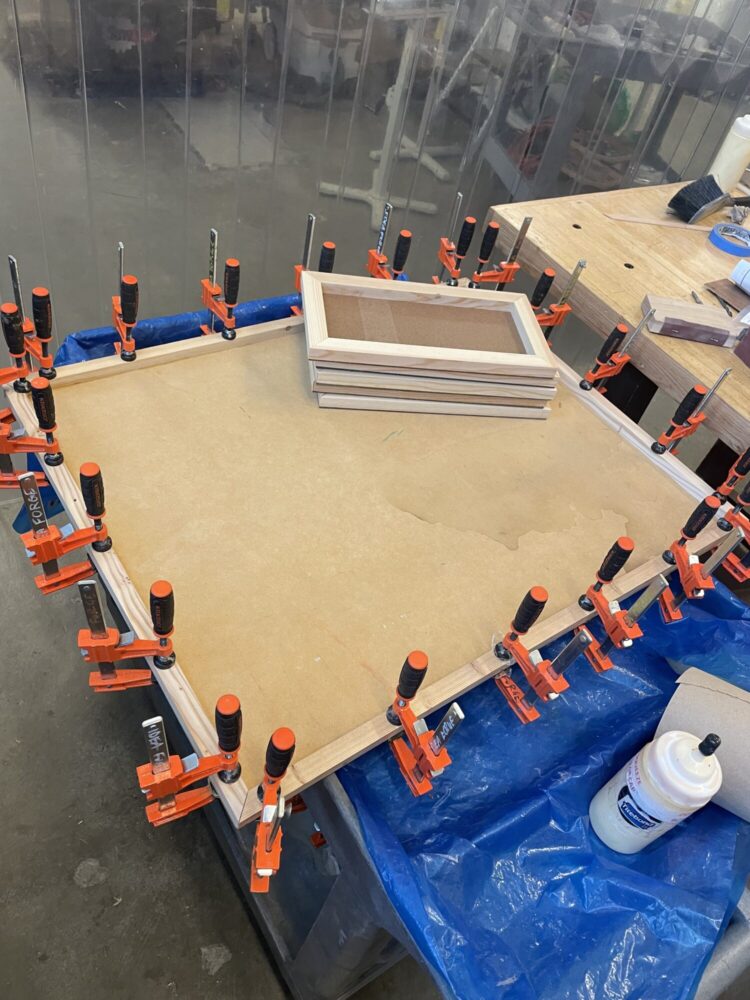
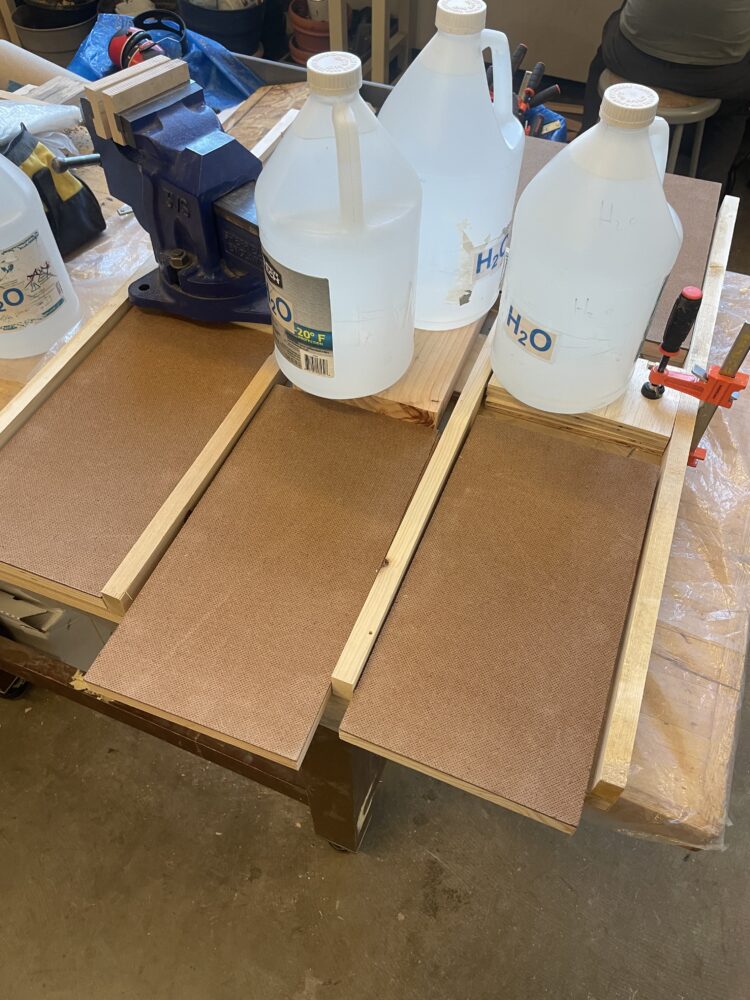
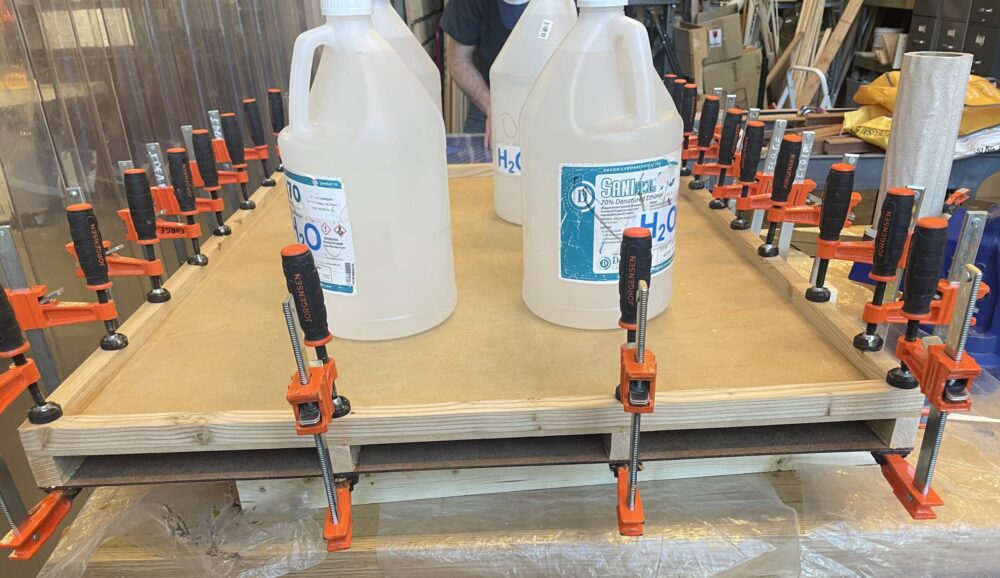
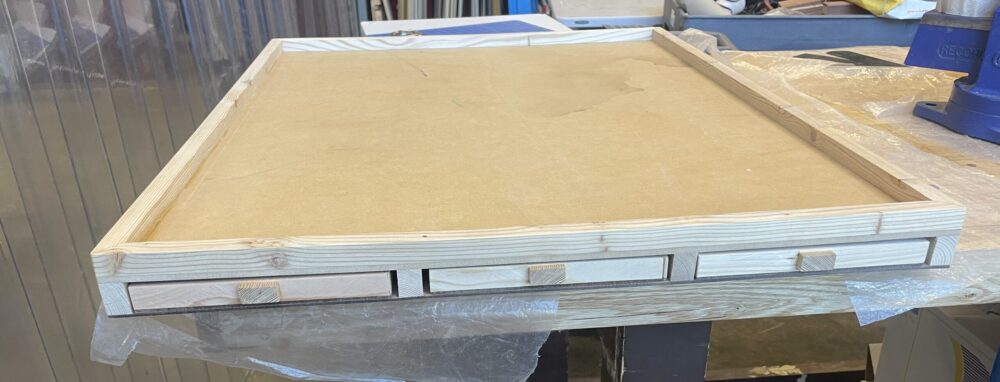
- Glued bottom rails on to bottom of top piece. With the top trim glued on to the top board, I decided to flip that board over and glue the bottom rails directly on to the bottom of the top board. I used the assembled drawers to ensure proper distancing between the rails so that the drawers could slide in. Similar to the other glue ups, I got the rails where I wanted them and clamped them in place. I glued and clamped the outer rails first and then tackled the 2 middle rails. Since the top board was slightly concaved (not flat), there wasn’t the best contact between the center rails and the top board. The staff helped me get creative during the “clamping” process for the center rails by using spare pieces of wood, gallon containers of water, a vice, and some clamps. It was during this process that I measured out and cut the drawer spacers. I left the 4 rails to dry over night.
- Glued in drawer spacers. These spacers are to keep the drawers from sliding too far into the puzzle holder and help position them. Like the bottom rails, gluing required some creativity. After applying glue to each of the three spacers, spare wood, gallon water bottles, a vice, and clamps were again used to apply force during the drying process. I had to wait for the rails to be properly glued before I could add the drawer spacers due to space limitations with the gallon containers and vice.
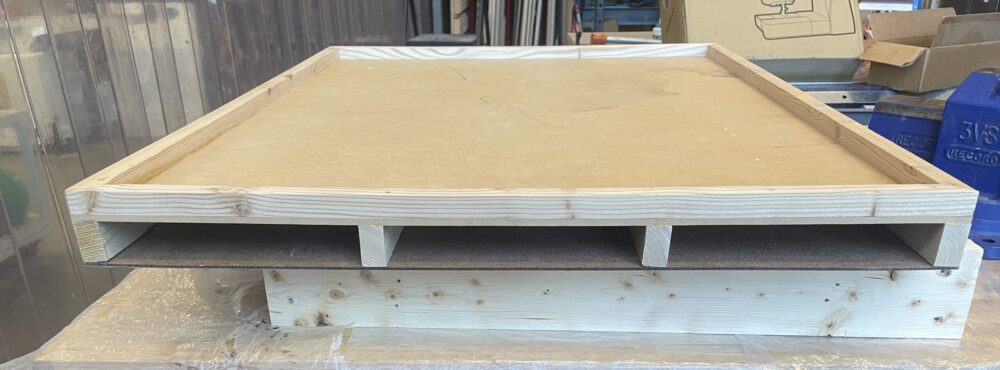
- Glued bottom board on to bottom rails. With the spacers and bottom rails glued, all that was left to add was the bottom board. The entire top piece (and bottom rails) were flipped upside down so that glue could be applied to the rails and then the board could be pressed on to the rails. Clamps were put into position and then the entire assembly was flipped over once again so that the entire weight of the product was on the bottom board. Additional weight was added on top via gallon water bottles and a vice. The glue was left to dry overnight.
- Cleaned up holder (sanding, trimming). Since there was glue that had seeped over the edges and dried, along with some edges that were not perfectly aligned during the clamping process, some trimming took place to clean up the puzzle holder. The drawers were also trimmed for neatness. Some sanding was also used to try and make the puzzle holder more comfortable (avoid splinters and add slight chamfers to the edges so they were not as sharp). THIS STEP WAS KEY! I was initially not going to do this since I was trying to finish the project asap and did not account for these steps, but I am so glad the woodshop staff encouraged me to trim and sand- it made all the difference! The puzzle holder ended up looking gorgeous! The surfaces were flat and smooth, no glue was visible, and the wood felt nicer to touch.
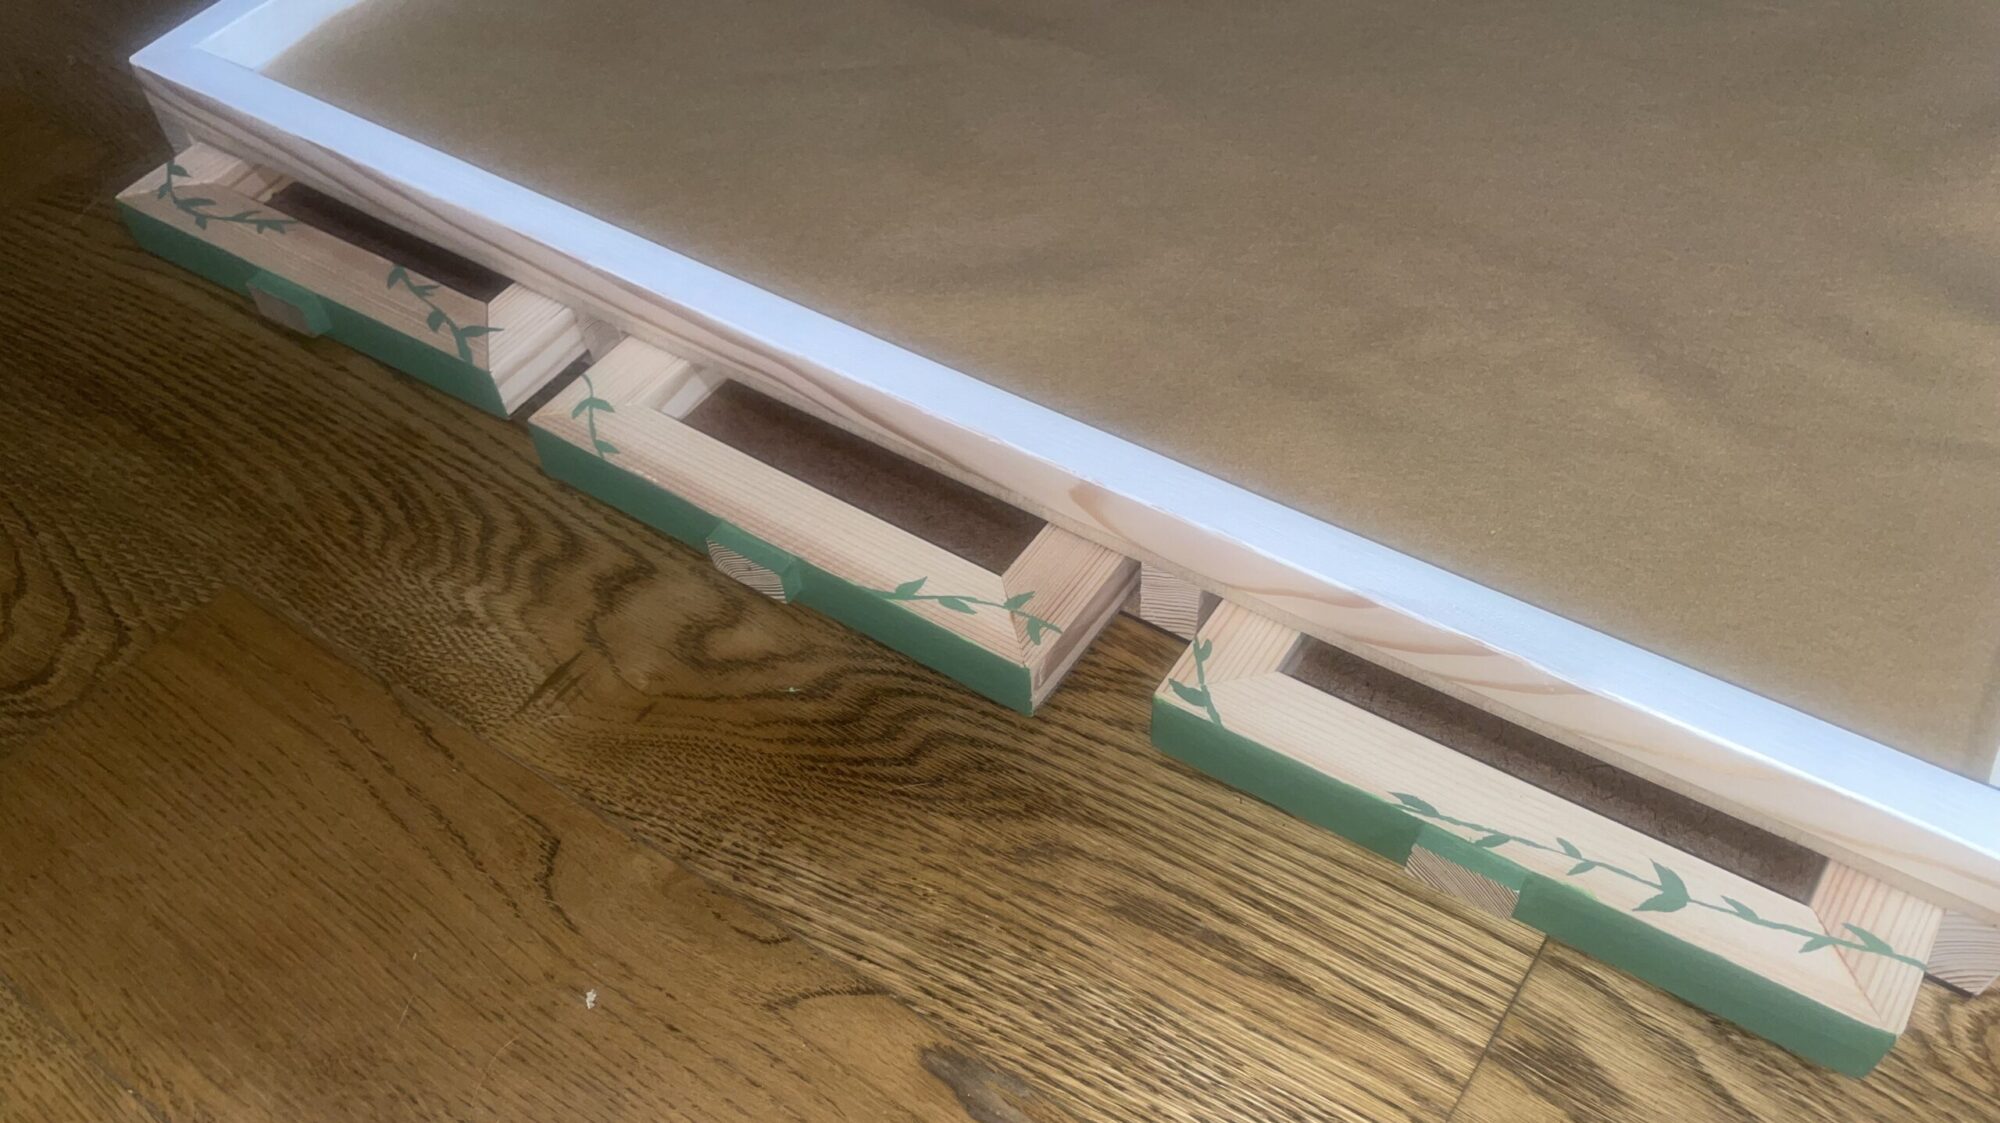
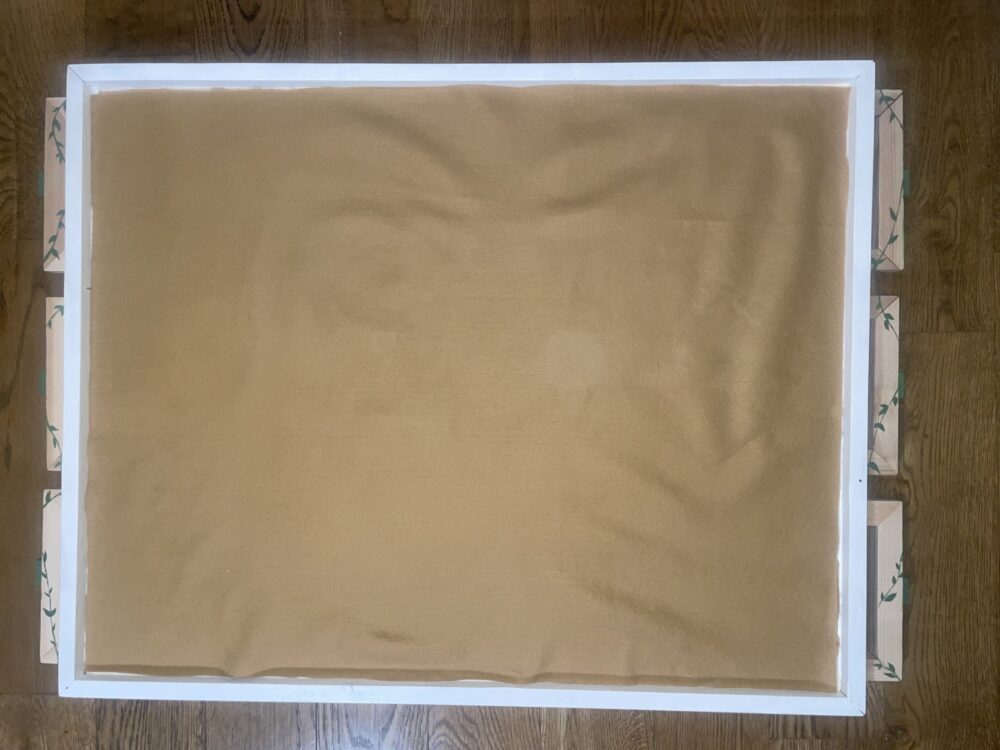
- Painted top trim, drawers & added decor. Once I got the puzzle holder out of the woodshop and back to my apartment it was time to really drive home the aesthetic I was going for with some painting! I got some paint (and a brush) from Art Parts. All I needed was white, green, and black (the black was used to create a different shade of green). I started by painting the top trim white (since white would require the most layers). I decided to paint only the top and inner surfaces of the top trim as opposed to all of the surfaces since I really liked how the outer face of the puzzle holder looked (it neatly showed all three different woods used during fabrication). I then painted the drawer faces and the sides of the drawer knobs. I experimented with different shades of green until I found one I really liked. Once all of that dried, I decided to paint some vines on the drawers since I had some spare time. I am so glad I added these vines!!! They really were the cherry on top and tied this whole project and its aesthetic together. Painting only took me a couple days since the acrylic paint dried fast.

- Added felt. The pictures shown were prior to the felt being properly secured on to the board (so the felt is just laid on top). I eventually got velco and put a piece in each corner.
Conclusion
I have already mentioned some of the changes I have made along the way, but to reiterate, the main changes ended up being: I only painted the top/inner surfaces of the trim as opposed to all the surfaces, I added some plant decor on the drawers, and I made the drawer handles instead of buying them. The overall fabrication process changed in regard to the steps I took to complete the project, but the final product still came out as initially designed! I successfully ended up with a puzzle holder with 6 drawers that can be easily pulled out and put back in. I also kept all of the colors the same as planned (both painting and felt). So I want to say even though there were some alterations, my planning went well and as expected (for the most part).

As for what I would have done differently, there are various things… I wish I would have incorporated some type of handle on the side that could have both assisted the function and form. I could have painted it green and it would have added a pop of color on the side that has none… plus it would have made the holder easier to handle. I also wish I would have better adhered the top felt. However, I ended up going with velcro since I wanted the felt to be removeable for cleaning/shaking off. So maybe I could have thought of other ideas around that… or even choose to paint the surface tan instead since it was sanded and relatively smooth. I also think I could have explored more in regard to decor and colors. Maybe I could have added more shades of green for more contrast/details… or painted vines on other surfaces as well (so that they are visible beyond just the drawers). I think I could have improved how I painted the handles… but due to the paintbrushes I was using, it was hard to paint small surfaces without the paint getting on the other surfaces, so if I redid the painting, I think it would have been neat to have the handle be a different shade of green or white. However, even with these considerations, I am still very pleased with how it turned out!! 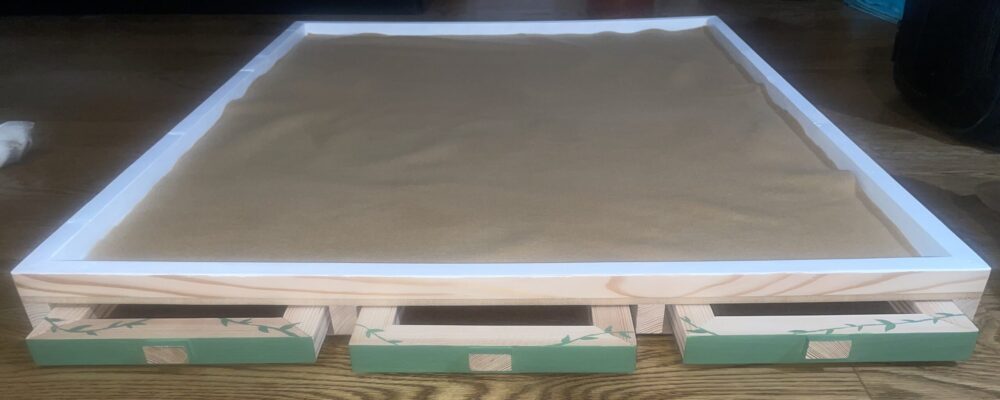
As for what is to come for my product, it’s quite simple- TIME TO START PUZZLING! Thankfully my product is something that can actively be used by me (hopefully for a long while). I assume that if the glue doesn’t hold up too long I can always go in and use some nails to better secure the pieces together… I just hope I can put it to good use! I plan on starting to use it right away!
6 Comments. Leave new
Great work! I’m glad to see this project worked well for you, and you ended up with something you’re excited to use and keep for a long while. You said you wanted to make a few changes like handles on the sides; do you think you’ll go through with them in the future? Also, has this first woodworking experience garnered any desire to do more projects down the road?
I appreciate the positive feedback! I cannot say for sure if I will go through with the handles quite yet… I anticipate trying to use the puzzle holder for some time and seeing if the lack of handles does become a frustration. If it’s not an inconvenience, then I may not add handles! And I thought it was fun to try out a new skill set! I think this project has definitely made me consider taking other woodworking projects in the future (I even spotted a nice little table tutorial already, which could be neat to try).
Your puzzle holder turned out beautifully, and I love how the organic minimalist aesthetic shines through in both form and function. The way you adapted your fabrication process based on hands-on experience shows great flexibility and craftsmanship! The painted vine details are such a thoughtful touch, adding personality and making the final piece feel even more cohesive.
Thank you!! I was worried the vines may stray away from the minimalism concept, but since it was Organic Minimalism I was going for, I felt like they would really tie it together. Appreciate hearing some positive feedback on those vines!
Hey, very cool project and such a useful thing! I am really impressed with how much the final design matched your initial sketches. Did you have any desire to make changes or had you thought through the original design well enough that changes were not necessary?
Thank you! I really tried to stick to my vision since I didn’t want to overcomplicate a minimalist project! Technically the vines are slight changes from what I initially sketched, but I do think that was a necessary change to truly capture my aesthetic! I wanted my aesthetic to really be seen through the material, so I went in knowing I didn’t want to touch the wood too much!