
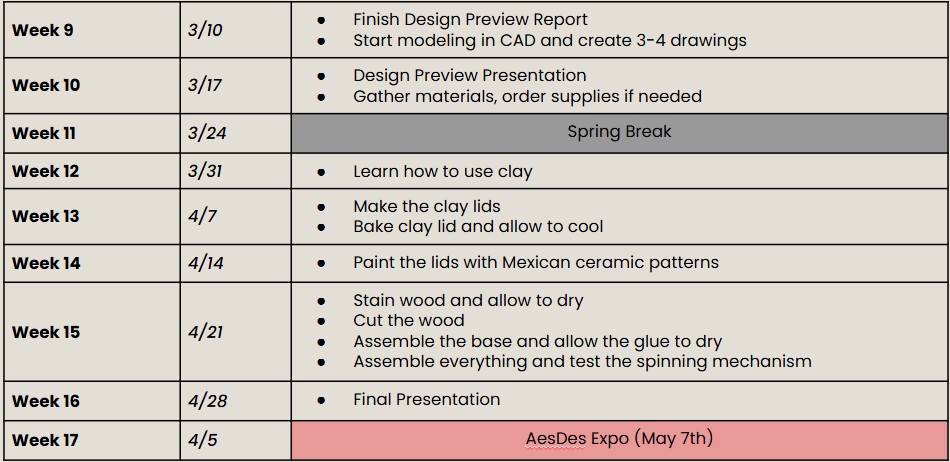
For my final project, I made a spice spinner for my mom. It was inspired by traditional Mexican ceramics and I wanted it to have a rustic but clean feel. I made this project using common boards, clay, paint, and a lazy Susan bearing. My timeline was flexible because there were a lot of steps where I had to wait and let things dry or cure. I planned the project by breaking it down into two phases. One phase was making the clay lids, and the other phase was building the wooden base. Here is the timeline I followed to make sure my project was done before my final presentation.
Materials I used:
- Common Boards (Home Depot)
- 24 small spice containers (Amazon)
- 6’’ Lazy Susan bearing (Amazon)
- Sculpey polymer clay (Michaels)
- Acrylic Paint (Already had)
- Water Resistant Mod Podge (Already had)
I did not make an initial hand sketch for this project. I did create a full CAD model showing the layout of the base, top piece, panels, and the bearing placement. During the design process, I decided to change from 16 jars to 12 jars, with 3 jars on each panel. I also made a last-minute decision to stain the wood after finding a good color at the store. For the painting, I only used white paint to keep the design simple and clean.
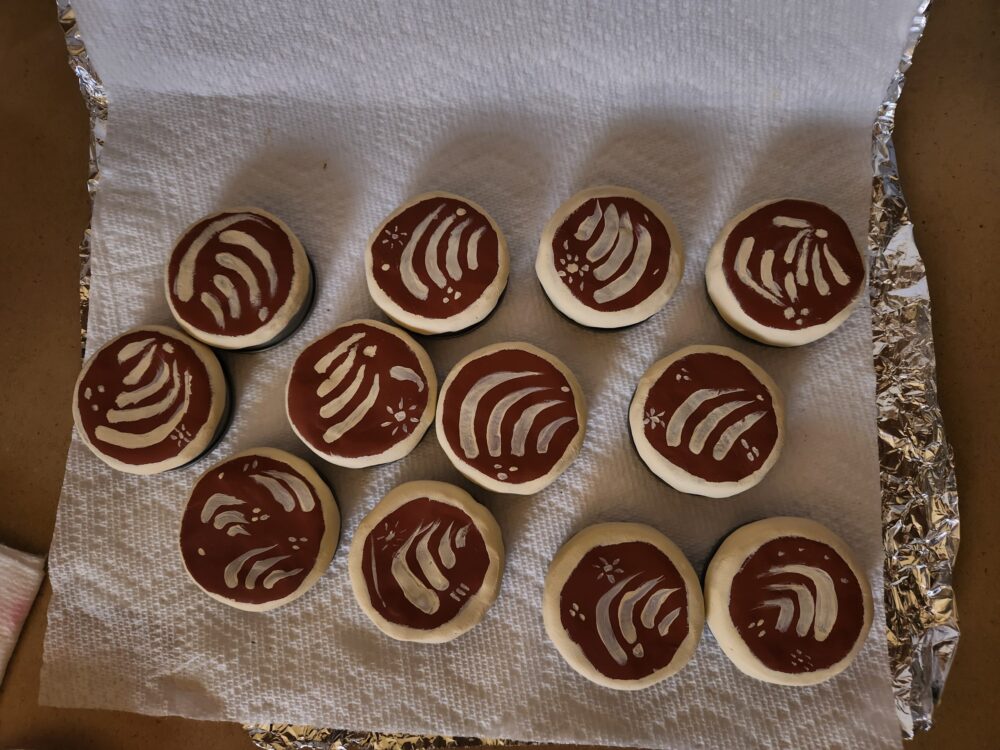
The process was simpler than I thought it would be. I thought it would take a lot longer because I was not very confident using power tools. Luckily, I got help and guidance along the way. I first started with the clay lids. Whenever I had free time, I would sit down and either mold clay onto the lids or paint some lids. Switching from air-dry clay to polymer clay made the process faster because the polymer clay cured in the oven in just 15 minutes.
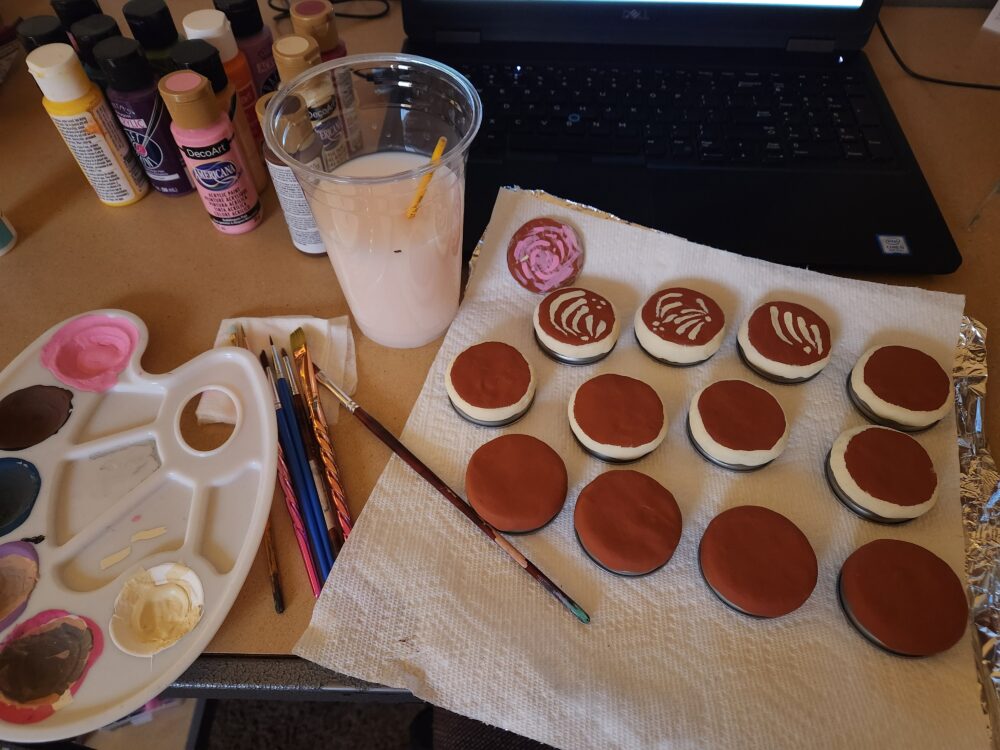
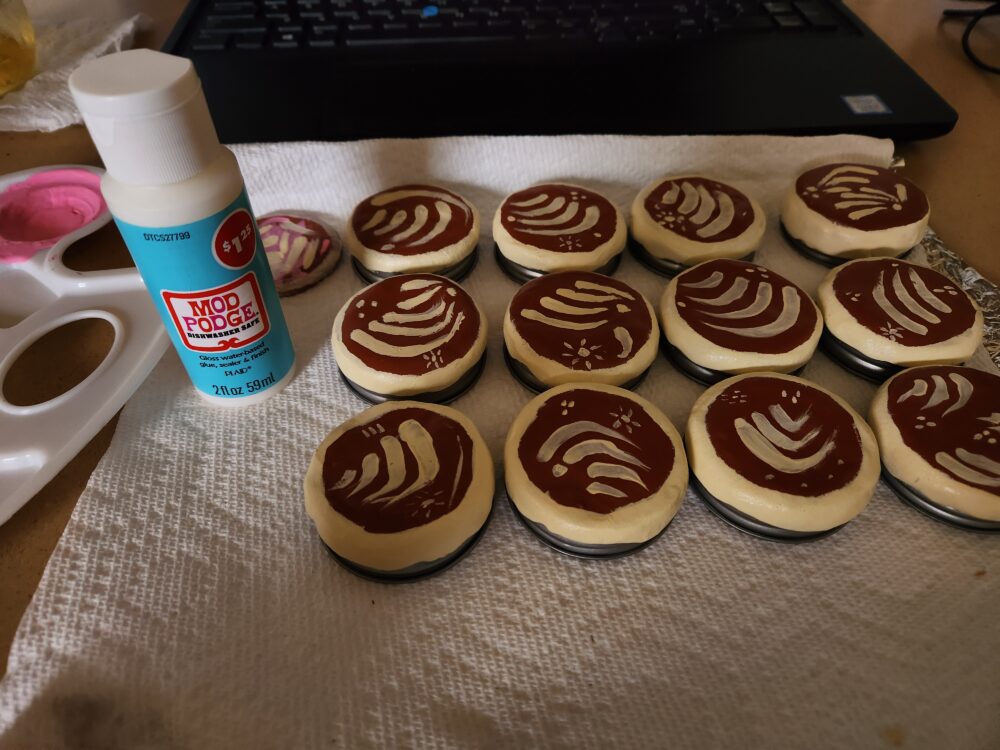
I molded the clay directly onto the metal lids. After baking, the clay stayed securely on the lids without needing extra adhesive. Baking the clay took about a day or two because I had to bake in small batches. After the lids were baked, I moved on to painting them. Painting took a lot longer because I did three coats of white paint to make sure the color looked clean and saturated. After painting, I let everything dry fully and then applied two coats of water-resistant Mod Podge to seal the paint. I had to wait about two hours between each coat of Mod Podge.
Once the lids were done, I moved on to making the wooden base. The base is made up of seven pieces of wood. There are two bottom pieces where the bearing is fastened, four panels to hold the jars, and one top piece. I bought two common boards from Home Depot, one that was 4 inches wide and one that was 10 inches wide. I used the 4-inch board for the panels and the 10-inch board for the top and bottom pieces.
I cut all the wood pieces and sanded them using the equipment at the ITLL. I sanded them so that the surfaces were smooth and that all the panels were even in size. After sanding, I stained the wood. I messed up the first time I used the stain because I did not wipe it off properly. Some sides of the wood came out darker than others. But when I stained the other sides, I wiped off the excess stain and the wood looked much better. It was a learning process and a lot of trial and error.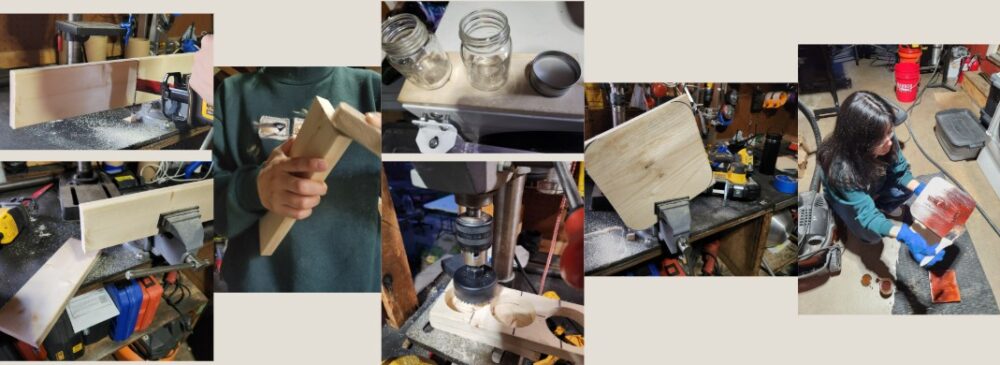
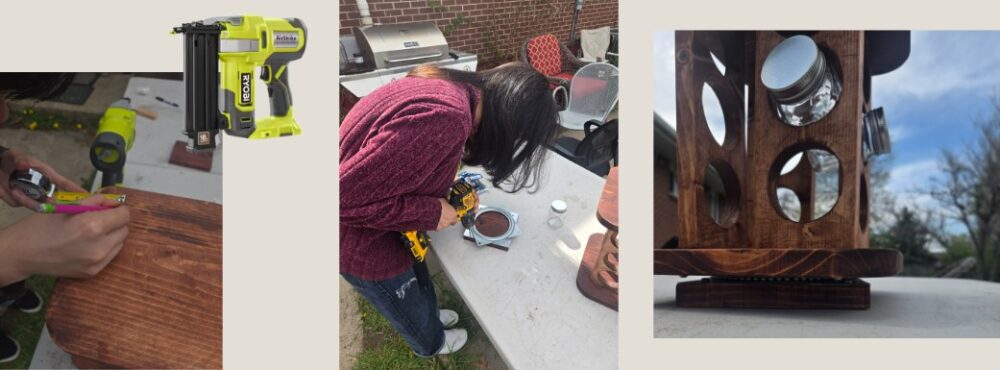
After the stain dried, I started assembling the spinner. I placed the panels in their spots by eyeballing where they would fit best. I made sure the jars could fit tightly between each panel without falling through. Once I was happy with the layout, I glued the panels to the bottom base. After letting the glue sit for a bit, I secured everything with a nail gun. I did the same for the top piece, gluing it and then securing it with nails.
After the frame was built, I attached the lazy Susan bearing. First, I screwed the bearing onto the smaller base piece. Then I attached it to the full structure using four more screws. Assembling the wood pieces took about an hour, much quicker than I expected.
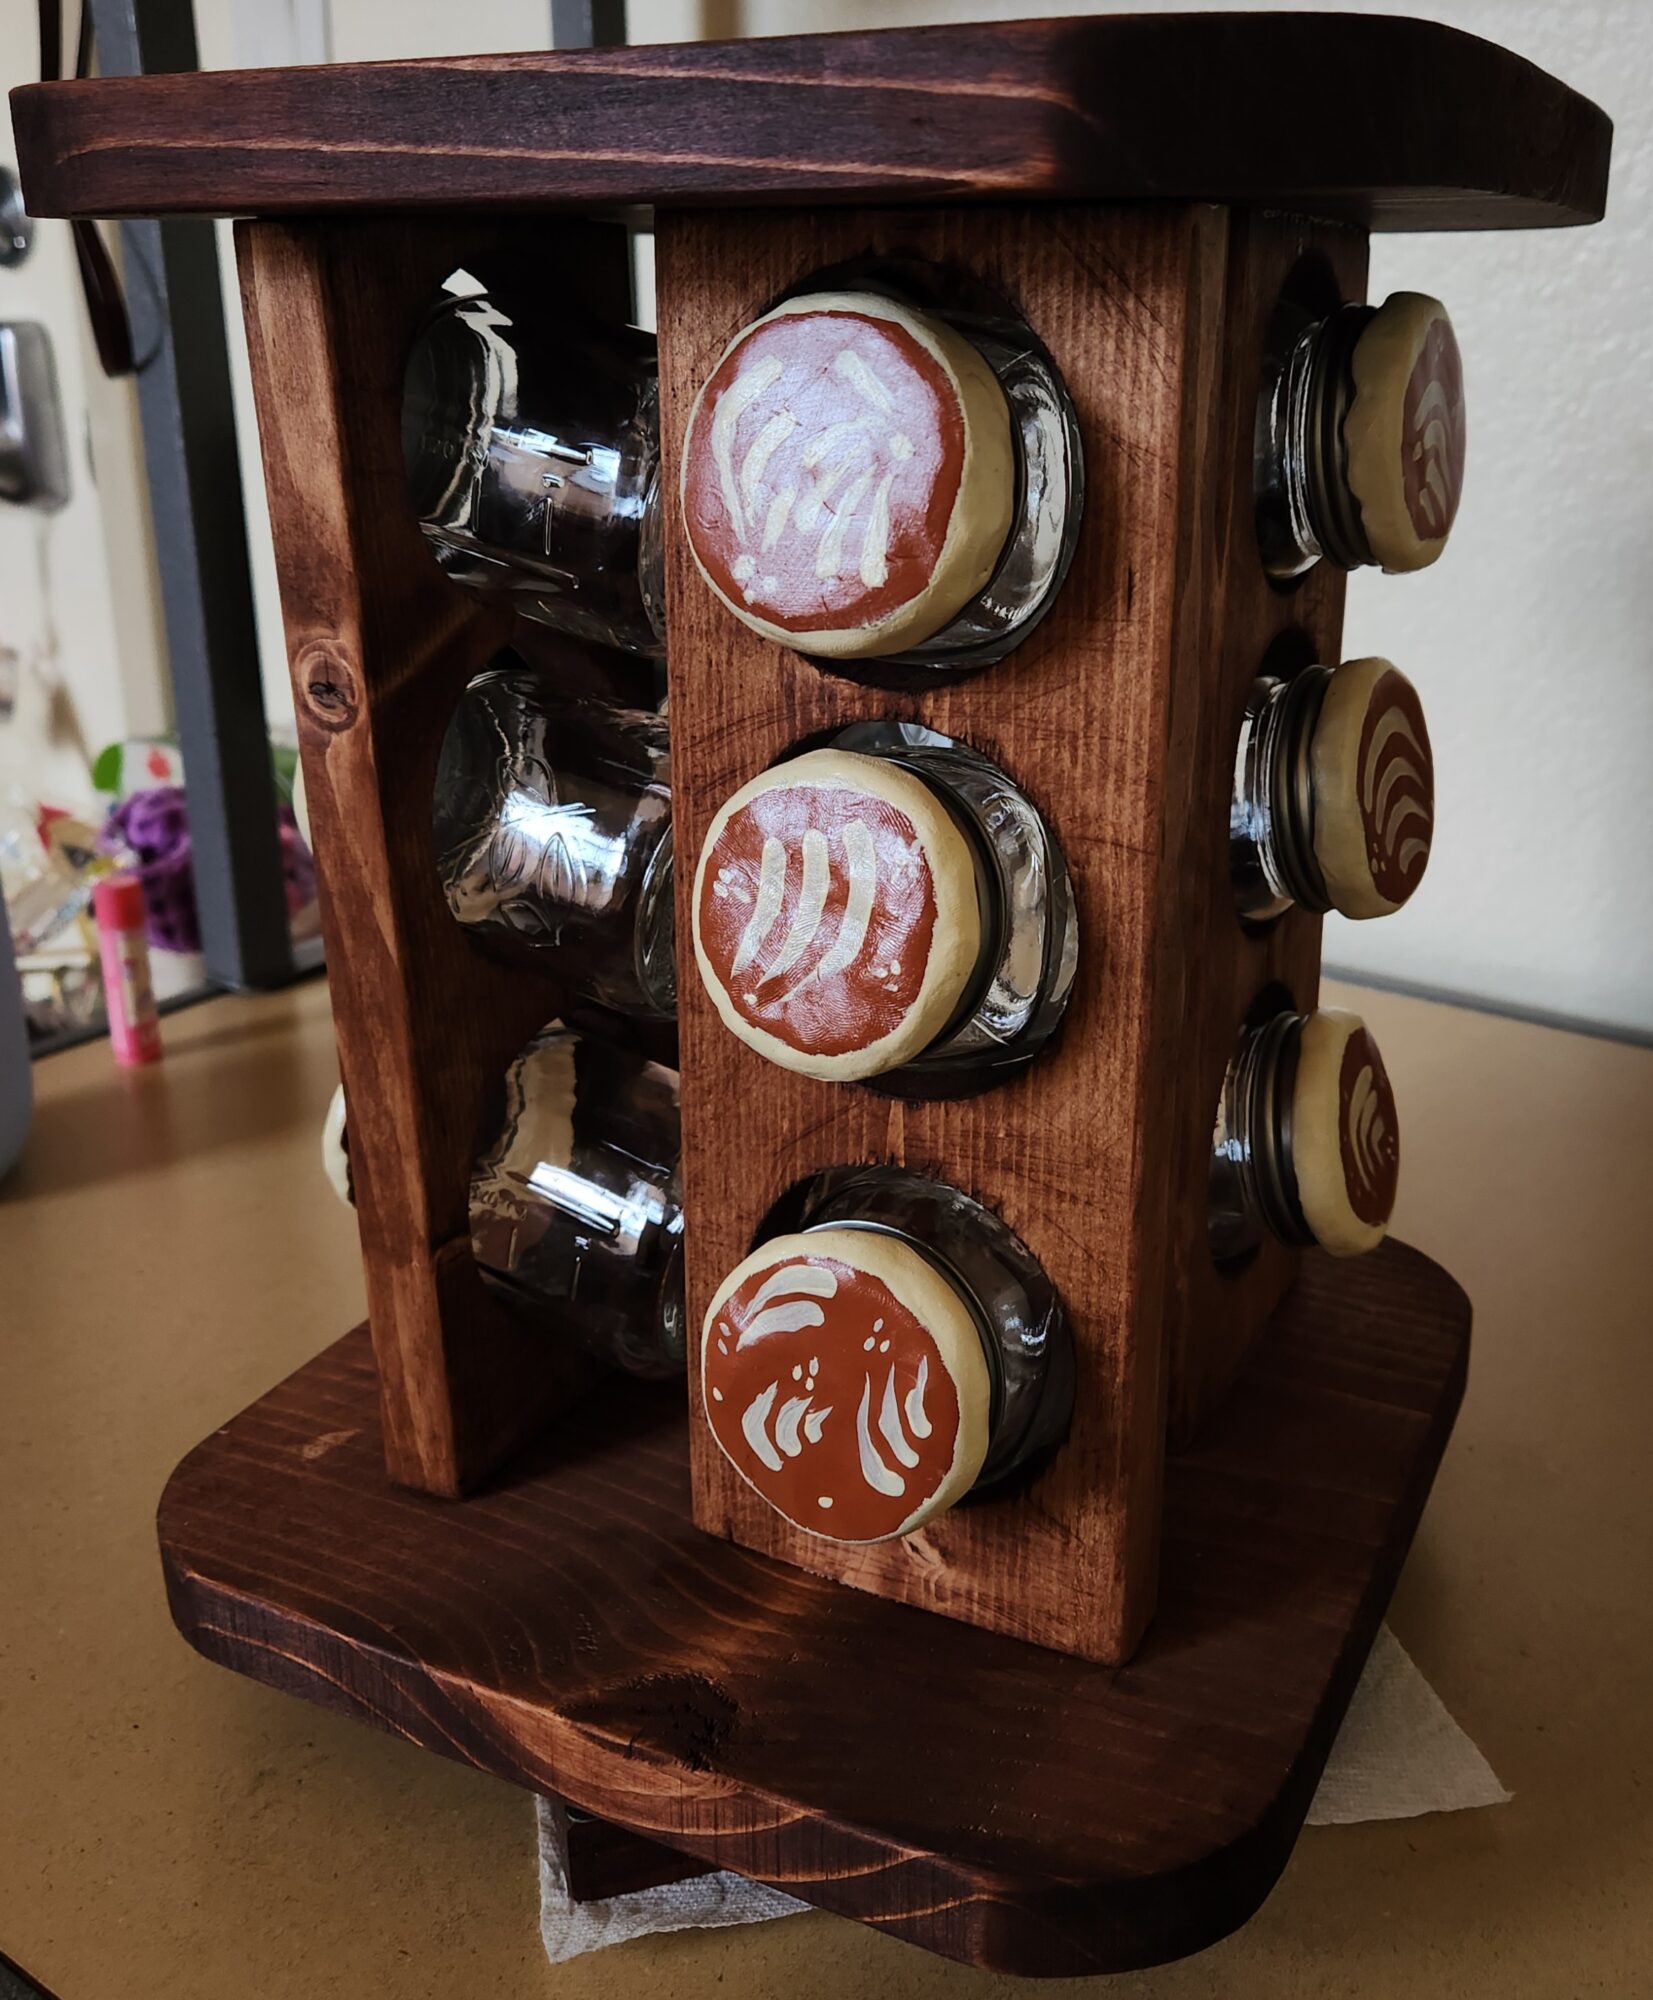
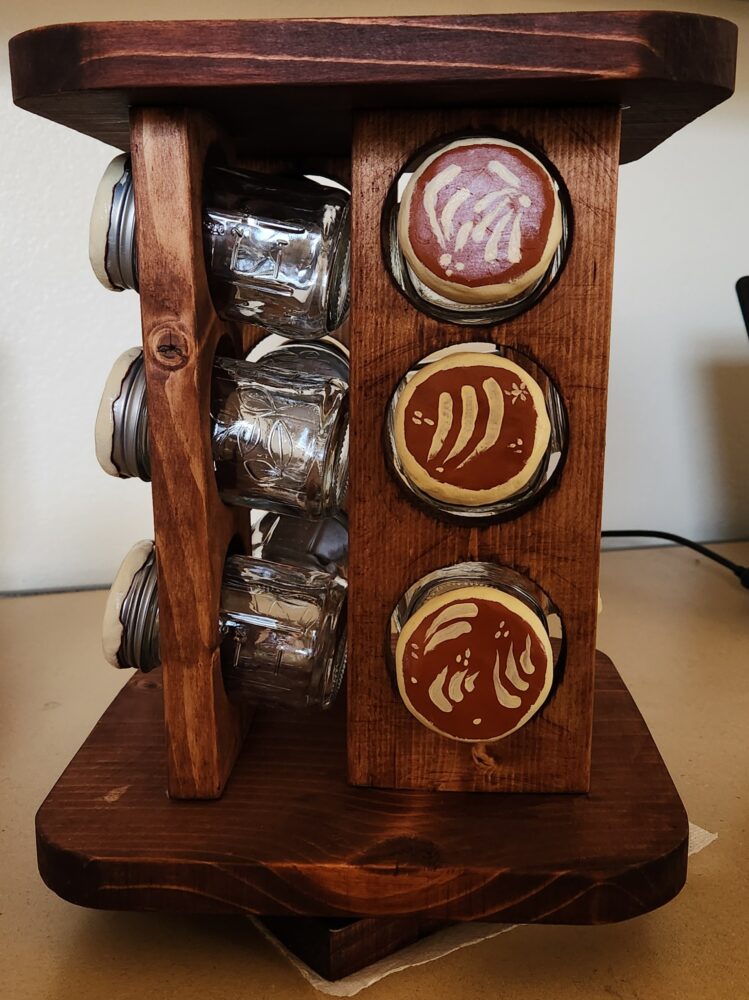
When everything was assembled, I tested the bearing. It spun really smoothly which made me very happy. Then I placed all the completed jars onto the spinner to check the final look. The simple white painted lids popped out nicely against the rich brown wood stain. The spinner felt warm, rustic, and clean, just like I had hoped.
In conclusion, my project stayed very close to what I originally planned. I did make some changes, like using polymer clay instead of air-dry clay, staining the wood, and reducing the number of jars. But these changes helped improve the final look and made the project come together better. If I could change anything, I would probably spend more time practicing wood staining before applying it to my final pieces. I wish I had gotten the stain more even from the start. I also would have liked to practice more detailed painting techniques, but I am still happy with the simple look I achieved.
This spinner was made for my mom and I am really excited to give it to her. I hope she puts it in her kitchen and uses it every day. I also learned a lot of new skills like woodworking, using a nail gun, painting on clay, and working with different materials. I am proud of how it turned out and I am happy I stayed true to my aesthetic.

2 Comments. Leave new
Hey Ariana,
Its very sweet that you’ve found a purpose for this project as a gift for your mom. I’m sure she’ll love it! I particularly liked the aesthetic of the clay lids which definitely fits the traditional Mexican appeal. I also liked the way the jar holding boards are slightly angular which gives them a more organic look. Nice project!
Very cool project, Ariana! Love the practicality and the simple, tasteful look that would fit seamlessly into any kitchen. Love the detail of adding the painted lids too. Are the designs purely artistic, or are they meant to tell certain spices apart? Great work, and great job stepping outside of your handiwork comfort zone!