
While the aesthetic direction of my retro-futuristic robot head can crusher was driven by mid-century sci-fi, the actual construction process was far more iterative, mechanical, and at times, experimental. In this second part of the report, I’ll walk through the real-world process of turning a sketch into a functional, wall-mounted robot. This post documents my timeline, the fabrication steps, the small (and large) design pivots, and reflections on what I learned and would do differently.
Timeline Overview
Here’s a rough breakdown of the phases in my process:
- Week 1: Research and gather inspiration, and create initial sketches.
- Week 2: Finalize design and begin CAD modeling.
- Week 3: Fabricate and assemble the crushing mechanism and test reliability.
- Week 4: Final assembly with the surrounding shell.
- Week 5: Final touches, documentation, and presentation preparation.
Design Process and Fabrication
From the start, I knew I didn’t want to reinvent the mechanical side of the crushing mechanism. After reviewing a variety of designs online with pneumatic arms, lever-driven systems, and servo presses, I realized none would be efficient or compact enough for a wall-mounted design. I settled on purchasing a prebuilt electric can crusher. This would allow me to focus purely on the outer casing, user interaction, and overall aesthetic while maintaining consistent crushing performance.
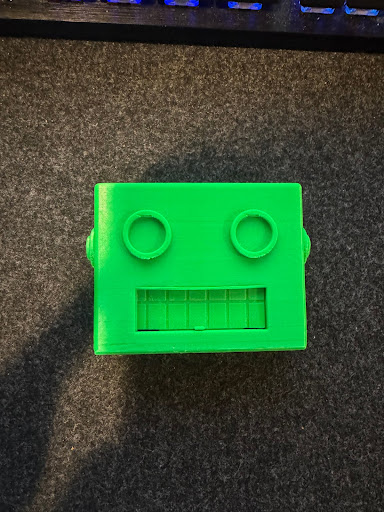
Once I had rough dimensions for the crusher, I began modeling the shell in SolidWorks. The overall shape was a squat, blocky head that could visually communicate weight and mechanical seriousness. The mouth geometry had to line up with the can output, and I needed a funnel slot at the top for inserting cans. The main design challenge was integrating more expressive facial geometry, like the brow ridge, cheeks, and antennae, with the strict functional requirements of fitting the crusher. I used extrudes, chamfers, and cut features to define bold edges and robotic elements. Once the overall form looked balanced, I began planning the internal channels and support walls for mounting.
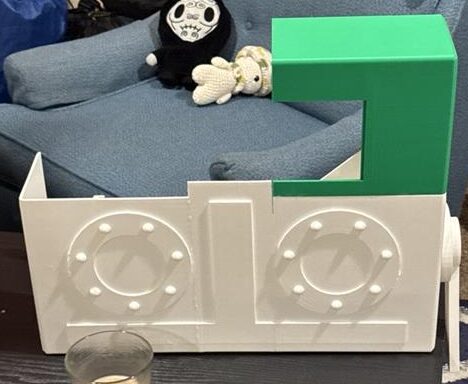
Before committing to a full-scale print, I exported and printed a small-scale prototype (~15% of the final size). The prototype helped me assess how cans would get expelled from the funnel system, as well as how the different parts would assemble. It also revealed some issues: certain walls were too thin, some curves didn’t translate well in 3D, and the funnel felt too sharp. I returned to CAD to refine things a bit before scaling up.
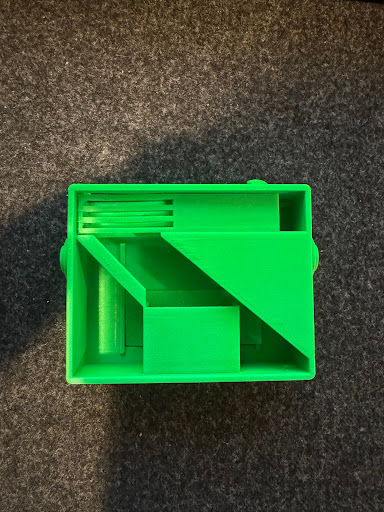
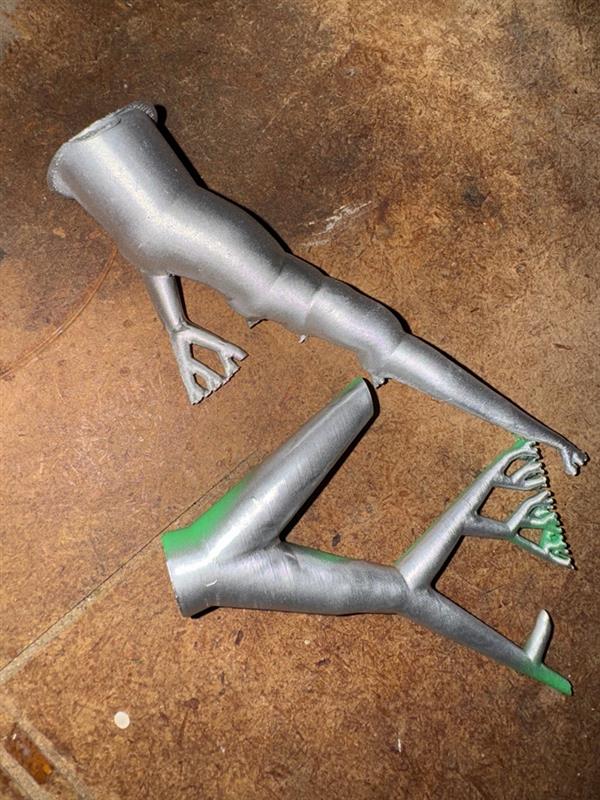
My printer has a limited build volume, so I split the final robot head into six interlocking pieces. I optimized print orientation for each piece to minimize supports and reduce post-processing time. The PLA prints took roughly 50–60 hours total, and I used standard 0.2mm layer height.

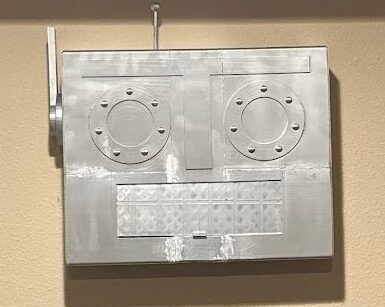
Post-print, I assembled all the pieces with super glue, which worked surprisingly well. There were some printing artifacts that caused some warping and didn’t allow some of the pieces to fully mesh together. To remedy this, I used some wood filler that I had lying around and applied it to these gaps. After letting that dry, I sanded down the wood filler, which was a noticeably different texture from the print lines. Also, due to budget constraints, I was forced to print in multiple different filament types and colors, and was left with a patchwork assembly with different colors. Before I went ahead and did this, I did some testing pieces with some support material to ensure that the paint didn’t look different from color to color. I chose an aluminum spray paint to match the retro-futuristic metallic look. After some testing and several light coats, I was pleased with the results and painted the final assembly. This step transformed the print from a plastic model into something visually closer to vintage sci-fi props. The paint also helped blend minor seams between the six components.
To mount the entire assembly, I simply used the built-in keyhole slots that are on the electric can crusher. I used a couple of screws and drywall adapters to attach the crusher to the wall, and since this is the heaviest part I can simply slide the rest of the shell over it. As mentioned before, the mouth area slides up and down to allow cans to exit easily without jamming or tipping. No internal lighting or electronics have been added yet, but I am open to incorporating some in the future.
Reflections and Lessons Learned
Looking back, one of the most successful aspects of this project was how well the modular CAD design worked. By splitting the robot head into six separate parts, I was able to print each component individually, which made the entire process much more manageable. It also gave me the flexibility to reprint specific pieces if something went wrong, without starting from scratch. Another decision that really paid off was using a prebuilt electric can crusher as the core mechanism. This saved a huge amount of time and gave me peace of mind throughout the design process, since I knew the crushing component was already reliable and functional.
What I’m most pleased with, though, is how the aesthetic held together from start to finish. The final design feels very much in line with the original retro-futurist vision I had in my head at the beginning. In fact, it ended up with more personality than I anticipated. It still looks serious and mechanical, but with a kind of charm that emerged naturally as I worked on the face and proportions.
That said, there are definitely things I would approach differently in a second version. One major area is incorporating electronics. I had initially planned to include some lighting or Arduino-based effects, but as the deadline approached, I simply didn’t have the time to integrate them. Something as simple as glowing eyes or a sound cue when a can is crushed would have added a whole new dimension to the piece and made it feel more alive. I’m still interested in exploring those additions down the road.
I also ran into some challenges with the print quality. Despite careful planning, a few seams are still visible where the pieces come together, and some of the parts warped slightly due to uneven cooling. A more precise printer or a heated enclosure might have helped with those issues.
As for the future, I still see a lot of potential in this project. I’d love to experiment with subtle LED lighting in the eyes or mouth—maybe a cool blue or an eerie red, depending on what kind of personality I want to evoke. A servo-controlled mouth flap or a sound module that plays a line of dialogue when a can is crushed could make it feel more like a real character from a 1950s sci-fi world. I’ve also considered turning the top antenna into a mechanical lever button, which would allow it to activate the mechanism without adding an obvious switch or button that takes away from the aesthetic. All of these additions would keep the aesthetic intact while giving the piece a bit more presence and interaction.
Ultimately, this project has been more than just a mechanical build—it’s been an attempt to bring a very specific artistic vision to life using physical fabrication tools. There’s something really satisfying about starting with a sketch and ending up with a real, working object that looks like it stepped out of another era. While not every feature made it into this first version, I feel like I created something that’s more than functional, expressive, and grounded in the retro-futurism aesthetic.
1 Comment. Leave new
Hi Garrett, I really like your finished project! Your mid-century sci-fi aesthetic blends well with the project’s mechanical, and the modular CAD approach was a smart way to manage printing limitations and allow iterative improvement. For future improvement, the project could benefit from more post-processing techniques (like sanding compounds) to eliminate visible seams and improve surface finish. Overall, fantastic job on this!