
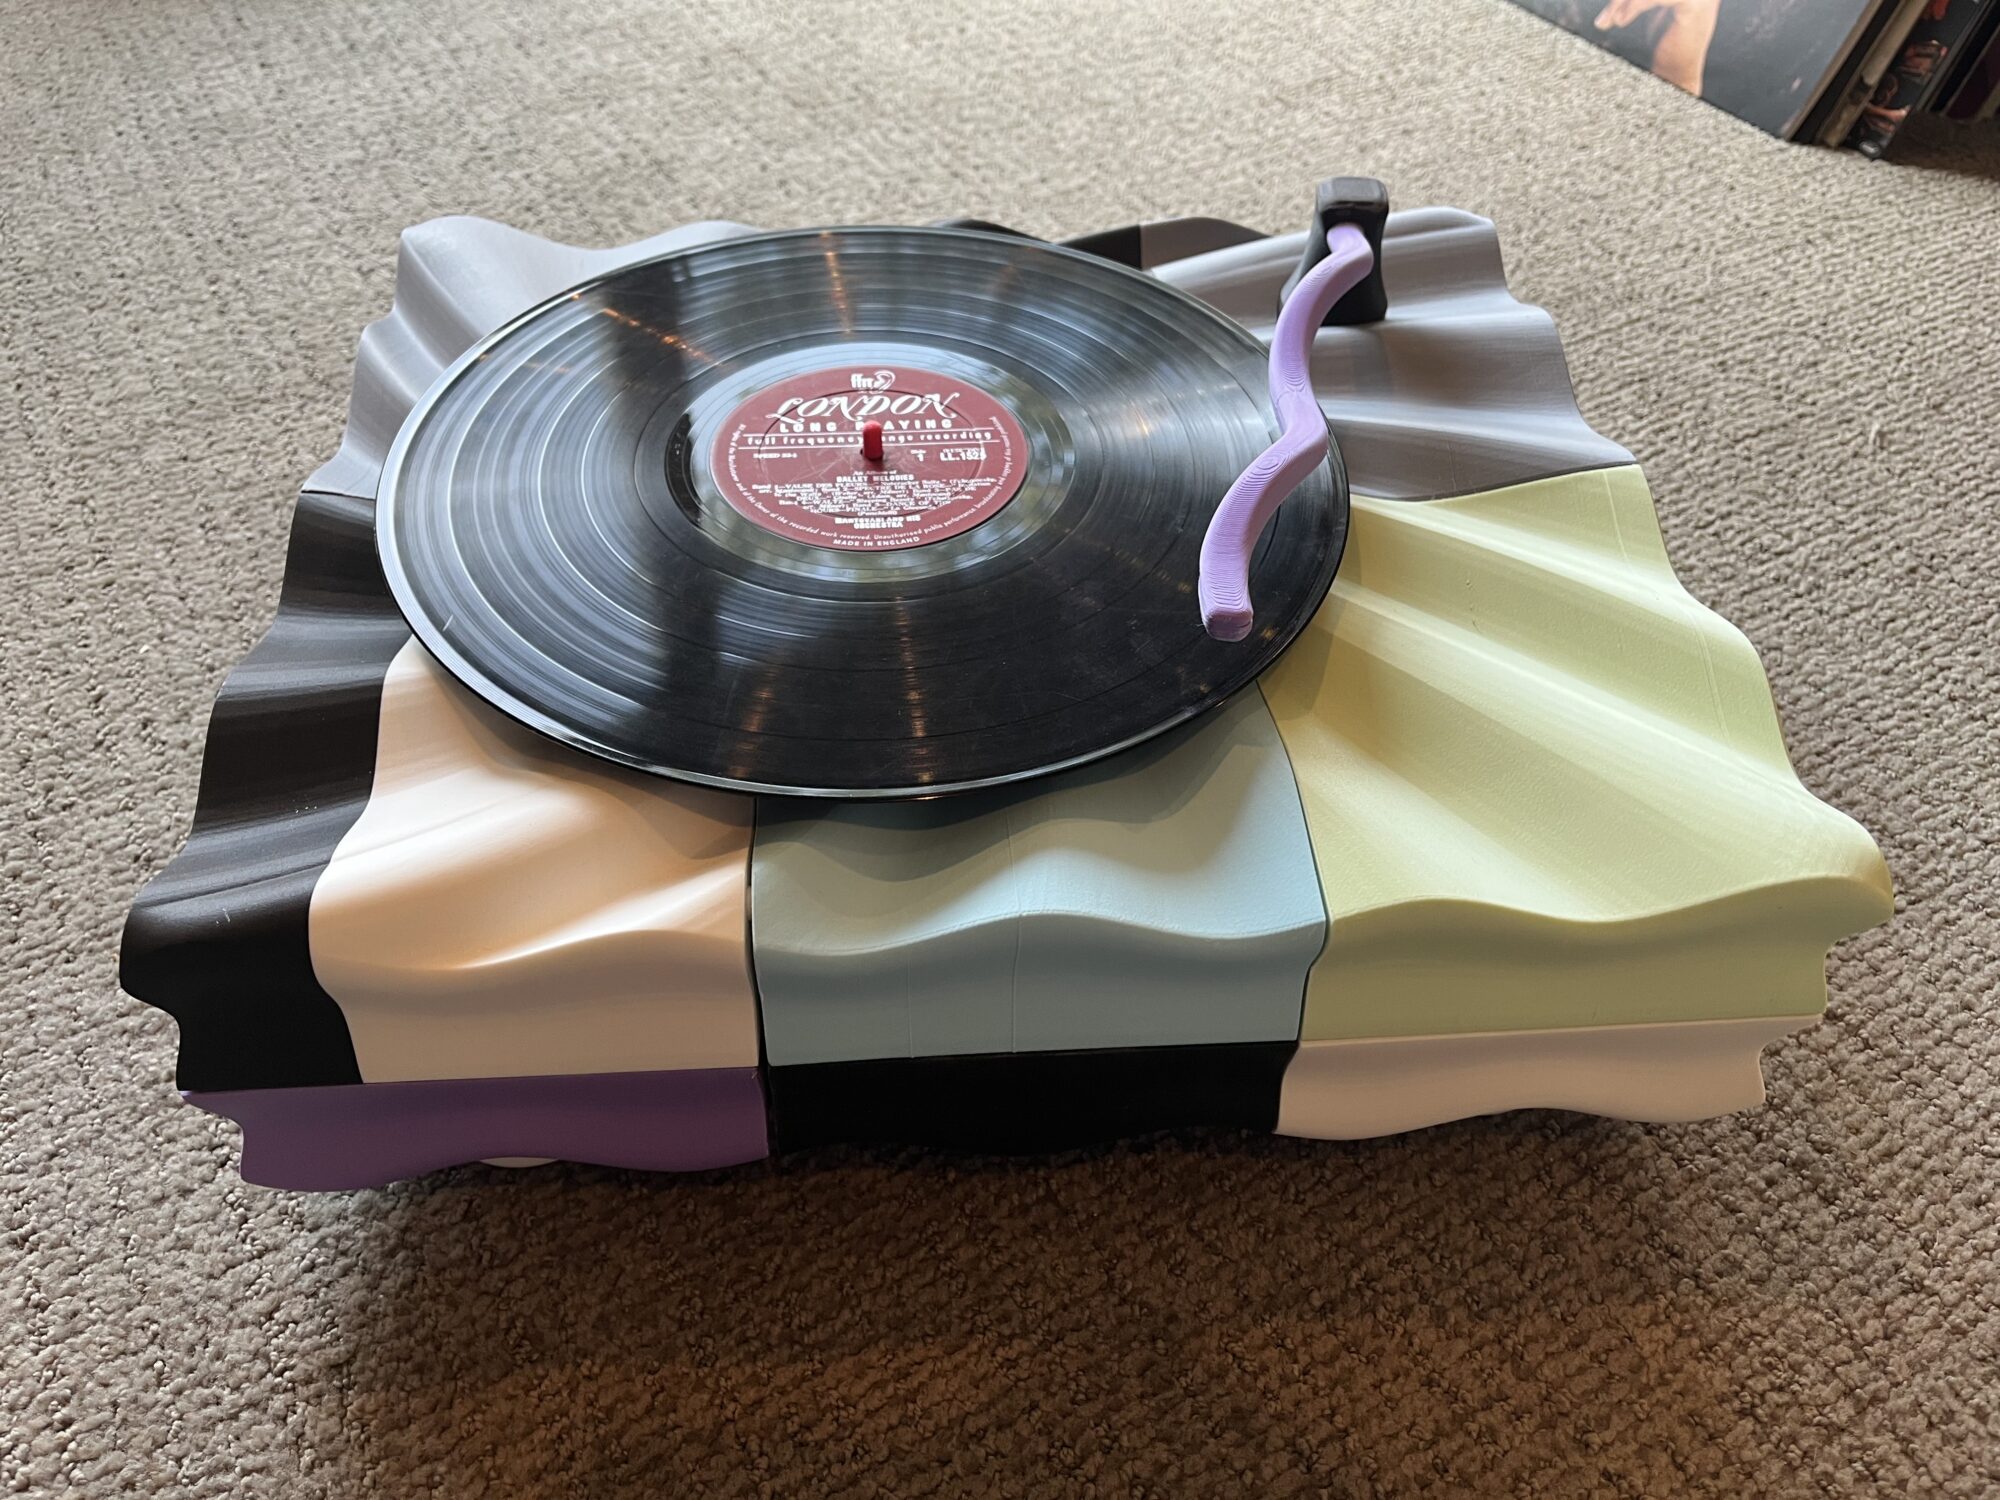
For my main project, I created an artistic vinyl record display that plays music from an internal Bluetooth speaker (see the featured image [1]). Through this project, I wanted to replicate the feeling of listening to a record player, while having the freedom to choose whatever songs you’d like through a Bluetooth device. Aesthetically, I wanted to take after Antoni Gaudí’s architectural style of Catalan Art Nouveau (also known as Modernisme).
See Artistic Vinyl Speaker: Part 1 for more details on my inspirations and finished project.
Project Timeline:
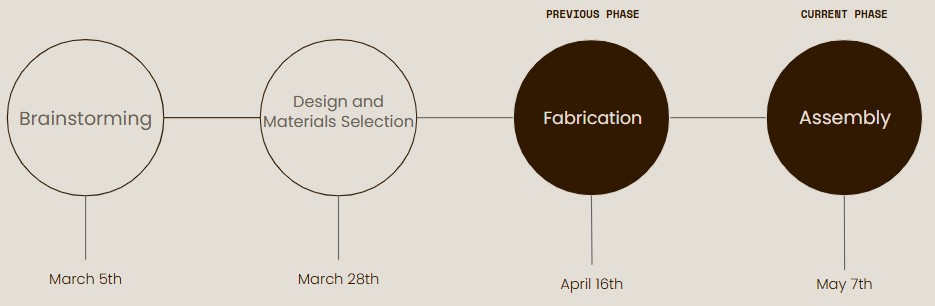
[2] Timeline
Brainstorming:

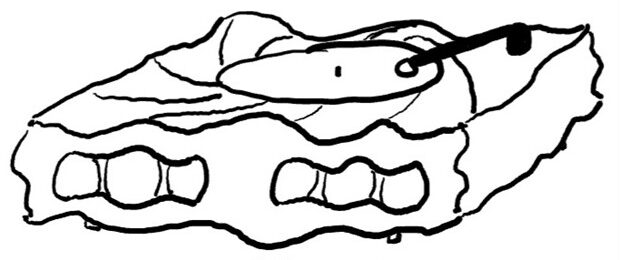
[3] Initial Sketch Configuration 1 [4] Initial Sketch Configuration 2
Prior to knowing what I wanted to create for this project, I had already decided that I wanted to use the Catalan Art Nouveau aesthetic. I wanted to experiment with vibrant colors, and natural flowing shaping, rather than fall into the modern trend of minimalistic, straight edge designs. After deciding to create a speaker that simulates a record player, I created the initial sketches shown above. The two configurations show different orientation ideas I had for the speaker within the record player. Figure 3 has the speaker facing the bottom of the box (having a cut out on the bottom to allow for the audio to get out). On the other hand, figure 4 shows the speaker facing out the front (with two holes inspired after the exterior of Casa Batlló). To further lean into the artistic nature of this project, I also came up with the idea to paint the record that would spin on top. This would serve two purposes: to add to the aesthetic and artistic design, as well as differentiating my project from a normal record player (allowing someone with no prior knowledge to recognize that it’s an artistic piece).
Design and materials selection:
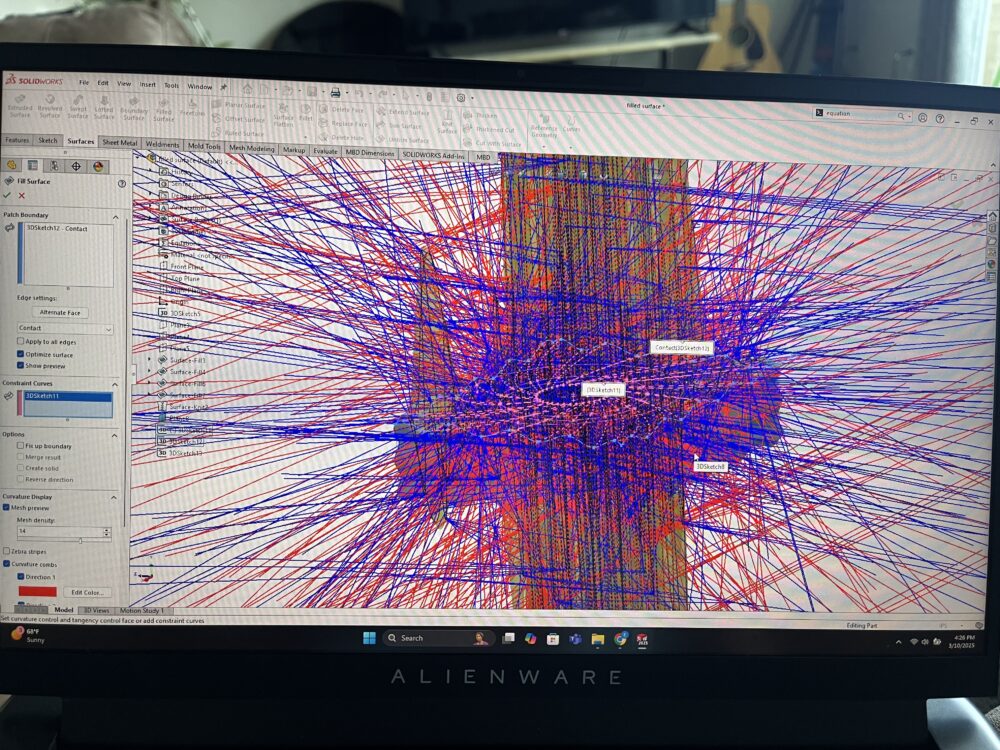
[5] CAD Catastrophe
The design phase of my project was by far the most time consuming. As part of this phase, I had to become familiar with CAD features that I have little experience with. I used SolidWorks for my model because that’s the software I’m most familiar with. One pitfall of doing this is the restrictions of SolidWorks’ organic shaping capabilities. As far as I know, the best way to create smooth, flowing geometry is to use surface features. In combination with my use of 3D splines, I was able to create an enclosed surface that shaped the outside of my container. The bottom and sides of the box were fairly straight-forward, however, I ran into issues when creating the spiraling pattern on the top face. Figure 5 shows a graphic SolidWorks gave me when trying to create this surface… definitely a mess. To work around these issues, I tried getting help from friends I know had SolidWorks experience, but everyone I talked to had little to no experience with surface features. In hindsight, it may have been easier to try learning a new software to create this design. After experimenting around, I learned that I could split the top face into individual segments, fill out each segment as it’s own surface, then stitch together those surfaces to create the full top face. Fortunately, this worked! From there, I added cuts to account for interfaces with other parts (for example, cutting holes for the feet to attach as well as the turntable and rotating arm). I also had to account for a tolerance with each of these components. This tolerance ensured parts were not so loose that they weren’t secure, but not too snug so that they wouldn’t rotate/fit. I’m particularly proud of the motor connection I designed. This connection is shown floating in the center of figure 7. I made sure the attachment was aligned with the top surface, and created a snap-in mechanism for the motor to be secure, but rotate freely.
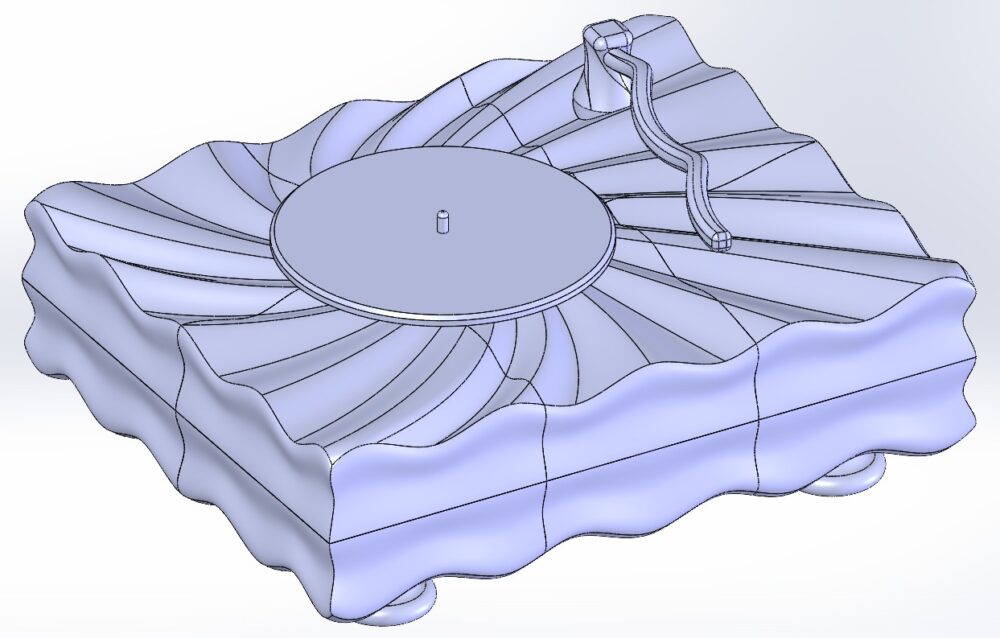
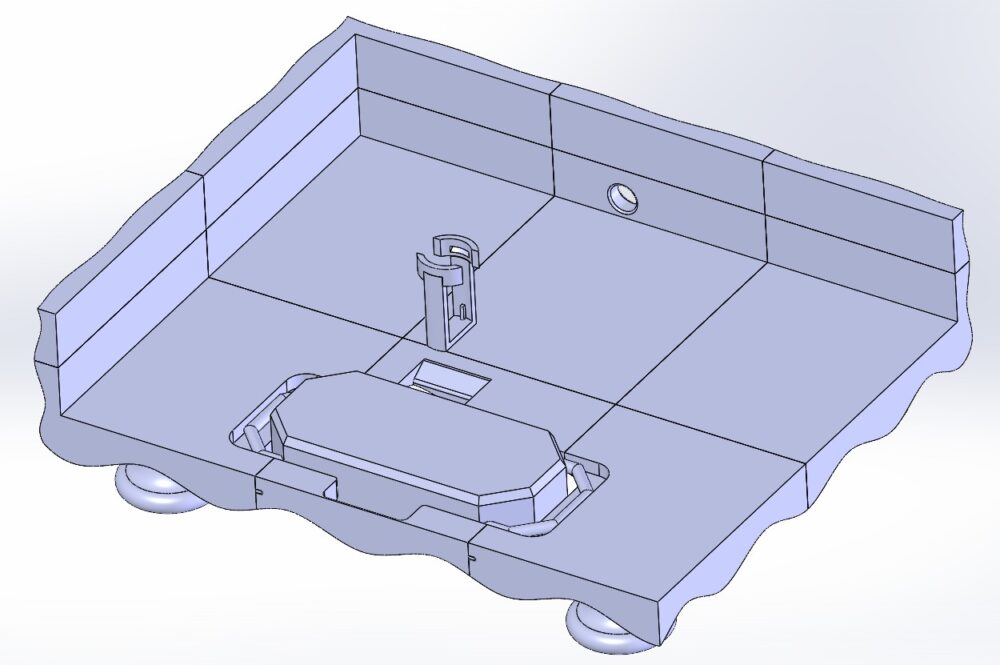
[6] CAD Assembly Exterior [7] CAD Assembly Interior
Lastly, I had the tedious task of ensuring my project was 3D printable (my fabrication method of choice). I planned to use the ITLL’s printers, but they had a limited bed size. This meant that I had to split my design into sections in order to meet the needed dimensions. In addition, along each segment, I added notches and holes that would allow for the segments to slide together. After all that design work, I was done (see figures 6 and 7)! I’m happy with how the model turned out and am grateful for the experience I gained while designing it.
Fabrication:
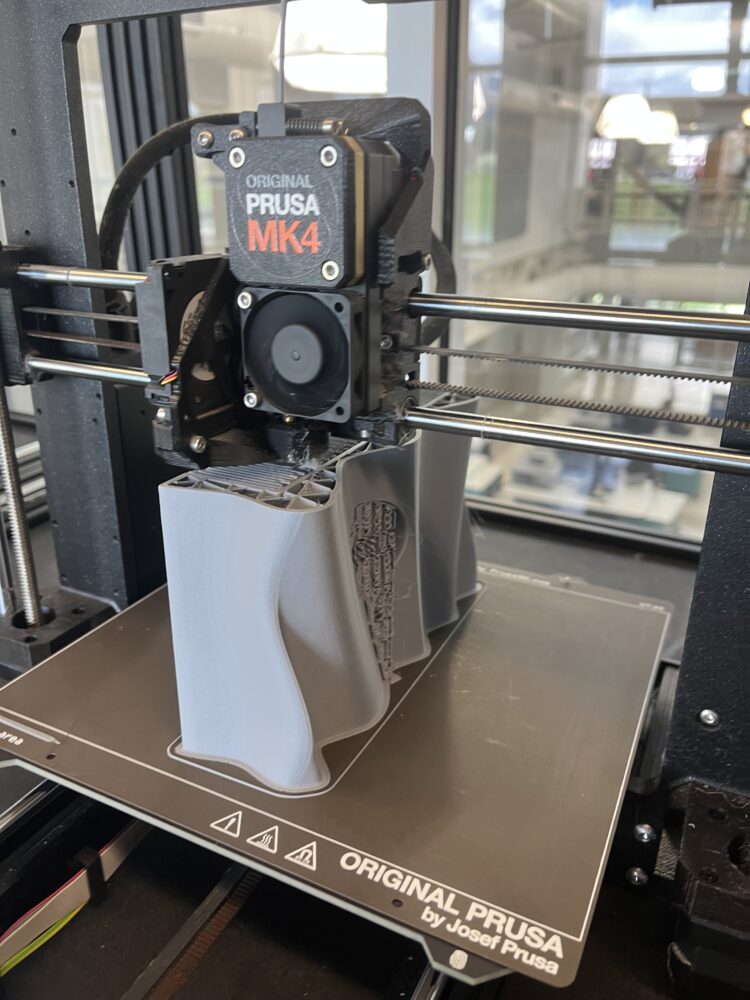
[8] Segment getting 3D Printed
Fabrication was the next longest part of this project. Taking all the 3D printed models I have, I then had to print each individual component (22 parts in total). In addition to the number of parts I needed to print, most segments of the record player took 20 hours to print due to their size an orientation on the printer bed. Finding available printers during Expo season at the ITLL was a bit of the challenge. (I’ve become well acquainted with the people that work there!) Besides the time requirement for each print, I also ended up needing to reprint many parts for various reasons. My first issue was the orientation I initially chose to print my parts in. As shown in figure 8, I printed each segment on their side. This is ensured that the top face of the record player was perpendicular to the layers the 3D printer was creating, leave a nice surface finish. Originally, I had printed these parts in an orientation that decreased print time. This made the top face parallel to the layer lines of the 3D printer, leaving a more jagged, step-like finish. There were also some parts I broke. For example, the motor connection point on the underside of the top face was fairly fragile, so while I was removing support material, it broke on one of my pieces. Lastly, there were a couple parts I had to slightly redesign. For example, the small “U”-shaped part connects the motor to the top face of the record player. Initially, I made it too long, so the turn table wasn’t able to reach the motor. Fortunately, that was a simple, quick fix.
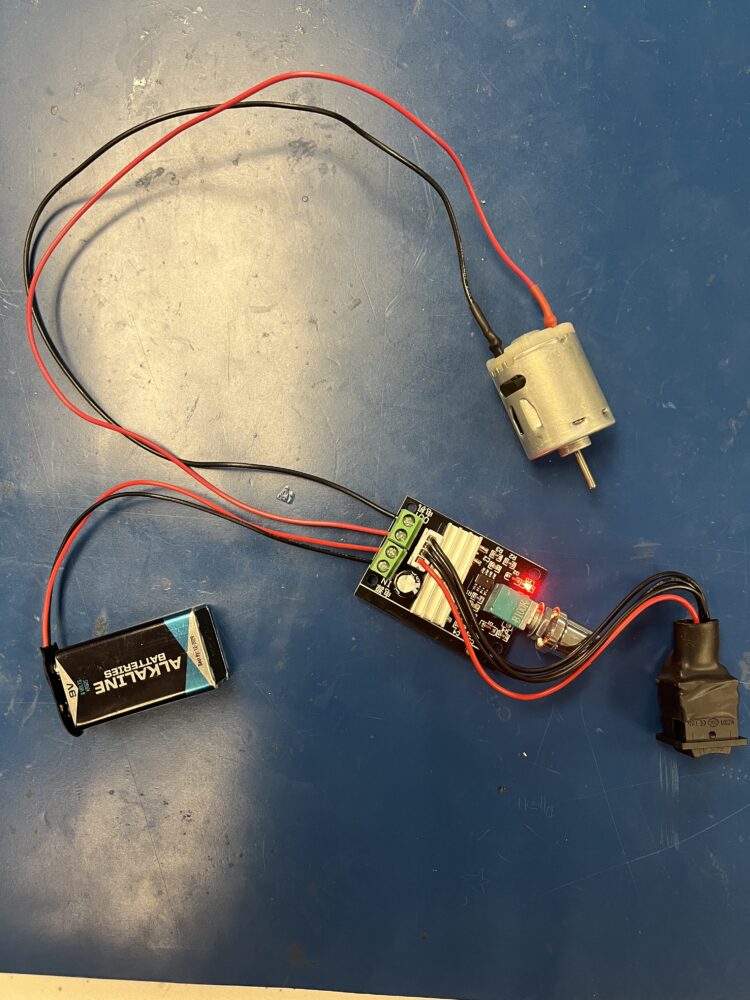
[9] Electronics Assembly
As part of the fabrication process, I also put together the electronics for the motor. This included a PWM (voltage regulating component), battery and it’s connector, and the motor itself. This wasn’t too difficult given the simplicity of this circuit, but it did require me to solder wire to the motor.
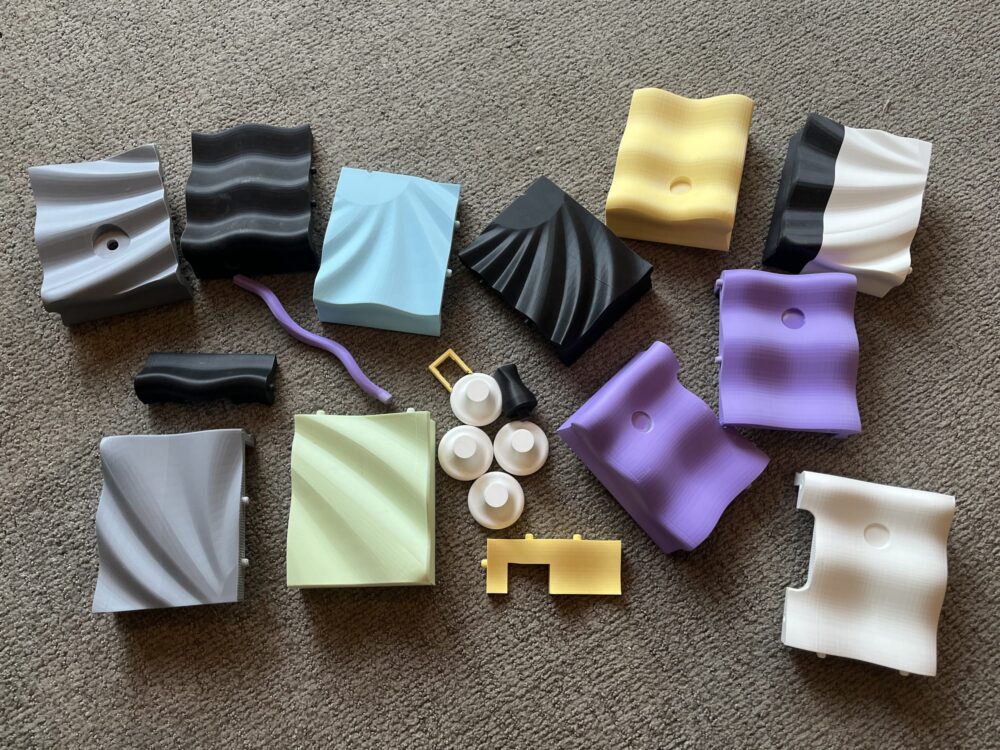
[10] All Printed Components (Excluding Turntable)
The last part of the fabrication process was sanding all the prints I created to allow for their interface. 3D printers leave small imperfections and support material doesn’t always get removed easily. I had to sand each hole and protrusion that connected the record player’s segments together so that each part fit flush. This was difficult because I couldn’t find a Dremel attachment that fit how I needed it to. To get around this, I wrapped a drill bit in sand paper and was able to sand the holes that way. After a little bit of work, I was able to get everything to fit together!
Assembly:
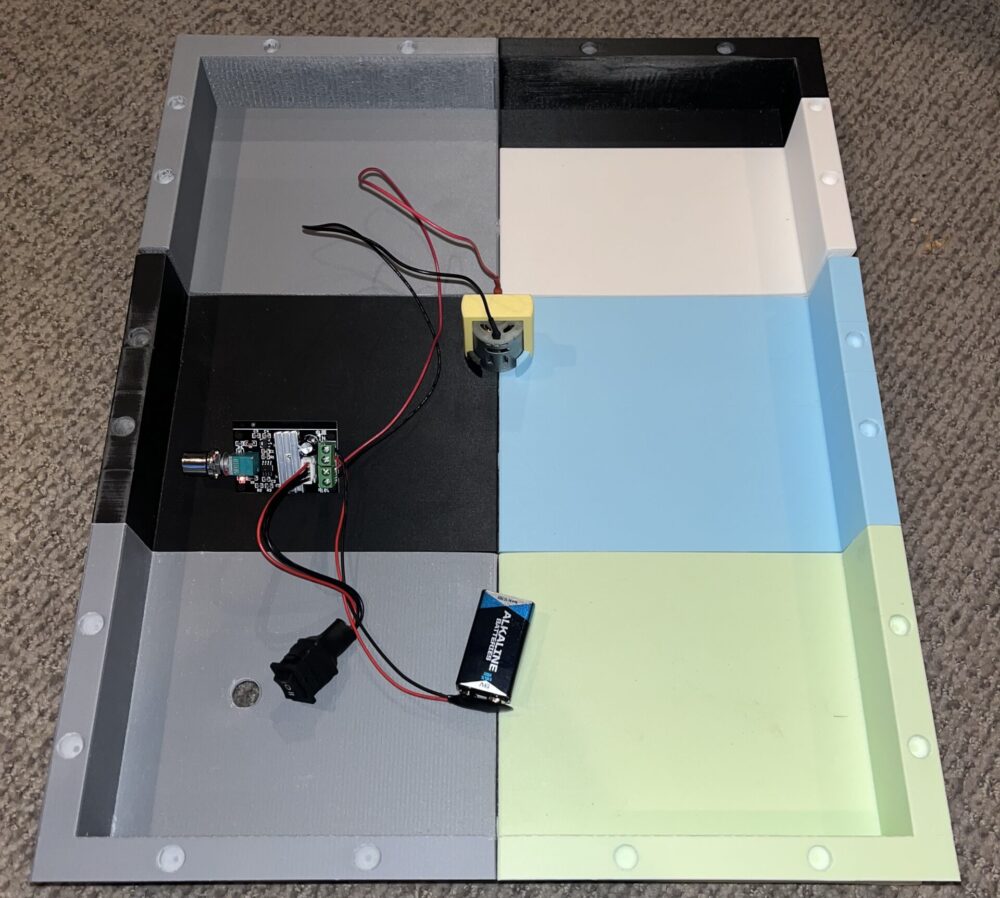
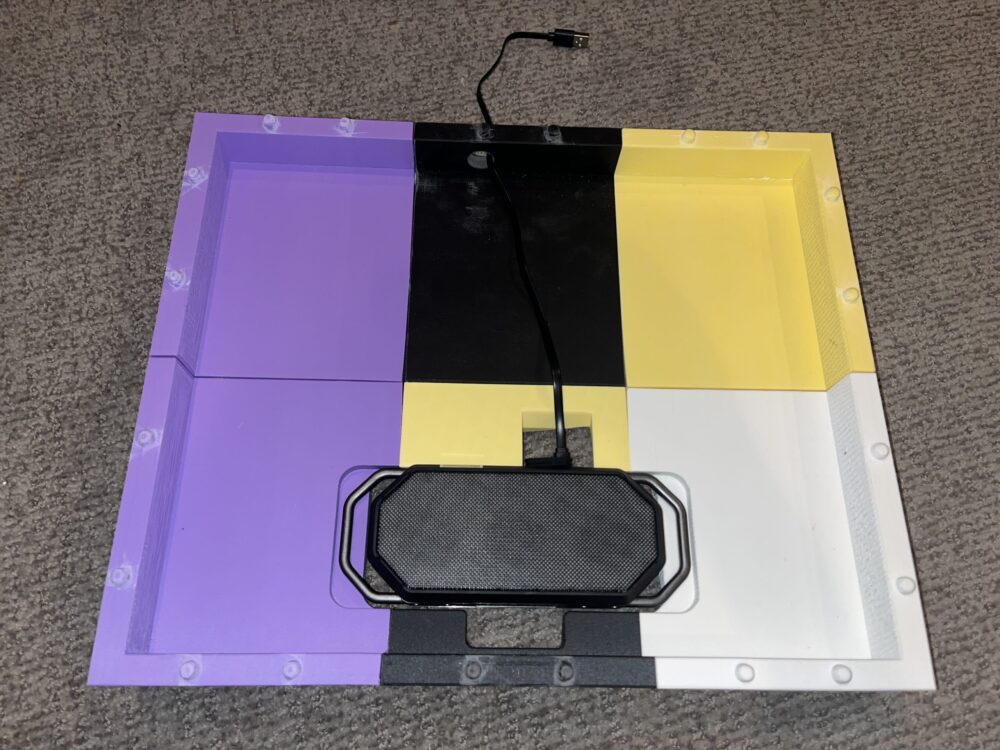
[11] Top Face Interior Assembled [12] Bottom Face Interior Assembled
The final phase was assembly. With my fabrication done, Assembly was pretty straight-forward. Having designed everything off precise measurements, I didn’t have many issues making parts fit together. One design change I needed to make was flipping the cutout shown in figure 12 where the charging cable attaches to the speaker. I had accidentally designed it on the opposite side, but that was an easy fix.
Conclusion:
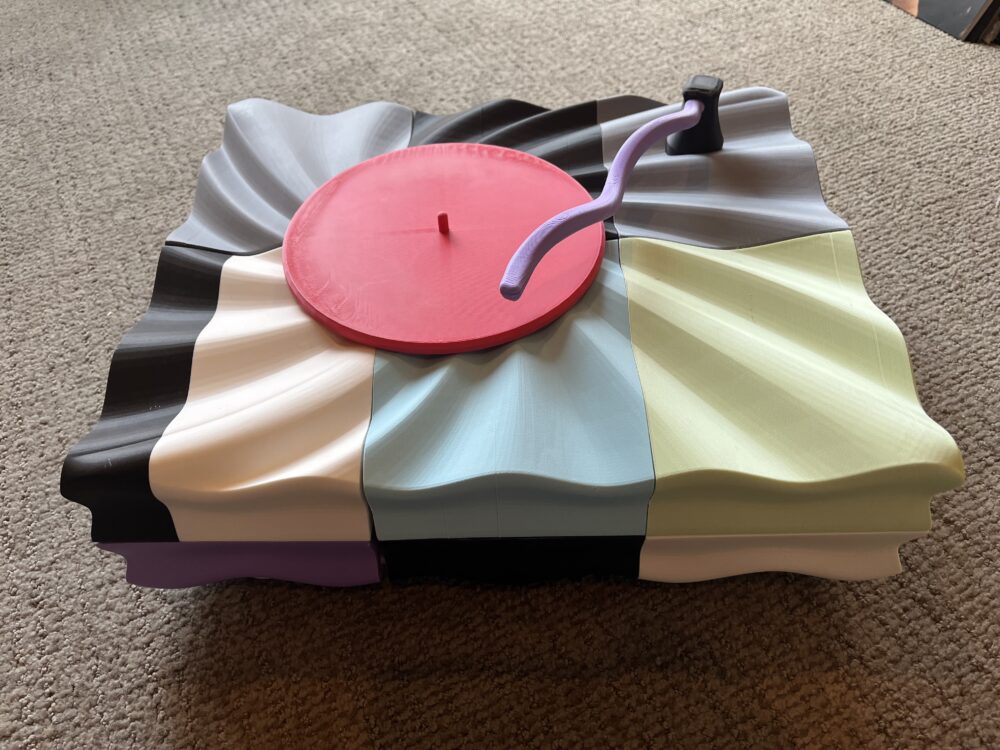
[13] Fully Assembled Project
See my record player in action
Overall, I’m very happy with how my project turned out. I challenged myself, learned a lot, and created something that I am proud of. A few changes that I still hope to make are adjusting the motor rotation rate/torque, and painting the recycled vinyl records I have to display on top. An issue I have right now is that, although I have a voltage regulator, the motor’s RPMs are too high, and torque too low for it to spin the record with stability and at the appropriate frequency. I tried troubleshooting by altering an existing gearbox design I found online, and while this can work, it is very unstable and much noisier than I’d like. Instead, I’ve purchased a replacement motor with a built in gearbox that allows for high torque at low RPMs. I hope to have this adjustment finished by Expo. My next priority is to paint the record to be displayed on top. I have many recycled records I can experiment with, but I’m excited to implement this addition and think it’ll help bring the project together.
If I did this project over again, there are likely a few changes I’d make. I’d consider using a different fabrication method, like carving wood or using a CNC. Another change I’d make is trying to use different modeling software to help with the design process. If I had more time (and I may go back to do this), I would fill in the gaps between the 3D printed segments to make for a smoother, more uniform piece. This is definitely a project I will be keeping with me to display/use as a speaker in my room. It’s size is a little inconvenient, but I want to make sure to display my work and enjoy all the effort I put into this project.
Citations:
N/A