

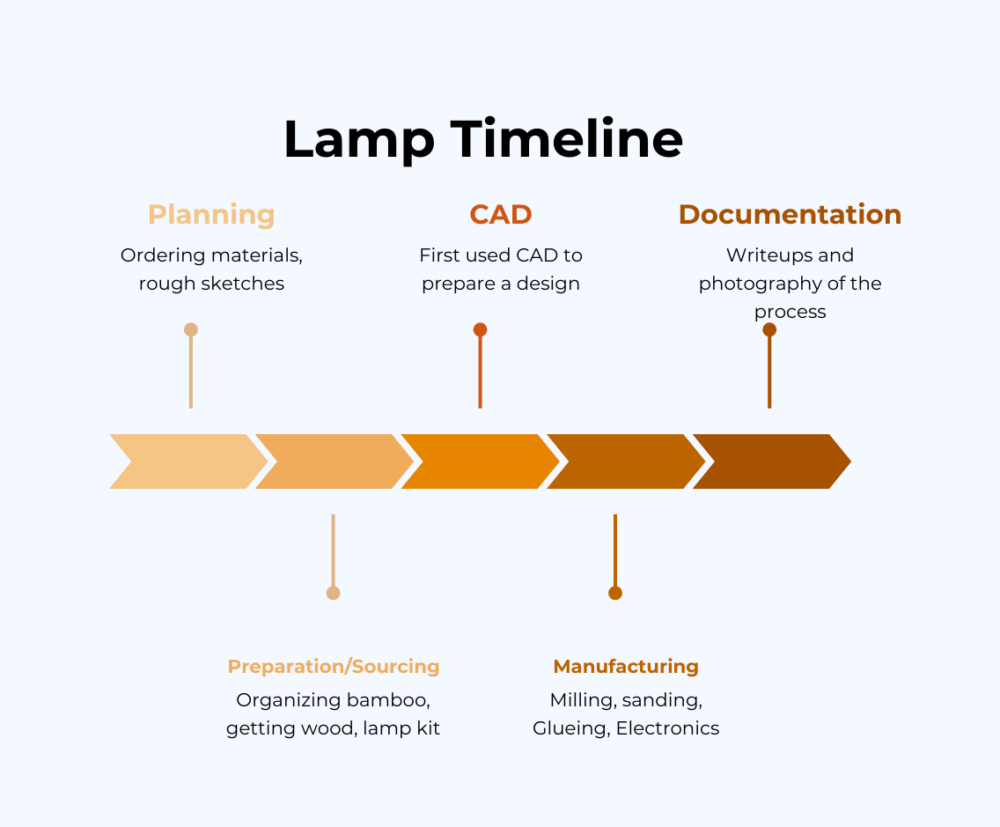
For my final project I created a lamp using bamboo poles to create the structural body. To actually create this, it took meticulous planning and accounting to ensure that the lamp was standing straight. Below is a timeline of the major components of my project.
Preparation
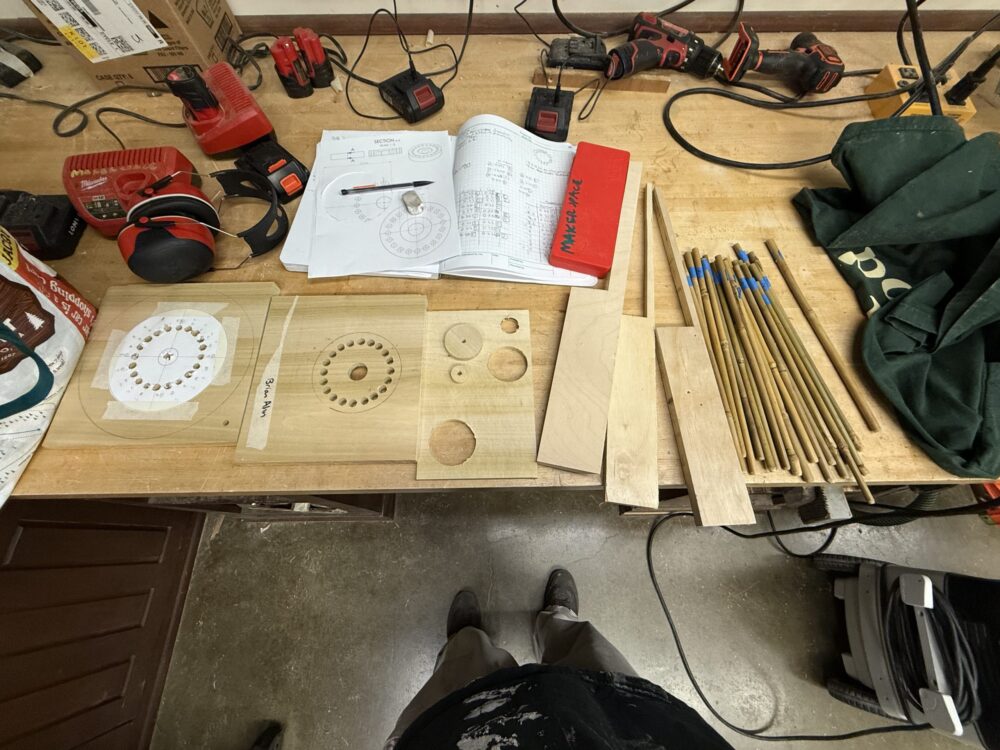
There were two rounds of preparation that I had to do before I started making any markings, did any drilling, or worked with the wood I had purchased for the base and top plate. The task was to sort the bamboo. I knew once I had the bamboo in my hands that making the lamp stand straight up was going to require some prevision. None of the pieces were perfectly straight so I found the 20 straightest pieces that I would use for the lamp.
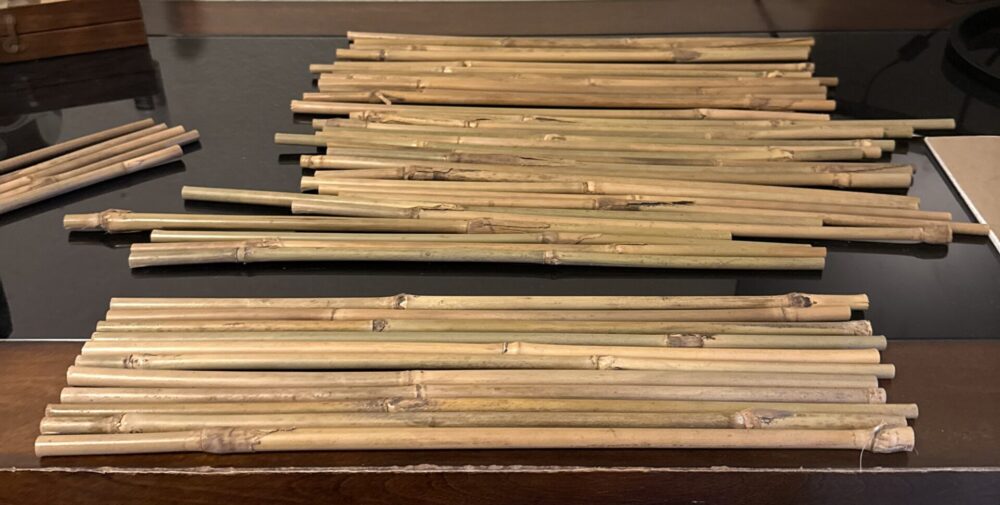
As seen, even the first 10 or so that I sorted have apparent differences and gaps can be seen from there curvature.
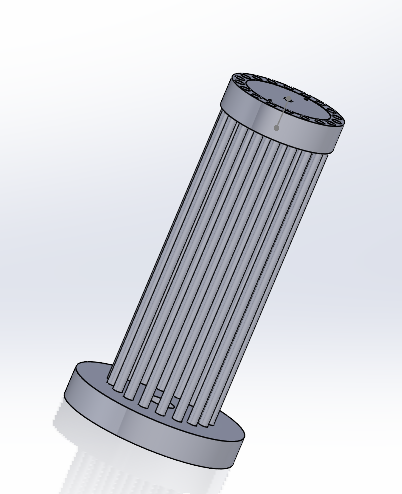
The next step in preparing was to make CAD mockups. I used these to plan what pieces I would need to cut out of the wood and how I was going to place the bamboo. In the CAD I decided on the addition of a useful piece that would allow me easy access to disassemble the lamp in the case that something warped, got knocked over and shifted, etc. I also decided I would do a mix of press fitting and wood glueing to place the bamboo sticks.

Now everything was ready, time for the planning and preparation to be fully realized.
The process:
First I cut the bamboo poles to length. I used a backstop and a small cutting block to make sure each pole was cut to 12 in.
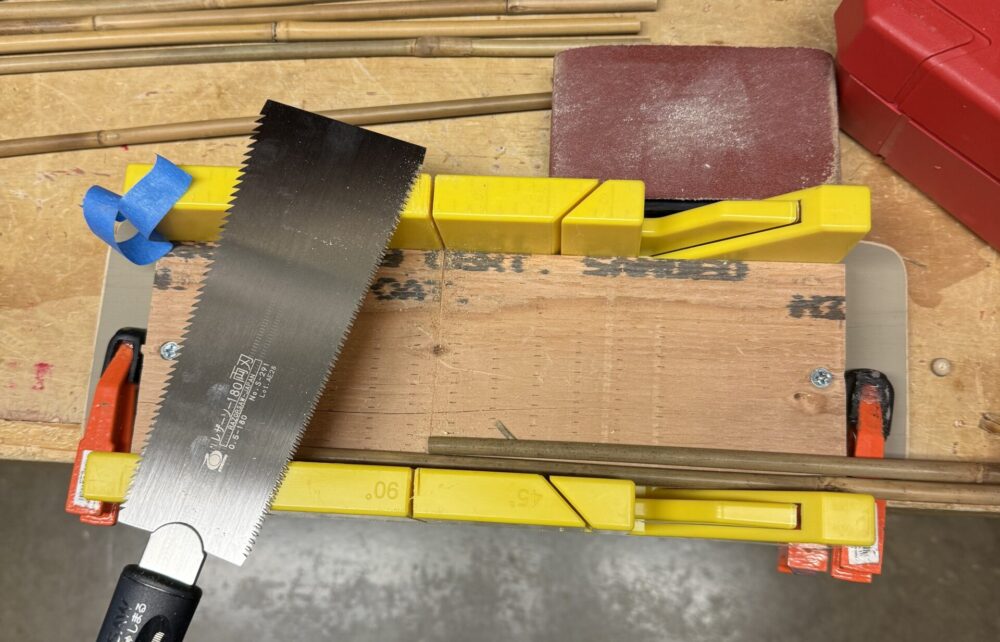
Bamboo is a very tough material and it took some strenuous cutting to get through it. Luckily this blade was extremely sharp and had small fine teeth that cut through it better than a large wood saw.
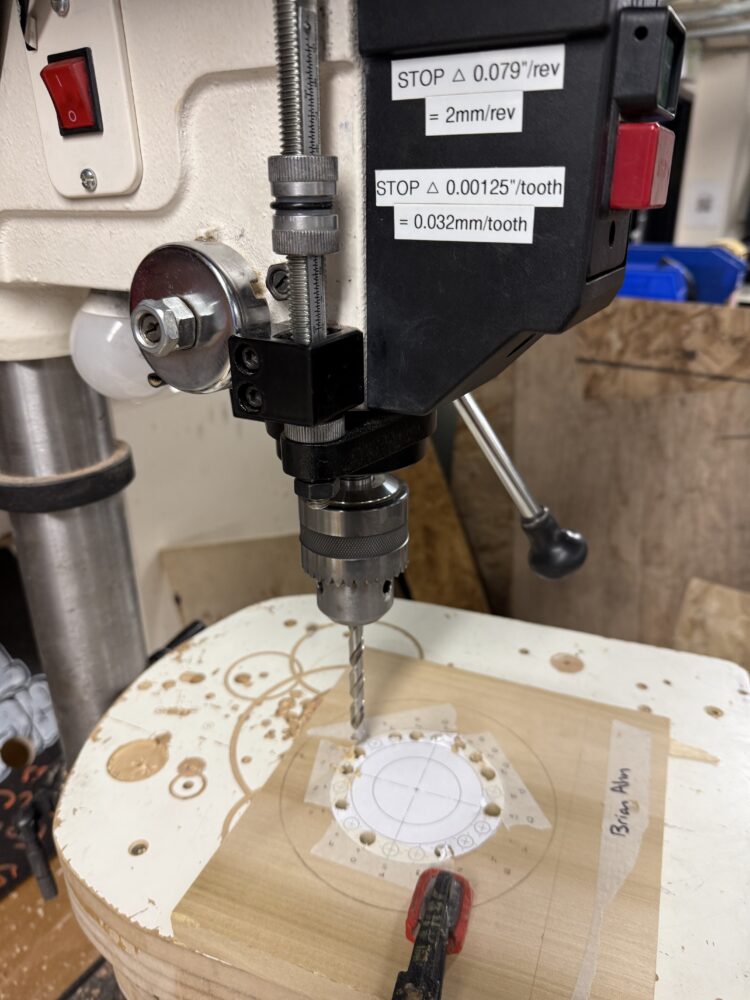
Next I marked up the wood and drilled the holes for each bamboo pole. I used 1-1 CAD drawings and taped them to the wood so I did not have to manually find each hole center that I would be drilling. I used a drill press to create the holes and utilized the drill stop feature to drill consistent depths into the wood without drilling completely through the material.
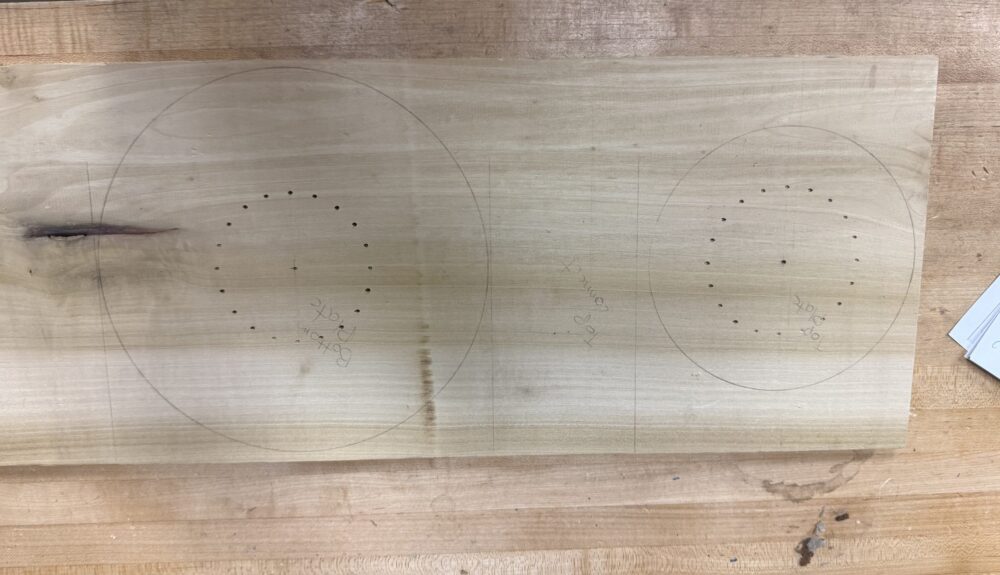
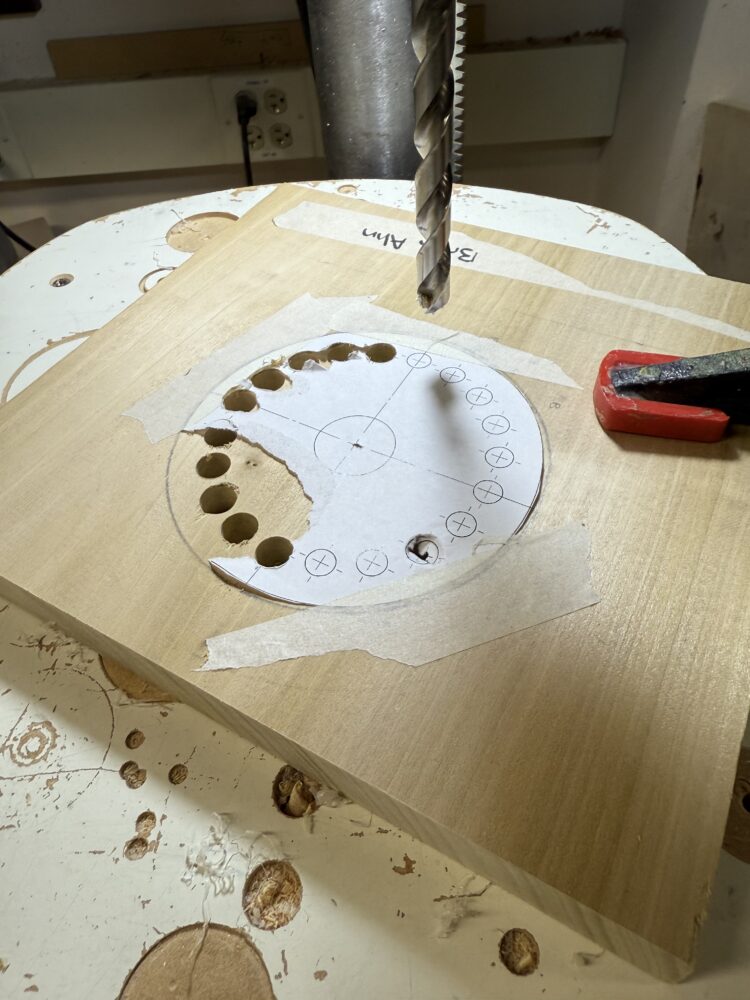
There was a step before drilling that was easily the most time consuming part of the process. I knew that I needed to create holes to size for at least one end of the bamboo poles. I elected to do this for bottom plate. So I did some accounting. I used calipers to measure each bamboo holes diameter and wrote it down in a table. I used masking tape to label each pole numbered 1-20 for later. The tape also denoted orientation, marking the “bottom” of the pole. I marked according holes on the bottom plate with numbers and letters that reffered to the drill bit size I would use for each hole. Then I went about drilling each hole to size. I started with the smallest drill bit and drilled each associated hole, moving up to the next size once each hole was finished.
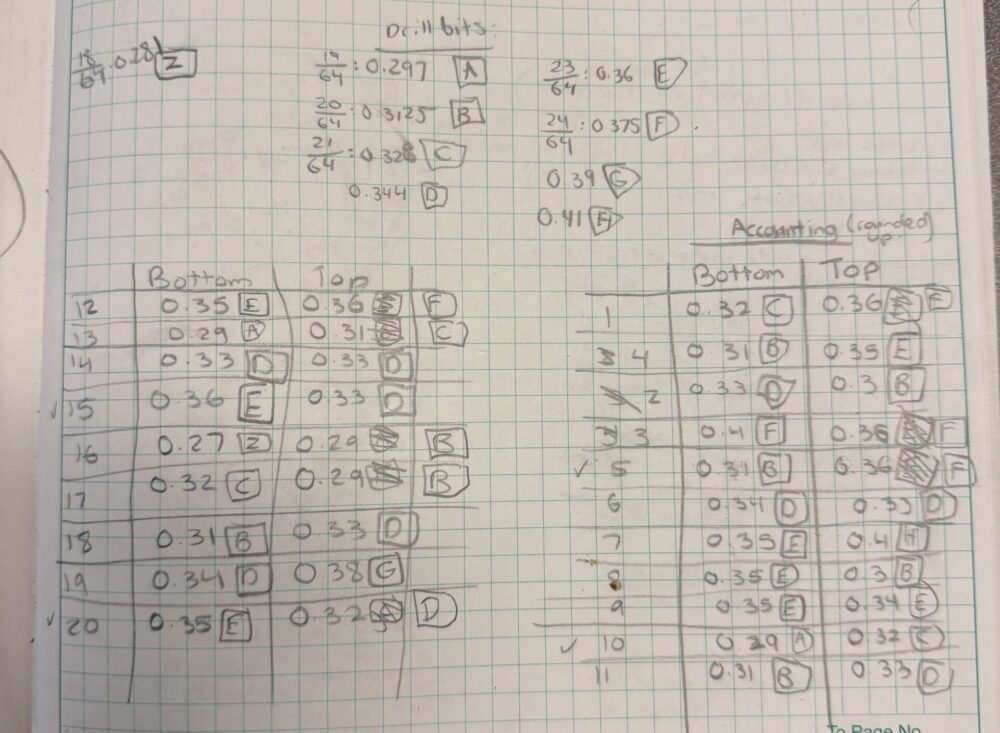
This is the table that I used to keep track of each measurement. While I initially measured both ends of the holes I ultimately only used the measurements for the bottom plate. Once these holes were drilled to size I did a quick sanity check to make sure I did my accounting right.
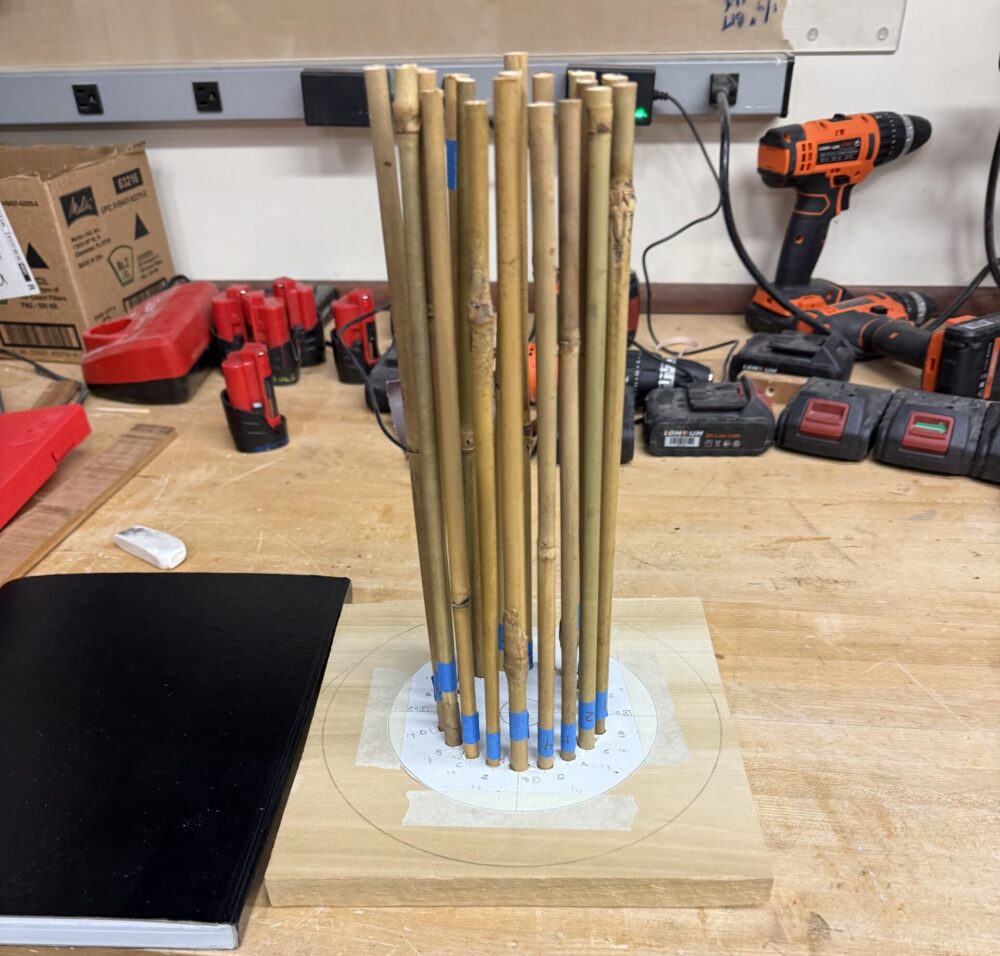
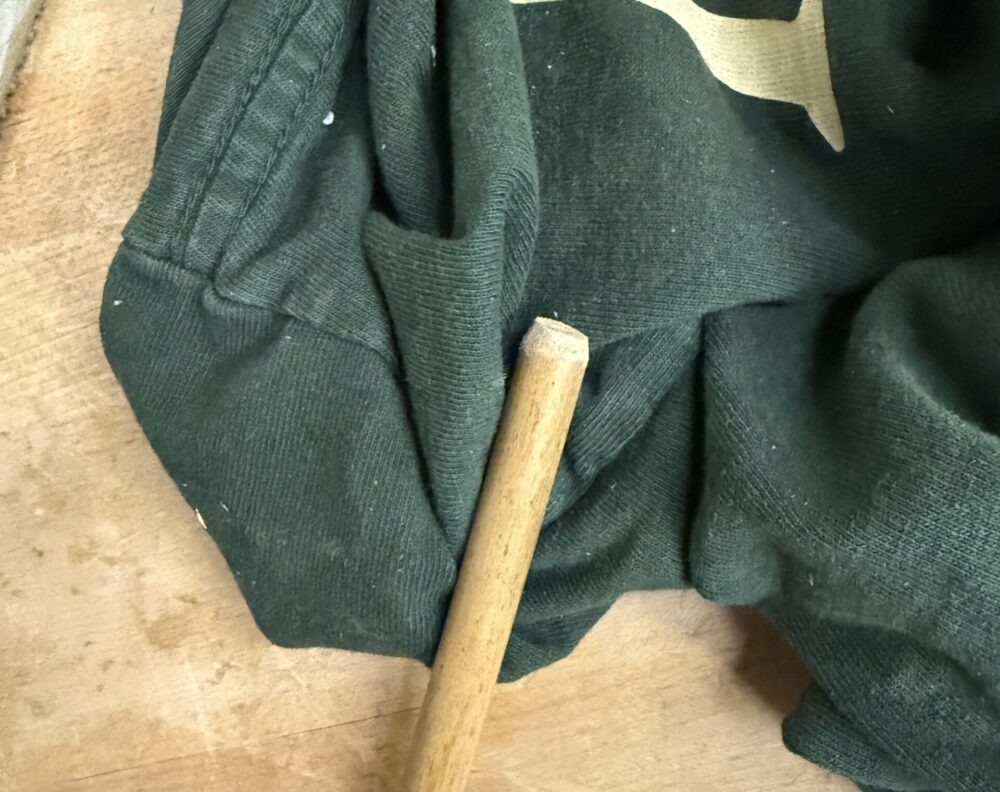
As seen, the poles fit but were not straight up. This would be fixed later in the process with an additional glueing mount that I made from some scrap wood and forcing the poles into the slots on the top plate. The next step was to do a similar drilling process with the top plate. I placed a 1-1 drawing of the circle onto my wood and drilled measured holes and a 0.5in depth. This time for each hole I oversized each one to ensure that they would fit each hole. The additional tolerance was to make sure that I could force the poles into their slots. To help with the assembly process I added bevels to the top and bottom ends of the bamboo poles. To do this I used a large sanding block and make long strokes while rotating the bamboo to give an even bevel.
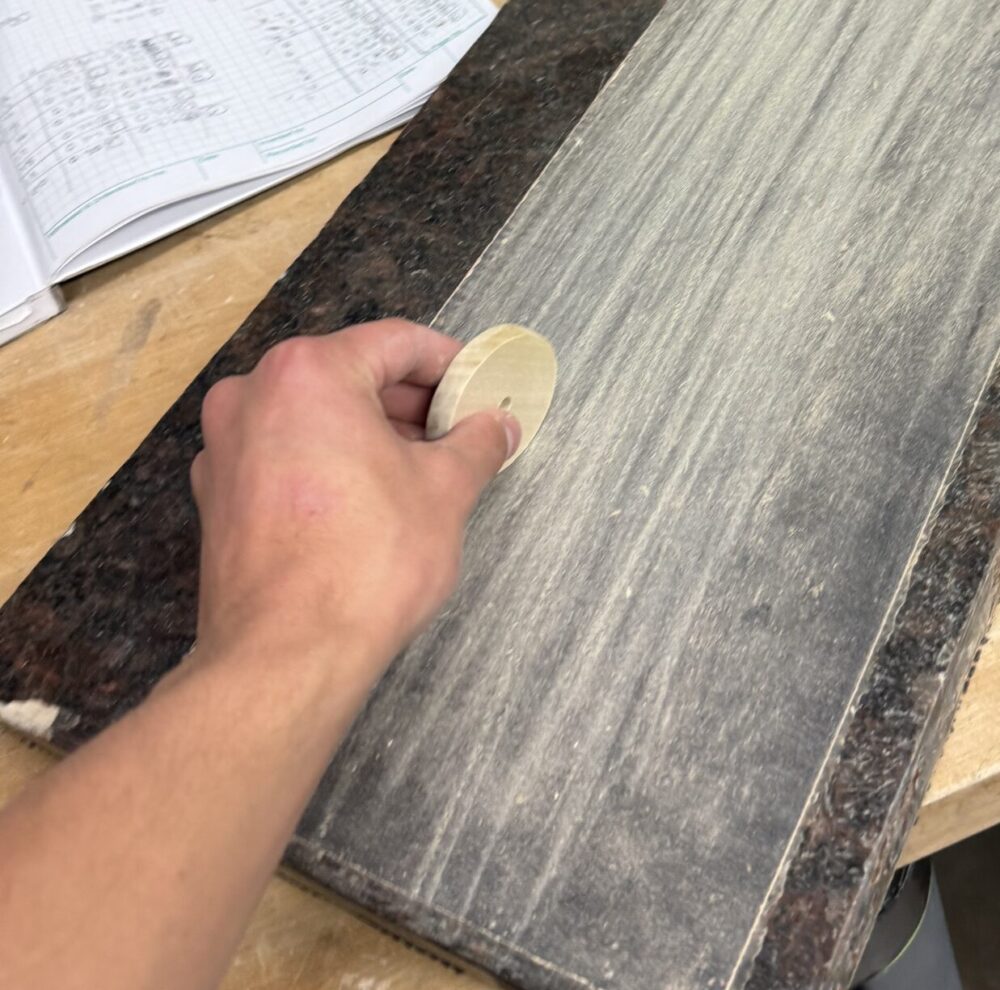
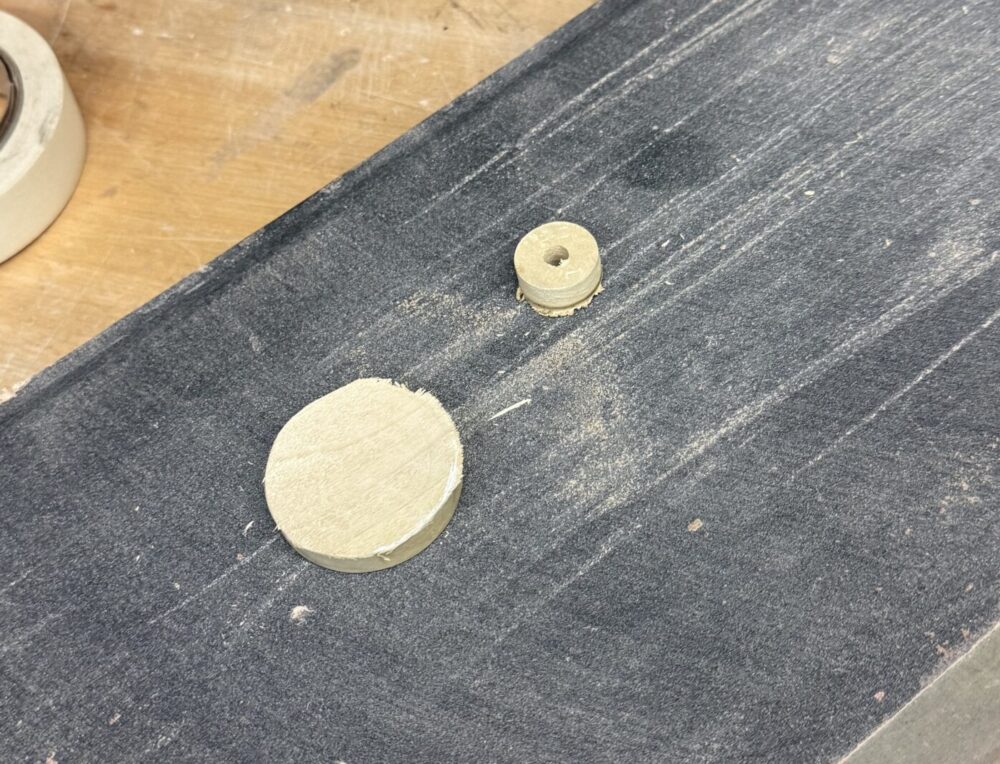
I drilled a center hole and a ledge inside the top plate to add the access port once that was made. To make the access port I used a planing machine that takes small amounts of material off the top of a plank of wood. I planed it down to half the thickness of the original piece of wood and drilled two small pieces out that would be the access point. These small pieces were sanded down and glued together to press fit into the top plate.
Assembly:
Now that all the pieces were cut and ready, it was time to aseemble.
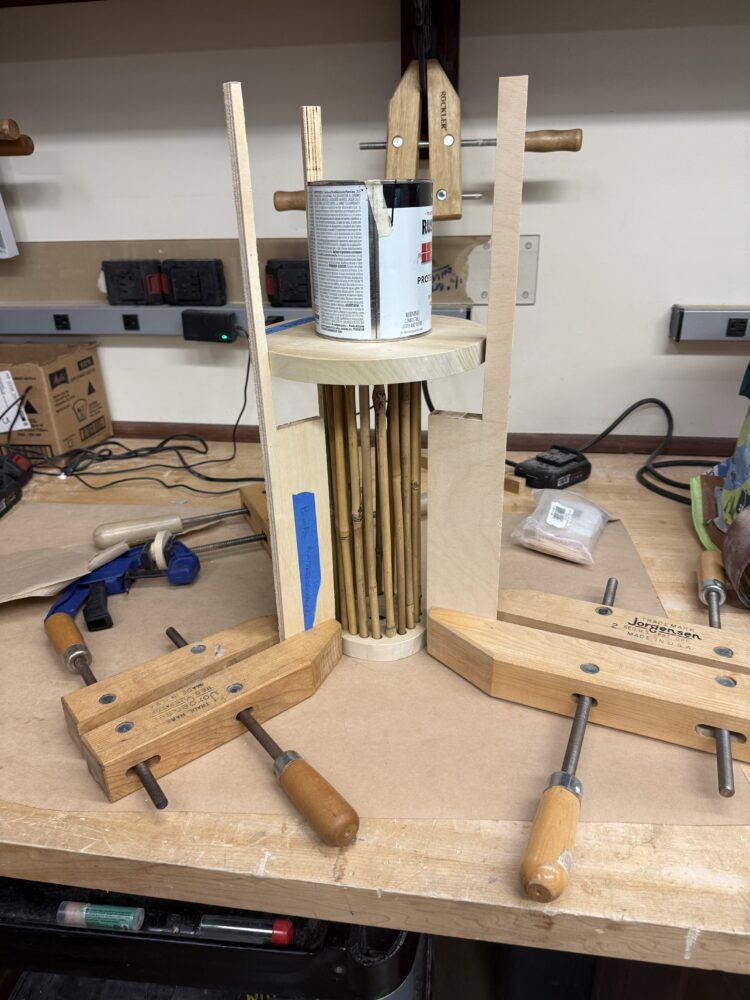
To once again ensure straightness I used some scrap wood to make tiered structures that would hold the lamp in place during the glueing process. I made three of these to form 3 points of contact around the circle. The difference in the tiers was the difference between the radius of the two circles.

These were very helpful in making sure the lamp remained straight while the wood dried. It took a little while to situate the poles into the top plate since they needed to all be slightly adjusted to fit into their holes. But after a little work, I got the poles glued in place in the bottom plate and the top plate on to glue them in a good place.
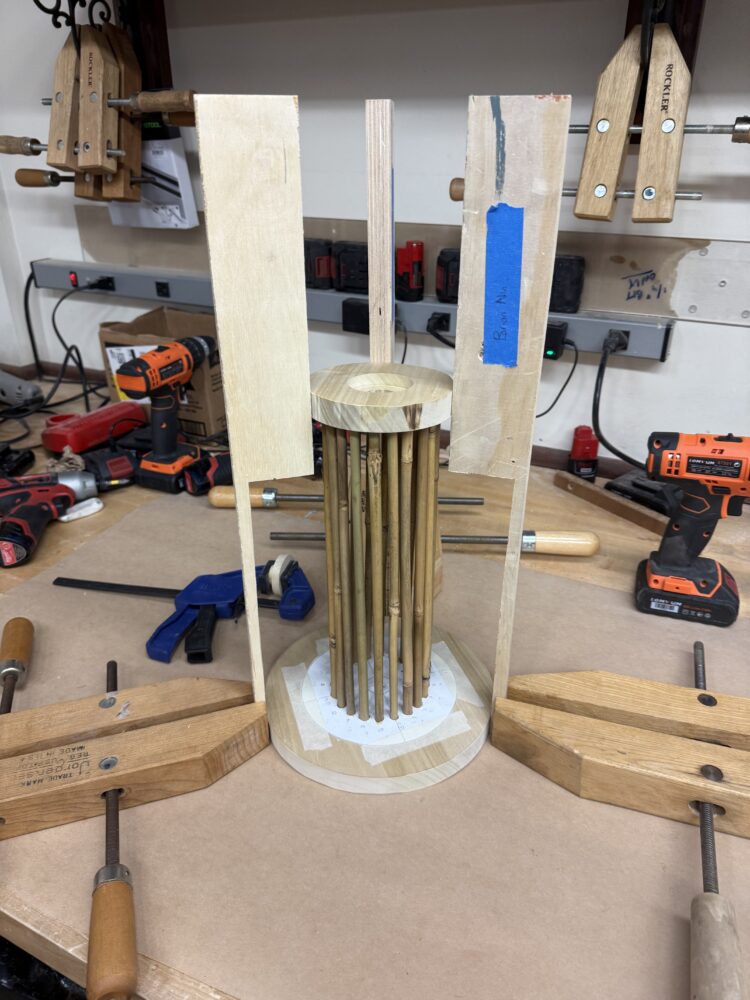
Once the glue settled the structure was flipped and the process repeated.
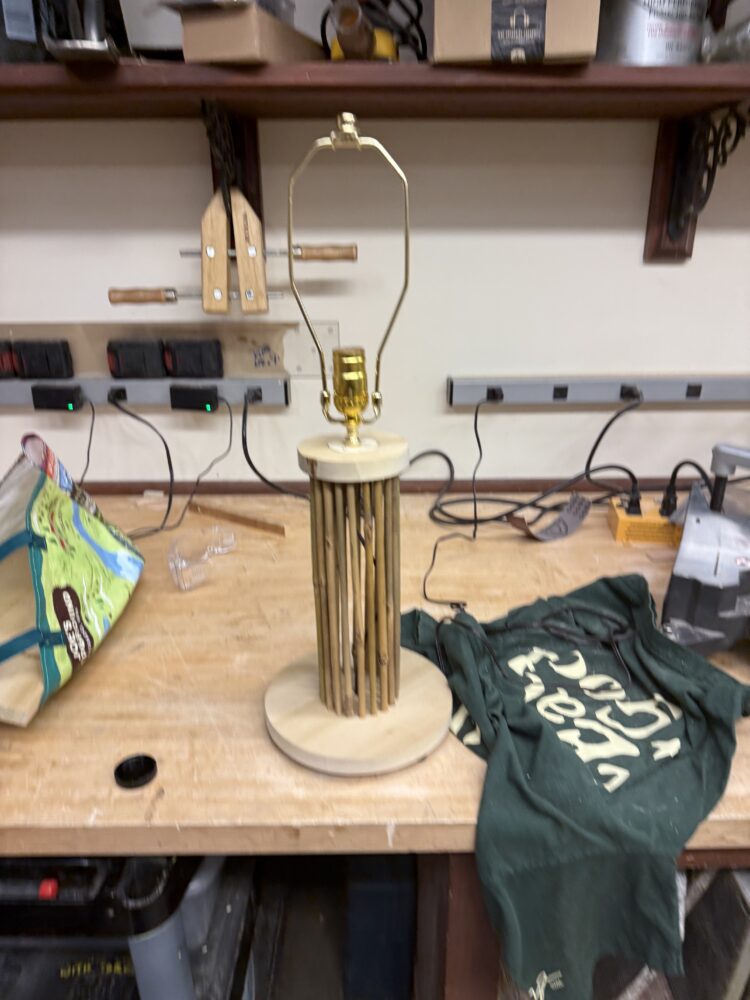
Once the glue was fully dried I had all my pieces together and all that was left was the electronics.
![]()
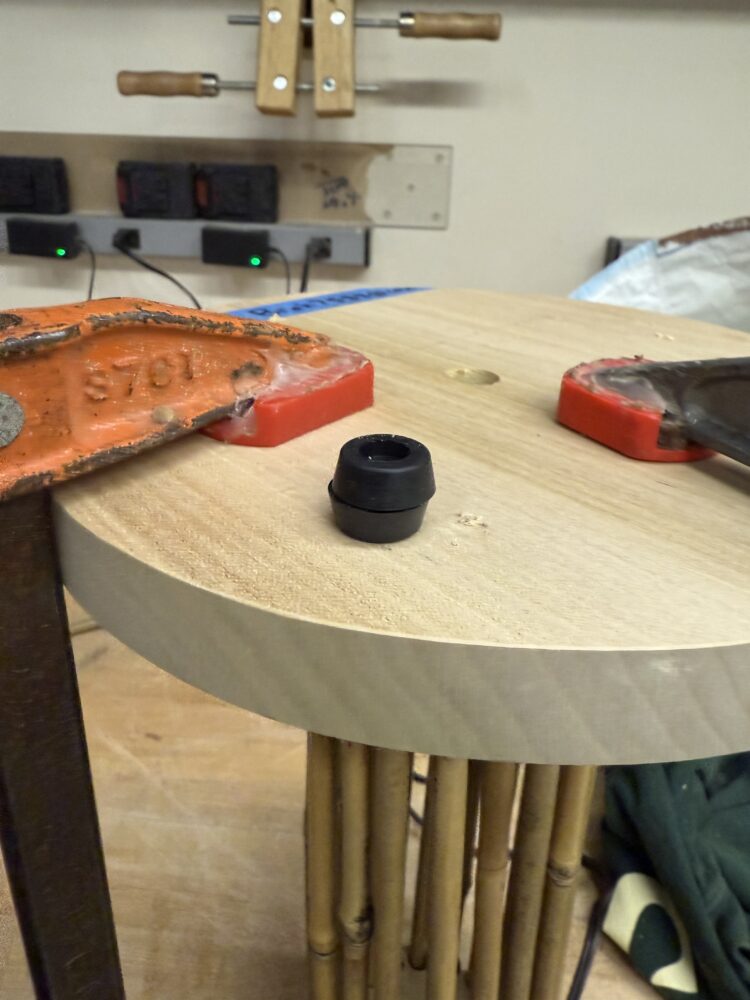
The electronics were pretty simple. But first I had to add some feet so the cord had somewhere to go. I bought these small rubber feet and stacked two of them to give a little more height.
I had bought a lamp kit that lets you turn almost anything into a lamp. Following the instructions I screwed together some parts, threaded the wire through the lamp, tied an underwriters knot to make sure tension on the cord would not pull the contact points out of the light socket, and it was ready.
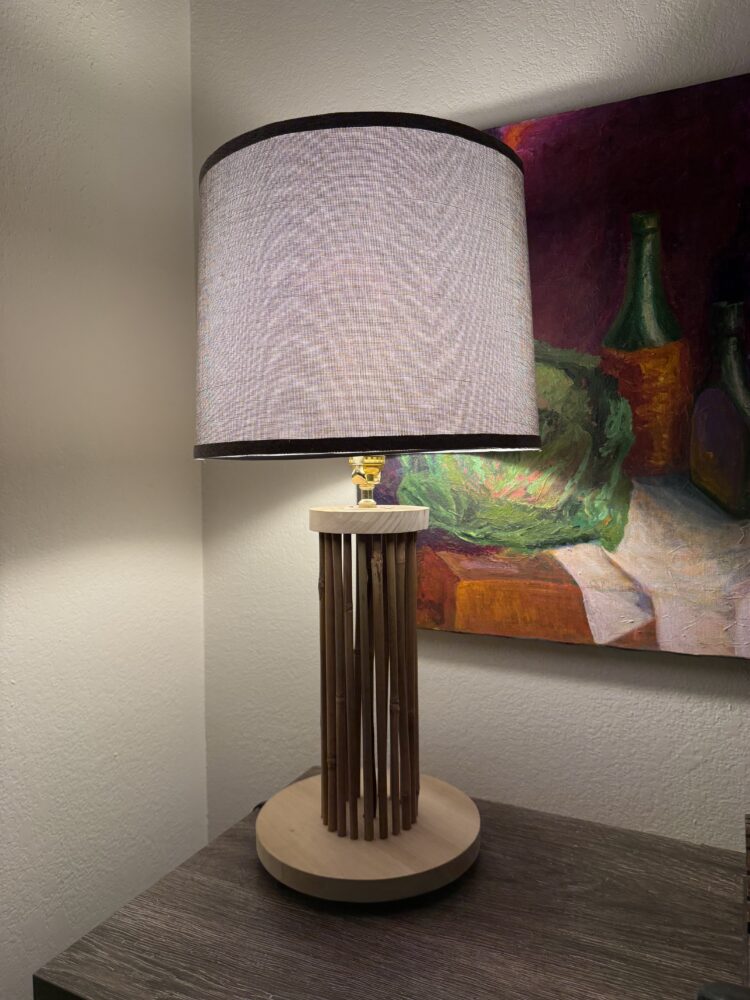
I got a little behind and the lampshade that I ordered is on its way but I think that the lamp itself turned out great. It is straight, looks clean, no visible mistakes (unless you flip it upside down) and matches the aesthetic I was going for.
I feel like over the process I executed my plan pretty well. There were some changes I made while manufacturing including increasing the diameter of the bottom plate from the original planned 6in to 8.5in. Otherwise, it came together exactly as planned. Looking back I wish that I had stained the wood for the top and bottom plate. The look right now is pretty raw and while it still matches my aesthetic it would be nice for it to have a stained vintage look. Overall the process was a great learning experience. I learned good technical woodworking skills and Josh (the woodshop lead) was a great help in showing me niche tools that fit my needs exactly. I have put it up in my room but am waiting for the lampshade to take some good photos of it. The lamp will continue to live on in my room providing warm light with the naturalist wooden vibe it emits. It will improve the feng shui in my room and I am super happy with how it worked out.