
With projects like this, it’s easy to focus most on the fabrication process, given it is time-consuming and can seem to take forever. The meaning of a piece is important. It is the reason for making the thing. However, there is art, too, in the construction and creation process. I spent the most time working on the fabrication of my project, and less on the design and inspiration, so this part is important in understanding the whole project. I’ll summarize previous posts to give an overview of the construction.
Over spring break, I was able to make a lot of progress on my toy piano project. I worked in my mom’s space, using the tools she’s gathered over the years whenever I needed them. I really enjoyed working alone—it gave me the freedom to play my music out loud and settle into a rhythm without worrying about people watching me or interrupting. The time alone let me really focus, and I found myself getting completely absorbed in the process.
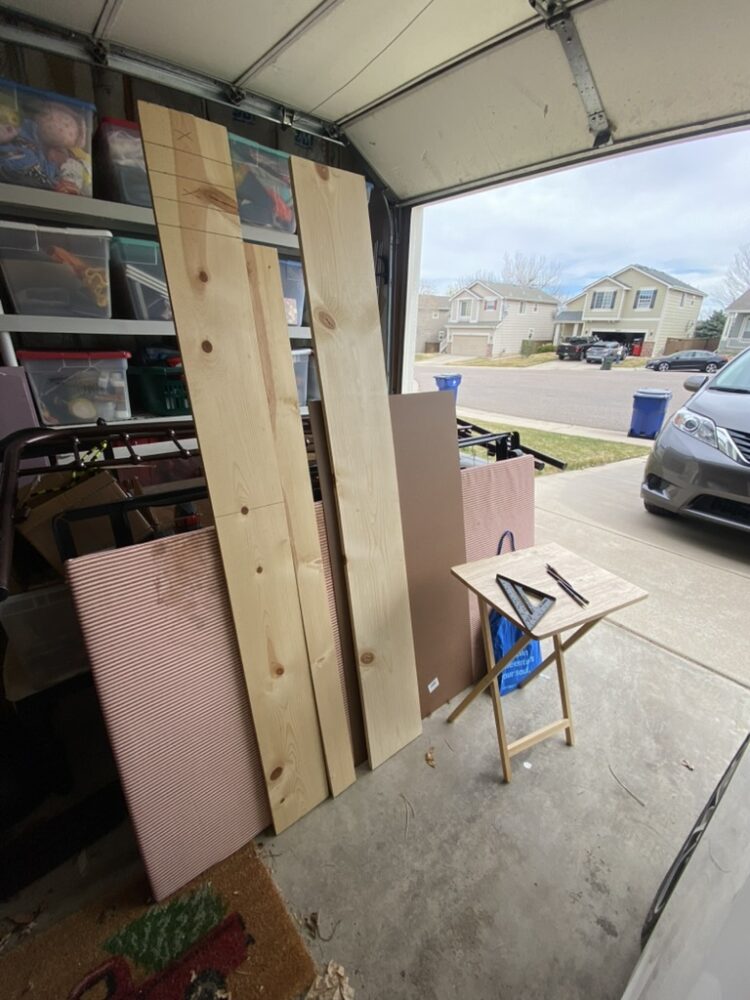
The project is a toy piano modeled after one that had been in my family from the 1960s to the 2010s. I didn’t start with a super detailed plan, which made me even more proud of how it turned out so far. I knew I wanted to make the main shell of the piano out of solid wood, so I went to Home Depot and bought a 1×10 board. I also picked up a doweling kit, knowing it would come in handy later for joining pieces.
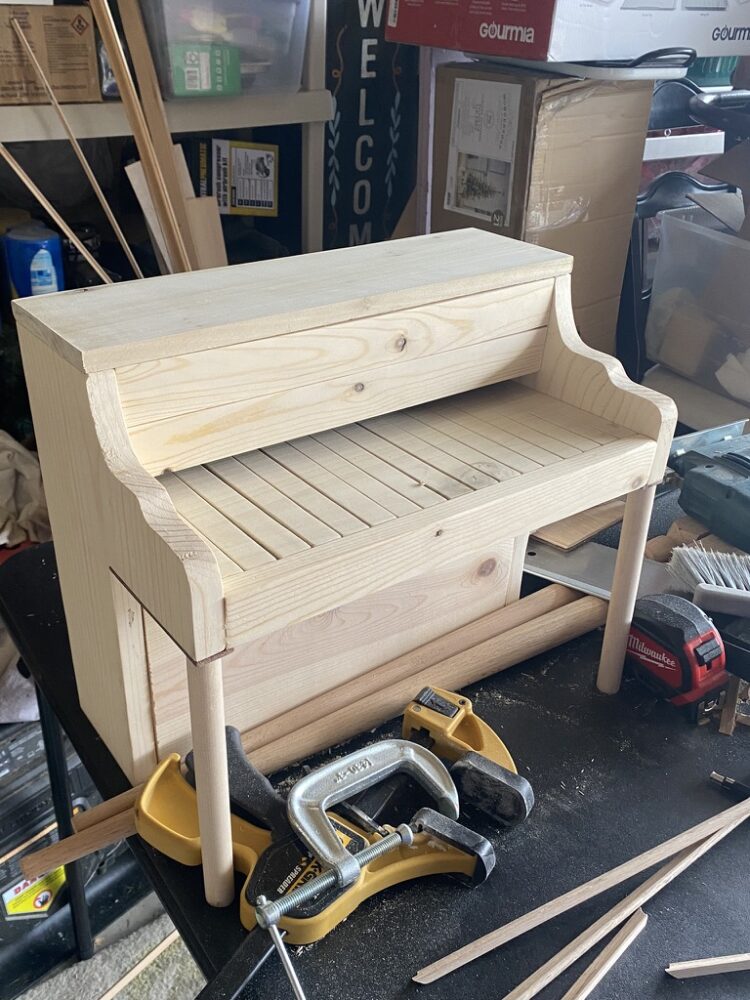
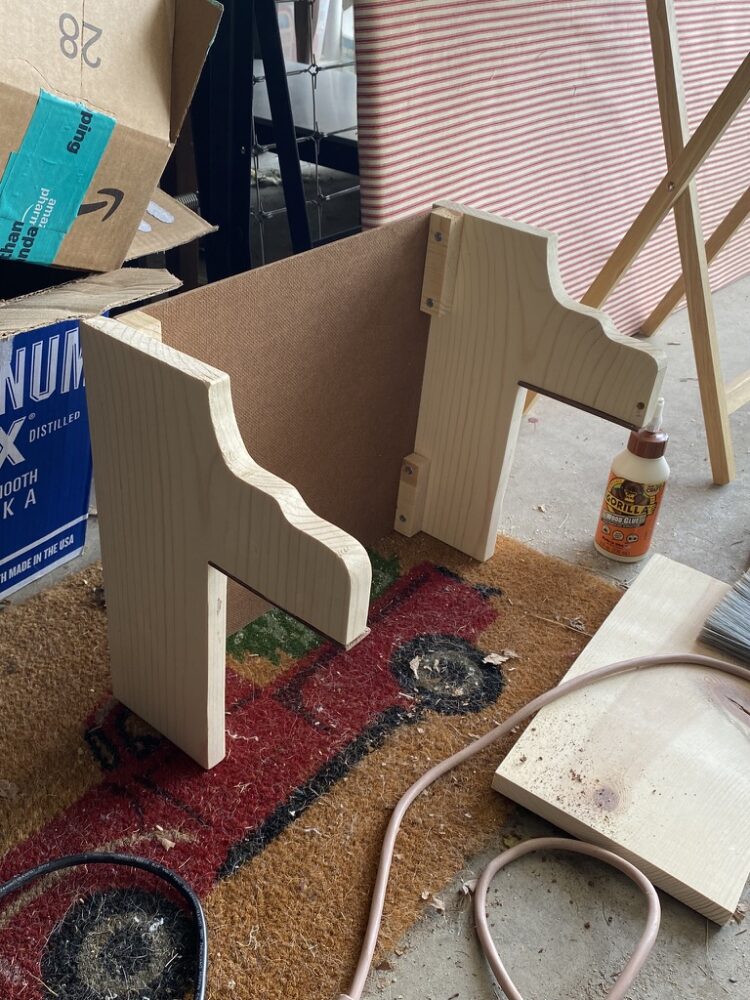
On the first day, I got into such a deep flow state that five hours went by before I even noticed. I managed to cut out the two side pieces of the piano, which had curved edges I designed using a paper template. I also cut out a set of keys, though I ended up not using them, and made a back panel to connect the sides. The next day, I didn’t document my progress as much but managed to attach the back panel and add cross-pieces to the front using wooden dowels. It was fun learning how to use the doweling kit, which was something I hadn’t done before.

On my last workday during break, I added small wood lips inside the piano that act as ledges for the solid wood top and the keys to rest on. I did this to bridge the gap between the sides without needing to dowel across that span. I also added two front legs made from a ¾-inch wood pole, which I attached using dowels as well. I haven’t glued them in permanently yet because I’m still not sure if I like how they look with the rest of the piano.
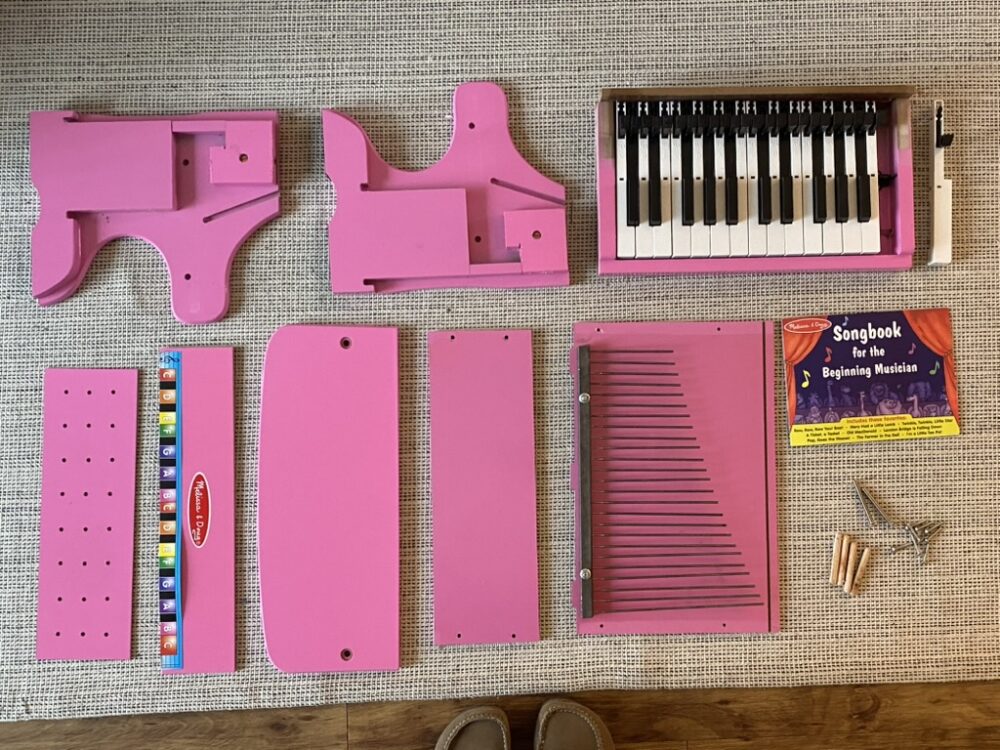
After spring break, I went back to Boulder and took a step back from building. I realized that making the sound mechanism from scratch would be too complicated, so I bought a premade Melissa & Doug toy piano for about $50 to harvest for parts. It wasn’t a huge expense, but it was more than I wanted to spend. Still, I really want the final piece to function, so it felt necessary. As soon as it arrived, I took it apart and examined how it worked. I was surprised by how flimsy it felt, especially considering Melissa & Doug’s reputation, and that made me even more proud of the quality of my own build.

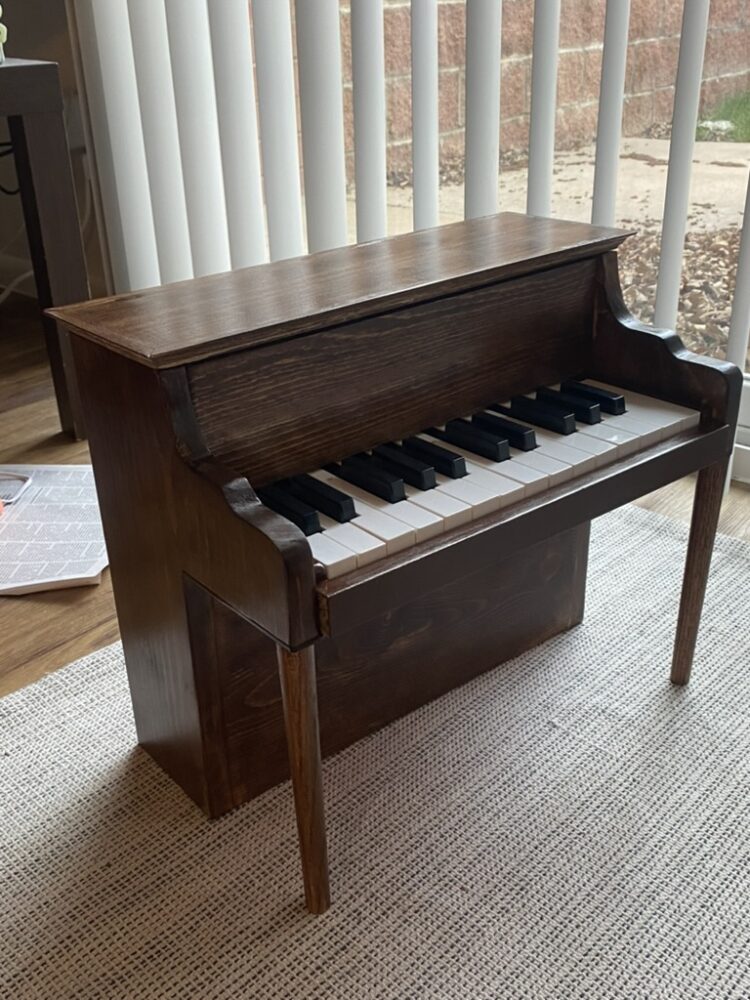
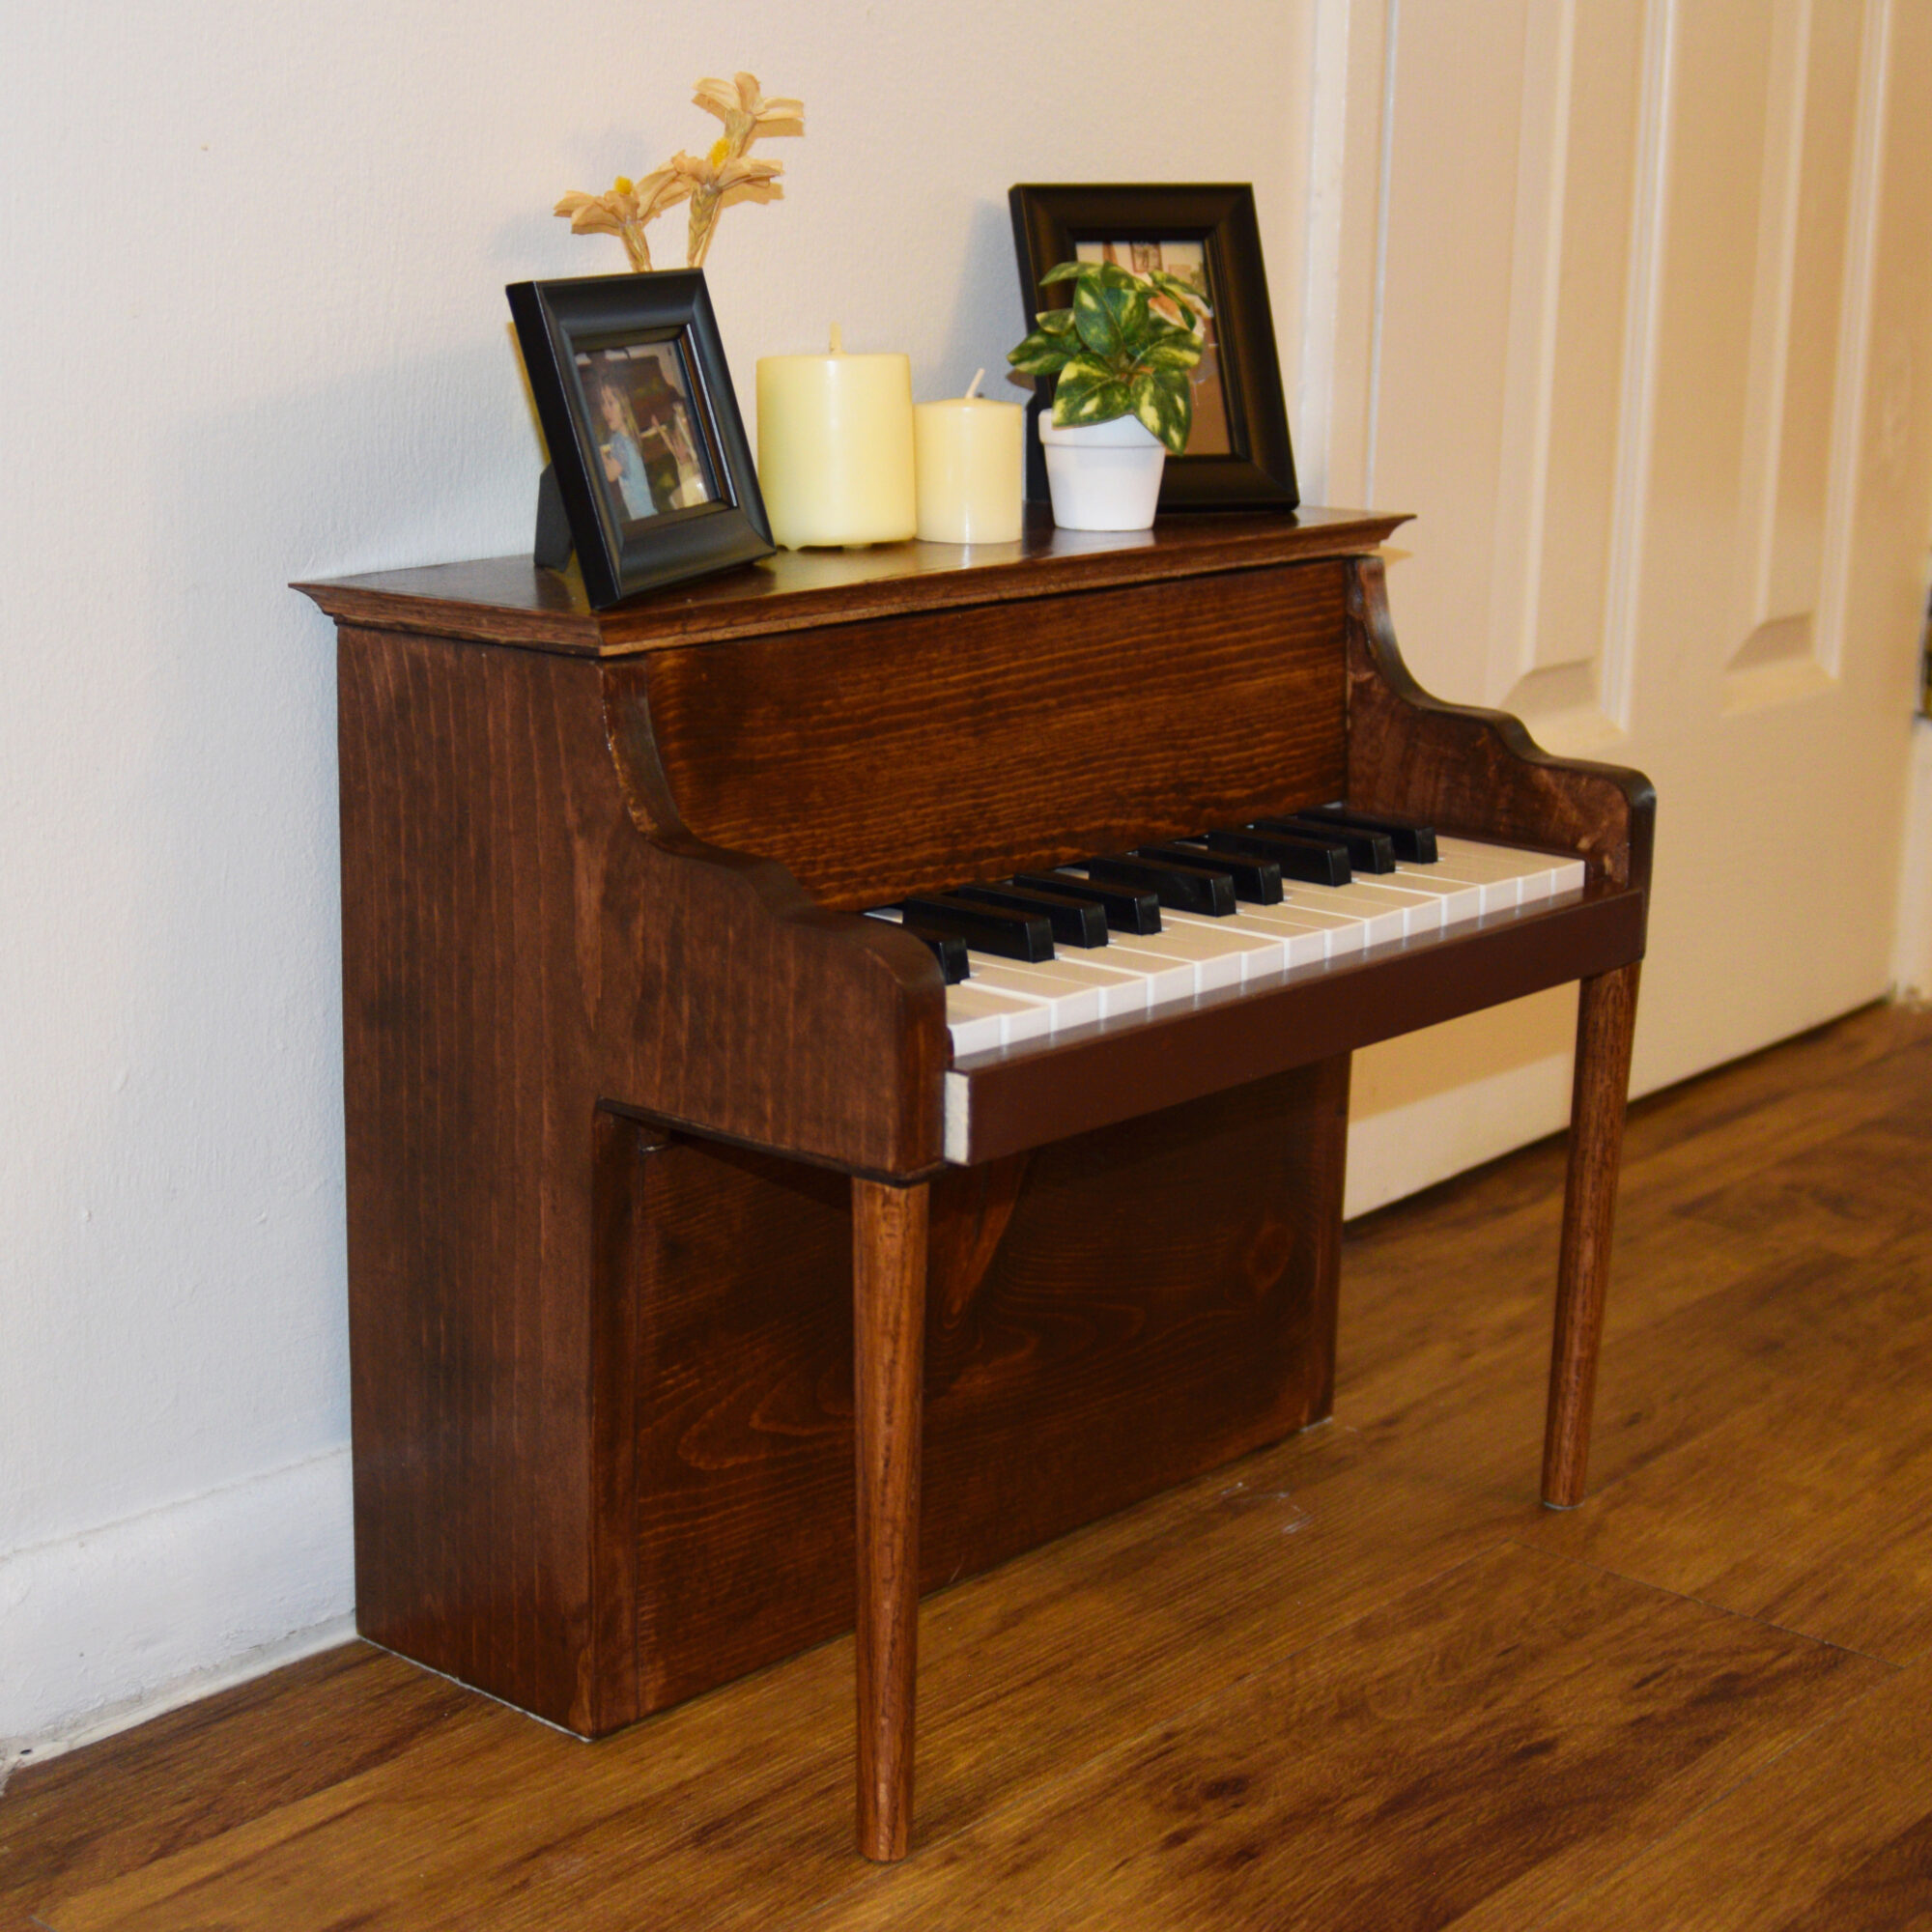
When I picked up work in Boulder, I finished sanding the piano as well as filling in any blemishes with wood filler. I then stained the whole piano with a stain to match the original piano and matched the paint color for the pink pieces from the Melissa & Doug piano. Seeing it in this stage was exciting because it was so close to being done. I could recognize it easily as my initial plan, which is always rewarding to see. I finally used a glossy spray finish in many layers which took a long time to dry and reapply, but the piano was done after that. I’m especially happy with how to whole thing can be easily deconstructed and reconstructed so I can do whatever future maintenance I need without destroying the whole thing. After the final assembly, I decided to try to make the piano sound/feel a little better by filling the keys with clay to get rid of some of that hollow clacky sound and adding felt to the key hammers to dull the sound a bit.
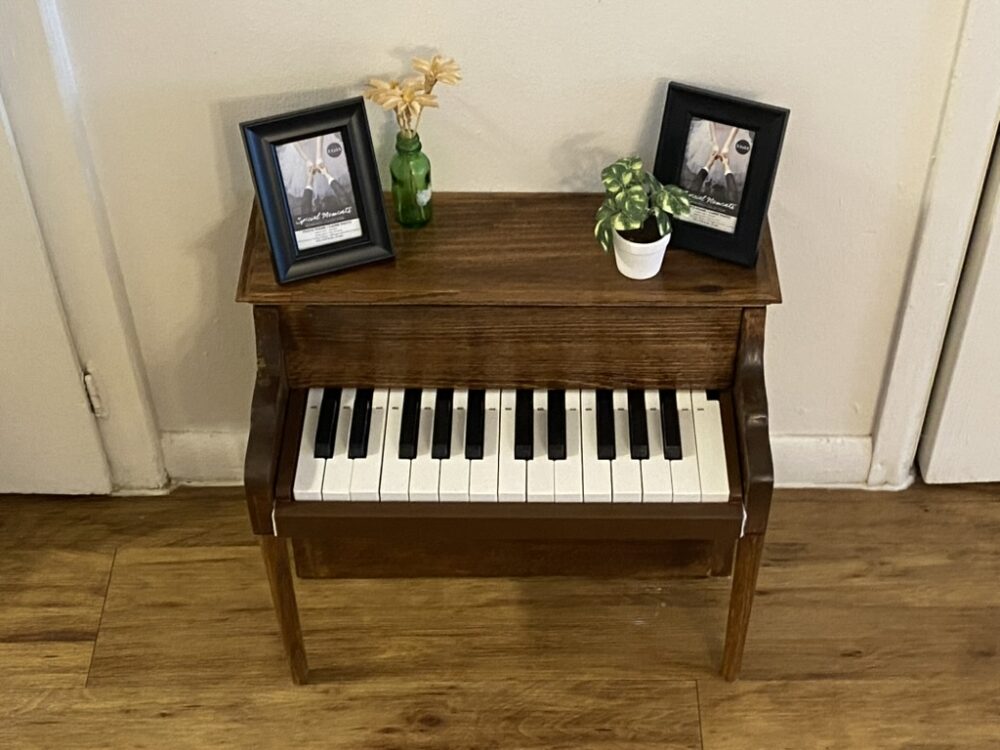
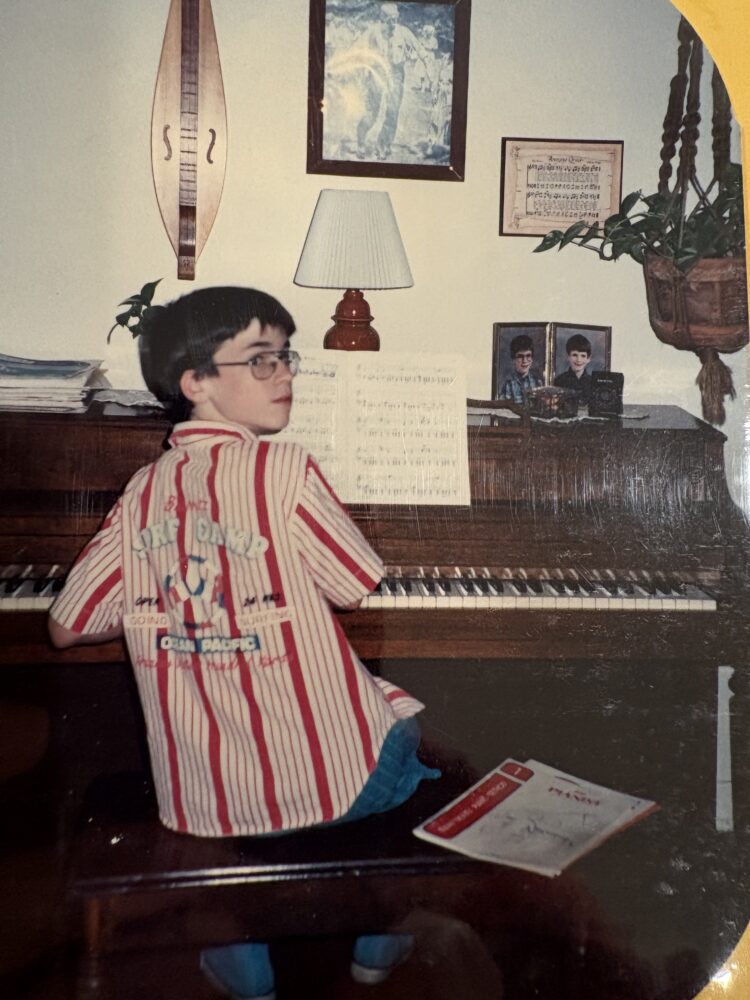
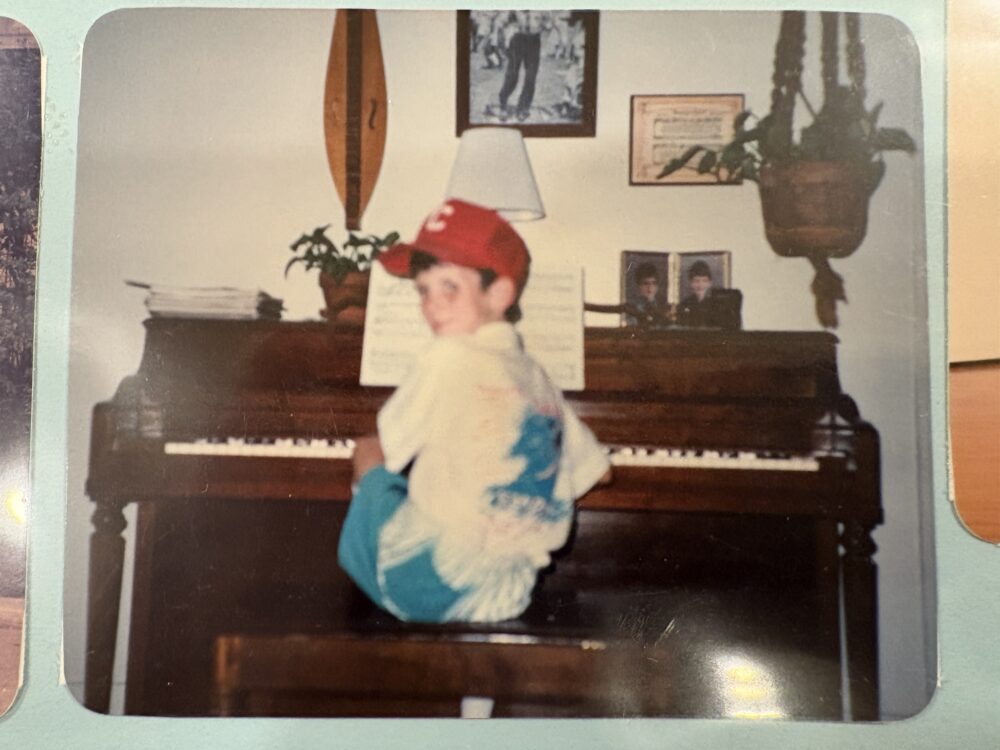
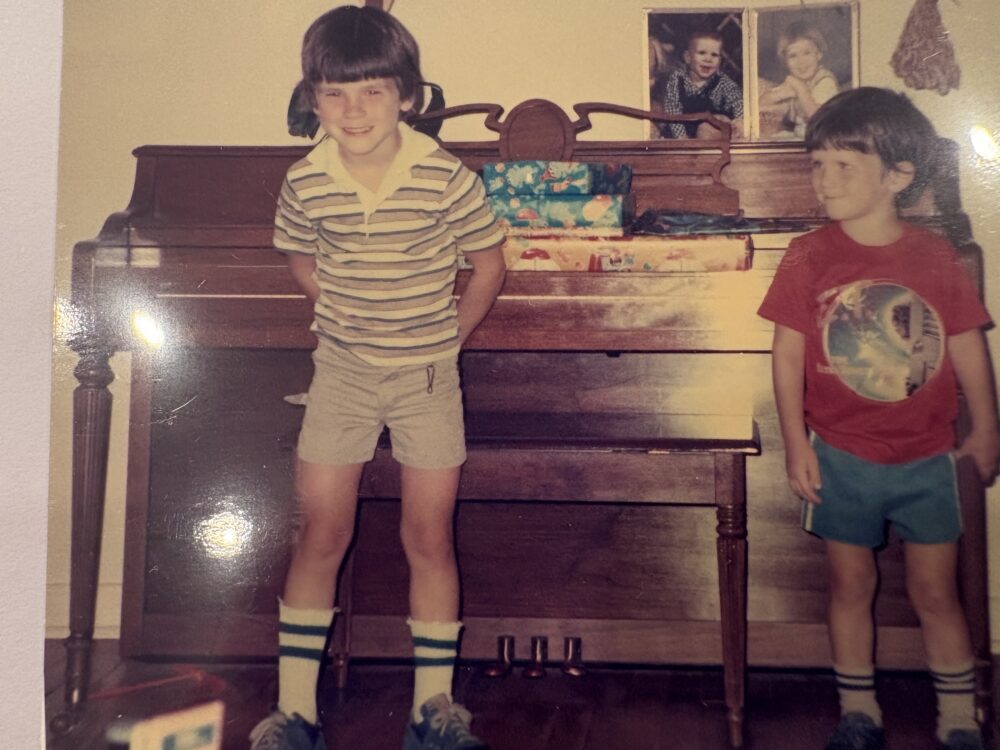
I’ve been living with this little piano in my hallway for a few weeks now and I’m really enjoying it. Sometimes when I walk by it, I’ll bust out a tune or try to play along with whatever song I’m listening to at the moment, which I couldn’t easily do before. I’m happy with how it turned out. I recently sent a photo of it to my grandmother, who got it when she was 16. She shared some more photos with the piano, seen below. These are photos of my dad and uncle as kids.
Like with any project, there are still some things I would change. Here are a few ideas I have:
Pedals: Like most pianos, our family piano had three pedals. I remember one of them being impossible to push down.
Music Stand: I wanted to add this music stand originally, but I ran out of time to learn how to laser cut. I can play it off, though, since the stand was actually broken for the longest time, so we often left it leaning against the wall so it didn’t fall on us while we played.
Fine-Tune Keys: The piano plays, and for that I’m grateful. However, it still sounds like a cheap toy piano (unsurprisingly). There are many things I could do to make it sound better, like adding some felt padding where the plastic joints move.
Miniature Music Books: My sister and I shared some memories we had of specific books we played with, and the notebooks we brought to practice with Ms. C, our piano teacher.
Bench: The original piano had a matching piano bench, which had a lid to store sheet music and books. I think this would be cool in miniature form to store little trinkets or aforementioned miniature music books.

This project taught me a lot about my work ethic and determination. I had a plan and I fully executed it. I’m often impressed with the things I’m able to create for classes when I’m given a deadline, and I realize how important it is to always set goals to reach for because you never know if you’ll surprise yourself. I’ve tried giving myself deadlines to do big project like this, but sometimes, I don’t reach the deadline. The external motivation of course assignments helps give an extra push to get it done. My mom often credits me for “just doing things” when I want to do them, like making projects, but she only sees the ones I do, not the hundreds I planned but didn’t execute. When I finish a project like this, I’m proud that I actually did it. I couldn’t even tell you how many works-in-progress I have, which I honestly may never finish at all. This project has inspired me to try more things like this which may not have a huge practical purpose, but serve as meaningful art and practice with fabrication.
I’m looking forward to showing this off at the expo to display my hard work.
1 Comment. Leave new
[…] Grandma’s Piano: A Miniature Replica – Final Report Part 2 […]