
In part 1 of this final report, I covered:
The Intention: To make a clock representative of personal identity
The Aesthetic: Art Nouveau
Inspiration: The human eye/iris
Modeling: Modeled in Rhino to be laser cut
Materials: Acrylic + MDF
In this part, I will be covering the prototyping process, final fabrication process and the challenges I faced with my initial plan for materiality.
Starting with my timeline,
Week of February 24: Plans and Inspirations – This phase of the project involved defining what I wanted to make and ideate on the feeling I wanted to create with this product.
Week of March 3: Specifications and ideations – This involved researching aesthetics and sketching out my ideas to nail exactly what I wanted to design. This was quite rewarding as I figured out my design early on.
Week of March 10: Prepare 3D model + Plan materials/fabrication – This was to fully flesh out and visualize the design in 3D space.
Week of March 17: Design and Plans Feedback – This was design preview critiques and, because I ordered material samples, I was able to receive feedback on my design choices and specifications.
Week of March 31/Apr1: Finalize laser template file – This involved putting in the final touches to the laser file and organizing it for the fabrication process.
Week of Apr 7: Prototyping – This involved making a smaller version of the clock to check the assembly of elements and ensure measurements were correct.
Week of Apr 14: Final laser appointment – This included overcoming final challenges and having all of the final pieces of the design together.
Week of Apr 21: Finalize design and presentation – This included taking professional photos of the product and preparing my presentation for the final review.
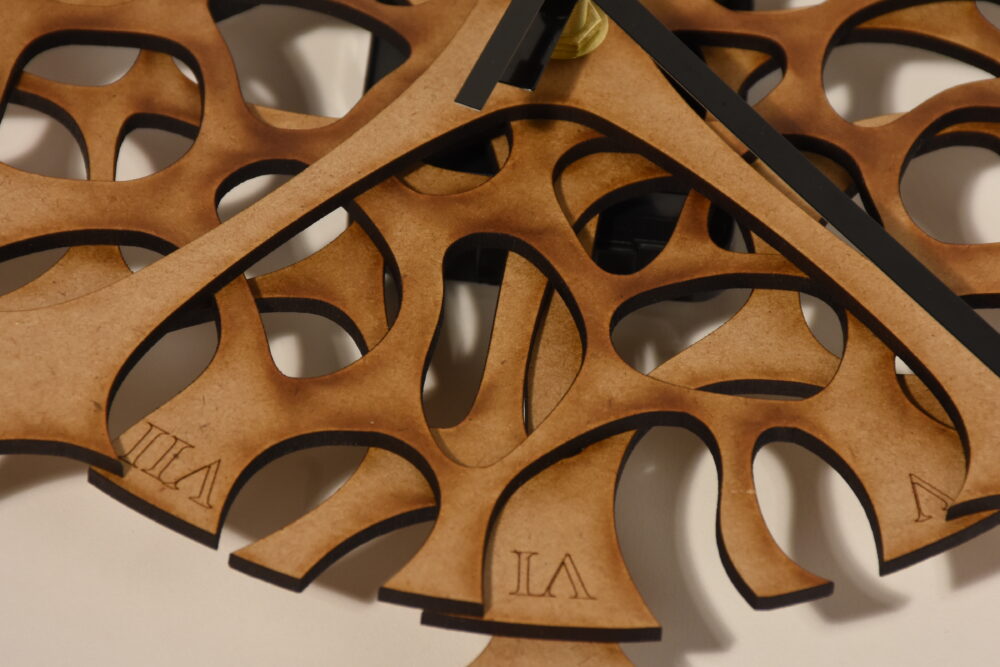
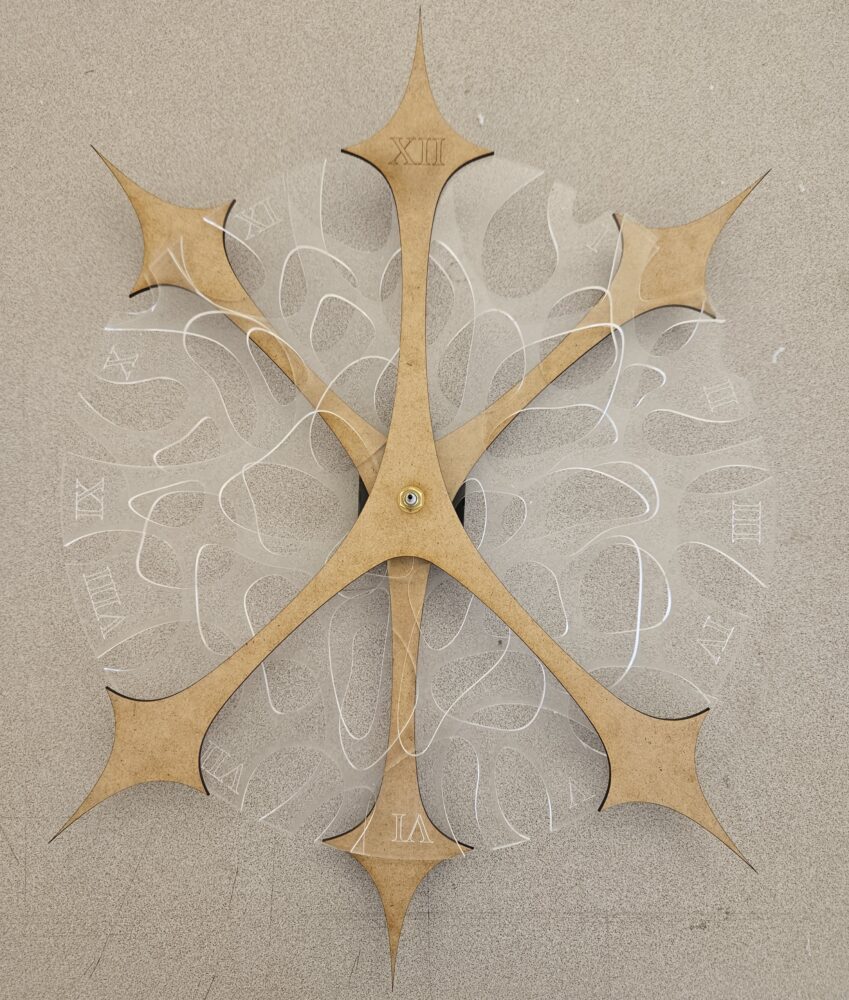
With the design finalized, material ordered and everything prepared for fabrication, I began the prototyping process. I wanted to make a prototype of the clock to ensure all of my measurements were correct for the clock mechanism to fit properly and hang on the wall as intended. This was a simple process that involved me laser cutting the clock only out of mdf (which is less expensive) and at an 8 inch diameter rather than full size.
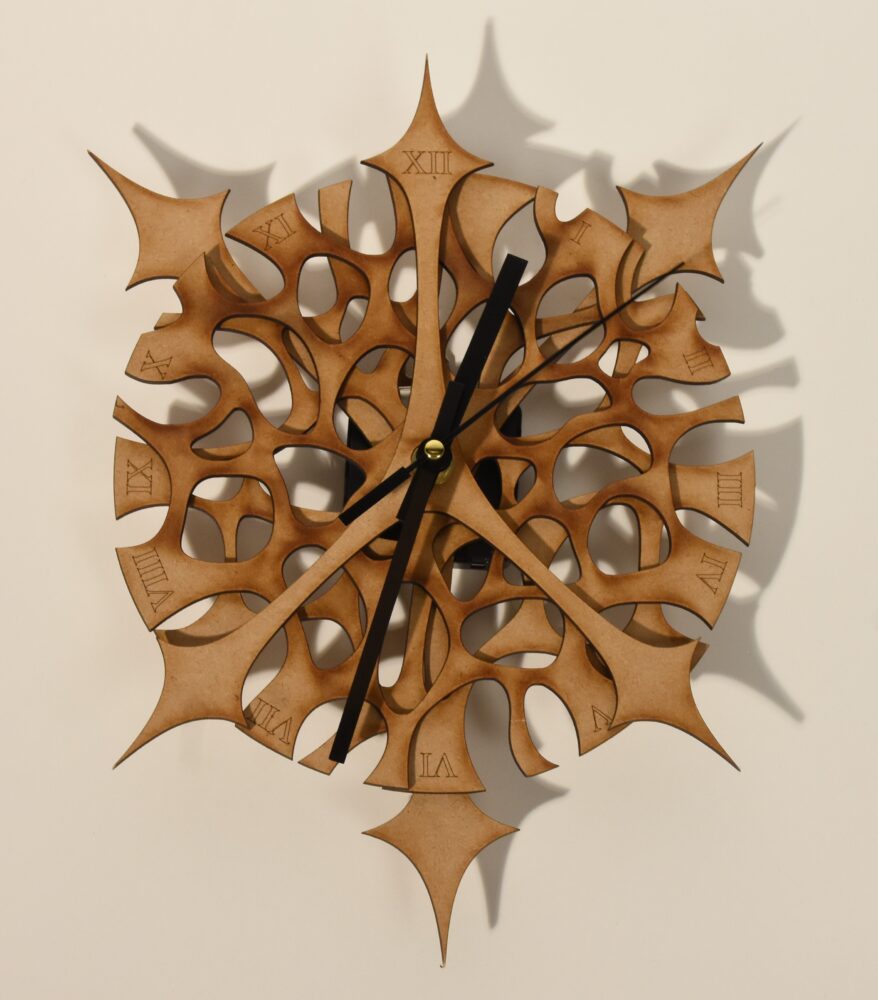
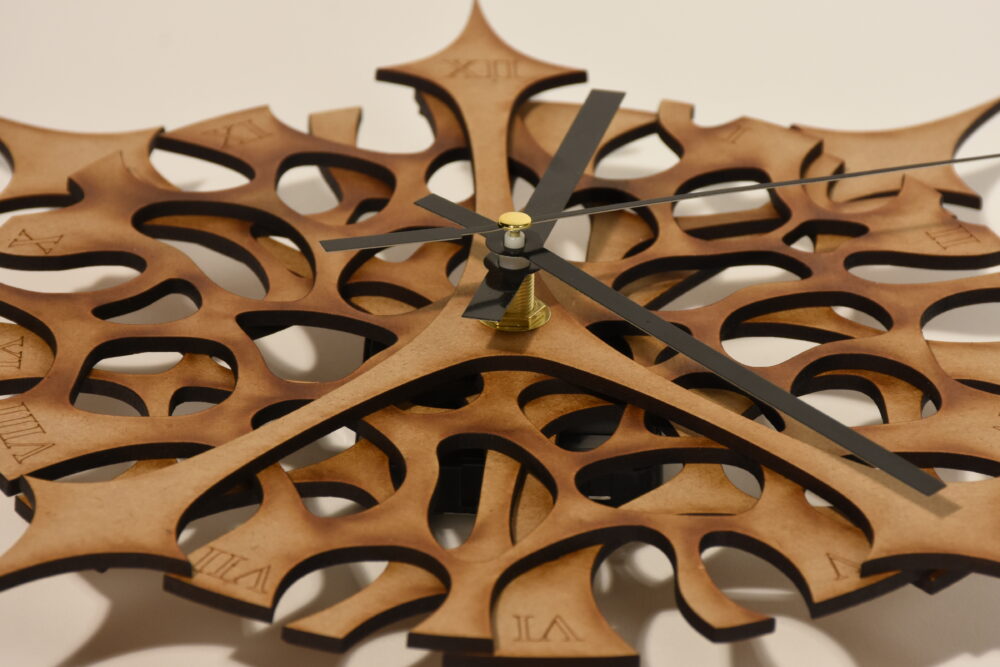
The prototype was completely successful in fitting the mechanism and achieved my design goals. I was pleasantly surprised by the outcome and can see myself painting or staining it in the future to use or gift to someone.
Moving forward, I rescaled the design to 14 inches in diameter and prepared the laser file according to the materials. My appointment was 1 week after I made my prototype, giving me enough time to make adjustments if needed.
In my final week leading up to my laser appointment, I was waiting for my colored acrylic to be delivered. Since I ordered from them before, I knew it took around 1 week to be delivered, but I ordered 3 weeks in advance to be sure it would be on time. Unfortunately, my package got lost in the mail and I had to improvise. Fortunately, I am accustomed to improvising and was able to make a new plan.
First: The Environmental Design (my major) Woodshop sold clear acrylic sheets which was the primary material to use initially.
Second: I did some research on how to dye acrylic as the color was a crucial piece of the final product. I found 2 ways to dye to acrylic:
- 1: Submerge the acrylic into boiled water filled with dye (similar to how you would dye clothing)
- 2: Use alcohol inks, alcohol solution and a heat gun to hand dye the acrylic using multiple colors.
Third: Since I did not have the equipment I would need to dye the acrylic using the 1st method, I decided to use the 2nd. I purchased materials at michaels and used the woodshop’s heat gun. I was fortunate enough to buy a pack of alcohol inks that had the colors I wanted to make with the initial design (turquoise, apple green, yellow).
Below are the materials I used:


At my final laser appointment, I cut out the material and tested the dyeing technique on some scrap pieces to be sure it would work.
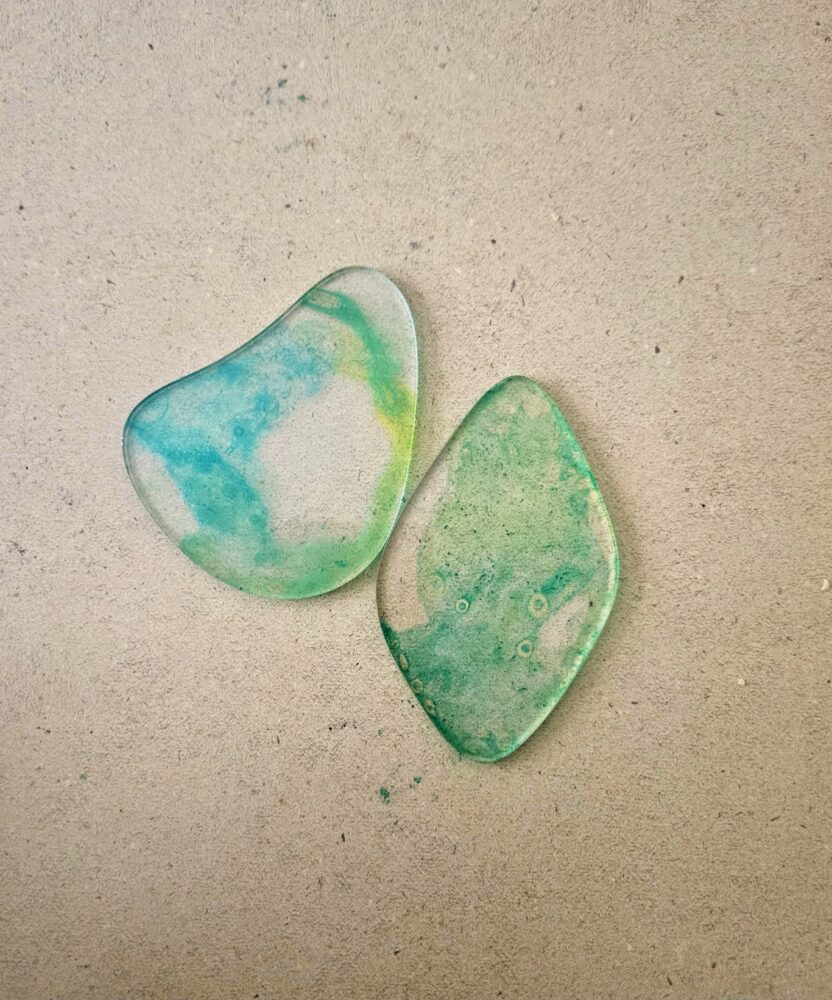
I decided to let the alcohol ink dye dry for over 24hrs to ensure nothing would set incorrectly and that I would have sufficient time to dye the final clock.
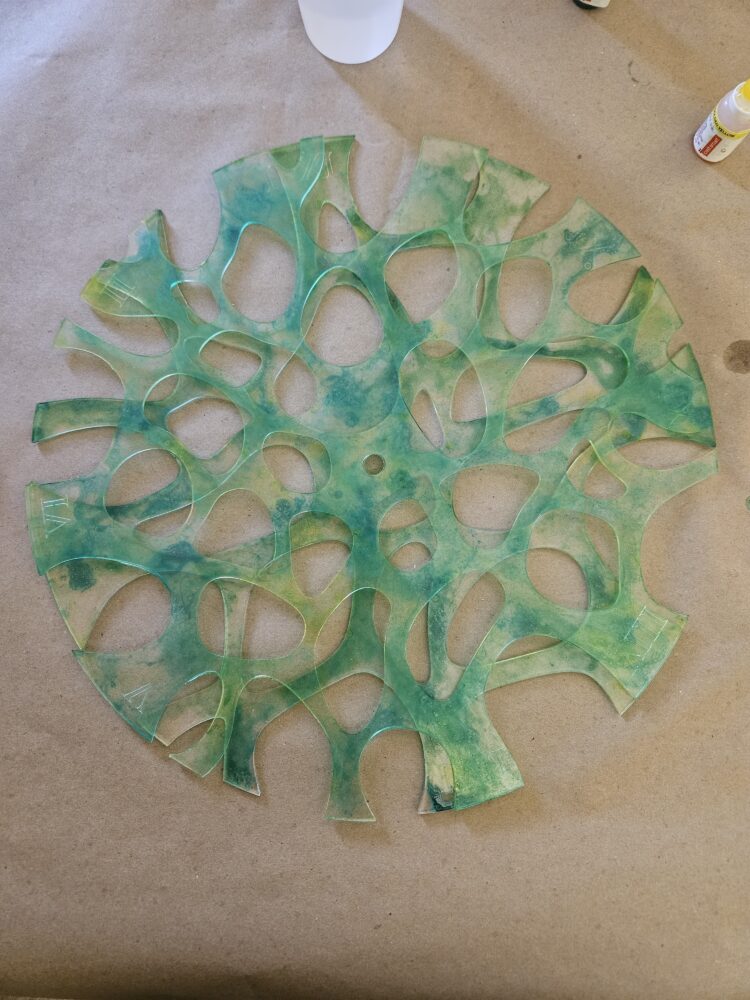
Going back to the workshop a few days later, I prepped and dyed the acrylic sheets as planned. Below are some process photos:

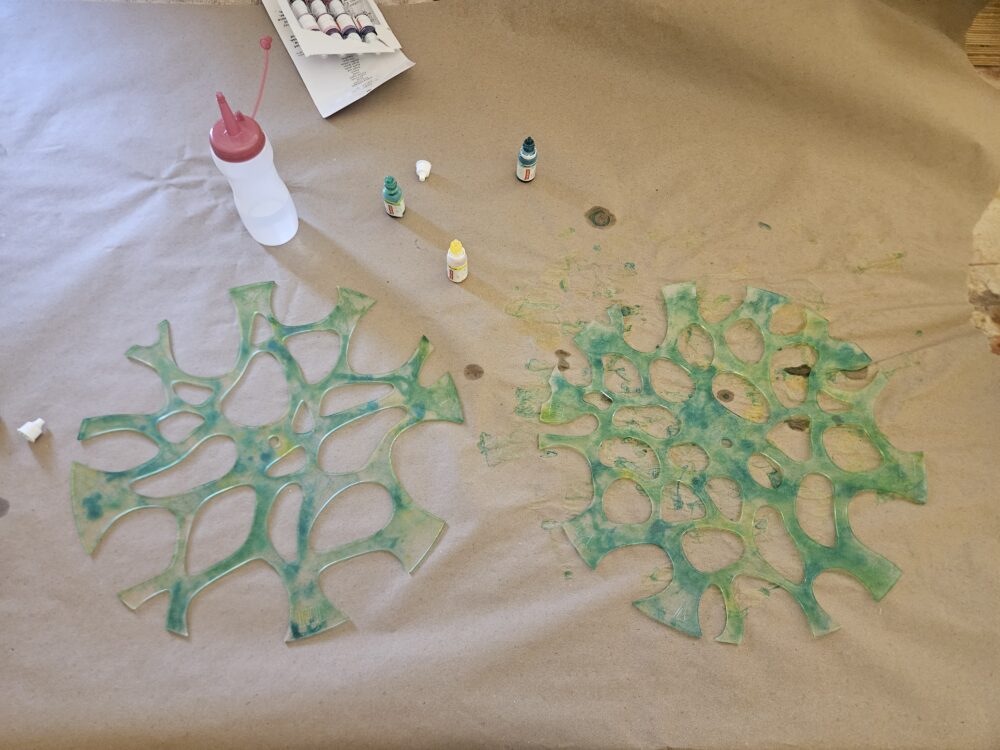
The steps included:
- I laid out butcher paper to protect the table
- I then mixed the 70% alcohol with water for a less potent and more diluted solution. This was mixed using a squeeze bottle so that I could control where the solution would be poured.
- Then, I put drops of the ink directly onto the acrylic sheet.
- This was followed by pouring some alcohol solution on top to help mix the inks.
- Finally, I used the heat gun to mix and move the solution around the acrylic. It dried quite quickly, so I had to move fast with mixing the inks how I wanted.
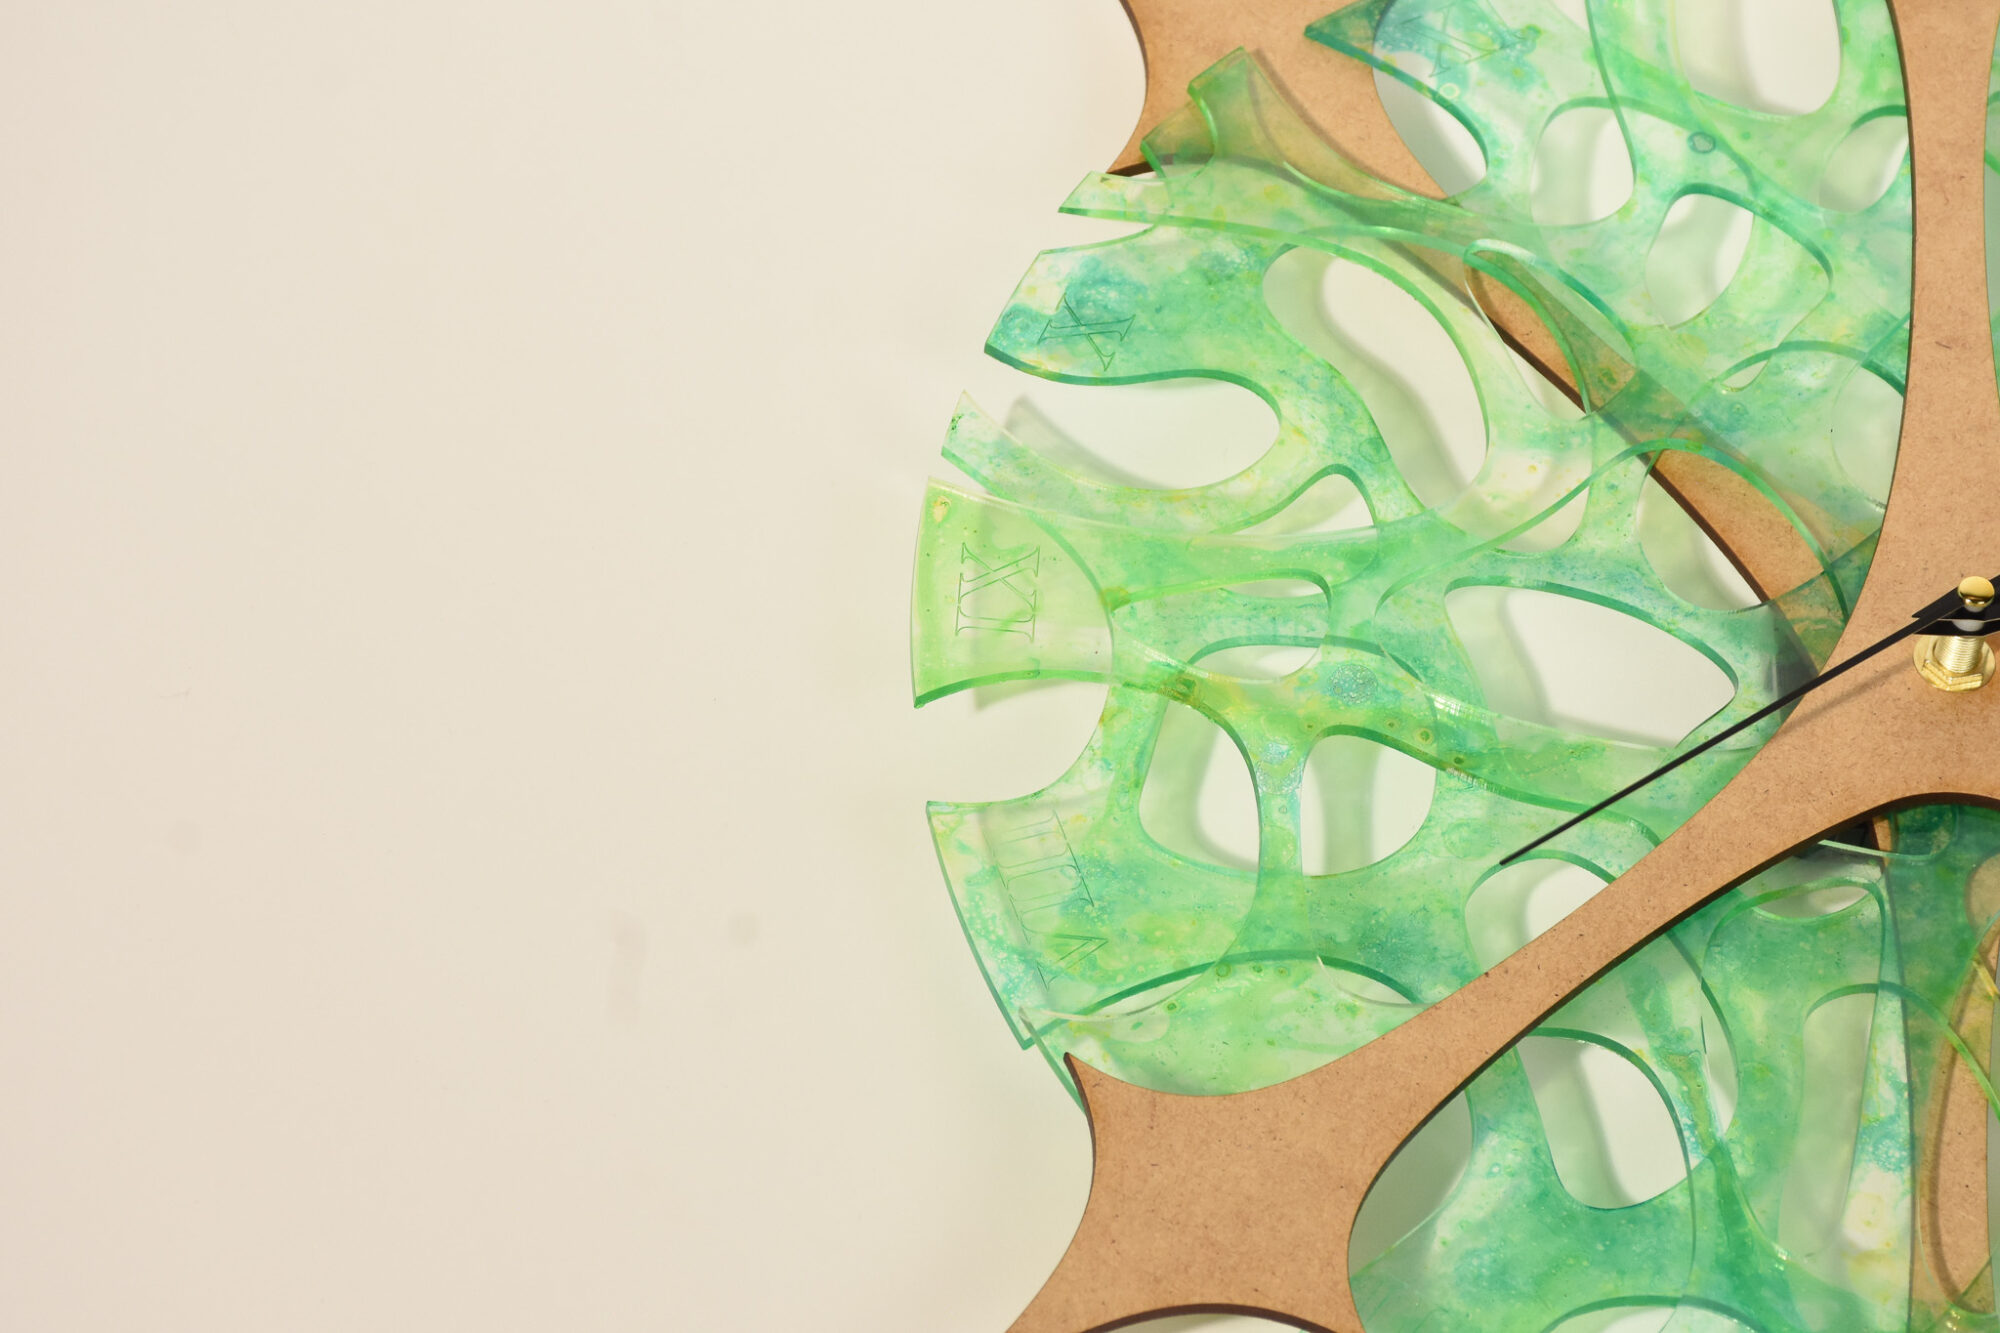
One thing to note from this process was that since the ink and alcohol solution dried quickly, I repeated this process on small surface areas until the entire acrylic sheet was dyed to my satisfaction. Additionally, I dyed the back part of the acrylic sheet to ensure the smooth texture was on top, eliminating as many discrepancies as possible.
Below is a photo of the final dyed acrylic stacked together:
Finally, I assembled the clock and it worked! Much of this improvisation had me frustrated and worried, but it turned out much better than expected.
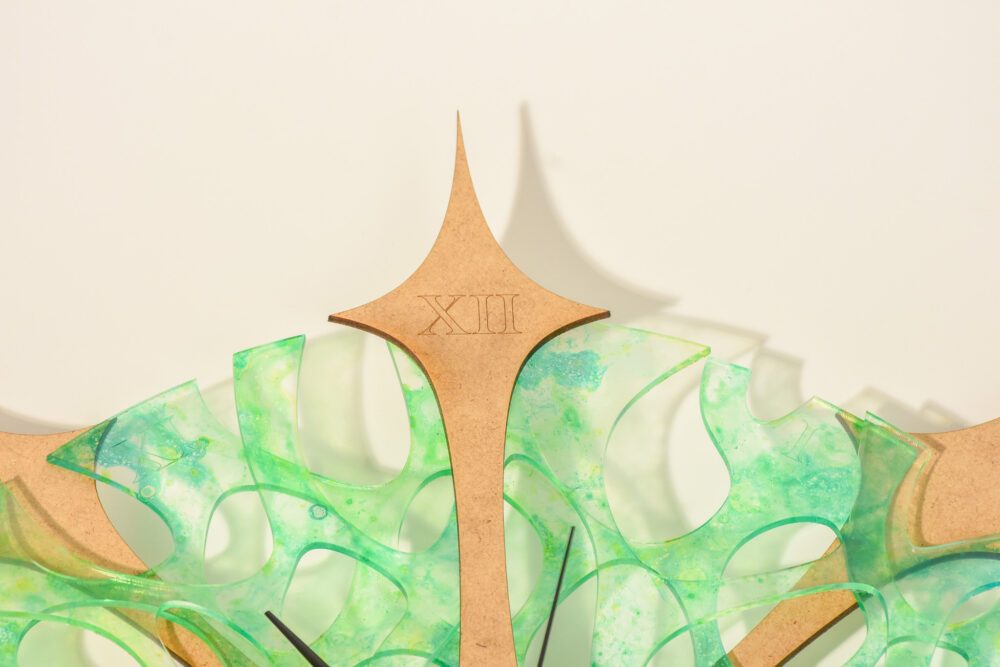
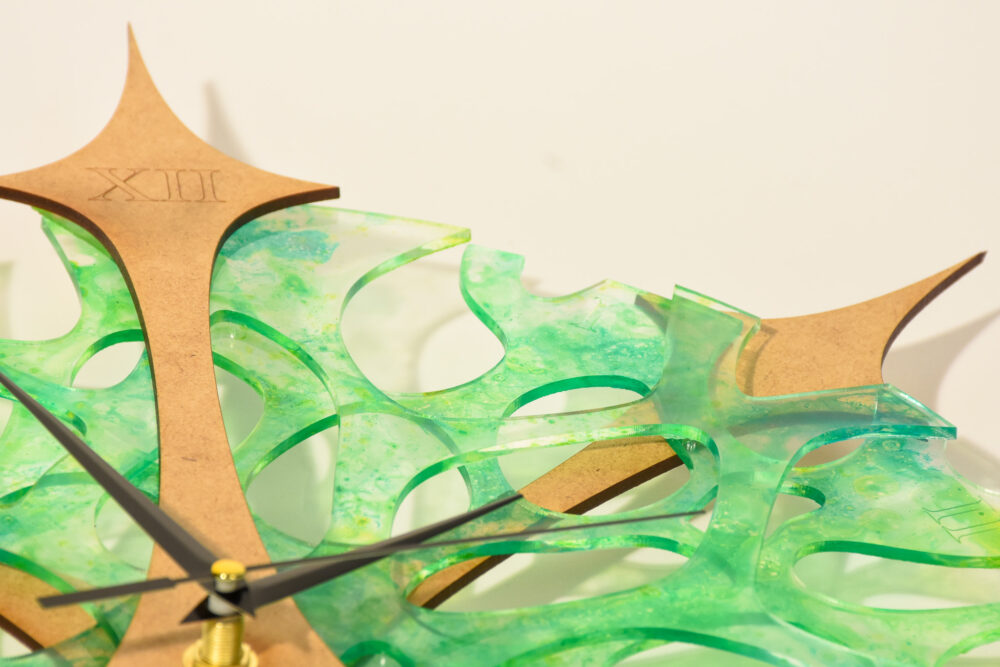
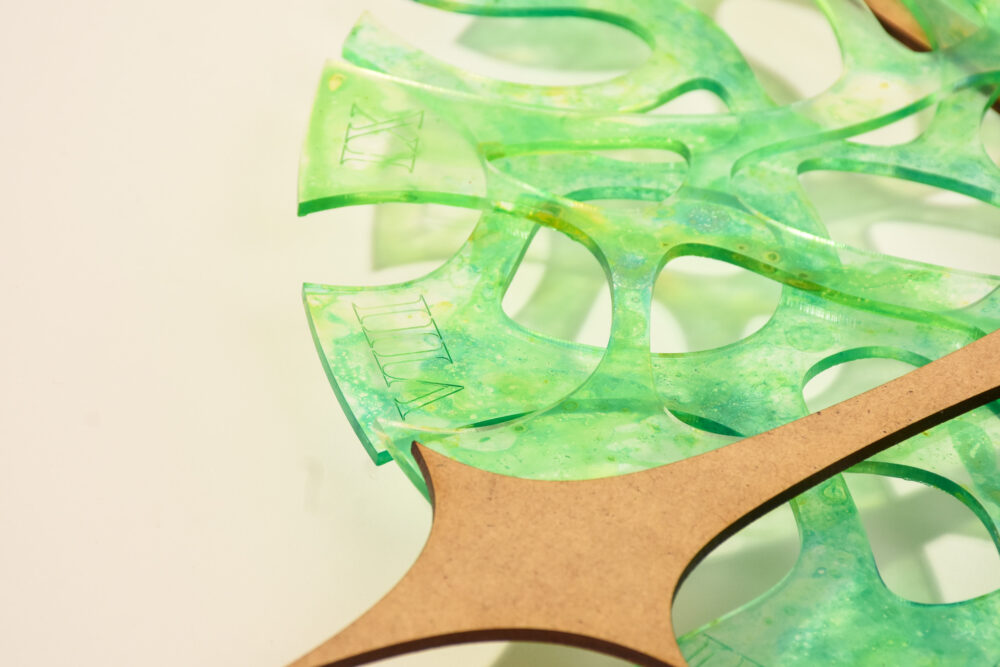
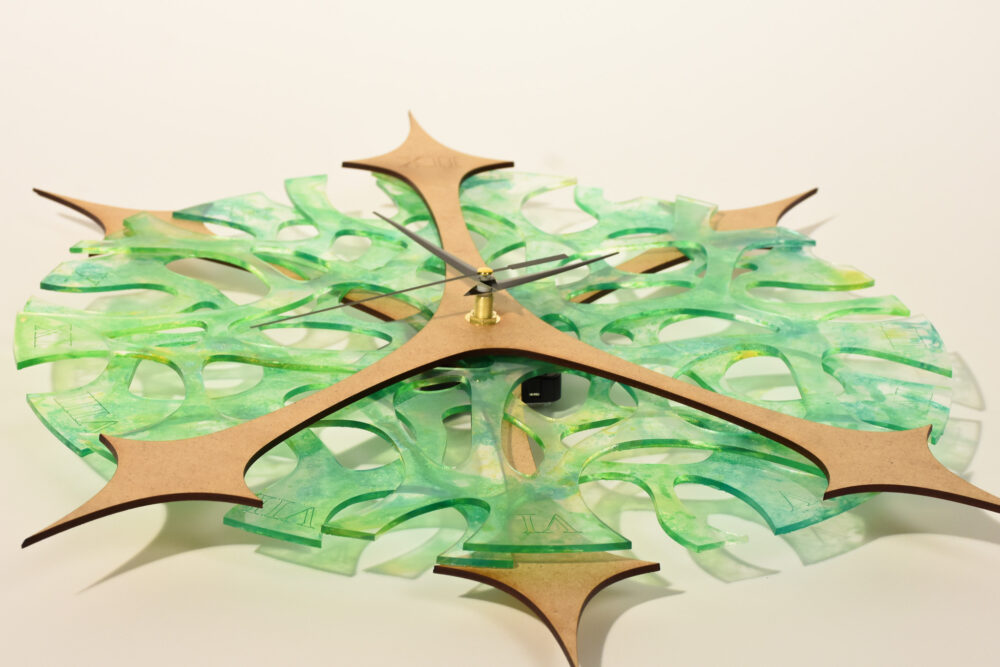
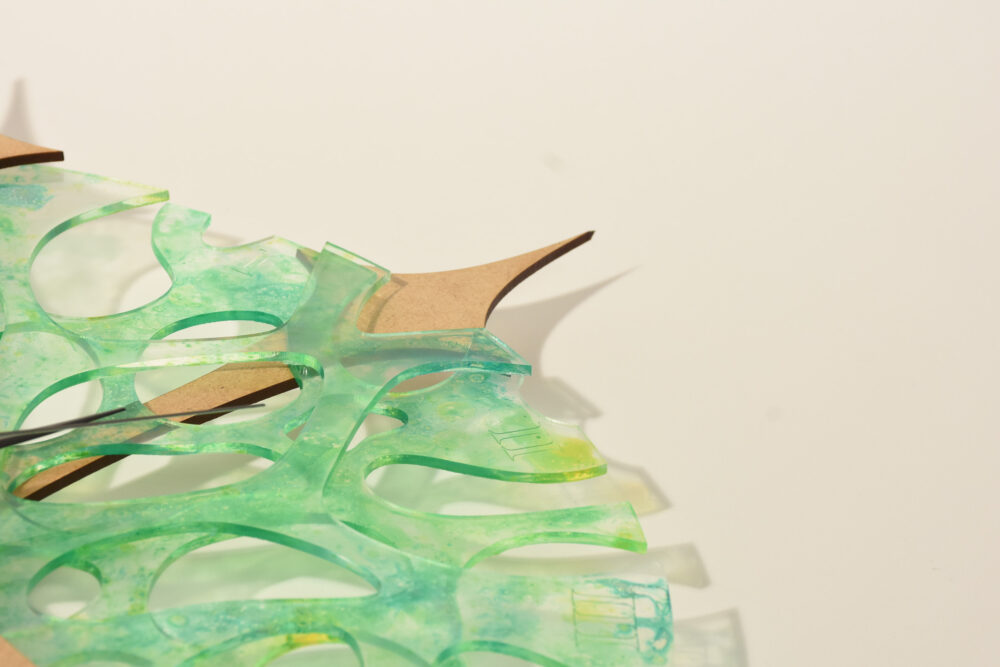
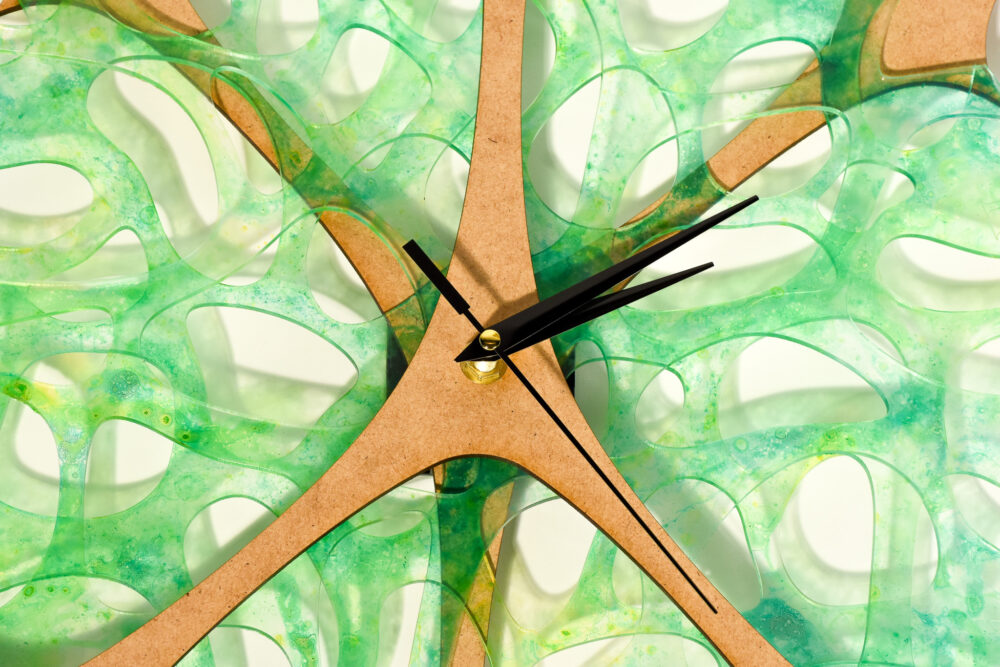
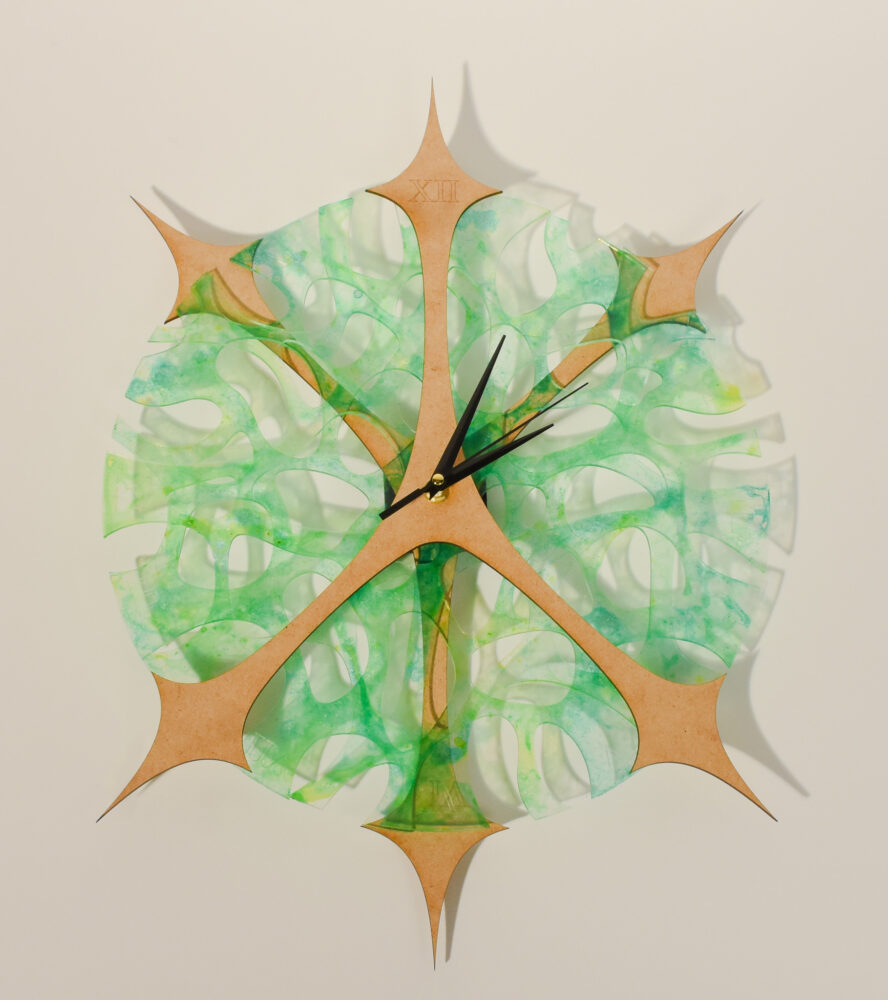
The clock includes two layers of spokes, making six in total (one reason for the name “Hex”). The first layer indicates the number 12 on the clock whereas the back layer highlights the 6, making them opposing pieces. The two middle layers of the assembly consist of the colored acrylic. It achieves the exact illusion I wanted of seeing intertwining pieces of glass that vary in color and transparency. This is something that draws people into the final design, wanting to look closer in hopes to understand how it works. This is where the final level of detail comes into play… once close enough, you can see that there are roman numerals etched into the acrylic, allowing one to see precisely what time it is. Generally, you do not need to see the numbers on an analog clock to know the time, but this is a slightly visible feature I wanted to add as the final layer of interest on the clock that you can only see up close.
Hex has a multitude of layers to its meaning. On the surface, it connects to its physical features and fabrication process of “hex” meaning six… 6 spokes, 6 layers/elements (2 layers of mdf, 2 layers of acrylic, 1 layer of etched numbers, 1 clock mechanism).
Digging a little deeper into its meaning, to “hex” is to cast a spell or bewitch someone or something. Throughout this entire process and in every blog post, I discuss the significance of the human eye; how I find it mesmerizing and intricate, not knowing where it begins or ends with all of the intertwining fractals. This is exactly what the clock is to represent, to hex someone with its intertwining pattern and curiosity that draws you in.
Sources:
https://www.google.com/url?sa=i&url=https%3A%2F%2Fwww.wagner-group.com%2Fen%2Fdo-it-yourself%2Fproducts-and-accessories%2Fproduct%2Fheat-gun-furno-300%2F&psig=AOvVaw3waucWJjepTJ7C1BM8DoWz&ust=1746123537250000&source=images&cd=vfe&opi=89978449&ved=0CAMQjB1qFwoTCLjBq_OxgI0DFQAAAAAdAAAAABAE
https://www.google.com/url?sa=i&url=https%3A%2F%2Fwww.skinsafeproducts.com%2Fwalgreens-isopropyl-alcohol-70-first-aid-antiseptic-32-fl-oz&psig=AOvVaw3shACAM7_CuoYuXK2wZUhp&ust=1746123537372000&source=images&cd=vfe&opi=89978449&ved=0CAMQjB1qFwoTCKCjrpuvgI0DFQAAAAAdAAAAABAE
https://www.michaels.com/product/bold-resin-pigment-ink-set-by-craft-smart-10694265?cm_mmc=PLASearch-_-google-_-MICH_Shopping_US_N_Seasonal_Graduation_N_PMAX_All_N-_-&Kenshoo_ida=&kpid=go_cmp-22423981827_adg-_ad-__dev-c_ext-_prd-10694265&gad_source=1&gbraid=0AAAAADkMxxeEdVs4QKQYQe5g8g7t3VJRR&gclid=Cj0KCQjwlMfABhCWARIsADGXdy8FGE47JcCuctafqhX2jj026gPIB1EmZGkd2S3v1UkSSp9z8vzov9waApt-EALw_wcB
2 Comments. Leave new
I really like how the dyed acrylic turned out! It adds a lot of visual dimension to the piece and I like the shadows that it creates on the wall surface.
Hi Mia – I really like the end result of your Hex clock! I especially liked learning about your acrylic dye process (something I’d love to try) and seeing the contrast between the solo-MDF and acrylic-MDF versions throughout your design process. Do you have any plans to make another one of these or sell them?