To create this project, there was a ton of work that wen t into this. I had several different phases of the project. There was research, design, build, prototyping, reevaluation/problem solving, and the finished product. I started with some research for the project and then applied that to my design/planning. I did some prototyping with the features that I was most concerned about. From there, I reevaluated the design and made edits. From there, I went into the build phase and re-evaluation/problem solving several times, each time I faced a challenge. This led to my finishing the project. This timeline can be seen below in the Gantt chart

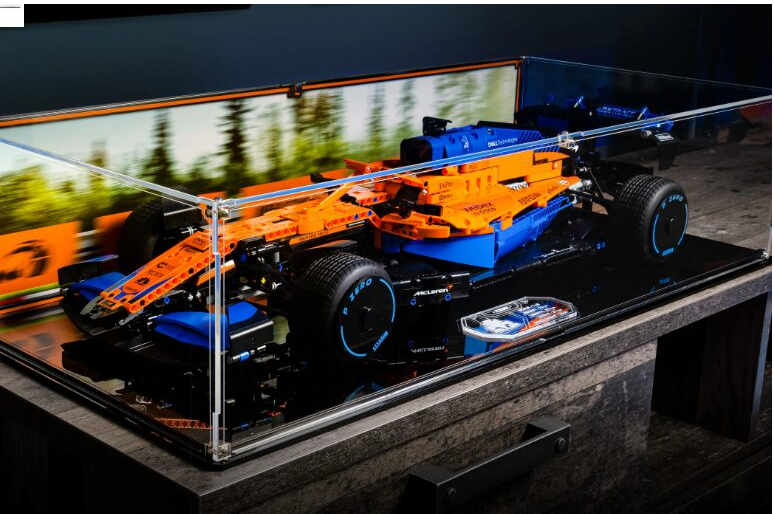
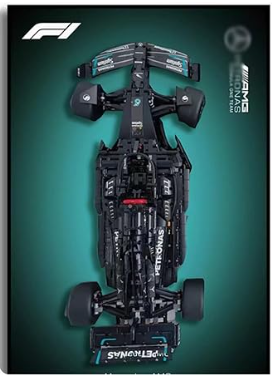
I started this project with research. This was done with the aesthetic of Dark Aero and Formula 1, as well as into options for displays that are already out there. I found that for the aesthetic of Dark Aero, it is typically dark grey and black colors with hints of color and patterns. Formula 1 also has carbon fiber as a major influence on the designs. There were a few that I found online for these displays. One of the ones I really liked had the cars supported by acrylic and had it at an angle. I thought this was a cool touch since you could see the top and side features of the cars. These designs were all shelf or floor cases. This was a problem since part of this project was to find a way to save some space on the limited floor and shelving space I have. Other options I found were wall-mounted. These were hung vertically or on their side. I thought about doing this, but I was not 100% sure if it would fit in the way I wanted on my wall, and I loved the angled so much. Below are some of the inspiration photos.
From there, I went into some drawings for designs. I debated whether I wanted to have these all on the same panel or have their individual panels. Part of the decision was based on how I wanted the backgrounds. I was thinking of having one of the vintage travel posters of one of the races on the background, but eventually decided against it since I was leaning towards the Dark Aero Aesthetic mentioned above. This has me thinking of having a carbon fiber-looking background with the Formula 1 logo behind the cars. Thinking more about it, I wanted to have it so I could easily move the cars around and have modularity, as well as have a border that accented the corresponding car.

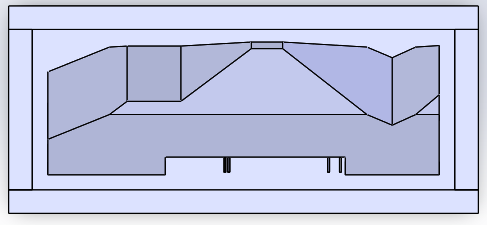
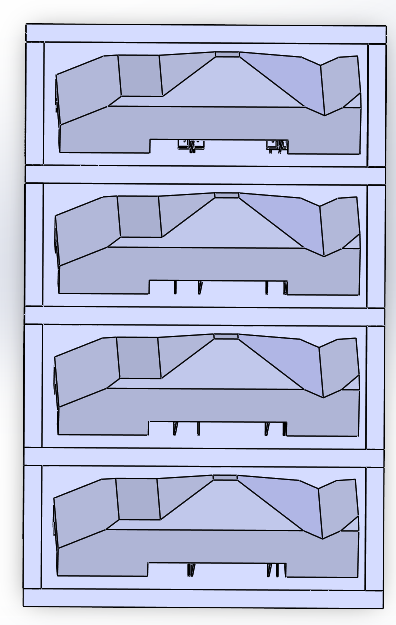
I stared to design my ideas in CAD, specifically the SolidWorks program. I designed a placeholder car that would give me the rough dimentions and fit of the cars. I then designed the acrylic supports, the backing and the frame. This would have the acrylic supports go through the back wall to add some support, for the brackets. I dcesigned all for panels so they coudl overlap and stack on top of each other. THis worked by having the sides and bottom of each fram attached to each backing, leaving the top open. This would make it so the bottom of the frame above would work as thte top of the lower one. I would then have a spare piece that would sit on top of the very top frame.
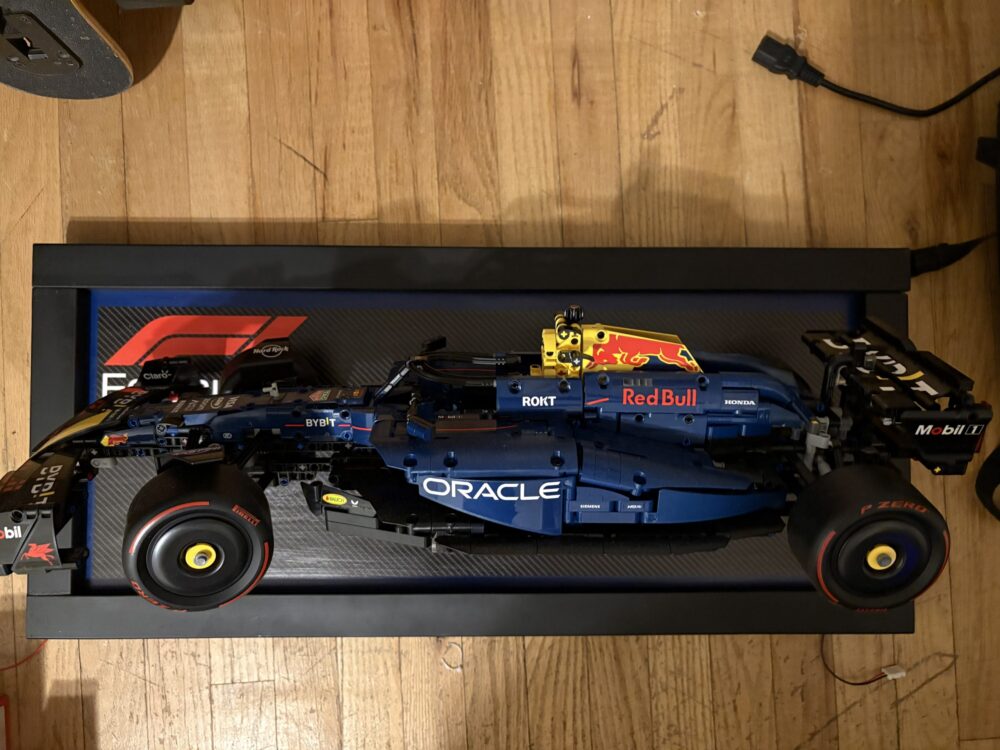
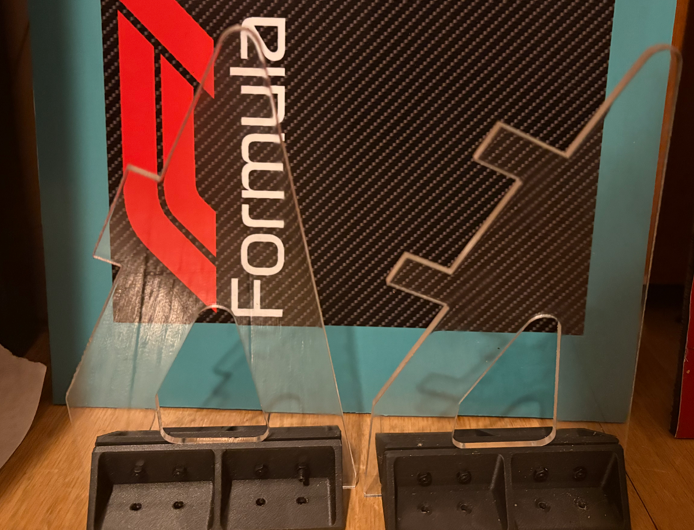
I started with some prototyping to figure out if things would work as well as starting the build. I started with buying the panels where I cut them down to fit into the laser cutter to put in the slots for the acrylic supports. I also bought some acrylic sheets to laser cut and test some designs. from there I experimented and found out that the design below was too weak and would snap. This changed my initial design. I designed and 3D printed some gusset brackets in black and redesigned the supports and cut those out. I had to make a cusom brackets for each since the bases of each car is different. Unfortinantly I could not get more backings so I had to drill through these making it so they are not as clean as I would like. Another feature that I experiment with was pasting the background onthe board. I designed these myself. I found a carbon fiber image and expanded it to fit the full size. I then added the Formula 1 logo. Lastly I added a border of each of the teams colros to make it work for each car. I initally printed the design on the an engineering poster printer. These came a little splotchy at times for the colors. Also I initally used glue to put them on, but that turned out bubbley and uneven. This also blead through the paper. The second attempt I tried some modpodge and got slightly better results, but still not what I wanted. From there I had them professionally printed on poster paper and used modgepod to glue the backings on and provide a shine.

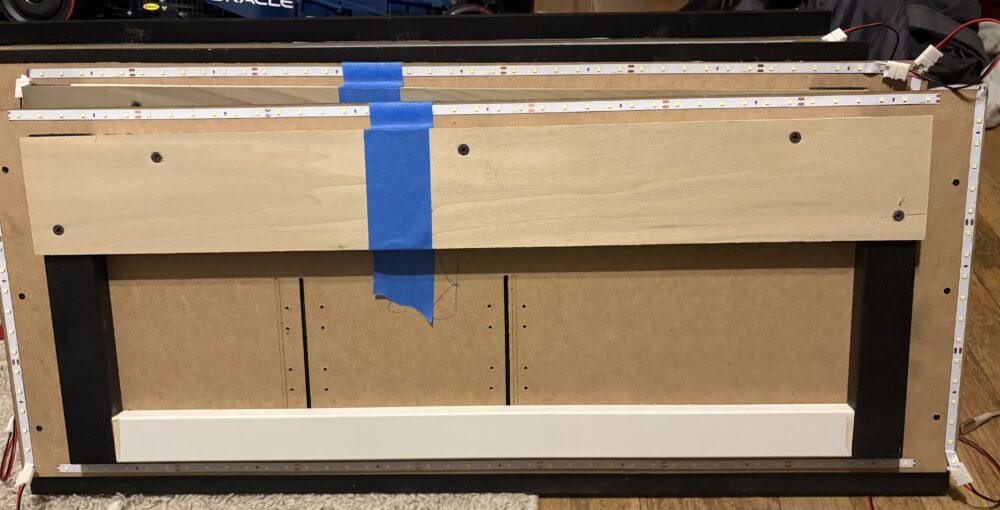
I bought sveral feet of this MDF planks and cut to various lengths to meet my needs. from there I painted most of them black. I cut lengths for the top, bottom, sides, and back of the frame. I planned on using a picture frame wire to hang the boards. I put on some vertial beams to give those more support. From there I ended up screwing in the framing boards on top of the backing art. from there I flipped the panels over. Here I added the LED strips and connecters along all sides so I can change the order with ease. Through some testing, I found that the wire was not the best since the weight would not be distributed evenling having it all on angle. Also the boards started to bed so I added more MDF cross beams. To counter this hanging issue with some mroe reasearch I designed a new custom backing to provide enough support. I bought some flat pieces and screws them into the back of the frames. I also took other flat boards and short MDF scrape pieces had them vertically screwsed into a board. This will mount to the wall. This works by sliding the vertical bits into the back of teh overhang of the displays.

From here I inserted the acrylic supports and gusset brackets with fasteners. From there I could mount the cars. This brought me to teh end of the project. I currently have 1 of 4 finished, but plan on getting the last few steps of the rest done by expo!