
 Timeline and Process Overview
The idea for this project was sparked several months ago when I visited a craft fair on Boulder’s Pearl Street and spoke with the team from Vortic Watch Company, who specialize in converting antique pocket watches into modern wristwatches. While their work was impressive, the price point was far beyond my reach. That encounter planted the seed for my own attempt to build a wristwatch using a vintage American pocket watch movement—something both functional and personally meaningful.
Project Timeline Overview
Exploration and Inspiration (Week 1–2)
- Visited Vortic Watch Co. booth
- Researched pocket watch conversions, trench watches, movement sizing, and case options
Shopping and Sourcing (Week 3–4)
- Spent extensive time comparing NH35/ETA 2824-compatible cases
- Prioritized finding a case with a brushed or sandblasted finish and a clear caseback
- Purchased movement, donor parts, and machining stock
Skill Building and Planning (Week 4–6)
- Learned how to program the CNC mill (with guidance from ITLL staff Mike and Jen)
- Learned to use dial bore gauges for accurate internal diameter measurement
- Acquired and studied the use of a vintage poising tool
- Developed CAD sketches and designed soft jaws for holding the case in the mill
Fabrication and Machining (Week 6–10)
- First attempt: Milled too far and damaged the dial seat lip
- Second attempt: Ran out of time mid-process; also damaged the caseback when it popped out of the soft jaws
- Third attempt: Successfully machined the case and polished out scratches with a Dremel
Servicing and Regulation (Week 7–11)
- Regulated the movement using a timegrapher
- Clocked the hairspring to reduce beat error to under 1 ms
- Used poising tool to balance the balance wheel
- Adjusted balance screws and finished regulation with the lever
- Cut down an ETA 2824 stem with a Dremel for fit
Final Assembly and Testing (Week 11–12)
- Assembled the case and movement
- Took photos of machining, assembly, and timing readouts
- Still pending: install a compatible non-screw-down crown and case tube for proper manual winding
Fabrication Process

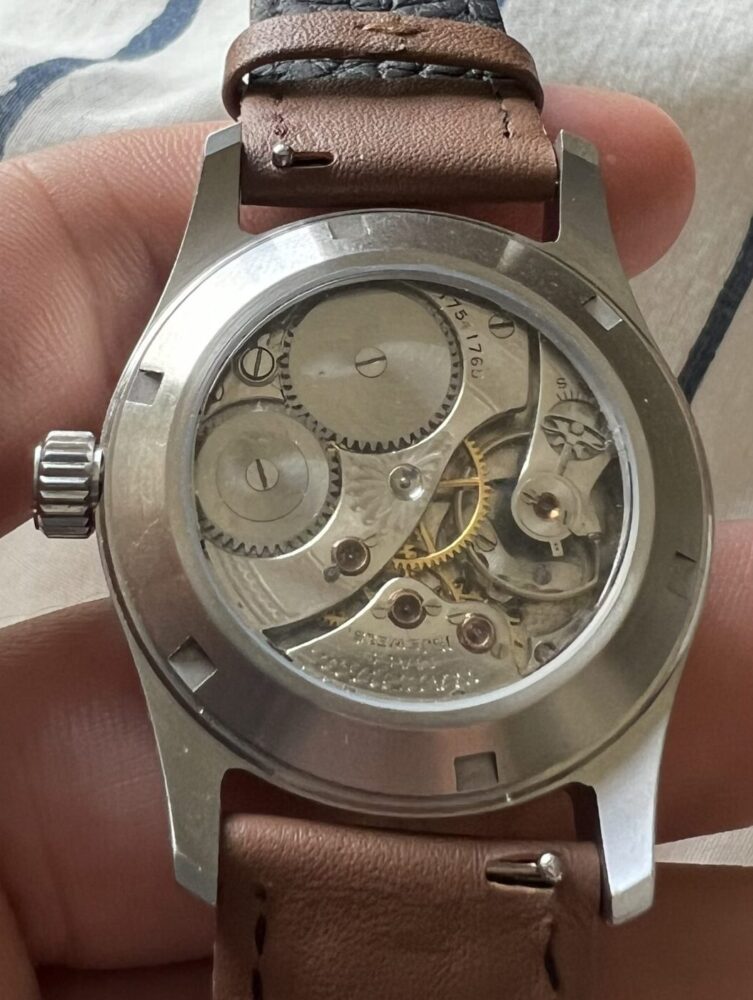
The fabrication began with the watch case. I had sourced a generic dive-style wristwatch case compatible with NH35 and ETA 2824 movements. However, because the vintage Waltham movement has different dimensions, I had to carefully machine the case’s inner diameter to accept the older movement.
To safely secure the round case in the CNC mill, I fabricated a custom set of soft jaws. I milled a cylindrical recess into aluminum blanks to hold the case by its bezel without marring the finish. With the case secured, I carefully programmed and executed multiple passes to expand the internal diameter. I learned to measure between each pass using a dial bore gauge, which ensured I didn’t overcut the case again—something I had done during the first attempt.
My second machining session was interrupted when the ITLL shop closed before I could finish, and I also damaged a caseback that popped out of the soft jaws during milling. My third and final session was successful, and I followed up by polishing the case and removing scratches using a Dremel.
Parallel to the case machining, I was servicing and regulating the movement. I had previously cleaned and lubricated the Waltham Grade 165, but several screws had gone missing, so I sourced a donor movement to replace them. I mounted the movement on a timegrapher and adjusted the hairspring to reduce beat error. This required roughly a dozen small adjustments to get the timing within acceptable range.
Once the beat error was corrected, I began fine regulation. I used a vintage poising tool sourced from eBay to check the balance wheel for positional variance. I found that the watch kept good time in the horizontal position but was significantly off when placed vertically. By adjusting the balance screws, I minimized the positional error, then finished regulation with the fine adjustment lever.
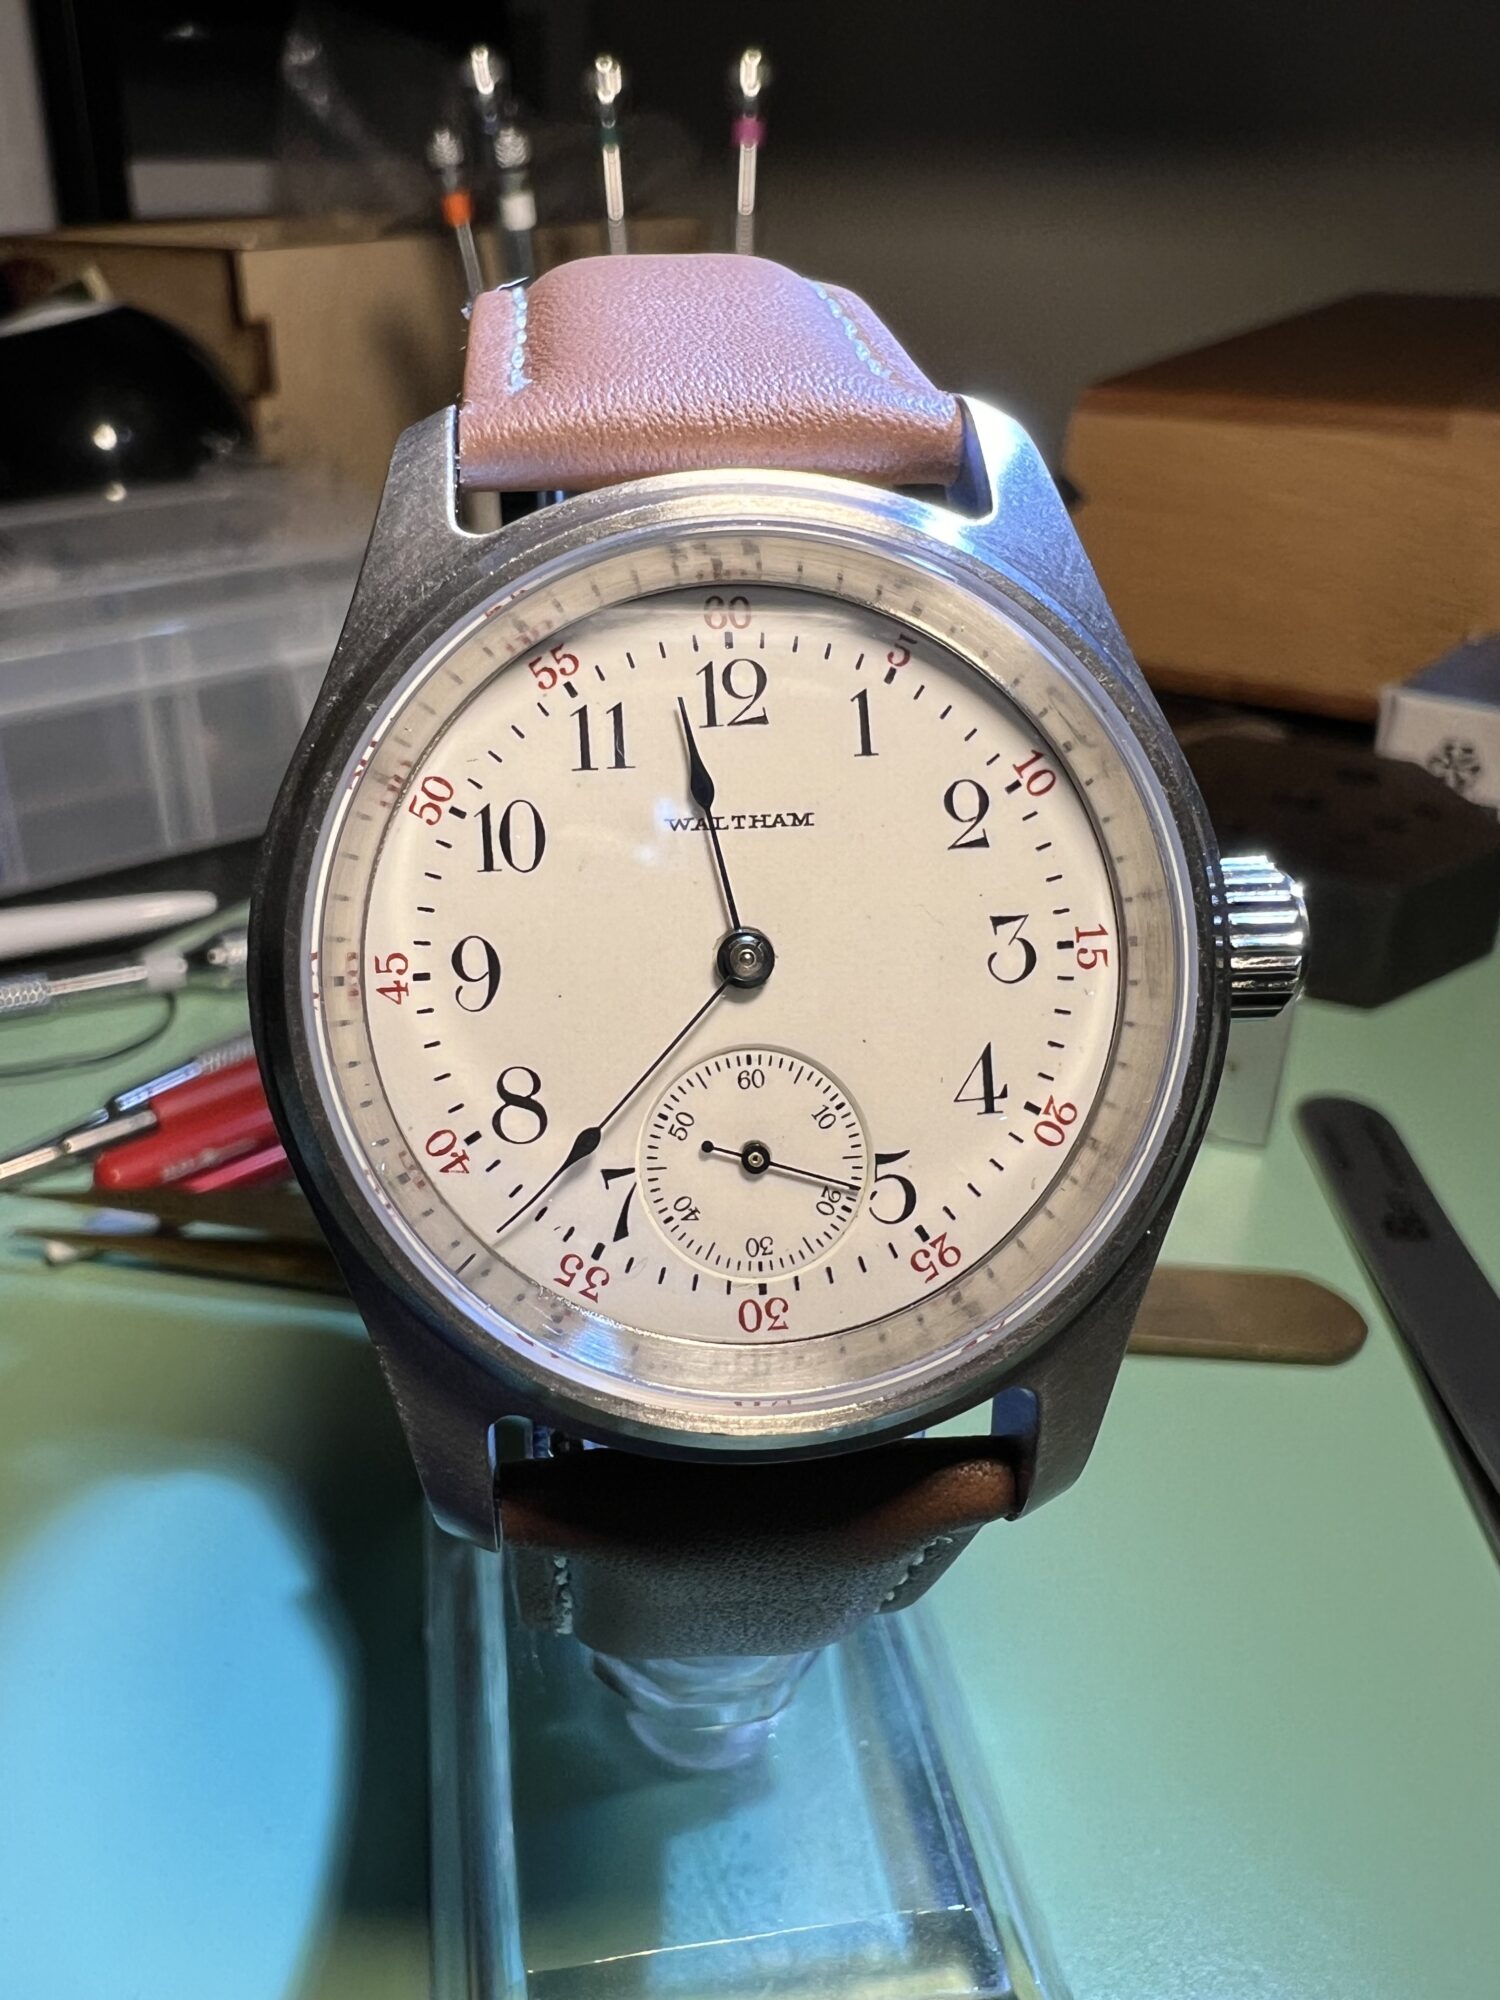
Finally, I cut down a standard ETA 2824 stem to fit the Waltham movement using a Dremel. Although it works, the screw-down crown and case tube present an issue for manual winding. The waterproofing features of the screw-down design obstruct the vintage pendant-set winding system. I plan to replace the crown and tube with a non-screw-down variant to make the watch fully functional and comfortable to operate.
Conclusion: Comparing Vision and Outcome
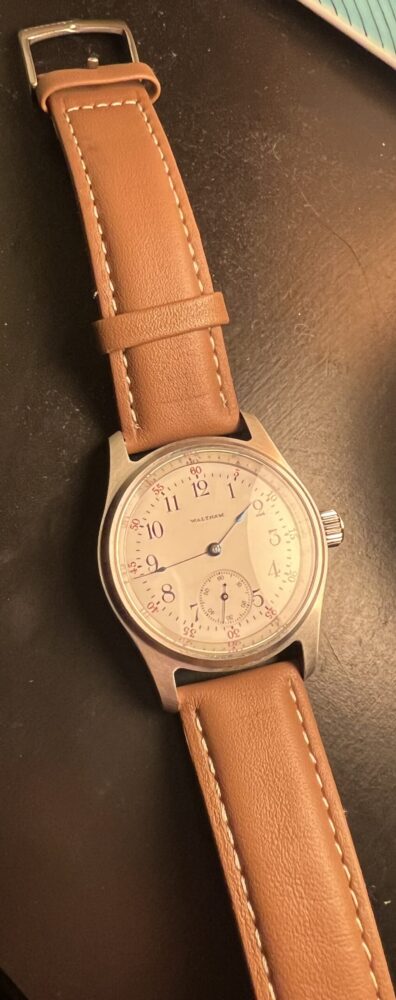
Looking back at the early stages of this project, I’m extremely satisfied with how closely the final product matches my original vision. I set out to build a functional, wearable watch using a 100-year-old movement, and the result reflects that intent both aesthetically and mechanically.
I had originally hoped to design a fully custom case, but machining limitations at the ITLL pushed me to modify an existing one. In hindsight, that compromise worked in my favor, as it gave me more time to focus on the movement’s performance and finishing details.
If I could go back and change one thing, it would be to exercise more caution and patience during my early milling sessions. Damaging the first case and caseback taught me a lot about fixturing and material constraints, and I was lucky to have ordered backups.
The aesthetics of the final piece are exactly what I had hoped for. The white enamel dial, visible through the clear caseback, captures the pre-modern elegance that originally inspired me. The brushed finish of the dive-style case provides a clean, understated backdrop that allows the historical beauty of the movement to take center stage.
This watch now has a purpose beyond just being a personal project. I plan to gift it to my father, who had been eyeing a Ulysse Nardin with a similar dial. Rather than letting him buy something expensive and impersonal, I’ve built a piece that combines tradition, craftsmanship, and personal meaning.