
Design Timeline Overview
The RailGlow project spanned over two months, starting in early March and wrapping up in early May. While the process was generally structured, it included plenty of loops and adjustments as I moved between design, fabrication, and documentation. Below is a breakdown of each key phase and what took place during that time:
Figure 1. Project Timeline for RailGlow
March 4–10: Inspiration and Vision
This was the brainstorming and initial concept phase. I identified the core problem, poor lighting above my stove, and began exploring the idea of a lamp that emphasizes interaction and rugged aesthetics. I sketched early ideas and committed to using wood and metal as my primary materials.
March 11–17: Exploration and Skill Acquisition
During this period, I focused on developing the skills I needed to complete the build. I met with the woodshop supervisor and tested techniques for drilling flat cavities and routing clean wiring paths. I also revisited the idea of how the sliding mechanism would work mechanically.
March 18 – April 7: Manufacturing (Base and Top)
This was the most time-intensive part of the project. I sanded and cut the lamp’s top and base from solid wood blocks, carved internal wire channels, and began integrating hardware like the rails and socket. These weeks were all about shaping, drilling, fitting, and gradually turning raw materials into finished parts. CAD references were invaluable during this phase to ensure accurate alignment. They were also very rewarding weeks seeing the lamp come to life.
April 8–18: Assembly and Testing
With the parts made, I moved into assembly. I installed the rails, secured the socket, routed the wires, and tested fit and function. While I had originally designed the lamp for a momentary switch, ongoing supplier issues meant I had to adapt and wire it with a standard inline plug instead. I also tested the amber bulb, which looked great but proved dimmer than expected in the space.
April 19–24: Documentation and Final Adjustments
This was a chance to reflect and clean up. I documented the entire build process with sketches, photos, and videos, then applied the final wood stain and finish. I also fine-tuned the fit of the rail mechanism and prepared the lamp for long-term use.
April 25–28: Contingency and Disaster Planning
While I didn’t hit any catastrophic issues late in the build, I used this time to review backup plans (like alternate bulb types and wiring configurations), inspect for long-term wear, and think through how I’d retrofit the momentary switch once it eventually arrives.
April 29 – May 3: Final Presentation Prep
This week was focused on compiling visuals, writing reflection pieces, and building out the presentation deck for the Design Expo. It was also when I finalized part 2 of this blog post and curated key build photos.
May 7: Design Expo
The project wraps with my final presentation, showcasing RailGlow in its finished form and highlighting how it embodies rugged minimalism, material honesty, and purposeful design choices.
Fabrication Process: How I Made RailGlow
Here’s a step-by-step breakdown of how I built the final piece from raw materials:
1. Base and Top Turning
Using solid blocks of hardwood, I cut both the base and top using a miter saw and smoothed everything out using a sander. The top was shaped to house the socket, and the base was hollowed out to hold wiring and eventually the switch. Maintaining clean edges and proper diameter was key for a cohesive, intentional silhouette.
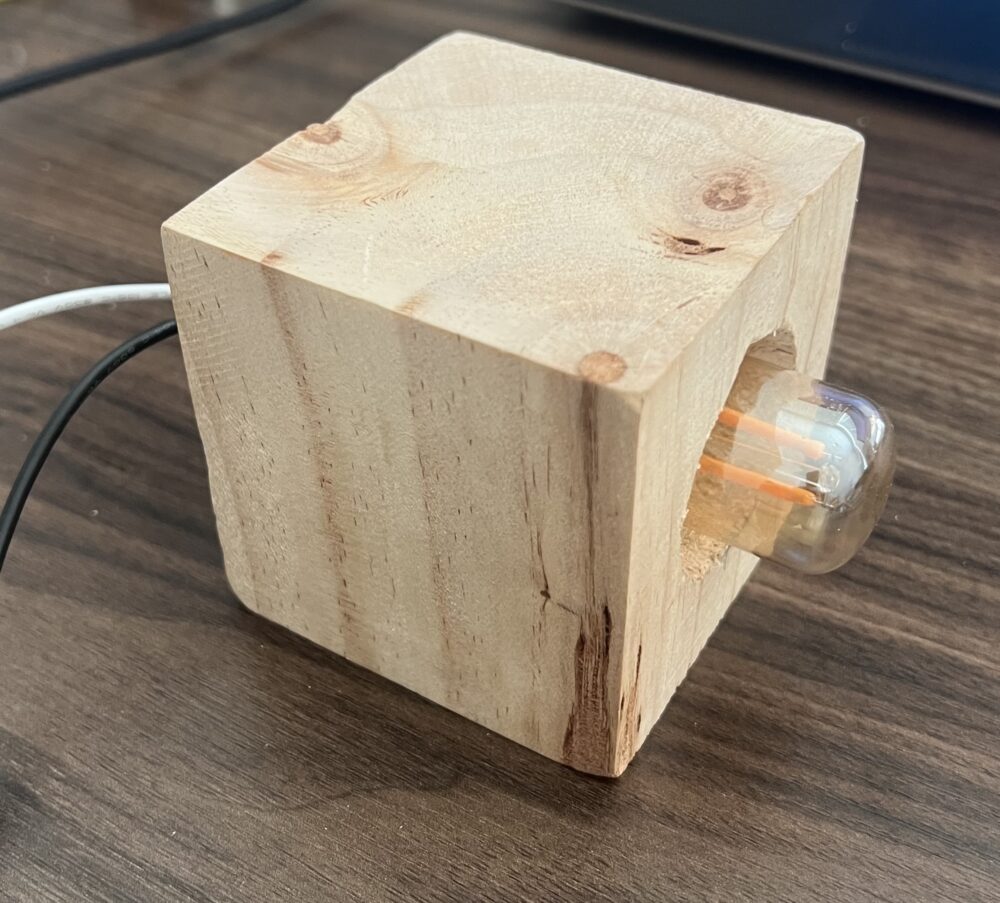
Figure 2. The top portion of the lamp.
2. Drilling and Routing
I used a forstner bit to drill flat-bottomed cavities for wiring channels and the switch housing (which I’d planned to embed flush). Routing was done slowly to avoid splintering and ensure enough clearance for wiring insulation and components.
3. Wiring Setup
All wires were measured, stripped, soldered, and covered with heat shrink tubing for protection. Sheathing was added to reduce strain, and a small relief notch was cut into the base to allow for flex without exposing the cable. I was initially planning to integrate a momentary switch, but due to sourcing delays, I installed a standard inline plug so I could still finish the project on time.
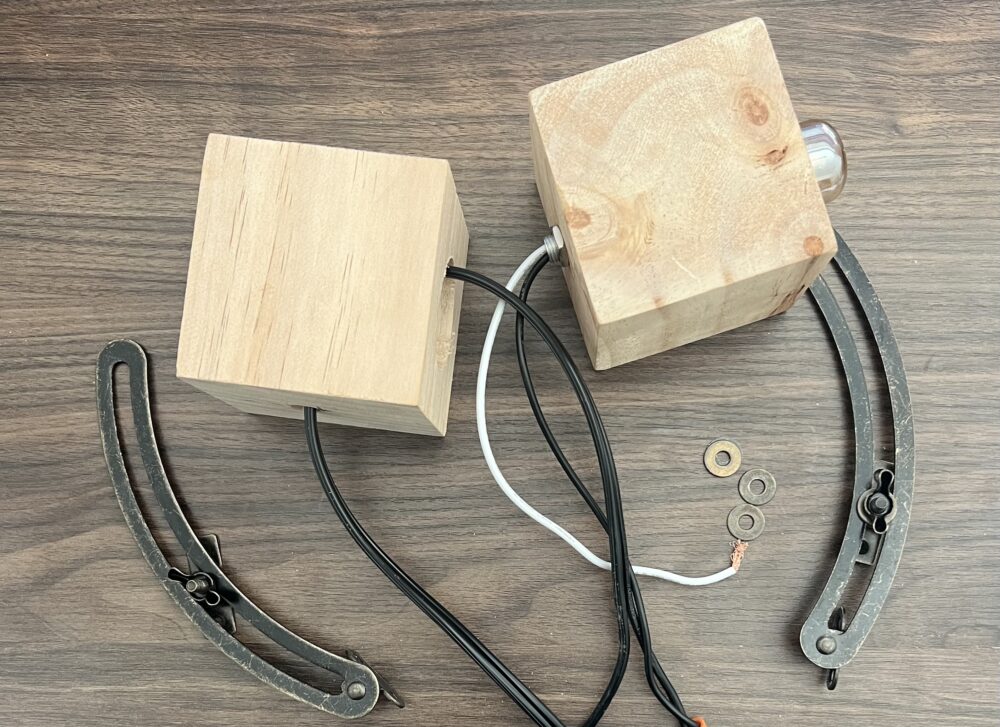
Figure 3. Testing assembly and fit of different components prior to finishing touches.
4. Rail and Swivel Installation
Curved metal rails were mounted onto the base with exposed fasteners, maintaining the mechanical honesty of the aesthetic. The top capsule was attached via a swivel joint to allow directional control of the light.
5. Finish Work
Before assembly, I tested wood stains and settled on a slightly warm-toned finish that enhances the grain but avoids gloss. After staining, I applied a protective wax oil and buffed the surface to a soft matte sheen. This kept the piece true to its rugged aesthetic which is raw, but refined.
6. Final Assembly and Testing
All parts were dry-fit to check tolerances. After wiring was secured, I completed full assembly and tested the rail motion, swivel joint, and electrical connection. The lamp lit successfully and felt intuitive to use, although the amber LED wasn’t as bright as I’d hoped which is something that I plan to revise.
Reflection: Where It Started vs. Where It Landed
When I first started this project, I had a very specific functional interaction in mind: a mechanical sliding motion that triggered light through a momentary switch. I also imagined a material language that would feel handmade, solid, and durable, with visible connections and wood that felt warm and real.

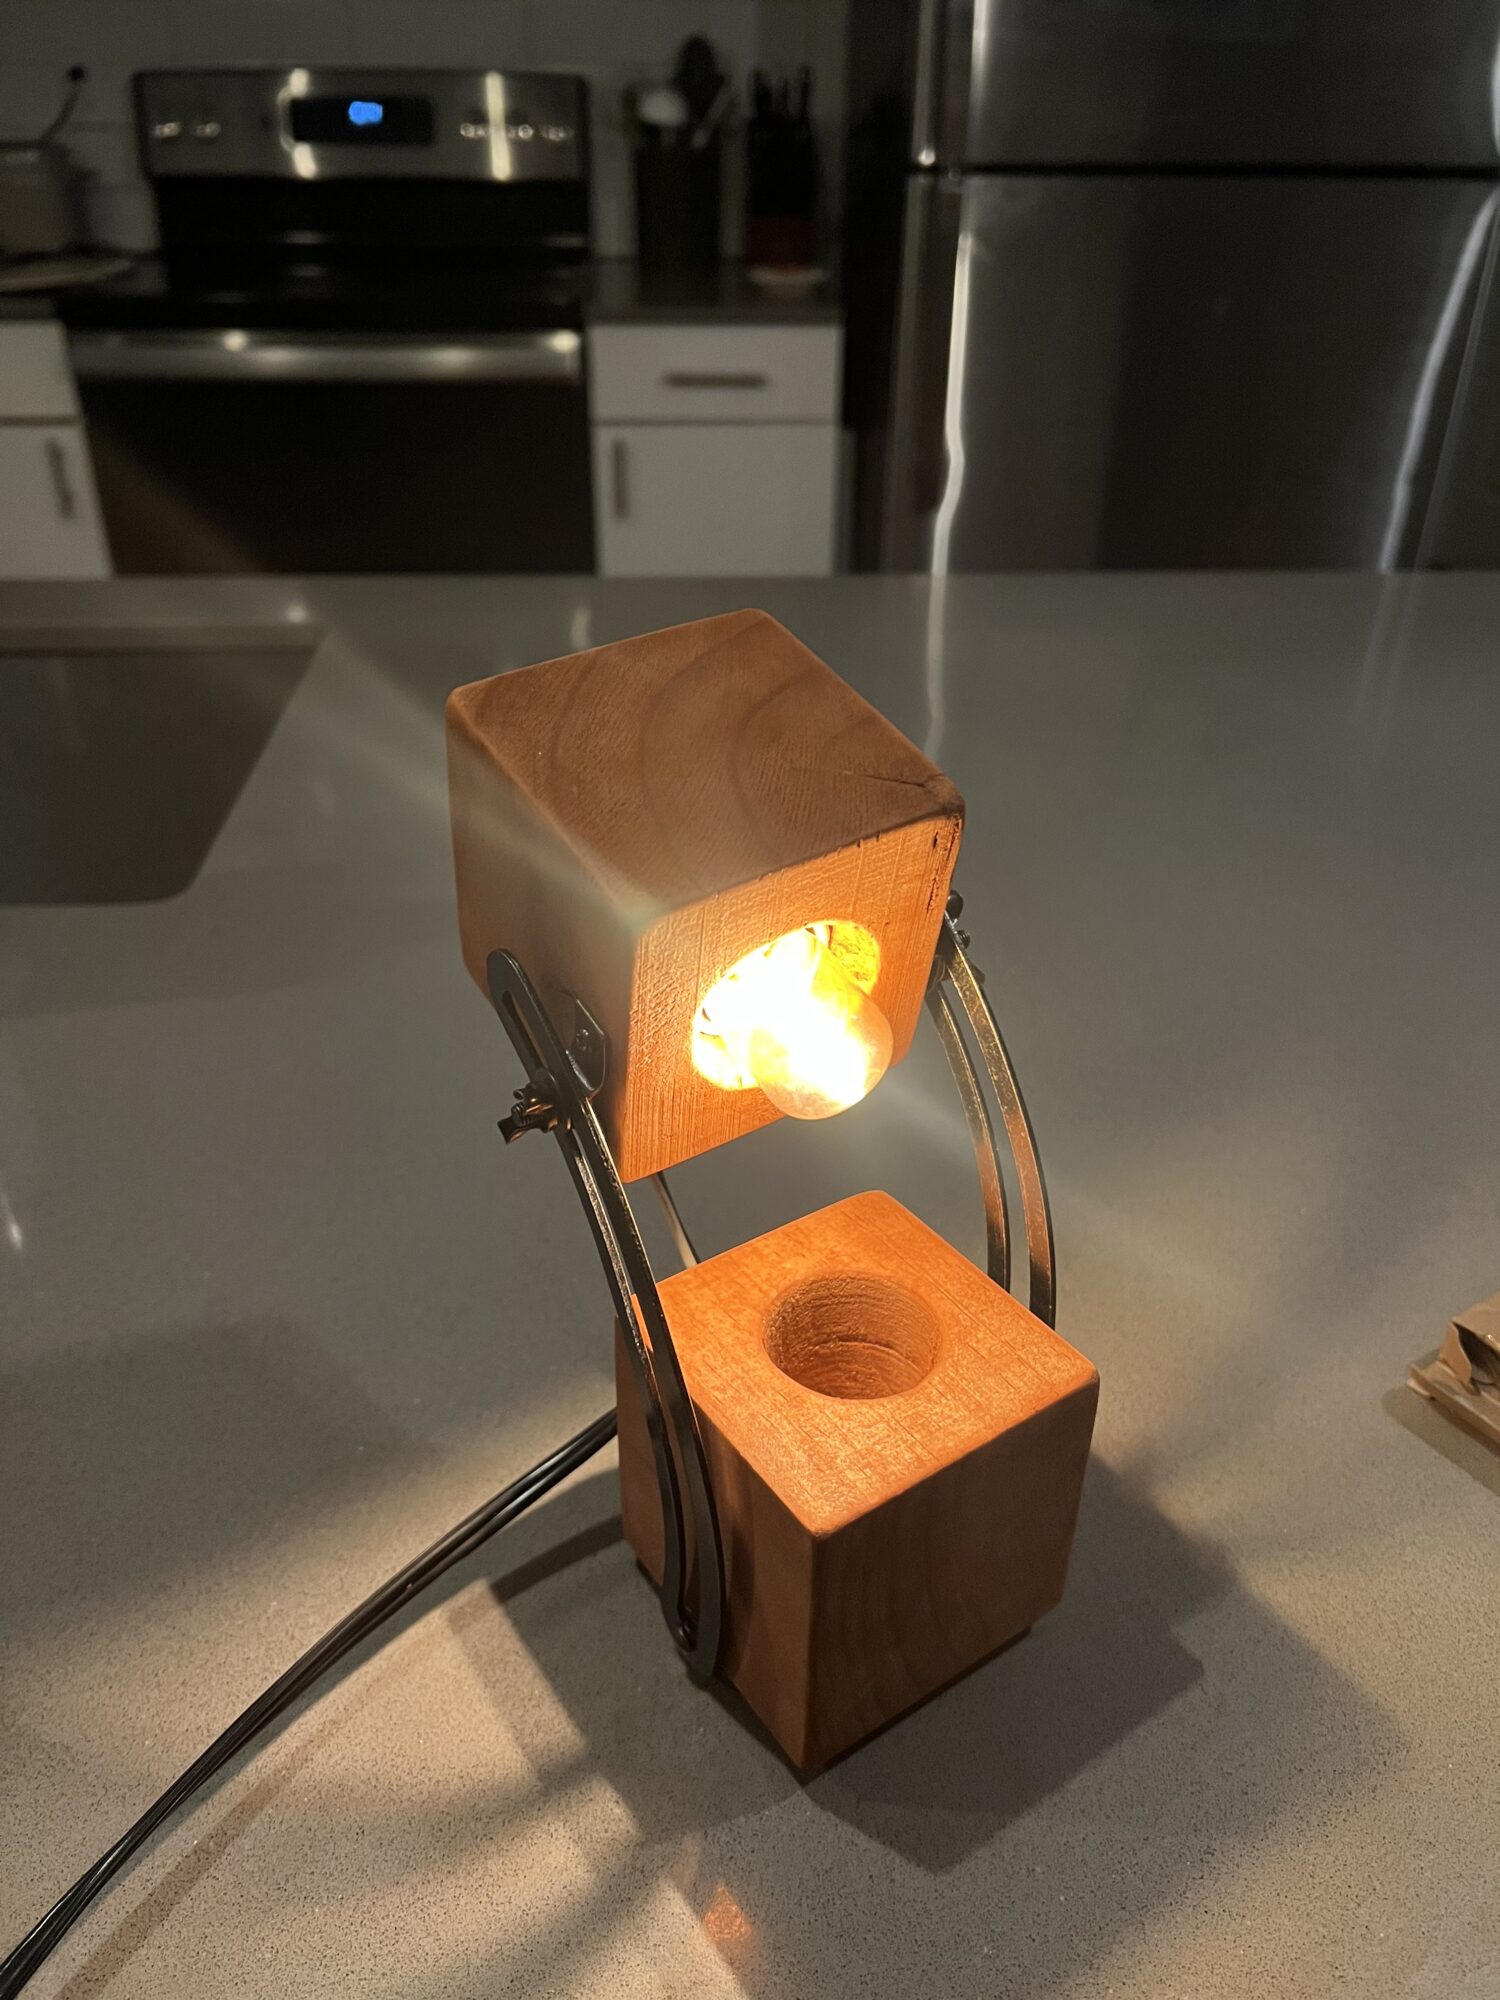
Figure 4. Stacked lighting.
Despite setbacks with the switch (which never arrived after two failed vendor attempts), I’m happy with where the project ended. The spirit of rugged minimalism is still very much alive in the final form: the wood grain, raw metal rails, visible screws, and physical movement all reinforce the intended aesthetic. Even with a more traditional plug instead of the momentary switch, the interaction still feels grounded and deliberate.
In hindsight, I would’ve ordered critical components like the switch much earlier, or sourced a backup from the start. I also might have chosen a different LED bulb, while the amber light was a strong aesthetic choice, it doesn’t cast enough usable light for the task at hand. I plan to test some warm white or higher-output bulbs while preserving the overall tone and mood.
What’s Next?
RailGlow won’t just be a project that ends at the Design Expo, it’s going to be part of my daily life. I plan to continue refining the lamp as I use it, beginning with the two key adjustments I wasn’t able to implement in time: the momentary switch and a brighter but still warm LED.
The housing and wiring are already prepared to accept the momentary switch, so when the part finally arrives, it will be a relatively easy retrofit. Reintroducing that feature will bring back the tactile interaction that originally inspired the lamp’s concept, turning the act of illumination into a small mechanical experience. I’m looking forward to having a finished object that fully embodies the intention behind it.
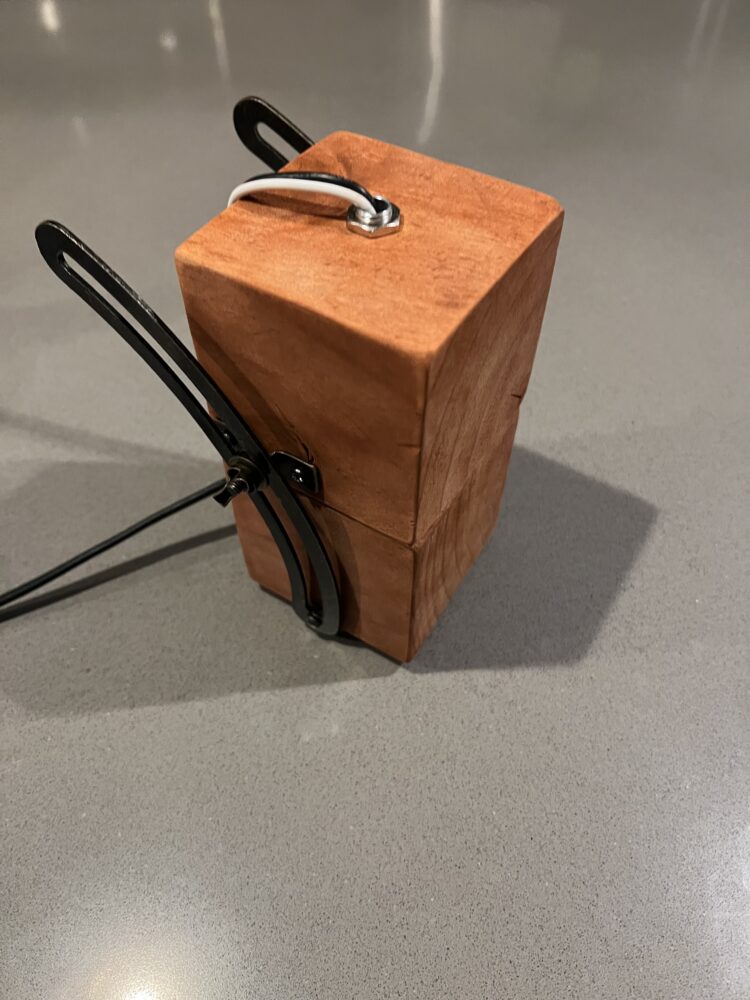
Figure 5. Lamp closed.
Lighting-wise, I plan to experiment with a few different bulbs. The amber LED looks great and matches the rugged, warm aesthetic, but it just doesn’t provide enough illumination for how I actually use the space. The goal now is to find a balance between visual warmth and practical brightness, and something that maintains the atmosphere while improving usability.
I’ve also thought about iterating on this project. There’s potential for a second version with a slightly different form factor, maybe using recycled metal instead of wood, or pushing the organic modernism influence a bit further. A wall-mounted version with a sliding vertical track could be an interesting next step. In any case, I want to continue working in this aesthetic space by combining physical interaction with exposed materials to create designs that invite both use and appreciation.
Final Reflections
Looking back, RailGlow started as a simple solution to a functional problem, bad kitchen lighting, and ended as something much more meaningful. The final lamp reflects a set of values I care deeply about: craftsmanship, honest materials, and interaction that feels deliberate.
While some functional compromises were made, like having to skip the switch due to supplier issues, I don’t see that as a failure. In fact, it taught me a lot about design flexibility and the reality of working with real-world constraints. There’s always a balance between vision and execution, and in this case, I was able to preserve the spirit of the design even when the path changed.
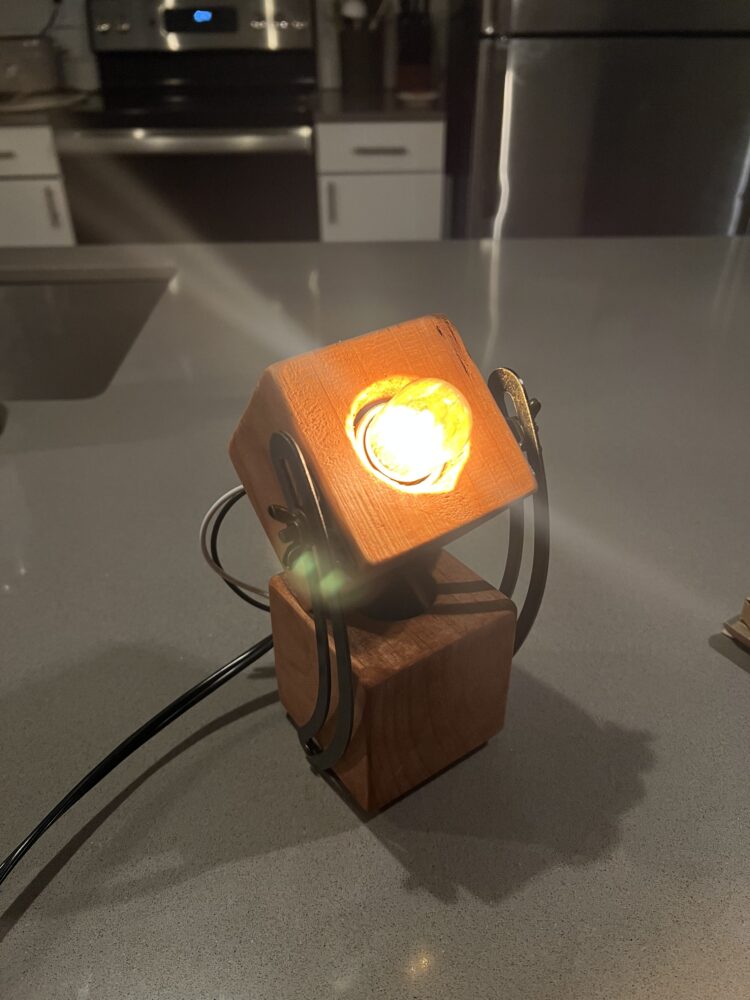
Figure 6. Light in upward orientation.
Aesthetically, I’m proud of how the piece turned out. The wood finish is rich and tactile. The rails and exposed fasteners give it a sense of strength and purpose. It feels like an object that belongs in a space, not just for what it does, but for how it looks and feels. It carries that sense of rugged refinement that I was aiming for from the very beginning.
If I were to start over, I’d secure all critical components much earlier and allow more buffer for sourcing issues. I might also build a small lighting test rig to better evaluate bulb performance in context. But beyond that, the process and outcome feel aligned.
RailGlow now stands as both a practical tool and a personal artifact and it is something I made, something I learned from, and something that’s going to continue evolving.
Sources:
All images were taken or produced by me
1 Comment. Leave new
Hi Jacob,
Very cool design! I love the final product! I like how you made something that represents your aesthetic and functions in a clever way. This is a great design piece, well done!
Do the rails easily slide? A video of the functionality would be great to see! Do you plan on making another one? Maybe using a different bulb or wood stain or a combination of the two?